Tauri 的基本使用笔记
文章目录
- 前言
- 如何将 Tauri 集成到前端项目?
- 进程间通信(命令)
-
- const invoke = window.__TAURI__.invoke;
- 进程间通信(事件)
-
- 前端 ⇒ Rust
- Rust ⇒ 前端
- 我的疑问
- 开发时的一些技巧
-
- 用代码打开前端的开发者工具
- 让 Tauri 不要监听文件
- Rust 格式化输出
- Rust 读写文件
- Rust 推荐教程
- 生成应用图标
-
- Windows 重建图标缓存
- 修改安装包的语言
-
- 打包报错:Error You must change the bundle identifier in `tauri.conf.json > tauri > bundle > identifier`. The default value `com.tauri.dev` is not allowed as it must be unique across applications.
- 两种打包方式的区别
- 打包后的应用打开会弹出命令行窗口
- 代码
-
- 进程间通信
前言
记录一下 Tauri 的基本操作
如何将 Tauri 集成到前端项目?
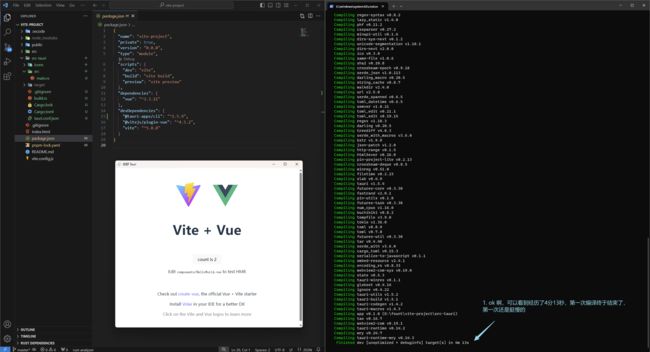
我们先创建一个普通的前端项目,这里我用 Vite + Vue3 创建一个空项目

然后启动检查一下,没啥问题:

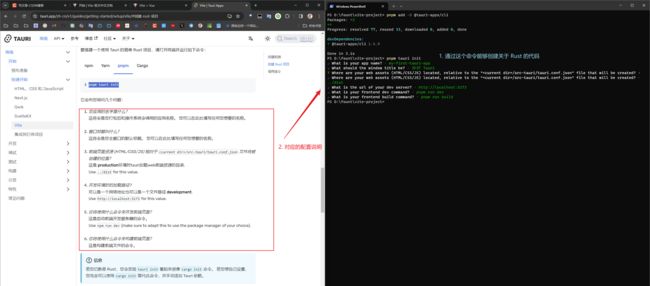
之后引入 Tauri 的脚手架,我们可以看一下官网的说明
pnpm add -D @tauri-apps/cli

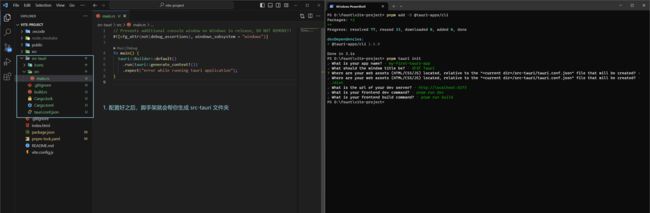
然后 pnpm tauri init ,通过脚手架 init 一些配置
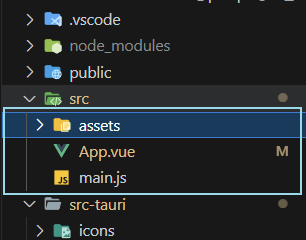
导入之后可以看一下代码结构,新增了 src-tauri 文件夹!
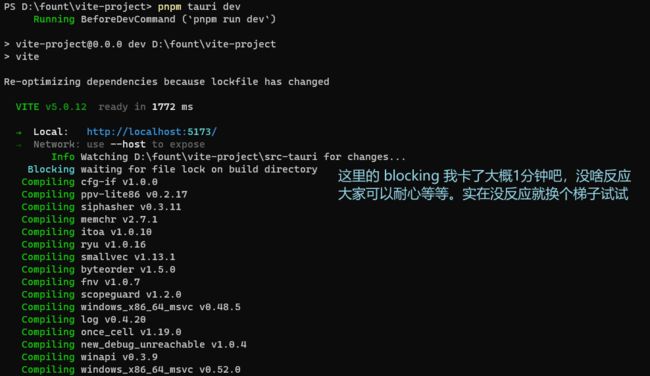
然后 pnpm tauri dev 启动一下,可以看到我启动花了四分钟,真的是挺慢的了,不过还是启动了!!
这里插一嘴,如果卡 blocking 的话,稍微等一下吧,太久了就检查一下代理,然后重复上述步骤
进程间通信(命令)
前端如何调用 Rust 指令呢?
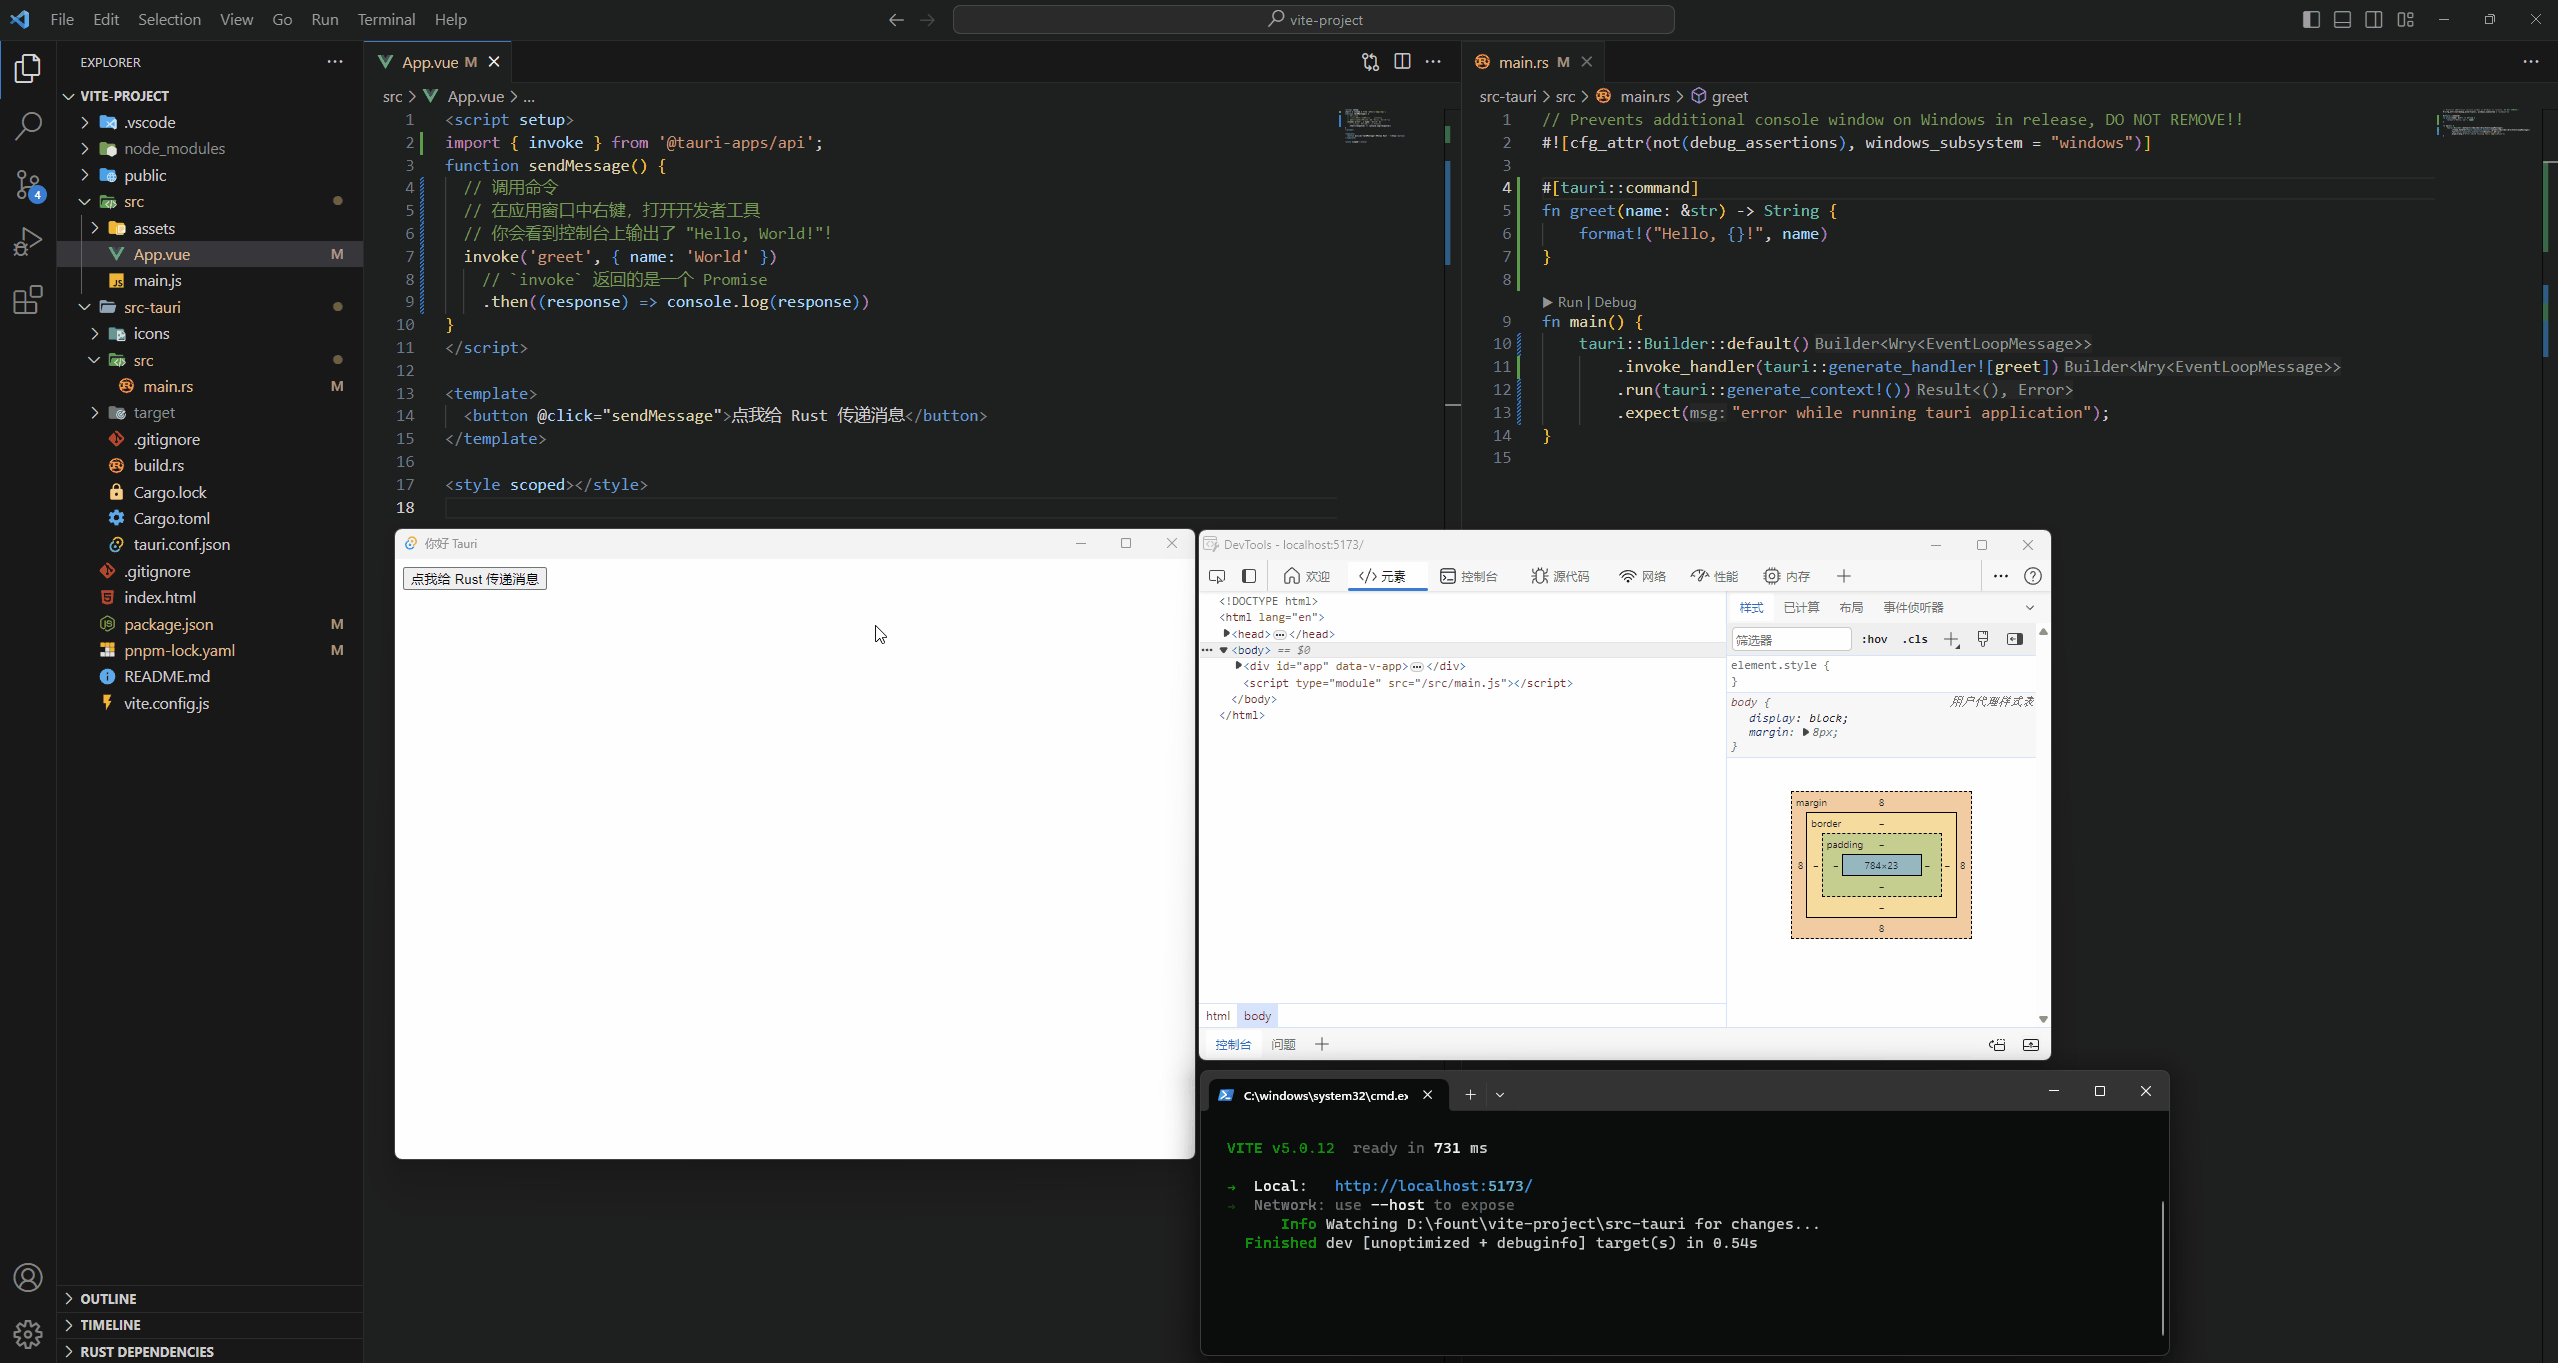
我们把前端精简一下,就剩一个组件,然后写一个按钮,用来触发命令
想要前端调用 Rust,还需要安装一个 @tauri-apps/api,具体可以看 官网:调用指令,安装完运行 tauri dev

我们就按照官网给的例子,写好 Rust 的代码

之后来测试一下
const invoke = window.TAURI.invoke;
这里的 invoke 也可以挂载到 window 上,只需要在 tauri.conf.json 中配置一下,默认是 false

进程间通信(事件)
官网上也有基于事件的进程间通信(非命令),不过我感觉命令的使用场景会多一些吧,更像是前后端通信
事件的话,感兴趣的话可以看看,这里简单使用一下
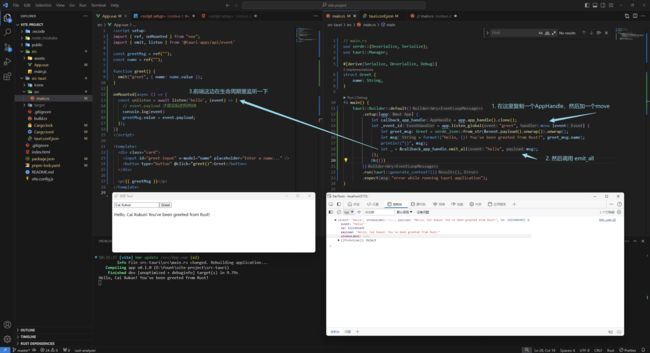
前端 ⇒ Rust
这里前端使用 emit() 传递,Rust 用 app.listen_global 接收
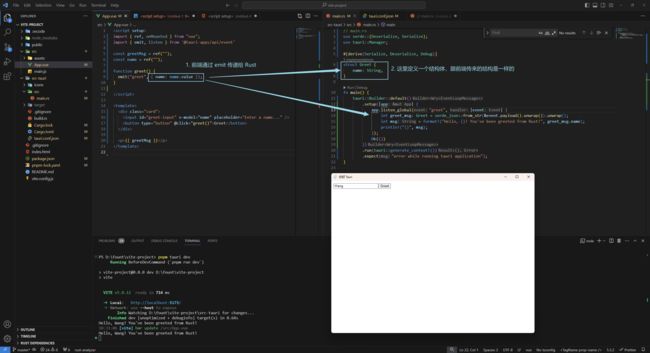
Rust ⇒ 前端
这里用了一下克隆
let callback_app_handle = app.app_handle().clone();
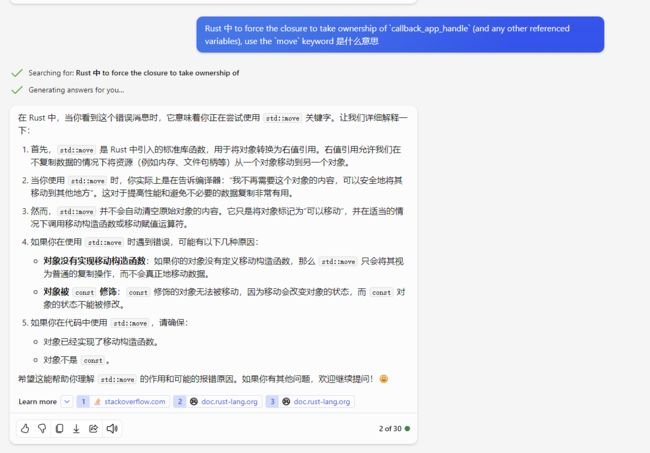
以及 move 关键字,如果不用move 的话会报错,这里问了一下 GPT 的回答:
还有 JSON 的转化,整体代码如下
整体的代码放到文章下面了
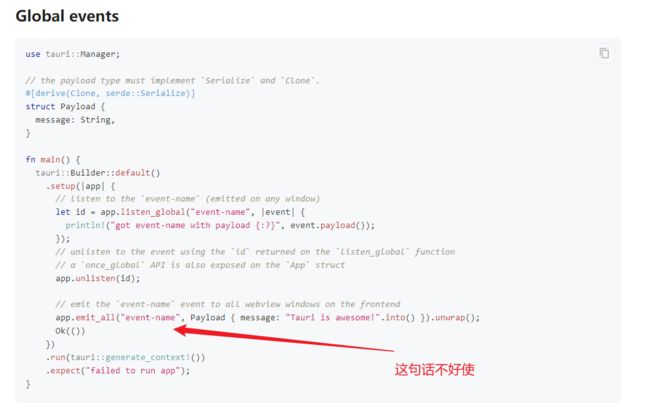
我的疑问
官网上给的例子,Rust 传递到前端没跑通,不知道是什么原因…点我跳转到官网的例子
我本来想的是 Rust 启动之后立马发消息给前端,但是实现不出来
给我的感觉像是时机的问题,可能是前端监听的晚了…用点击事件就能触发
开发时的一些技巧
用代码打开前端的开发者工具
每次启动的时候,前端控制台默认是不打开的,每次修改 Rust 之后,窗口都会重新启动,并且不会打开控制台,调试的话很麻烦
那么让代码帮我们打开控制台

在 setup 中添加这两句,拿到窗口,打开开发者工具
let window = app.get_window("main").unwrap();
window.open_devtools();
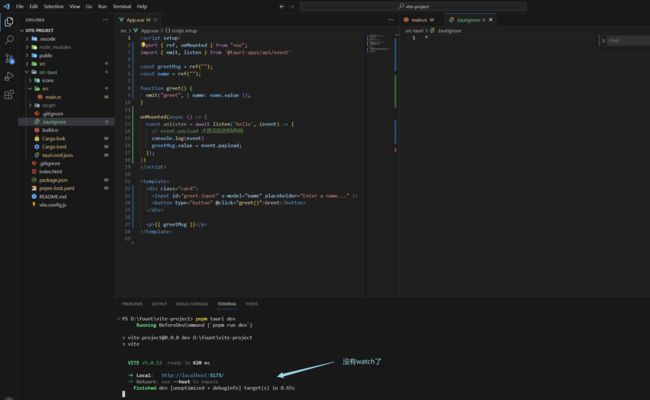
让 Tauri 不要监听文件
Rust 启动会监听 src-tauri 下的文件变化,如果有变化,就会重新编译,重启窗口,有时候并不希望这样

那我们可以在src-tauri 文件夹下新建 .taurignore 文件,然后输入 * 保存,这就代表所有文件的变化都不监听了
Rust 格式化输出
Rust 中如何像前端一样 console.log() 一些变量呢?

println!("{:?}", 变量);
println!("{:#?}", 变量);
Rust 读写文件
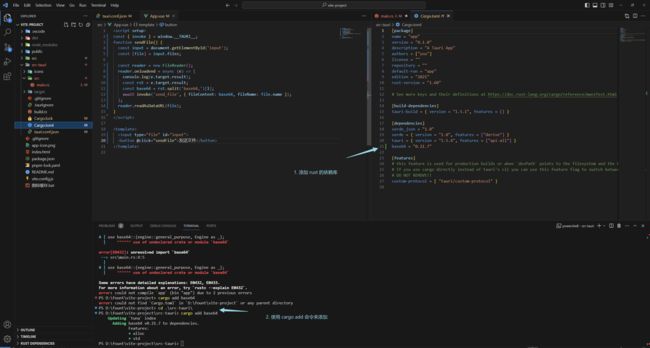
因为 Rust 的基础数据类型比较少,所以这里我用 String 来传递文件,就是先将文件转换成 Base64 ,然后传给 Rust 来处理。

可以看到Rust 中的变量自动帮我们解包了,并且还是小写加下划线的形式,为什么这么设计呢,不理解,看一下GPT怎么说的吧
没关系,反正会如何使用就行
我们拿到 base64 之后就可以写文件了
接着我们写一下 Rust,需要导入一些模块,可以看到下面的 base64 飘红了
需要 cd 到 src-tauri 里然后,用 cargo add base64 命令安装模块
之后再来运行一下
可以看到文件已经放到 src-tauri 目录下了
这就是一个简单的文件读写
<script setup>
const { invoke } = window.__TAURI__;
function sendFile() {
  const input = document.getElementById('input');
  const [file] = input.files;

  const reader = new FileReader();
  reader.onloadend = async (e) => {
    console.log(e.target.result);
    const rst = e.target.result;
    const base64 = rst.split('base64,')[1];
    await invoke('send_file', { fileContent: base64, fileName: file.name });
  };
  reader.readAsDataURL(file);
}
</script>

<template>
  <input type="file" id="input">
  <button @click="sendFile">发送文件</button>
</template>
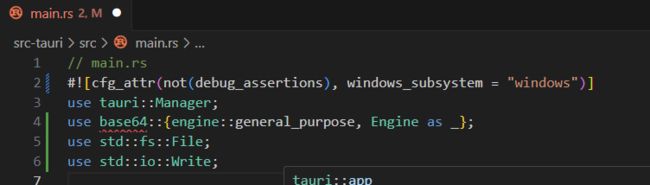
// main.rs
#![cfg_attr(not(debug_assertions), windows_subsystem = "windows")]
use tauri::Manager;
use base64::{engine::general_purpose, Engine as _};
use std::fs::File;
use std::io::Write;

#[tauri::command]
fn send_file(file_content: String, file_name: String) {
    println!("{:?}", file_content);
    println!("{:?}", file_name);

    let file_bytes = general_purpose::STANDARD.decode(file_content).unwrap();
    let mut file = File::create(file_name).expect("创建文件失败");
    file.write_all(&file_bytes).expect("写入文件失败");
}

fn main() {
    tauri::Builder::default()
        .setup(|app| {
            let window = app.get_window("main").unwrap();
            window.open_devtools();
            Ok(())
        })
        .invoke_handler(tauri::generate_handler![send_file])
        .run(tauri::generate_context!())
        .expect("error while running tauri application");
}
Rust 推荐教程
b站杨哥的视频,教程比较干净,适合速学
生成应用图标
Tauri 可以通过命令来生成各种尺寸的图标
我们现在网上找一个尺寸比较大的,可以去 iconfont 上面找
然后放到项目根目录下,执行命令 pnpm tauri icon

修改后的图标可能不生效,有可能的原因有
- 图标太小了
- 存在缓存
Windows 重建图标缓存
把下面的代码复制到 txt 中,然后修改为 bat 执行文件,然后执行
rem 关闭Windows外壳程序explorer

taskkill /f /im explorer.exe

rem 清理系统图标缓存数据库

attrib -h -s -r "%userprofile%\AppData\Local\IconCache.db"

del /f "%userprofile%\AppData\Local\IconCache.db"

attrib /s /d -h -s -r "%userprofile%\AppData\Local\Microsoft\Windows\Explorer\*"

del /f "%userprofile%\AppData\Local\Microsoft\Windows\Explorer\thumbcache_32.db"
del /f "%userprofile%\AppData\Local\Microsoft\Windows\Explorer\thumbcache_96.db"
del /f "%userprofile%\AppData\Local\Microsoft\Windows\Explorer\thumbcache_102.db"
del /f "%userprofile%\AppData\Local\Microsoft\Windows\Explorer\thumbcache_256.db"
del /f "%userprofile%\AppData\Local\Microsoft\Windows\Explorer\thumbcache_1024.db"
del /f "%userprofile%\AppData\Local\Microsoft\Windows\Explorer\thumbcache_idx.db"
del /f "%userprofile%\AppData\Local\Microsoft\Windows\Explorer\thumbcache_sr.db"

rem 清理 系统托盘记忆的图标

echo y|reg delete "HKEY_CLASSES_ROOT\Local Settings\Software\Microsoft\Windows\CurrentVersion\TrayNotify" /v IconStreams
echo y|reg delete "HKEY_CLASSES_ROOT\Local Settings\Software\Microsoft\Windows\CurrentVersion\TrayNotify" /v PastIconsStream

rem 重启Windows外壳程序explorer

start explorer
生效的截图如下:

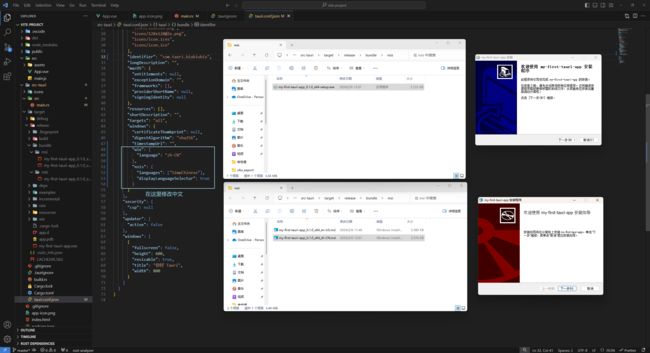
修改安装包的语言
默认是英语, 安装包默认是是两种方式,Wix 和 NSIS
我们在 tauri.conf.json 中声明打包语言,注意:路径是 tauri.bundle.windows,windows 好几个位置都有,别找错了
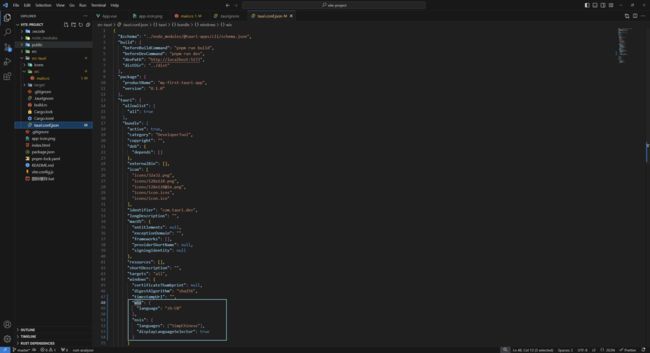
 "wix": {
   "language": "zh-CN"
 },
 "nsis": {
   "languages": ["SimpChinese"],
   "displayLanguageSelector": true
 }
打包报错:Error You must change the bundle identifier in tauri.conf.json > tauri > bundle > identifier. The default value com.tauri.dev is not allowed as it must be unique across applications.

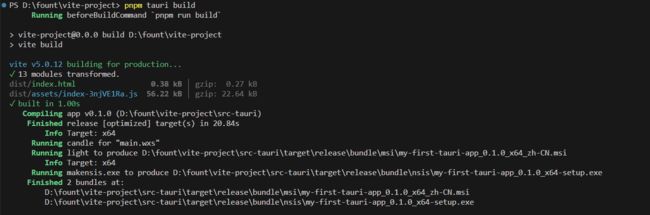
两种打包方式的区别
因为我做的工具需要文件处理,Wix 打包后的应用需要管理员权限才能拿到文件,所以我更倾向于 NSIS 的安装包
第一次打包会有些慢,等一等就好了
打包后的应用打开会弹出命令行窗口
这是官网的解释
代码
进程间通信
// Vue
<script setup>
import { ref, onMounted } from "vue";
import { emit, listen } from '@tauri-apps/api/event'

const greetMsg = ref("");
const name = ref("");

function greet() {
  emit("greet", { name: name.value });
}

onMounted(async () => {
  const unlisten = await listen('hello', (event) => {
    // event.payload 才是实际的结构体
    console.log(event)
    greetMsg.value = event.payload;
  });
})
</script>

<template>
  <div class="card">
    <input id="greet-input" v-model="name" placeholder="Enter a name..." />
    <button type="button" @click="greet()">Greet</button>
  </div>

  <p>{{ greetMsg }}</p>
</template>
// main.rs
use serde::{Deserialize, Serialize};
use tauri::Manager;

#[derive(Serialize, Deserialize, Debug)]
struct Greet {
    name: String,
}

fn main() {
    tauri::Builder::default()
        .setup(|app| {
            let callback_app_handle = app.app_handle().clone();
            let _event_id = app.listen_global("greet", move |event| {
                let greet_msg: Greet = serde_json::from_str(&event.payload().unwrap()).unwrap();
                let msg = format!("Hello, {}! You've been greeted from Rust!", greet_msg.name);
                println!("{}", msg);
                let _ = &callback_app_handle.emit_all("hello", msg);
            });
            Ok(())
        })
        .run(tauri::generate_context!())
        .expect("error while running tauri application");
}