vs code中项目的基本配置--include路径、运行参数、debug配置
1.安装C/C++ for Visual Studio Code
点击左边扩展栏图标—>搜索C/C++ -> 安装->Reload: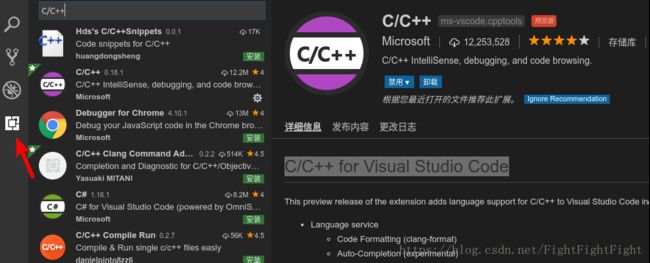
安装完成之后,打开你的包含c++的文件夹,将会生成一个.vscode文件夹,所有的配置将在这个文件夹中进行配置。
2.配置IntelliSense
扩展程序会根据当前系统环境配置基本信息,因此有可能配置不完整,这时需要通过生成c_cpp_properties.json文件来配置缺少的信息:
ctrl+shift+P打开Command Palette,运行C/Cpp: Edit configurations...生成c_cpp_properties.json:
{
    "configurations": [
        {
            "name": "Linux",
            "includePath": [
                "${workspaceFolder}/**"
            ],
            "defines": [],
            "compilerPath": "/usr/bin/gcc",  //编译器路径
            "cStandard": "c11",
            "cppStandard": "c++17",
            "intelliSenseMode": "clang-x64"
        }
    ],
    "version": 4
}
这是Ubuntu平台上默认生成的c_cpp_properties.json文件,可在这个文件中添加配置。
对于Windows环境下,需要自己下载编译器安装并配置,比如我下载了MinGW64,然后需要配置环境变量:
变量名:MINGW
变量值:D:\worksoftware\mingw-w64\i686-8.1.0-posix-dwarf-rt_v6-rev0\mingw32\bin
引入到Path环境变量中:
%MINGW%
然后重启VS code,并在c_cpp_properties.json文件中添加:
"compilerPath": "D:\\worksoftware\\mingw-w64\\i686-8.1.0-posix-dwarf-rt_v6-rev0\\mingw32\\bin\\g++.exe"
- 1
3.构建应用程序
如果要构建应用程序,则需要生成tasks.json文件:
Ctrl+Shift+P -> Tasks: Configure Tasks… -> Create tasks.json file from templates -> Others.
{
    // See https://go.microsoft.com/fwlink/?LinkId=733558
    // for the documentation about the tasks.json format
    "version": "2.0.0",
    "tasks": [
        {
            "label": "build demo1",                                 //任务标签
            "type": "shell",                                             //类型
            "command": "g++",                                    //对应的命令:g++ -g demo1.cpp -o demo
            "args": [
                "-g",
                "demo1.cpp",
                "-o",
                "demo"
            ],
            "problemMatcher": [],
            "group": {
                "kind": "build",
                "isDefault": true
            }
        }
    ]
}
生成tasks.json后,根据自己需求修改command、args或其他字段。
4.DEBUG代码
要启用调试,需要生成launcher.json文件:
点击菜单栏DEBUG->Add Configuration ->选择C++ (GDB/LLDB)(Windows下选择C++ Windows) ,这时将会生成launcher.json文件:
{
    // Use IntelliSense to learn about possible attributes.
    // Hover to view descriptions of existing attributes.
    // For more information, visit: https://go.microsoft.com/fwlink/?linkid=830387
    "version": "0.2.0",
    "configurations": [
        {
            "name": "(gdb) Launch",
            "type": "cppdbg",   //正在使用的调试器,使用Visual Studio Windows时必须为cppvsdbg,使用GDB或LLDB时必须为cppdbg.
            "request": "launch",  //表示此配置是用于启动程序还是附加到已运行的实例上
            "program": "${workspaceFolder}/demo",   //要执行的可执行文件的完整路径
            "args": [],
            "stopAtEntry": false,
            "cwd": "${workspaceFolder}",            //设置调试器启动的应用程序的工作目录
            "environment": [],
            "externalConsole": true,
            "MIMode": "gdb",   //要连接的调试器
            "setupCommands": [
                {
                    "description": "Enable pretty-printing for gdb",
                    "text": "-enable-pretty-printing",
                    "ignoreFailures": true
                }
            ]
        }
    ]
}
生成launcher.json文件后,其他的属性可不改,但必须将program属性的值修改为要执行的文件。然后点击Debug->Start Debugging,既可以开始调试了,点击侧边栏的Debug图标可查看BreakPoint、Call Stack等。
简单例子:
{
    "configurations": [
        {
            "name": "Win32",
            "includePath": [
                "${workspaceFolder}/**",
                "${workspaceRoot}",
                "xxx/include"
            ],
            "browse": {
                "path": [
                    "${workspaceRoot}",
                    "xxx/lib"
                ]
            },
            "defines": [
                "_DEBUG",
                "UNICODE",
                "_UNICODE"
            ],
            "compilerPath": "xxx/gcc.exe",
            "cStandard": "c11",
            "cppStandard": "c++17",
            "intelliSenseMode": "gcc-x64"
        }
    ],
    "version": 4
}
{
    "version": "2.0.0",
    "command": "g++",
    "args": ["-g","${file}","-Lxxx/lib","-Ixxx/include","-o","${fileBasenameNoExtension}.exe"], // 编译命令参数,添加-L,-I选项
    "problemMatcher": {
        "owner": "cpp",
        "fileLocation": ["relative", "${workspaceRoot}"],
        "pattern": {
            "regexp": "^(.*):(\\d+):(\\d+):\\s+(warning|error):\\s+(.*)$",
            "file": 1,
            "line": 2,
            "column": 3,
            "severity": 4,
            "message": 5
        }
    }
}
附加上launch.json,参考网上的,链接找不到了,感谢原作者。
{
   "version": "0.2.0",
   "configurations": [

       {
           "name": "(gdb) Launch",	// 配置名称,将会在启动配置的下拉菜单中显示
           "type": "cppdbg", 		// 配置类型,这里只能为cppdbg
           "request": "launch",	// 请求配置类型,可以为launch(启动)或attach(附加)
           "program": "${workspaceRoot}/${fileBasenameNoExtension}.exe",// 将要进行调试的程序的路径
           "args": [],				// 程序调试时传递给程序的命令行参数,一般设为空即可
           "stopAtEntry": false, 	// 设为true时程序将暂停在程序入口处,一般设置为false
           "cwd": "${workspaceRoot}",// 调试程序时的工作目录,一般为${workspaceRoot}即代码所在目录
           "environment": [],
           "externalConsole": true,// 调试时是否显示控制台窗口,一般设置为true显示控制台
           "MIMode": "gdb",
           "miDebuggerPath": "xxx\\gdb.exe",// miDebugger的路径,注意这里要与MinGw的路径对应
           "preLaunchTask": "g++",	// 调试会话开始前执行的任务,一般为编译程序,c++为g++, c为gcc
           "setupCommands": [
               {
                   "description": "Enable pretty-printing for gdb",
                   "text": "-enable-pretty-printing",
                   "ignoreFailures": true
               }
           ]
       }
   ]
}