一文学会shiro的使用
@[TOC] 一文学会shiro的使用
1.认识shiro
1.1 shiro介绍
1.2 主要功能
2 Springboot集成shiro
2.1 创建shiro环境
这个环节我就不赘述了,即准备一个空的springboot项目,如果springboot不会的 可以看[SpringBoot2.X快速构建和配置](https://blog.csdn.net/wufagang/article/details/106271739) 快速搭建环境
2.2 配置shiro 认证功能
2.2.1 定义类配置类
package com.wfg.myshiro.config;

import com.wfg.myshiro.realm.MyRealm;
import com.wfg.myshiro.realm.MyRealm1;
import org.apache.shiro.mgt.SecurityManager;
import org.apache.shiro.spring.web.ShiroFilterFactoryBean;
import org.apache.shiro.web.mgt.DefaultWebSecurityManager;
import org.springframework.context.annotation.Bean;
import org.springframework.context.annotation.Configuration;

import java.util.LinkedHashMap;
import java.util.Map;

/**
 * myshiro 配置类 作用类似于spring的配置文件
 *
 * @Title: com.wfg.myshiro.config
 * @Date: 2020/12/24 0024 23:05
 * @Author: wfg
 * @Description:
 * @Version:
 */
@Configuration
public class ShiroConfig {


    @Bean
    public SecurityManager securityManager(MyRealm1 myRealm){
        DefaultWebSecurityManager securityManager = new DefaultWebSecurityManager();
        securityManager.setRealm(myRealm);
        return  securityManager;
    }

    /**
     * realm 来完成我们的认证和授权
     * @return
     */
    @Bean
    public MyRealm1 myRealm(){
        return new MyRealm1();
    }

    /**
     * ShiroFilterFactoryBean 相当于规则过滤器
     * 比如什么样的请求可以通过,什么样的规则不能通过
     * @return
     */
    @Bean
    public ShiroFilterFactoryBean shiroFilterFactoryBean(SecurityManager securityManager){
        ShiroFilterFactoryBean shiroFilterFactoryBean = new ShiroFilterFactoryBean();
        shiroFilterFactoryBean.setSecurityManager(securityManager);
        //登录请求跳转的地址
        shiroFilterFactoryBean.setLoginUrl("/");
        //配置登录成功后的跳转地址
        shiroFilterFactoryBean.setSuccessUrl("/sucess");
        //配置没有权限的时候跳转的地址
        shiroFilterFactoryBean.setUnauthorizedUrl("/noPermission");
        /**
         * 配置权限拦截规则
         */
        Map filterChainMap = new LinkedHashMap<>();
        //配置login请求不需要进行登录验证, anon表示不需要进行登录验证
        filterChainMap.put("/login","anon");
        //配置退出登录,清空当前用户的session信息
        filterChainMap.put("/logout","logout");
        //配置admin开头的所有请求需要进行登录认证,authc 表示登录认证
        filterChainMap.put("/admin/**","authc");
        //配置user开头的所有请求需要进行登录认证,authc 表示登录认证
        filterChainMap.put("/user/**","authc");
        //配置剩余的所有请求全部需要进行登录认证(注意这个必须写在最后面),可选配置
        //filterChainMap.put("/**","authc");
        shiroFilterFactoryBean.setFilterChainDefinitionMap(filterChainMap);
        return shiroFilterFactoryBean;
    }
}
2.2.2 定义controller
package com.wfg.myshiro.controller;

import org.apache.shiro.SecurityUtils;
import org.apache.shiro.authc.*;
import org.apache.shiro.subject.Subject;
import org.springframework.stereotype.Controller;
import org.springframework.ui.Model;
import org.springframework.web.bind.annotation.RequestMapping;
import org.springframework.web.bind.annotation.ResponseBody;

/**
 * myshiro
 *
 * @Title: com.wfg.myshiro.controller
 * @Date: 2020/12/25 0025 8:23
 * @Author: wfg
 * @Description:
 * @Version:
 */
@Controller
public class TestController {

    @RequestMapping("/")
    public String index(){
        return "login";
    }

    /**
     * 登录方法
     * @return
     */
    @RequestMapping("/login")
    public String login(String username, String password , Model model){
        //获取权限操作对象,一遍进行登录操作
        Subject subject = SecurityUtils.getSubject();
        //如果没有进行过登录验证进行登录验证
        if(!subject.isAuthenticated()){
            //如果没有登录,使用用户名和密码设置用户令牌
            UsernamePasswordToken usernamePasswordToken = new UsernamePasswordToken(username,password);

            try {
                //进行登录,这里是有shiro来完成
                subject.login(usernamePasswordToken);
            } catch (UnknownAccountException e) {
                //账号不存在异常
                model.addAttribute("errorMessage","账号不存在");
                return "/login";
            }
            catch (LockedAccountException e) {
                //登录失败会抛出各种异常
                model.addAttribute("errorMessage","账号被锁");
                return "/login";
            }
            catch (IncorrectCredentialsException e) {
                //密码认证失败后shiro自动抛出错误
                model.addAttribute("errorMessage","登录失败");
                return "/login";
            }catch (AuthenticationException e) {
                //登录失败会抛出各种异常
                model.addAttribute("errorMessage","登录失败");
                return "/login";
            }


        }

        return "redirect:/success";
    }
    @RequestMapping("/logout")
    public String logout(){
        return "redirect:/";
    }

    @RequestMapping("/success")
    public String success(){
        return "success";
    }

    @RequestMapping("/noPersmission")
    public String noPersmission(){
        return "noPersmission";
    }

    @RequestMapping("/admin/test")
    @ResponseBody
    public String testAdmin(){
        return "admin 请求";
    }

    @RequestMapping("/user/test")
    @ResponseBody
    public String testUser(){
        return "user 请求";
    }

}
2.2.3 定义realm
这个事没写逻辑的realm使用的实现的接口
package com.wfg.myshiro.realm;

import org.apache.shiro.authc.AuthenticationException;
import org.apache.shiro.authc.AuthenticationInfo;
import org.apache.shiro.authc.AuthenticationToken;
import org.apache.shiro.realm.Realm;

/**
 * myshiro
 *Realm:域,Shiro 从从 Realm 获取安全数据(如用户、角色、权限),
 * 就是说 SecurityManager 要验证用户身份,
 * 那么它需要从 Realm 获取相应的用户进行比较以确定用户身份是否合法;
 * 也需要从 Realm 得到用户相应的角色 / 权限进行验证用户是否能进行操作;
 * 可以把 Realm 看成 DataSource,即安全数据源。
 * 也就是说对于我们而言,最简单的一个 Shiro 应用:
 *
 * 1.应用代码通过 Subject 来进行认证和授权,而 Subject 又委托给 SecurityManager;
 *
 * 2.我们需要给 Shiro 的 SecurityManager 注入 Realm,
 *     从而让 SecurityManager 能得到合法的用户及其权限进行判断
 * @Title: com.wfg.myshiro
 * @Date: 2020/12/24 0024 23:15
 * @Author: wfg
 * @Description:
 * @Version:
 */
public class MyRealm implements Realm {
    @Override
    public String getName() {
        return null;
    }

    @Override
    public boolean supports(AuthenticationToken authenticationToken) {
        return false;
    }

    @Override
    public AuthenticationInfo getAuthenticationInfo(AuthenticationToken authenticationToken) throws AuthenticationException {
        return null;
    }
}
具体如何实现登录逻辑判断的
package com.wfg.myshiro.realm;

import org.apache.shiro.authc.*;
import org.apache.shiro.realm.AuthenticatingRealm;

/**
 * myshiro
 *
 * @Title: com.wfg.myshiro
 * @Date: 2020/12/26 0026 9:37
 * @Author: wfg
 * @Description: 父类只负责用户认证即登录
 * @Version:
 */
public class MyRealm1 extends AuthenticatingRealm {

    /**
     * 用户认证的方法:
     * @param authenticationToken 用户身份令牌 这里存放着用户的账号和密码
     * @return 登录成功后返回的用户信息,相等于session
     * @throws AuthenticationException 如果认证失败抛出各种异常
     * 这个方法不能手工调用,shiro自动调用
     */
    @Override
    protected AuthenticationInfo doGetAuthenticationInfo(AuthenticationToken authenticationToken) throws AuthenticationException {
        UsernamePasswordToken usernamePasswordToken = (UsernamePasswordToken) authenticationToken;
        String username = usernamePasswordToken.getUsername();
        char[] password = usernamePasswordToken.getPassword();
        System.out.println(username+"===="+new String(password));

        //不存在的账号
        if(!"admin".equals(username)&&!"zhangsan".equals(username)){
            throw new UnknownAccountException("没找到想要的账号");
        }
        //根据不同的情况进行往外逻辑判断抛出相应的异常既可
        if("zhangsan".equals(username)){
            throw new LockedAccountException("账号被锁定");
        }
        /**
         * 创建密码认证对象,有shiro 完成认证操作
         * 参数一: 用户名数据库或者前台页面传入的均可
         * 参数二:是从数据库中查询到的密码
         * 参数三:为当前realm的名字
         *
         *
         */
        return new SimpleAuthenticationInfo(username,"123456",getName());
    }
}
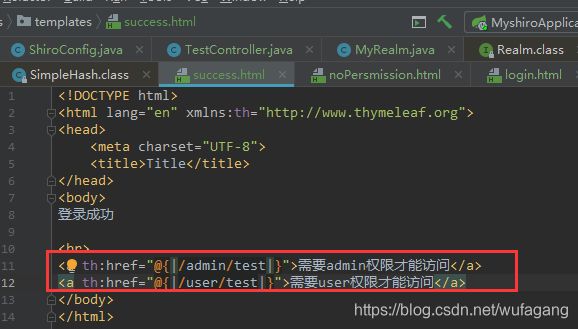
2.2.4 编写几个静态页面
都非常简单:
login.html
<html lang="en" xmlns:th="http://www.thymeleaf.org">
<head>
    <meta charset="UTF-8">
    <title>Titletitle>
head>
<body>

<form action="/login" method="post">
账号:<input type="text" name="username">
密码:<input type="text" name="password">
    <button type="submit">提交button>
form>

<span th:text="${errorMessage}">span>
body>
html>
noPersmission.html
<html lang="en">
<head>
    <meta charset="UTF-8">
    <title>Titletitle>
head>
<body>
对不起,你没有权限!
body>
html>
success.html
<html lang="en">
<head>
    <meta charset="UTF-8">
    <title>Titletitle>
head>
<body>
登录成功
body>
html>
2.2.5 测试
测试这里自行测试吧,不过多的做了,稍微仔细一点会发现缓存的问题
下面下面说如何把缓存的问题处理掉
2.3 认证缓存
当登录成功后.我们发现点击后退后,我们再随便输入账号和密码都可以成功通过认证,原因是shiro已经拿到到了认证状态后,再次登入后不会进行再一次的判断,所以我们的方案:
第一:做退出按钮
第二:在进入login之前都进行logout操作
第三:可以前台页面做空着,如果可以获取到登录信息的情况下,不允许进入登录页面
针对前两种方案我们做下:
2.3.1 修改congtroller
 @RequestMapping("/logout")
    public String logout(){
        Subject subject = SecurityUtils.getSubject();
        //退出操作,清空shiro的认证信息
        subject.logout();
        return "redirect:/";
    }
2.4 shiro 加密
 /**
         * 实际生产环境中我们这样的加密是没有意义的
         * 因为我们主要是在前段访问后端的时候,防止在中间截取或者篡改数据
         * shiro提供这个算法主要是为了在注册的时候使用
         * 我们这里就是为了学习,不太深究了
         */
        //针对页面输入的的密码进行加密
        HashedCredentialsMatcher hashedCredentialsMatcher = new HashedCredentialsMatcher("MD5");
        hashedCredentialsMatcher.setHashIterations(2);
        this.setCredentialsMatcher(hashedCredentialsMatcher);
        //针对数据库密码进行加密
        SimpleHash simpleHash2 = new SimpleHash("MD5", "123456", "", 2);
public static void main(String[] args) {
        /**
         * 参数一: 加密算法
         * 参数二: 加密数据
         * 参数三: 加密盐值,不同的盐值加密后的结果不一致
         * 参数四:加密次数
         */
        SimpleHash simpleHash = new SimpleHash("MD5", "123456", "", 1);
        System.out.println(simpleHash);
        SimpleHash simpleHash2 = new SimpleHash("MD5", "123456", "", 2);
        System.out.println(simpleHash2);
        SimpleHash simpleHash3 = new SimpleHash("MD5", "e10adc3949ba59abbe56e057f20f883e", "", 1);
        System.out.println(simpleHash3);
        SimpleHash simpleHash4 = new SimpleHash("MD5", "123456", "admin", 1);
        System.out.println(simpleHash4);
        SimpleHash simpleHash5 = new SimpleHash("MD5", "123456", "admin1", 1);
        System.out.println(simpleHash5);
    }
前段加密不再赘述,自行百度非常简单
2.5 权限分配
需要判断用户哪个权限是否可以使用,我们就必须要先为用户分配一个权限才可以分配,需要在MyRealm类中配置并且修改集成的父类
2.5.1修改MyRealm类
这里我直接新建使用MyRealm3集成AuthorizingRealm这个类
package com.wfg.myshiro.realm;

import org.apache.shiro.authc.*;
import org.apache.shiro.authc.credential.HashedCredentialsMatcher;
import org.apache.shiro.authz.AuthorizationInfo;
import org.apache.shiro.authz.SimpleAuthorizationInfo;
import org.apache.shiro.crypto.hash.SimpleHash;
import org.apache.shiro.realm.AuthorizingRealm;
import org.apache.shiro.subject.PrincipalCollection;

import java.util.HashSet;

/**
 * myshiro
 *
 * @Title: com.wfg.myshiro.realm
 * @Date: 2020/12/26 0026 22:00
 * @Author: wfg
 * @Description:  @Version:
 */
public class MyRealm2 extends AuthorizingRealm {
    /**
     * 用户授权的方法,当用户认证通过每次访问需要授权的请求时都需要执行这段代码来完成
     *  * 曾授权操作,这里应该查询数据库来获取当前用户的所有角色和权限并设置到shiro中
     *  *
     * @param principalCollection
     * @return
     */
    @Override
    protected AuthorizationInfo doGetAuthorizationInfo(PrincipalCollection principalCollection) {
        System.out.println("---------授权了------------");
        //获取用户的账号,根据账号从数据库中获取数据
        Object obj = principalCollection.getPrimaryPrincipal();
        //定义用户角色的set集合应该来自数据库
        //注意:由于每次点击需要授权的请求时,shiro都会执行这个方法,因此如果这里的数据是来自数据库中的
        //那么一定控制好不能每次都从数据库中获取数据这样的效率太低了
        HashSet<String> roles = new HashSet<>();
        //设置角色,这里操作应该是用数据库中读取数据
        System.out.println(obj+"===================");
        if("admin".equals(obj)){
            roles.add("admin");
            //roles.add("user");
        }
        if("user".equals(obj)){
            roles.add("user");
        }
        //认证信息
        SimpleAuthorizationInfo info = new SimpleAuthorizationInfo();
        //SimpleAuthenticationInfo info = new SimpleAuthenticationInfo();
        info.setRoles(roles);
        return info;
    }

    @Override
    protected AuthenticationInfo doGetAuthenticationInfo(AuthenticationToken authenticationToken) throws AuthenticationException {
        UsernamePasswordToken usernamePasswordToken = (UsernamePasswordToken) authenticationToken;
        String username = usernamePasswordToken.getUsername();
        char[] password = usernamePasswordToken.getPassword();
        System.out.println(username+"===="+new String(password));

        //不存在的账号
        if(!"admin".equals(username)&&!"zhangsan".equals(username)){
            throw new UnknownAccountException("没找到想要的账号");
        }
        //根据不同的情况进行往外逻辑判断抛出相应的异常既可
        if("zhangsan".equals(username)){
            //throw new LockedAccountException("账号被锁定");
        }
        /**
         * 实际生产环境中我们这样的加密是没有意义的
         * 因为我们主要是在前段访问后端的时候,防止在中间截取或者篡改数据
         * shiro提供这个算法主要是为了在注册的时候使用
         * 我们这里就是为了学习,不太深究了
         */
        //针对页面输入的的密码进行加密
        HashedCredentialsMatcher hashedCredentialsMatcher = new HashedCredentialsMatcher("MD5");
        hashedCredentialsMatcher.setHashIterations(2);
        this.setCredentialsMatcher(hashedCredentialsMatcher);
        //针对数据库密码进行加密
        SimpleHash simpleHash2 = new SimpleHash("MD5", "123456", "", 2);

        /**
         * 创建密码认证对象,有shiro 完成认证操作
         * 参数一: 用户名数据库或者前台页面传入的均可
         * 参数二:是从数据库中查询到的密码
         * 参数三:为当前realm的名字
         *
         *
         */
        return new SimpleAuthenticationInfo(username,simpleHash2,getName());
    }
}
config中修改

html增加几个测试连接
2.6 增加注解的方式
修改congfig类
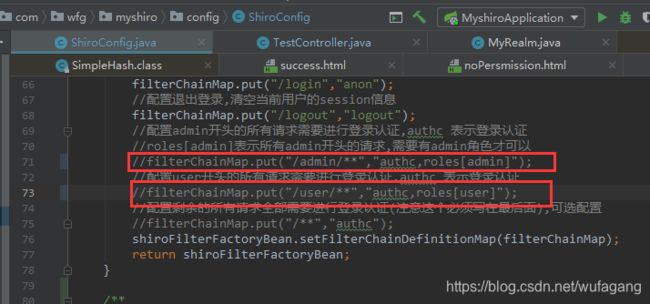
首先注释掉这些授权配置
再增加下面注解配置支持
 /**
     * 开启shiro注解支持(例如@RequiresRoles()和@RequiresPermissions())
     * shiro的注解需要借助spring的aop来实现
     * @return
     */
    @Bean
    public DefaultAdvisorAutoProxyCreator advisorAutoProxyCreator(){
        DefaultAdvisorAutoProxyCreator advisorAutoProxyCreator = new DefaultAdvisorAutoProxyCreator();
        advisorAutoProxyCreator.setProxyTargetClass(true);
        return advisorAutoProxyCreator;
    }

    /**
     * 开启spring的aop注解支持
     * @param securityManager
     * @return
     */
    @Bean
    public AuthorizationAttributeSourceAdvisor authorizationAttributeSourceAdvisor(SecurityManager securityManager){
        AuthorizationAttributeSourceAdvisor authorizationAttributeSourceAdvisor = new AuthorizationAttributeSourceAdvisor();
        authorizationAttributeSourceAdvisor.setSecurityManager(securityManager);
        return authorizationAttributeSourceAdvisor;
    }
修改controller
 /**
     *  @RequiresRoles("admin") 这个注解是shiro提供的
     *  第一个参数是角色,并且是数组的形式
     *  第二个参数:存在多个的是进行逻辑与还是逻辑或
     * @return
     */
    @RequiresRoles(value = {"admin"},logical = Logical.AND)
    @RequestMapping("/admin/test")
    @ResponseBody
    public String testAdmin(){
        return "admin 请求";
    }

    @RequiresRoles("zhangsan")
    @RequestMapping("/user/test")
    @ResponseBody
    public String testUser(){
        return "user 请求";
    }
源码下载