yolov5 web端部署进行图片和视频检测
目录
1、思路
2、代码结构
3、代码运行
4、api接口代码
5、web ui界面
6、参考资料
7、代码分享
1、思路
通过搭建flask微型服务器后端,以后通过vue搭建网页前端。flask是第一个第三方库。与其他模块一样,安装时可以直接使用python的pip命令实现。flask是web开发框架,简单易学,因此用flask来搭建web服务也非常简单。
在pycharm新建一个项目,命名为web2020,然后新建一个python文件,命名为main.py。在代码中输入如下代码:
from flask import  Flask    #导入Flask类
app=Flask(__name__)         #实例化并命名为app实例
if __name__=="__main__":
    app.run(port=2020,host="127.0.0.1",debug=True)   #调用run方法,设定端口号,启动服务
路由定义:
from flask import  Flask
app=Flask(__name__)

@app.route('/')
def index():
    return 'welcome to my webpage!'

if __name__=="__main__":
    app.run(port=2020,host="127.0.0.1",debug=True)
通过这种方式,实现python调用模型,然后通过web服务器进行数据输入输出,最后通过浏览器web页面进行展示。
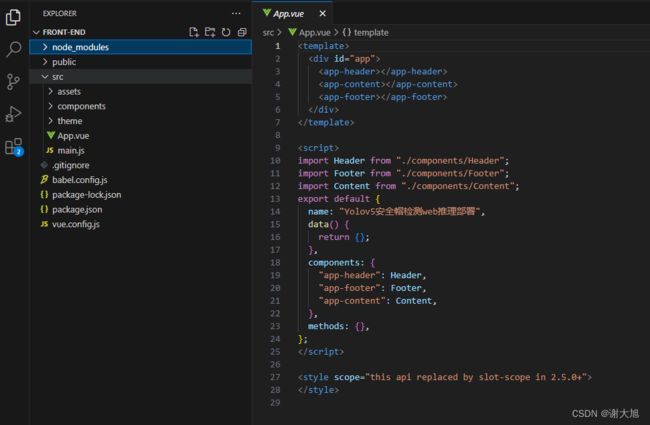
2、代码结构
前端代码结构
后端代码结构

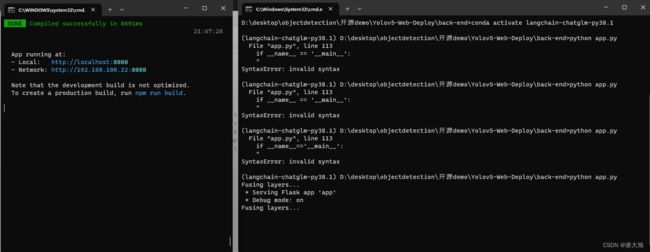
3、代码运行

4、api接口代码
import datetime
import logging as rel_log
import os
import shutil
from datetime import timedelta
from flask import *
from flask import Flask, render_template, Response
from processor.AIDetector_pytorch import Detector

import core.main

# import camera driver
if os.environ.get('CAMERA'):
    Camera = import_module('camera_' + os.environ['CAMERA']).Camera
else:
    from camera import Camera


UPLOAD_FOLDER = r'./uploads'

ALLOWED_EXTENSIONS = set(['png', 'jpg'])
app = Flask(__name__)
app.secret_key = 'secret!'
app.config['UPLOAD_FOLDER'] = UPLOAD_FOLDER

werkzeug_logger = rel_log.getLogger('werkzeug')
werkzeug_logger.setLevel(rel_log.ERROR)

# 解决缓存刷新问题
app.config['SEND_FILE_MAX_AGE_DEFAULT'] = timedelta(seconds=1)


# 添加header解决跨域
@app.after_request
def after_request(response):
    response.headers['Access-Control-Allow-Origin'] = '*'
    response.headers['Access-Control-Allow-Credentials'] = 'true'
    response.headers['Access-Control-Allow-Methods'] = 'POST'
    response.headers['Access-Control-Allow-Headers'] = 'Content-Type, X-Requested-With'
    return response

#图片检测接口
def allowed_file(filename):
    return '.' in filename and filename.rsplit('.', 1)[1] in ALLOWED_EXTENSIONS


#@app.route('/')
#def hello_world():
#    return redirect(url_for('static', filename='./index.html'))
@app.route('/')
def index():
    """Video streaming home page."""
    return render_template('index.html')


@app.route('/upload', methods=['GET', 'POST'])
def upload_file():
    file = request.files['file']
    print(datetime.datetime.now(), file.filename)
    #if file and allowed_file(file.filename):
    src_path = os.path.join(app.config['UPLOAD_FOLDER'], file.filename)
    file.save(src_path)
    shutil.copy(src_path, './tmp/ct')
    image_path = os.path.join('./tmp/ct', file.filename)
    pid, image_info = core.main.c_main(
        image_path, current_app.model, file.filename.rsplit('.', 1)[1])
    return jsonify({'status': 1,
                        'image_url': 'http://127.0.0.1:5003/tmp/ct/' + pid,
                        'draw_url': 'http://127.0.0.1:5003/tmp/draw/' + pid,
                        'image_info': image_info})

    #return jsonify({'status': 0})


@app.route("/download", methods=['GET'])
def download_file():
    # 需要知道2个参数, 第1个参数是本地目录的path, 第2个参数是文件名(带扩展名)
    return send_from_directory('data', 'testfile.zip', as_attachment=True)


# show photo
@app.route('/tmp/', methods=['GET'])
def show_photo(file):
    if request.method == 'GET':
        if not file is None:
            image_data = open(f'tmp/{file}', "rb").read()
            response = make_response(image_data)
            response.headers['Content-Type'] = 'image/png'
            return response


#视频检测接口
def gen(camera):
    """Video streaming generator function."""
    while True:
        frame = camera.get_frame()
        yield (b'--frame\r\n'
               b'Content-Type: image/jpeg\r\n\r\n' + frame + b'\r\n')


@app.route('/video_start')
def video_feed():
    """Video streaming route. Put this in the src attribute of an img tag."""
    return Response(gen(Camera()),
                    mimetype='multipart/x-mixed-replace; boundary=frame')

#视频流检测接口
#@app.route('/livestream_start')


#程序启动入口
if __name__=='__main__':
    files = [
        'uploads', 'tmp/ct', 'tmp/draw',
        'tmp/image', 'tmp/mask', 'tmp/uploads'
    ]
    for ff in files:
        if not os.path.exists(ff):
            os.makedirs(ff)
    with app.app_context():
        current_app.model = Detector()
    app.run(host='127.0.0.1', port=5003, debug=True)
5、web ui界面
上传图像
原始图像
{{ wait_return }}
检测结果
检测目标
重新选择图像
{{ scope.row[2] }}
{{ scope.row[0] }}
{{ scope.row[1] }}
视频名称
![]()
6、参考资料
yolov5-flask-web - 知乎 (zhihu.com)
Flask部署YOLOv5 - 知乎 (zhihu.com)
https://zhuanlan.zhihu.com/p/104273184
特别感谢作者
GitHub - Sharpiless/Yolov5-Flask-VUE: 基于Flask+VUE前后端,在阿里云公网WEB端部署YOLOv5目标检测模型