maskrcnn训练自己的数据集
一、搭建环境
代码地址:https://github.com/facebookresearch/maskrcnn-benchmark
1、创建环境
我选择的是pthon=3.8,当低于3.8时,opencv将不满足安装条件
conda create -name maskrcnn python=3.8
2、激活环境
conda activate maskrcnn
3、this installs the right pip and dependencies for the fresh python
conda install ipython pip
4、maskrcnn_benchmark and coco api dependencies
pip install ninja yacs cython matplotlib tqdm opencv-python
如果安装速度慢或超时,可使用以下命令:
pip install ninja yacs cython matplotlib tqdm opencv-python -i https://pypi.tuna.tsinghua.edu.cn/simple
5、安装torch和torchvision
这里的版本非常关键,最终在cuda10.2+torch1.5.0+torchvision0.6.0下安装成功
6、install pycocotools
git clone https://github.com/cocodataset/cocoapi.git
cd cocoapi/PythonAPI
python setup.py build_ext install
7、install cityscapesScripts
git clone https://github.com/mcordts/cityscapesScripts.git
cd cityscapesScripts/
python setup.py build_ext install
8、install apex
如果cuda、torch的版本没有找到最佳匹配,这一部分安装会出现报错
git clone https://github.com/NVIDIA/apex.git
cd apex
python setup.py install --cuda_ext --cpp_ext
9、install PyTorch Detection
git clone https://github.com/facebookresearch/maskrcnn-benchmark.git
cd maskrcnn-benchmark
python setup.py build develop
- 报错1
解决方案:pip install setuptools==58.2.0
/home/liuyuxing/anaconda3/envs/maskrcnn/lib/python3.8/site-packages/setuptools/command/develop.py:40: EasyInstallDeprecationWarning: easy_install command is deprecated.
!!

        ********************************************************************************
        Please avoid running ``setup.py`` and ``easy_install``.
        Instead, use pypa/build, pypa/installer, pypa/build or
        other standards-based tools.

        See https://github.com/pypa/setuptools/issues/917 for details.
        ********************************************************************************

!!
  easy_install.initialize_options(self)
/home/liuyuxing/anaconda3/envs/maskrcnn/lib/python3.8/site-packages/setuptools/_distutils/cmd.py:66: SetuptoolsDeprecationWarning: setup.py install is deprecated.
!!

        ********************************************************************************
        Please avoid running ``setup.py`` directly.
        Instead, use pypa/build, pypa/installer, pypa/build or
        other standards-based tools.

        See https://blog.ganssle.io/articles/2021/10/setup-py-deprecated.html for details.
        ********************************************************************************

!!
  self.initialize_options()
running egg_info
error: Cannot update time stamp of directory 'maskrcnn_benchmark.egg-info'
- 报错2
error: [Errno 13] Permission denied
解决方案sudo python setup.py build develop,若之后出现以下报错:
Traceback (most recent call last):
  File "setup.py", line 7, in <module>
    import torch
ImportError: No module named torch
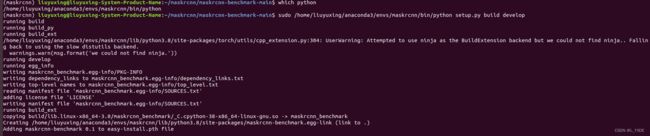
终极解决方案:
#1
 which python
# 地址:/home/liuyuxing/anaconda3/envs/maskrcnn/bin/python
#2
sudo /home/liuyuxing/anaconda3/envs/maskrcnn/bin/python setup.py build develop
安装成功:
二、训练
1、创建自己的datasets
train2017和val2017分别存放了训练集和测试集的图片

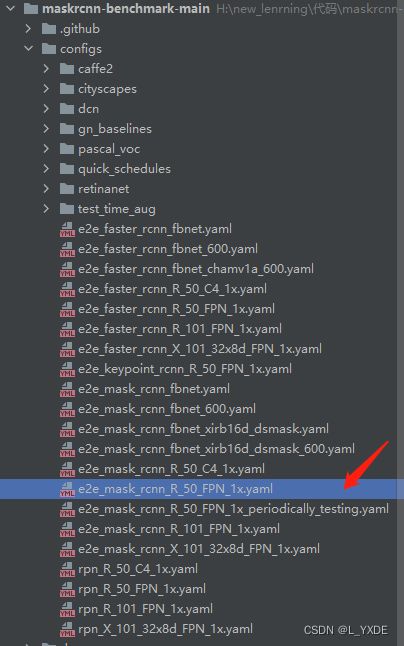
2、选择.yaml文件
可以根据自己的需求选择不同文件,并记住该文件的地址:
3、修改.yaml文件
(1)修改权重地址
这个权重可在官方地址处下载:https://github.com/facebookresearch/maskrcnn-benchmark/blob/main/MODEL_ZOO.md

(2)数据集

4、修改训练类别数量
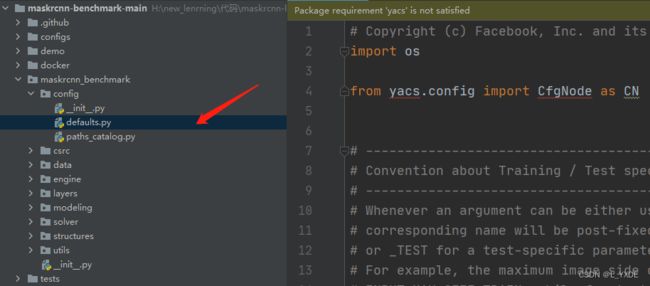
![]()
![]()
2是类别数,1是背景
5、数据集地址

6、权重文件的相关修改
由于我训练时使用了两类,若直接使用原权重文件(含81类),会产生以下报错:
size mismatch for roi_heads.box.predictor.cls_score.bias: copying a param with shape torch.Size([81]) from checkpoint, the shape in current model is torch.Size([3]).
size mismatch for roi_heads.box.predictor.cls_score.weight: copying a param with shape torch.Size([81, 1024]) from checkpoint, the shape in current model is torch.Size([3, 1024]).
size mismatch for roi_heads.box.predictor.bbox_pred.bias: copying a param with shape torch.Size([324]) from checkpoint, the shape in current model is torch.Size([12]).
size mismatch for roi_heads.box.predictor.bbox_pred.weight: copying a param with shape torch.Size([324, 1024]) from checkpoint, the shape in current model is torch.Size([12, 1024]).
size mismatch for roi_heads.mask.predictor.mask_fcn_logits.bias: copying a param with shape torch.Size([81]) from checkpoint, the shape in current model is torch.Size([32]).
size mismatch for roi_heads.mask.predictor.mask_fcn_logits.weight: copying a param with shape torch.Size([81, 256, 1, 1]) from checkpoint, the shape in current model is torch.Size([3, 256, 1, 1]).
解决方案1+2
方案1:http://t.csdn.cn/0LwDH
 import torch
 model = torch.load("e2e_mask_rcnn_X_101_32x8d_FPN_1x.pth")
 // Remove the previous training parameters.
 del model['iteration']
 del model['scheduler']
 del model['optimizer']
 // Remove the output layers in COCO, these are the mismatched layers you saw.
 //Second stage prediction
 del model["model"]["module.roi_heads.box.predictor.cls_score.weight"]
 del model["model"]["module.roi_heads.box.predictor.cls_score.bias"]
 del model["model"]["module.roi_heads.box.predictor.bbox_pred.weight"]
 del model["model"]["module.roi_heads.box.predictor.bbox_pred.bias"]
 //mask prediction
 del model["model"]["module.roi_heads.mask.predictor.mask_fcn_logits.weight"]
 del model["model"]["module.roi_heads.mask.predictor.mask_fcn_logits.bias"]
 // RPN
 del model["model"]["module.rpn.head.cls_logits.weight"]
 del model["model"]["module.rpn.head.cls_logits.bias"]
 del model["model"]["module.rpn.head.bbox_pred.weight"]
 del model["model"]["module.rpn.head.bbox_pred.bias"]
 //save the model
 torch.save(model, "modified_model.pth")
若此时还没解决,则继续第二步
方案2:
\maskrcnn-benchmark-main\tools\train_net.py的第65行
extra_checkpoint_data = checkpointer.load(cfg.MODEL.WEIGHT)
更改为:
extra_checkpoint_data = checkpointer.load(cfg.MODEL.WEIGHT, False)
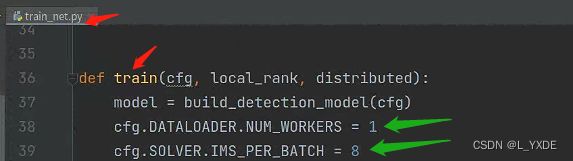
6、如何应付模型训练超过内存:
注释\maskrcnn-benchmark-main\tools\train_net.py第170行的
cfg.freeze() # cfg.freeze()使参数不能被修改
然后调整num_works或batch_size:增加以下两句:(绿色箭头所指为新增加的两句,可以根据自己的实际情况调整这两个)
我曾尝试修改.yaml文件里的
DATALOADER:
    SIZE_DIVISIBILITY:1
但似乎并没不能改变bach_size.
(有相关了解的同学欢迎补充)