macOS上使用VScode编译配置C++语言开发环境
本文介绍macOS上使用VScode编译配置C++语言开发环境
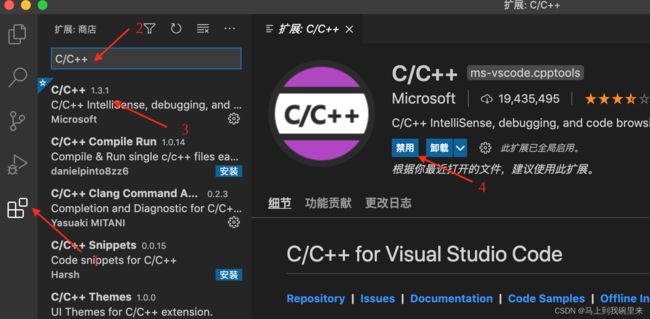
1.准备工作
安装C/C++插件
2.配置c_cpp_properties.json文件
[⇧⌘P]打开命令模式,选择[C/Cpp: Edit Configurations(JSON)]命令,回车后会自动生成一个.vscode目录,目录下有一个c_cpp_properties.json文件,如下所示:
{
    "configurations": [
        {
            "name": "Mac",
            "defines": [],
            "macFrameworkPath": [
                "/System/Library/Frameworks",
                "/Library/Frameworks",
                "${workspaceFolder}/**"
            ],
            "compilerPath": "/usr/bin/g++",
            "cStandard": "c11",
            "cppStandard": "c++17",
            "intelliSenseMode": "clang-x64",
            "browse": {
                "path": [
                    "${workspaceFolder}"
                ],
                "limitSymbolsToIncludedHeaders": true,
                "databaseFilename": ""
            }
        }
    ],
    "version": 4
}
3.配置tasks.json文件
[⇧⌘P]打开命令模式,选择[Tasks: Configure Task]命令,选择的模板为MSBuild,回车后会自动在.vscode目录下生成一个tasks.json文件:
{
    // See https://go.microsoft.com/fwlink/?LinkId=733558
    // for the documentation about the tasks.json format
    "version": "2.0.0",
    "tasks": [
        {
            "label": "build c++",
            "type": "shell",
            "command": "g++",
            "args": [
                "${file}",
                "-std=c++17",
                "-g",
                "-Wall",
                "-lm",
                "-o",
                "${fileDirname}/${fileBasenameNoExtension}.out"
            ],
            "group": "build",
            "presentation": {
                "reveal": "silent",
                "panel": "shared",
                "echo": true,
                "focus": false,
                "showReuseMessage": true,
                "clear": false
            },
            "problemMatcher": "$gcc"
        },
        {
            "label": "run c++",
            "type": "shell",
            "dependsOn": "build c++",
            "command": "${fileDirname}/${fileBasenameNoExtension}.out",
            "presentation": {
                "focus": true
            },
            "group": "test"
        }
    ]
}
4.配置launch.json文件
方式1:

方式2:
[⇧⌘P]打开命令模式,选择[Debug: Open launch.json]命令,选择的模板为C/C++,回车后会自动在.vscode目录下生成一个launch.json文件:
{
    // Use IntelliSense to learn about possible attributes.
    // Hover to view descriptions of existing attributes.
    // For more information, visit: https://go.microsoft.com/fwlink/?linkid=830387
    "version": "0.2.0",
    "configurations": [
        {
            "name": "(lldb) Launch",
            "type": "cppdbg",
            "request": "launch",
            "program": "enter program name, for example ${workspaceFolder}/a.out",
            "args": [],
            "stopAtEntry": false,
            "cwd": "${workspaceFolder}",
            "environment": [],
            "externalConsole": false,
            "MIMode": "lldb"
        }
    ]
}
完成这三步C++开发环境就配置好了,接下来就可以编译,运行,调试C++程序了。
[⇧⌘B]是编译程序,[⇧⌘R]是运行程序。
如果安装了插件『Code Runner』可以更快捷地直接运行程序,安装看下一步。
5.安装「Code Runner」插件

安装完插件,[⇧⌘P]打开命令模式选择「run code」运行项目,这个时候你可以直接在cpp代码区右键-> 「run code」,就可以直接输出结果,而不需要[⇧⌘B]编译程序和[⇧⌘R]运行程序了。
如果需要调试,那就按F5,进入调试模式即可。
6.写在最后
如果你看完上面的安装过程,你还没有成功配置C++环境,或者你搞不清楚这些具体的关系,你只需要保证你的工作区间(你存放cpp文件或项目的文件夹)有一个隐藏文件夹叫.vscode,而这个文件夹中又有三个配置好的文件即可。
