
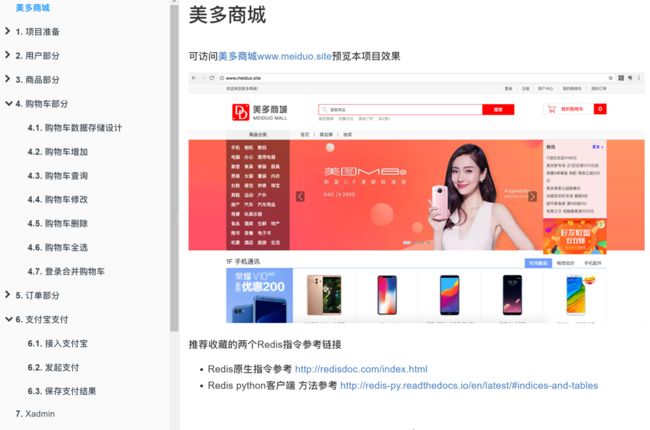
本系列文章md笔记(已分享)主要讨论django商城项目开发相关知识。本项目利用Django框架开发一套前后端不分离的商城项目(4.0版本)含代码和文档。功能包括前后端不分离,方便SEO。采用Django + Jinja2模板引擎 + Vue.js实现前后端逻辑,Nginx服务器(反向代理)Nginx服务器(静态首页、商品详情页、uwsgi服务器(美多商场业务场景),后端服务:MySQL、Redis、Celery、RabbitMQ、Docker、FastDFS、Elasticsearch、Crontab,外部接口:容联云、QQ互联、支付宝。
全套笔记和代码自取在个人博客: https://gitee.com/yinuo112/Backend/blob/master/Django/美多商城项目4.0文档/1.md
感兴趣的小伙伴可以自取哦,欢迎大家点赞转发~
共 11 章,63 子模块
用户部分
图片验证码
1. 后端接口设计:
访问方式: GET /image_codes/(?P
请求参数: 路径参数
| 参数 | 类型 | 是否必须 | 说明 |
|---|---|---|---|
| image_code_id | uuid字符串 | 是 | 图片验证码编号 |
返回数据:
验证码图片
视图原型
# url('^image_codes/(?P[\w-]+)/$', views.ImageCodeView.as_view()),


class ImageCodeView(APIView):
    """
    图片验证码
    """
    pass
2. 具体视图实现
在verifications/views.py中实现视图
class ImageCodeView(APIView):
    """
    图片验证码
    """

    def get(self, request, image_code_id):
        """
        获取图片验证码
        """
        # 生成验证码图片
        text, image = captcha.generate_captcha()

        redis_conn = get_redis_connection("verify_codes")
        redis_conn.setex("img_%s" % image_code_id, constants.IMAGE_CODE_REDIS_EXPIRES, text)

        # 固定返回验证码图片数据,不需要REST framework框架的Response帮助我们决定返回响应数据的格式
        # 所以此处直接使用Django原生的HttpResponse即可
        return HttpResponse(image, content_type="images/jpg")
说明:
django-redis提供了get_redis_connection的方法,通过调用get_redis_connection方法传递redis的配置名称可获取到redis的连接对象,通过redis连接对象可以执行redis命令。
我们需要在配置文件中添加一个新的redis配置,用于存放验证码数据
CACHES = {
    "default": {
        "BACKEND": "django_redis.cache.RedisCache",
        "LOCATION": "redis://10.211.55.5:6379/0",
        "OPTIONS": {
            "CLIENT_CLASS": "django_redis.client.DefaultClient",
        }
    },
    "session": {
        "BACKEND": "django_redis.cache.RedisCache",
        "LOCATION": "redis://10.211.55.5:6379/1",
        "OPTIONS": {
            "CLIENT_CLASS": "django_redis.client.DefaultClient",
        }
    },
    "verify_codes": {
        "BACKEND": "django_redis.cache.RedisCache",
        "LOCATION": "redis://10.211.55.5:6379/2",
        "OPTIONS": {
            "CLIENT_CLASS": "django_redis.client.DefaultClient",
        }
    }
}
3. 设置域名
我们现在为前端和后端分别设置两个不同的域名
| 位置 | 域名 |
|---|---|
| 前端 | www.meiduo.site |
| 后端 | api.meiduo.site |
编辑/etc/hosts文件,可以设置本地域名
sudo vim /etc/hosts在文件中增加两条信息
127.0.0.1   api.meiduo.site
127.0.0.1   www.meiduo.site
windows系统中若设置本地域名,hosts文件在如下目录:
C:\Windows\System32\drivers\etc我们在前端front_end_pc/js目录中,创建host.js文件用以为前端保存后端域名
var host = 'http://api.meiduo.site:8000';在所有需要访问后端接口的前端页面中都引入host.js,使用host变量即可指代后端域名。
修改settings配置中的ALLOWED_HOSTS
一旦不再使用127.0.0.1访问Django后端,需要在配置文件中修改ALLOWED_HOSTS,增加可以访问后端的域名
ALLOWED_HOSTS = ['api.meiduo.site', '127.0.0.1', 'localhost', 'www.meiduo.site']4. 前端Vue代码:
js/register.js
data: {
    ...
    image_code_id: '',  // 图片验证码编号
    image_code_url: '',  // 验证码图片路径
},
mounted: function() {
    this.generate_image_code();
},
methods: {
    // 生成uuid
    generate_uuid: function(){
        var d = new Date().getTime();
        if(window.performance && typeof window.performance.now === "function"){
            d += performance.now(); //use high-precision timer if available
        }
        var uuid = 'xxxxxxxx-xxxx-4xxx-yxxx-xxxxxxxxxxxx'.replace(/[xy]/g, function(c) {
            var r = (d + Math.random()*16)%16 | 0;
            d = Math.floor(d/16);
            return (c =='x' ? r : (r&0x3|0x8)).toString(16);
        });
        return uuid;
    },
    // 生成一个图片验证码的编号,并设置页面中图片验证码img标签的src属性
    generate_image_code: function(){
        // 生成一个编号
        // 严格一点的使用uuid保证编号唯一, 不是很严谨的情况下,也可以使用时间戳
        this.image_code_id = this.generate_uuid();

        // 设置页面中图片验证码img标签的src属性
        this.image_code_url = this.host + "/image_codes/" + this.image_code_id + "/";
    },
    ...
}
短信验证码
1. 业务处理流程
- 检查图片验证码
- 检查是否在60s内有发送记录
- 生成短信验证码
- 保存短信验证码与发送记录
- 发送短信
2. 后端接口设计:
访问方式: GET /sms_codes/(?P
请求参数: 路径参数与查询字符串参数
| 参数 | 类型 | 是否必须 | 说明 |
|---|---|---|---|
| mobile | str | 是 | 手机号 |
| image_code_id | uuid字符串 | 是 | 图片验证码编号 |
| text | str | 是 | 用户输入的图片验证码 |
返回数据: JSON
| 返回值 | 类型 | 是否必传 | 说明 |
|---|---|---|---|
| message | str | 否 | OK,发送成功 |
视图原型:
# url('^sms_codes/(?P1[3-9]\d{9})/$', views.SMSCodeView.as_view()),


class SMSCodeView(GenericAPIView):
    """
    短信验证码
    传入参数:
        mobile, image_code_id, text
    """
    pass
3. 后端实现
在verifications/serializers.py中定义序列化器,用以校验
class ImageCodeCheckSerializer(serializers.Serializer):
    """
    图片验证码校验序列化器
    """
    image_code_id = serializers.UUIDField()
    text = serializers.CharField(max_length=4, min_length=4)

    def validate(self, attrs):
        """
        校验
        """
        image_code_id = attrs['image_code_id']
        text = attrs['text']
        # 查询真实图片验证码
        redis_conn = get_redis_connection('verify_codes')
        real_image_code_text = redis_conn.get('img_%s' % image_code_id)
        if not real_image_code_text:
            raise serializers.ValidationError('图片验证码无效')

        # 删除图片验证码
        try:
            redis_conn.delete('img_%s' % image_code_id)
        except RedisError as e:
            logger.error(e)

        # 比较图片验证码
        real_image_code_text = real_image_code_text.decode()
        if real_image_code_text.lower() != text.lower():
            raise serializers.ValidationError('图片验证码错误')

        # 判断是否在60s内
        mobile = self.context['view'].kwargs['mobile']
        send_flag = redis_conn.get("send_flag_%s" % mobile)
        if send_flag:
            raise serializers.ValidationError('请求次数过于频繁')

        return attrs
在verifications/views.py中定义实现视图:
class SMSCodeView(GenericAPIView):
    """
    短信验证码
    """
    serializer_class = serializers.ImageCodeCheckSerializer

    def get(self, request, mobile):
        """
        创建短信验证码
        """
        # 判断图片验证码, 判断是否在60s内
        serializer = self.get_serializer(data=request.query_params)
        serializer.is_valid(raise_exception=True)

        # 生成短信验证码
        sms_code = "%06d" % random.randint(0, 999999)

        # 保存短信验证码与发送记录
        redis_conn = get_redis_connection('verify_codes')
        pl = redis_conn.pipeline()
        pl.setex("sms_%s" % mobile, constants.SMS_CODE_REDIS_EXPIRES, sms_code)
        pl.setex("send_flag_%s" % mobile, constants.SEND_SMS_CODE_INTERVAL, 1)
        pl.execute()

        # 发送短信验证码
        sms_code_expires = str(constants.SMS_CODE_REDIS_EXPIRES // 60)
        ccp = CCP()
        ccp.send_template_sms(mobile, [code, expires], SMS_CODE_TEMP_ID)

        return Response({"message": "OK"})
4. 前端实现
修改register.html
美多商城-注册
 商品美 · 种类多 · 欢迎光临
用户注册
登录
修改register.js
var vm = new Vue({
    el: '#app',
    data: {
        host: host,

        error_name: false,
        error_password: false,
        error_check_password: false,
        error_phone: false,
        error_allow: false,
        error_image_code: false,
        error_sms_code: false,
        error_name_message: '',
        error_image_code_message: '',
        error_phone_message: '',
        error_sms_code_message: '',

        image_code_id: '', // 图片验证码id
        image_code_url: '',

        sms_code_tip: '获取短信验证码',
        sending_flag: false, // 正在发送短信标志

        username: '',
        password: '',
        password2: '',
        mobile: '',
        image_code: '',
        sms_code: '',
        allow: false
    },
    mounted: function(){
        this.generate_image_code();
    },
    methods: {
        // 生成uuid
        generate_uuid: function(){
            var d = new Date().getTime();
            if(window.performance && typeof window.performance.now === "function"){
                d += performance.now(); //use high-precision timer if available
            }
            var uuid = 'xxxxxxxx-xxxx-4xxx-yxxx-xxxxxxxxxxxx'.replace(/[xy]/g, function(c) {
                var r = (d + Math.random()*16)%16 | 0;
                d = Math.floor(d/16);
                return (c =='x' ? r : (r&0x3|0x8)).toString(16);
            });
            return uuid;
        },
        // 生成一个图片验证码的编号,并设置页面中图片验证码img标签的src属性
        generate_image_code: function(){
            // 生成一个编号
            // 严格一点的使用uuid保证编号唯一, 不是很严谨的情况下,也可以使用时间戳
            this.image_code_id = this.generate_uuid();

            // 设置页面中图片验证码img标签的src属性
            this.image_code_url = this.host + "/image_codes/" + this.image_code_id + "/";
        },
        check_username: function (){
            var len = this.username.length;
            if(len<5||len>20) {
                this.error_name_message = '请输入5-20个字符的用户名';
                this.error_name = true;
            } else {
                this.error_name = false;
            }

        },
        check_pwd: function (){
            var len = this.password.length;
            if(len<8||len>20){
                this.error_password = true;
            } else {
                this.error_password = false;
            }
        },
        check_cpwd: function (){
            if(this.password!=this.password2) {
                this.error_check_password = true;
            } else {
                this.error_check_password = false;
            }
        },
        check_phone: function (){
            var re = /^1[345789]\d{9}$/;
            if(re.test(this.mobile)) {
                this.error_phone = false;
            } else {
                this.error_phone_message = '您输入的手机号格式不正确';
                this.error_phone = true;
            }

        },
        check_image_code: function (){
            if(!this.image_code) {
                this.error_image_code_message = '请填写图片验证码';
                this.error_image_code = true;
            } else {
                this.error_image_code = false;
            }
        },
        check_sms_code: function(){
            if(!this.sms_code){
                this.error_sms_code_message = '请填写短信验证码';
                this.error_sms_code = true;
            } else {
                this.error_sms_code = false;
            }
        },
        check_allow: function(){
            if(!this.allow) {
                this.error_allow = true;
            } else {
                this.error_allow = false;
            }
        },
        // 发送手机短信验证码
        send_sms_code: function(){
            if (this.sending_flag == true) {
                return;
            }
            this.sending_flag = true;

            // 校验参数,保证输入框有数据填写
            this.check_phone();
            this.check_image_code();

            if (this.error_phone == true || this.error_image_code == true) {
                this.sending_flag = false;
                return;
            }

            // 向后端接口发送请求,让后端发送短信验证码
            axios.get(this.host + '/sms_codes/' + this.mobile + '/?text=' + this.image_code+'&image_code_id='+ this.image_code_id, {
                    responseType: 'json'
                })
                .then(response => {
                    // 表示后端发送短信成功
                    // 倒计时60秒,60秒后允许用户再次点击发送短信验证码的按钮
                    var num = 60;
                    // 设置一个计时器
                    var t = setInterval(() => {
                        if (num == 1) {
                            // 如果计时器到最后, 清除计时器对象
                            clearInterval(t);
                            // 将点击获取验证码的按钮展示的文本回复成原始文本
                            this.sms_code_tip = '获取短信验证码';
                            // 将点击按钮的onclick事件函数恢复回去
                            this.sending_flag = false;
                        } else {
                            num -= 1;
                            // 展示倒计时信息
                            this.sms_code_tip = num + '秒';
                        }
                    }, 1000, 60)
                })
                .catch(error => {
                    if (error.response.status == 400) {
                        this.error_image_code_message = '图片验证码有误';
                        this.error_image_code = true;
                        this.generate_image_code();
                    } else {
                        console.log(error.response.data);
                    }
                    this.sending_flag = false;
                })
        },
        // 注册
        on_submit: function(){
            this.check_username();
            this.check_pwd();
            this.check_cpwd();
            this.check_phone();
            this.check_sms_code();
            this.check_allow();


        }
    }
});
跨域CORS
我们为前端和后端分别设置了两个不同的域名
| 位置 | 域名 |
|---|---|
| 前端 | www.meiduo.site |
| 后端 | api.meiduo.site |
现在,前端与后端分处不同的域名,我们需要为后端添加跨域访问的支持。
我们使用CORS来解决后端对跨域访问的支持。
使用django-cors-headers扩展
参考文档https://github.com/ottoyiu/django-cors-headers/
安装
pip install django-cors-headers添加应用
INSTALLED_APPS = (
    ...
    'corsheaders',
    ...
)
中间层设置
MIDDLEWARE = [
    'corsheaders.middleware.CorsMiddleware',
    ...
]
添加白名单
# CORS


CORS_ORIGIN_WHITELIST = (
    '127.0.0.1:8080',
    'localhost:8080',
    'www.meiduo.site:8080',
    'api.meiduo.site:8000'
)
CORS_ALLOW_CREDENTIALS = True # 允许携带cookie- 凡是出现在白名单中的域名,都可以访问后端接口
- CORS_ALLOW_CREDENTIALS 指明在跨域访问中,后端是否支持对cookie的操作。
未完待续, 同学们请等待下一期
全套笔记和代码自取在个人博客: https://gitee.com/yinuo112/Backend/blob/master/Django/美多商城项目4.0文档/1.md
感兴趣的小伙伴可以自取哦,欢迎大家点赞转发~
ders
#### 添加应用
INSTALLED_APPS = (
...
'corsheaders',
...
)
#### 中间层设置
MIDDLEWARE = [
'corsheaders.middleware.CorsMiddleware',
...
]
#### 添加白名单
CORS
CORS_ORIGIN_WHITELIST = (
'127.0.0.1:8080',
'localhost:8080',
'www.meiduo.site:8080',
'api.meiduo.site:8000'
)
CORS_ALLOW_CREDENTIALS = True # 允许携带cookie
* 凡是出现在白名单中的域名,都可以访问后端接口
* CORS_ALLOW_CREDENTIALS 指明在跨域访问中,后端是否支持对cookie的操作。