mac vuepress搭建博客
文章目录
- 一、安装vuepress
- 二、初始化项目
- 三、页面内容配置
-
- 遇到的问题:
- 四、设置封面页
- 五、配置导航栏 nav
- 六、配置侧边栏 slider
- 七、配置插件
-
- 1.UI 插件
- 2.支持 PWA
- 八、github 部署
-
- 1.创建 github 仓库
- 2.配置仓库名称
- 3.在项目根目录中,创建一个如下的脚本文件deploy.sh
- 4.运行deploy.sh 脚本
- 5.setting Github Pages
- 九、Copy 自动加版权信息
-
- 安装
- 配置
- 自定义剪贴板
一、安装vuepress
如果用 npm 来安装, Node.js 版本需要 >=8 才可以
yarn global add vuepress # 或者:npm install -g vuepress
提示:如果你的现有项目依赖了 webpack 3.x,推荐使用 Yarn 而不是 npm 来安装 VuePress。因为在这种情形下,npm 会生成错误的依赖树。
二、初始化项目
yarn init -y # 或者 npm init -y
完成后会创建一个package.json
{
  "name": "vuepressBlog",
  "version": "1.0.0",
  "main": "index.js",
  "license": "MIT",
}
在 package.json 中, 配置启动命令
"scripts": {
    "dev": "vuepress dev docs",
    "build": "vuepress build docs"
  },
创建docs目录,用来存放.md类型的文章和.vuepress相关配置
mkdir docs
cd docs
mkdir .vuepress
三、页面内容配置
新建一个总的配置文件config.js
cd .vuepress
touch config.js
配置内容
module.exports = {
  title: 'miruna的博客',
  description: '前端技术栈分享',
}
遇到的问题:
node:internal/crypto/hash:71
  this[kHandle] = new _Hash(algorithm, xofLen);
                  ^

Error: error:0308010C:digital envelope routines::unsupported
    at new Hash (node:internal/crypto/hash:71:19)
    at Object.createHash (node:crypto:133:10)
    at module.exports (/Users/miruna/.config/yarn/global/node_modules/webpack/lib/util/createHash.js:135:53)
    at NormalModule._initBuildHash (/Users/miruna/.config/yarn/global/node_modules/webpack/lib/NormalModule.js:417:16)
    at handleParseError (/Users/miruna/.config/yarn/global/node_modules/webpack/lib/NormalModule.js:471:10)
    at /Users/miruna/.config/yarn/global/node_modules/webpack/lib/NormalModule.js:503:5
    at /Users/miruna/.config/yarn/global/node_modules/webpack/lib/NormalModule.js:358:12
    at /Users/miruna/.config/yarn/global/node_modules/loader-runner/lib/LoaderRunner.js:373:3
    at iterateNormalLoaders (/Users/miruna/.config/yarn/global/node_modules/loader-runner/lib/LoaderRunner.js:214:10)
    at Array.<anonymous> (/Users/miruna/.config/yarn/global/node_modules/loader-runner/lib/LoaderRunner.js:205:4)
    at Storage.finished (/Users/miruna/.config/yarn/global/node_modules/enhanced-resolve/lib/CachedInputFileSystem.js:55:16)
    at /Users/miruna/.config/yarn/global/node_modules/enhanced-resolve/lib/CachedInputFileSystem.js:91:9
    at /Users/miruna/.config/yarn/global/node_modules/graceful-fs/graceful-fs.js:123:16
    at FSReqCallback.readFileAfterClose [as oncomplete] (node:internal/fs/read_file_context:68:3) {
  opensslErrorStack: [ 'error:03000086:digital envelope routines::initialization error' ],
  library: 'digital envelope routines',
  reason: 'unsupported',
  code: 'ERR_OSSL_EVP_UNSUPPORTED'
}


Node.js v18.16.0
error Command failed with exit code 1.
info Visit https://yarnpkg.com/en/docs/cli/run for documentation about this command.
Linux & Mac OS
export NODE_OPTIONS=--openssl-legacy-provider
windows
set NODE_OPTIONS=--openssl-legacy-provider
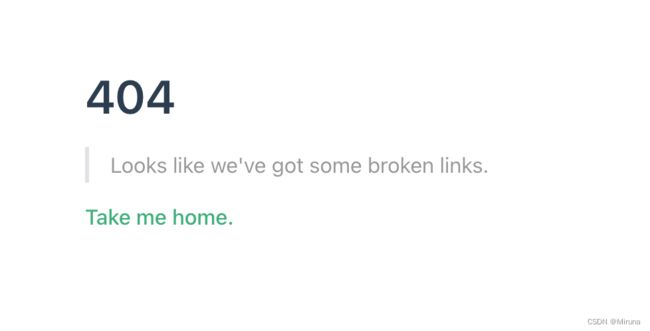
2.运行yarn dev时会出现页面 404 页面,vuepress 默认打开的是 docs 下的readme.md文件, 由于没有创建,所以找到的是 vuepress 默认提供的 404 页面,在 docs 目录下创建README.md文件, 再运行,就可以看到运行起来的效果。

四、设置封面页
五、配置导航栏 nav
在config.js中添加:
themeConfig:{
  nav: [{text: "主页", link: "/"      },
      { text: "node", link: "/node/" },
      { text: "前端",
        items: [
          { text: "html", link:"/web/html/"},
          { text: "css", link:"/web/css/"},
          ]
      },
    ],
}
目录结构

六、配置侧边栏 slider
自动获取侧边栏内容
module.exports = {
  themeConfig: {
    sidebar: 'auto',
  },
}
七、配置插件
1.UI 插件
配置内置的全局 UI
plugins: [
  ['@vuepress/back-to-top'], // 返回顶部
  ['@vuepress/nprogress'], // 加载进度条
]
2.支持 PWA
安装插件
yarn add -D @vuepress/plugin-pwa
# 或者 npm install -D @vuepress/plugin-pwa
在config.js中配置
module.exports = {
  plugins: [
    '@vuepress/pwa',
    {
      serviceWorker: true,
      updatePopup: true,
    },
  ],
}
八、github 部署
1.创建 github 仓库
在 github 上创建一个名为 blog 的仓库, 并将代码提交到 github 上
2.配置仓库名称
配置docs/.vuepress/config.js文件中的 base, 如果打算发布到https://
base: '/blog/'
3.在项目根目录中,创建一个如下的脚本文件deploy.sh
#!/usr/bin/env sh

# 确保脚本抛出遇到的错误
set -e

# 生成静态文件
npm run docs:build

# 进入生成的文件夹
cd docs/.vuepress/dist

git init
git add -A
git commit -m 'deploy'

# 如果发布到 https://.github.io/
git push -f [email protected]:/.git master:gh-pages
# 例如 git push -f [email protected]:marujiao/blog.git master:gh-pages
cd -
4.运行deploy.sh 脚本
直接把deoloy.sh拖到终端下运行,如果遇到这个报错zsh: permission denied,试试用chmod u+x *.sh,重新运行,接着会报digital envelope routines::unsupported,再运行一次export NODE_OPTIONS=--openssl-legacy-provider,再重新运行就好了。成功之后会创建一个名为 gh-pages的分支

5.setting Github Pages


九、Copy 自动加版权信息
如果想要禁止别人复制你的网站内容, 或者复制时添加版权信息,可以通过vuepress-plugin-copyright插件实现
安装
yarn add vuepress-plugin-copyright
# OR npm install vuepress-plugin-copyright
配置
module.exports = {
  plugins: { //文字复制添加版权
    "copyright", {
    noCopy: false,  // 设置为true, 不允许复制
    minLength: 100,
    authorName: "程序员成长指北-koala",
    clipboardComponent: ".vuepress/components/clipboardComponent.vue"
  },
  }
}
自定义剪贴板
自定义剪贴板组件,放置在.vuepress/components下,这里要注意的是,相对路径是基于sourceDir进行解析
<template>
  <div>
    <div v-html="html" />
    <div class="quote_address">
      <p>著作权归「Miruna」所有。p>
      <p>链接:<a :href="location">{{ location }}a>p>
    div>
  div>
template>

<script>
  export default {
    props: ['html'],
    created() {
      this.location = window.location
    },
  }
script>