【lesson46】进程通信之system V(共享内存)
文章目录
- 共享内存通信原理
- 用共享内存通信
-
- shmServer.cc
- shmClient.cc
- 完整通信代码
-
- common.hpp
- Log.hpp
- shmServer.cc
- shmClient.cc
- 通信测试
- 共享内存借助管道添加访问控制
-
- common.hpp
- shmServer.cc
- shmClient.cc
共享内存通信原理
两个进程将一块system V的物理地址通过页表映射到自己的进程地址空间中。

具体点:
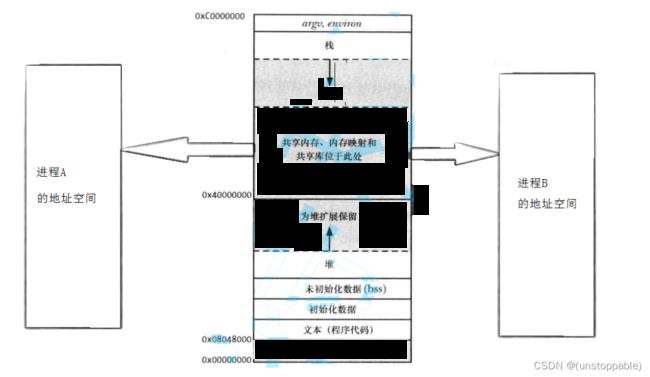
共享内存的建立
共享内存提供者是OS
那么OS要不要管理共享内存?
当然要—>先描述,再组织----->重新理解共享内存:
共享内存 = 共享内存块 + 共享内存的内核数据结构
用共享内存通信
创建两个文件:
shmServer.cc:读取数据
shmClient.cc:写入数据
shmServer.cc
1.创建key值


fotk参数:
pathname:随便写一个固定的路径,主要是为了生成唯一key值标识共享内存。
proj_id:也是随便写一个值,目的pathname一样。

2.创建共享内存
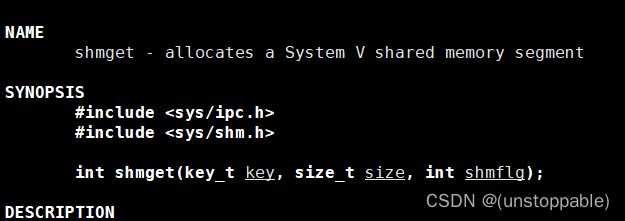
参数key:通过唯一key值创建内存并且共享内存以key编号
参数size:要申请的字节共享内存大小
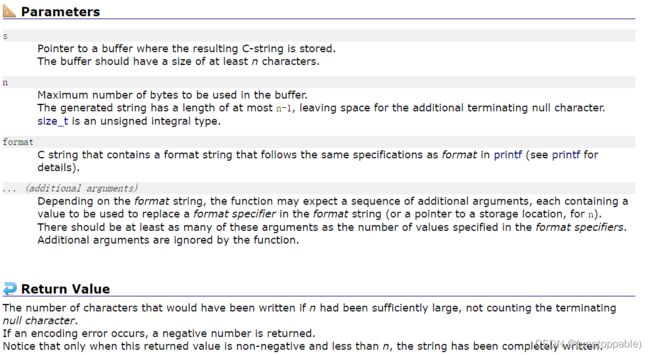
参数shmflg:
![]()
返回值:
![]()
成功返回用户层用来唯一表示共享内存的shmid

3.挂接共享内存到进程地址空间的共享区

参数shmid:用户层共享内存的唯一标识
参数shmaddr:
![]()
参数shmflg:

返回值:
![]()

4.通信逻辑之后实现,先把其它逻辑走通。
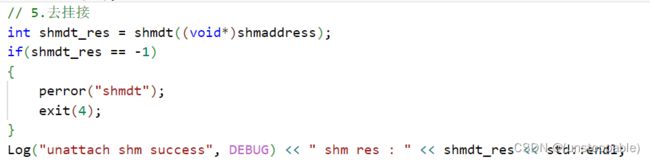
5.通信结束,共享内存去挂接
![]()
参数shmaddr:之前挂接的共享内存地址
返回值:
![]()
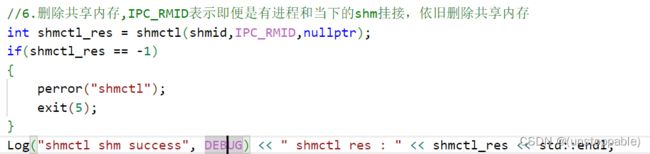
6.删除共享内存

参数shmid:共享内存用户层编号
参数cmd:
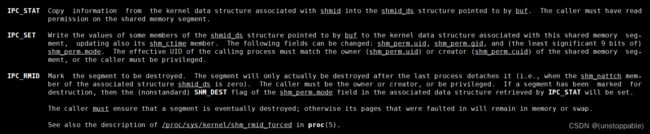
参数buf:

返回值:

通信逻辑的实现:
我们直接输出共享内存中的数据即可。
shmClient.cc
1.获取key值
2.获取共享内存

3.挂接共享内存到进程地址空间的共享区
4.开始通信,通信逻辑之后再实现
5.共享内存去挂接
这里不用删除共享空间,因为共享空间不是这个进程创建的。
通信逻辑:

我们直接向共享内存写数据。


完整通信代码
common.hpp
#pragma once
#include Log.hpp
#pragma once
#include shmServer.cc
#include "common.hpp"
std::string TransToHex(key_t k)
{
char buffer[32];
snprintf(buffer, sizeof buffer, "0x%x", k);
return buffer;
}
int main()
{
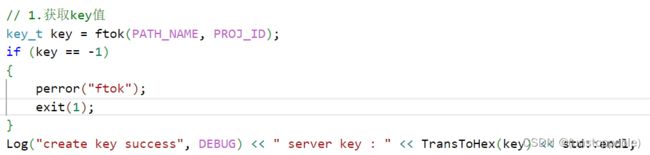
// 1.创建key值
key_t key = ftok(PATH_NAME, PROJ_ID);
if (key == -1)
{
perror("ftok");
exit(1);
}
Log("create key success", DEBUG) << " server key : " << TransToHex(key) << std::endl;
//sleep(10);
// 2.创建共享内存
int shmid = shmget(key, SHM_SIZE, IPC_CREAT | IPC_EXCL | 0666);
if (shmid == -1)
{
perror("shget");
exit(2);
}
Log("create shm success", DEBUG) << " shm id : " << shmid << std::endl;
//sleep(10);
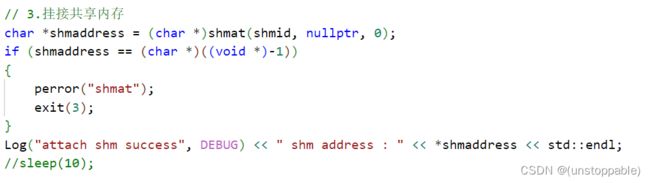
// 3.挂接共享内存的地址,到进程地址空间
char *shmaddress = (char *)shmat(shmid, nullptr, 0);
if (shmaddress == (char *)((void *)-1))
{
perror("shmat");
exit(3);
}
Log("attach shm success", DEBUG) << " shm address : " << (int)*shmaddress << std::endl;
//sleep(10);
// 4.进行通信的逻辑
//Server读取数据
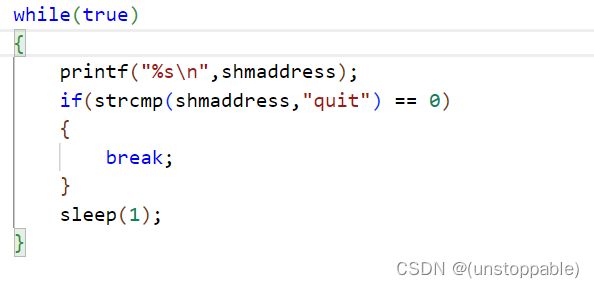
while(true)
{
printf("%s\n",shmaddress);
if(strcmp(shmaddress,"quit") == 0)
{
break;
}
sleep(1);
}
// 5.去挂接
int shmdt_res = shmdt((void*)shmaddress);
if(shmdt_res == -1)
{
perror("shmdt");
exit(4);
}
Log("unattach shm success", DEBUG) << " shm res : " << shmdt_res << std::endl;
//sleep(10);
//6.删除共享内存,IPC_RMID表示即便是有进程和当下的shm挂接,依旧删除共享内存
int shmctl_res = shmctl(shmid,IPC_RMID,nullptr);
if(shmctl_res == -1)
{
perror("shmctl");
exit(5);
}
Log("shmctl shm success", DEBUG) << " shmctl res : " << shmctl_res << std::endl;
//sleep(10);
return 0;
}
shmClient.cc
#include "common.hpp"
std::string TransToHex(key_t k)
{
    char buffer[32];
    snprintf(buffer, sizeof buffer, "0x%x", k);
    return buffer;
}

int main()
{
    // 1.获取key值
    key_t key = ftok(PATH_NAME, PROJ_ID);
    if (key == -1)
    {
        perror("ftok");
        exit(1);
    }
    Log("create key success", DEBUG) << " server key : " << TransToHex(key) << std::endl;
    //sleep(10);

    // 2.获取共享内存
    int shmid = shmget(key, SHM_SIZE, 0);
    if (shmid == -1)
    {
        perror("shget");
        exit(2);
    }
    Log("create shm success", DEBUG) << " shm id : " << shmid << std::endl;
    //sleep(10);

    // 3.挂接共享内存
    char *shmaddress = (char *)shmat(shmid, nullptr, 0);
    if (shmaddress == (char *)((void *)-1))
    {
        perror("shmat");
        exit(3);
    }
    Log("attach shm success", DEBUG) << " shm address : " << *shmaddress << std::endl;
    //sleep(10);

    // 4.通信逻辑
    // clinent写入数据
    char c = 'a';
    for (; c <= 'z'; c++)
    {
        snprintf(shmaddress, SHM_SIZE - 1,
                 "hello server, 我是其他进程,我的pid: %d, inc: %c\n",
                 getpid(), c);

        sleep(1);
    }

    snprintf(shmaddress,SHM_SIZE-1,"quit");

    // 5.去挂接
    int shmdt_res = shmdt((void *)shmaddress);
    if (shmdt_res == -1)
    {
        perror("shmdt");
        exit(4);
    }
    Log("unattach shm success", DEBUG) << " shm res : " << shmdt_res << std::endl;
    //sleep(10);
    return 0;
}
通信测试
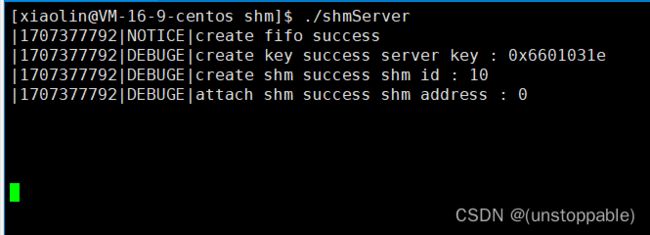
我们可以看到server端在client还没有写入数据是就一直读取内容。
在client端运行起来后,也还在读取数据。

client端写入数据结束后,再写入quit指令,server端随之退出。

这里我们能看到system V缺乏访问控制。
那么我们能添加访问控制吗?可以
共享内存借助管道添加访问控制
common.hpp
#pragma once
#include shmServer.cc
#include "common.hpp"

// 对应的程序,在加载的时候,会自动构建全局变量,自动调用构造函数 -- 创建管道文件
// 程序退出的时候,全局变量会被析构,自动调用析构函数-----删除管道文件
Init init;

std::string TransToHex(key_t k)
{
    char buffer[32];
    snprintf(buffer, sizeof buffer, "0x%x", k);
    return buffer;
}

int main()
{
    // 1.创建key值
    key_t key = ftok(PATH_NAME, PROJ_ID);
    if (key == -1)
    {
        perror("ftok");
        exit(1);
    }
    Log("create key success", DEBUG) << " server key : " << TransToHex(key) << std::endl;
    //sleep(10);

    // 2.创建共享内存
    int shmid = shmget(key, SHM_SIZE, IPC_CREAT | IPC_EXCL | 0666);
    if (shmid == -1)
    {
        perror("shget");
        exit(2);
    }
    Log("create shm success", DEBUG) << " shm id : " << shmid << std::endl;
    //sleep(10);

    // 3.挂接共享内存的地址,到进程地址空间
    char *shmaddress = (char *)shmat(shmid, nullptr, 0);
    if (shmaddress == (char *)((void *)-1))
    {
        perror("shmat");
        exit(3);
    }
    Log("attach shm success", DEBUG) << " shm address : " << (int)*shmaddress << std::endl;
    //sleep(10);

    // 4.进行通信的逻辑
    //Server读取数据
    /* int fd = OpenFifo(FIFO_NAME,READ);
    while(true)
    {
        Wait(fd);
        printf("%s\n",shmaddress);
        if(strcmp(shmaddress,"quit") == 0)
        {
            break;
        }
        sleep(1);
    }

    CloseFifo(fd); */

    //shift alt a 注释指令
    while(true)
    {
        printf("%s\n",shmaddress);
        if(strcmp(shmaddress,"quit") == 0)
        {
            break;
        }
        sleep(1);
    }

    // 5.去挂接
    int shmdt_res = shmdt((void*)shmaddress);
    if(shmdt_res == -1)
    {
        perror("shmdt");
        exit(4);
    }
    Log("unattach shm success", DEBUG) << " shm res : " << shmdt_res << std::endl;
    //sleep(10);

    //6.删除共享内存,IPC_RMID表示即便是有进程和当下的shm挂接,依旧删除共享内存
    int shmctl_res = shmctl(shmid,IPC_RMID,nullptr);
    if(shmctl_res == -1)
    {
        perror("shmctl");
        exit(5);
    }
    Log("shmctl shm success", DEBUG) << " shmctl res : " << shmctl_res << std::endl;
    //sleep(10);

    return 0;
}
shmClient.cc
#include "common.hpp"
std::string TransToHex(key_t k)
{
    char buffer[32];
    snprintf(buffer, sizeof buffer, "0x%x", k);
    return buffer;
}

int main()
{
    // 1.获取key值
    key_t key = ftok(PATH_NAME, PROJ_ID);
    if (key == -1)
    {
        perror("ftok");
        exit(1);
    }
    Log("create key success", DEBUG) << " server key : " << TransToHex(key) << std::endl;
    //sleep(10);

    // 2.获取共享内存
    int shmid = shmget(key, SHM_SIZE, 0);
    if (shmid == -1)
    {
        perror("shget");
        exit(2);
    }
    Log("create shm success", DEBUG) << " shm id : " << shmid << std::endl;
    //sleep(10);

    // 3.挂接共享内存
    char *shmaddress = (char *)shmat(shmid, nullptr, 0);
    if (shmaddress == (char *)((void *)-1))
    {
        perror("shmat");
        exit(3);
    }
    Log("attach shm success", DEBUG) << " shm address : " << *shmaddress << std::endl;
    //sleep(10);

    // 4.通信逻辑
    // clinent写入数据
    /* int fd = OpenFifo(FIFO_NAME,WRITE);
    while(true)
    {
        ssize_t n = read(0,shmaddress,SHM_SIZE-1);
        if(n > 0)
        {
            shmaddress[n-1] = 0;
            Signal(fd);
            if(strcmp(shmaddress,"quit") == 0)
            {
                break;
            }

        }
        else if(n == 0)
        {
            break;
        }
        else
        {
            perror("read");
        }
    }

    CloseFifo(fd); */

    char c = 'a';
    for (; c <= 'z'; c++)
    {
        snprintf(shmaddress, SHM_SIZE - 1,
                 "hello server, 我是其他进程,我的pid: %d, inc: %c\n",
                 getpid(), c);

        sleep(1);
    }

    snprintf(shmaddress,SHM_SIZE-1,"quit");

    // 5.去挂接
    int shmdt_res = shmdt((void *)shmaddress);
    if (shmdt_res == -1)
    {
        perror("shmdt");
        exit(4);
    }
    Log("unattach shm success", DEBUG) << " shm res : " << shmdt_res << std::endl;
    //sleep(10);
    return 0;
}
Log.hpp和之前一样,这里就不再写一遍。
附加:
Linux下查看共享内存:
ipcs -m
Linux下手动删除共享内存:
ipcrm -m(shimd)
Linux下循环查看共享内存脚本:
while :; do ipcs -m; sleep 1; done