Springboot使用camunda工作流使用笔记
工作流基础:Camunda 官方快速入门教程中文版
工作流进阶(java):Camunda SpringBoot与进阶内容
新版本camunda-modeler的UI改了不少,对应起来比较麻烦,固博客记录一次实际使用过程。
启动类添加新注解
@EnableProcessApplication
依赖
            org.camunda.bpm.springboot
            camunda-bpm-spring-boot-starter
            7.16.0


            org.camunda.bpm.springboot
            camunda-bpm-spring-boot-starter-rest
            7.16.0


            org.camunda.bpm.springboot
            camunda-bpm-spring-boot-starter-webapp
            7.16.0


            org.camunda.bpm
            camunda-external-task-client
            7.16.0
yml
camunda.bpm:
  # 配置账户密码来访问Camunda自带的管理界面
  admin-user:
    id: demo
    password: demo
    firstName: Demo
  filter:
    create: All tasks
在META-INF中创建processes.xml文件,不用填啥,作用可见processes.xml文件介绍

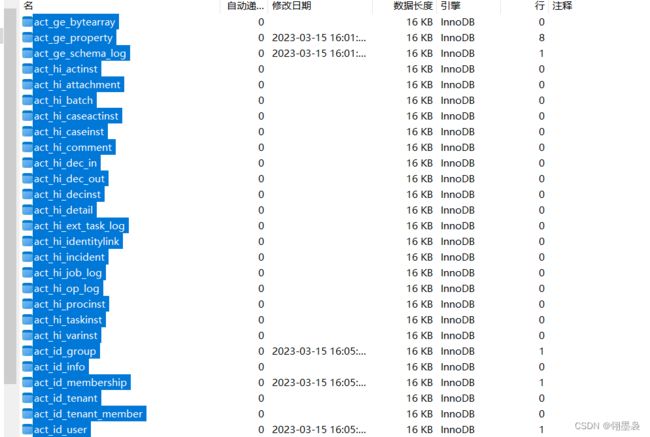
配置后第一次启动项目非常慢,启动成功后数据库会多出49张表
进入localhost:端口/camunda/app/cockpit/default/#/login可见camunda首页,yml中配置为demo
(若修改用户id会新创建一个用户原用户不会删除)

登录进入控制台

控制台汉化:汉化链接
汉化效果:(驾驶舱内部未汉化,其他两个内部汉化了)

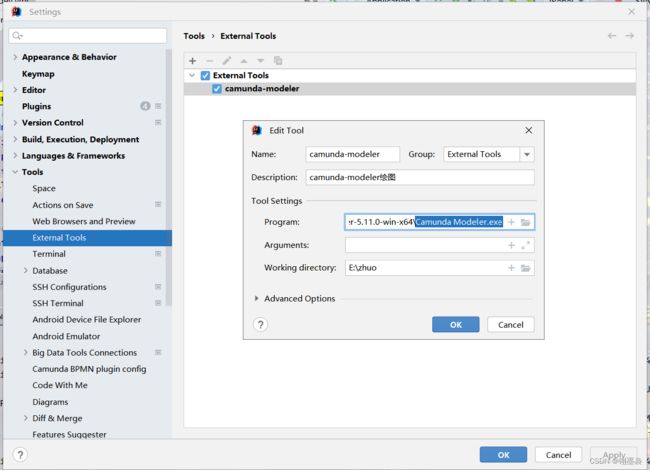
camunda-modeler(绘制流程工具)
1.下载路径
2.找个路径解压放好
3.IDEA安装外部Tools(选择解压路径的Camunda Modeler.exe)
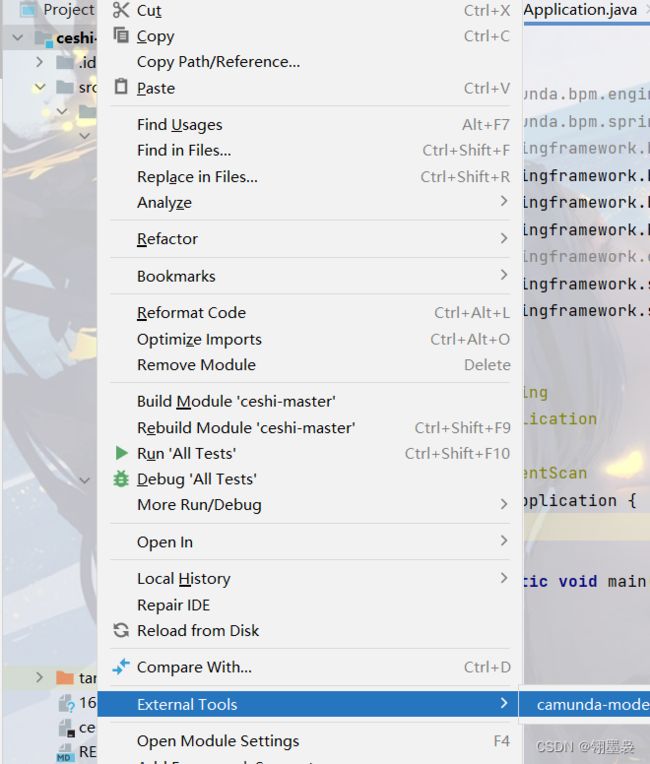
4.使用时右击项目名

常用流程元素绘制方法与作用
1.服务任务(可绑定一个java类进行一些业务的处理,可以对一些流程所用参数进行赋值获取)例如本任务绑定了ceshi.camunda包下的AmountObtained类
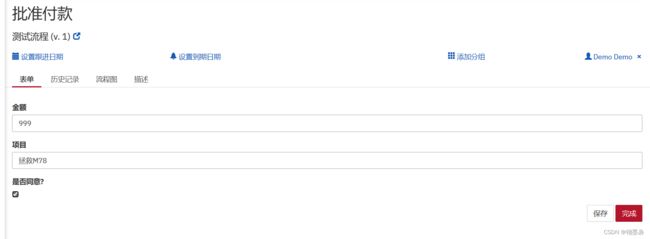
 2.用户任务(一般用于处理一些表单,例如在这里我给他创建了一个表单,当流程执行到这一步时,他需要对表单内的三个流程参数(amount,item,approved)进行处理
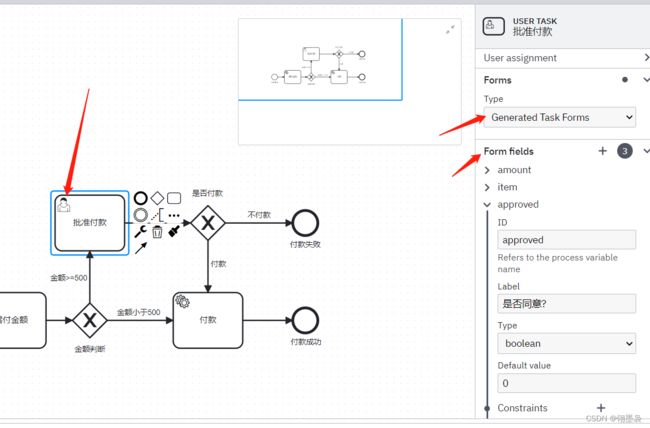
表单效果(参数类型决定交互形式)
3.排他网关(此处将会出现分支)
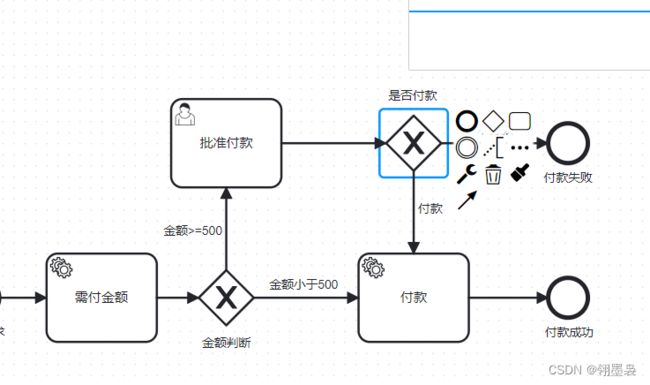
虽然排他网关直接创建就行,但网关后边的线需要添加一些设置,见下图,意为当表达式!approved为真时走这条线。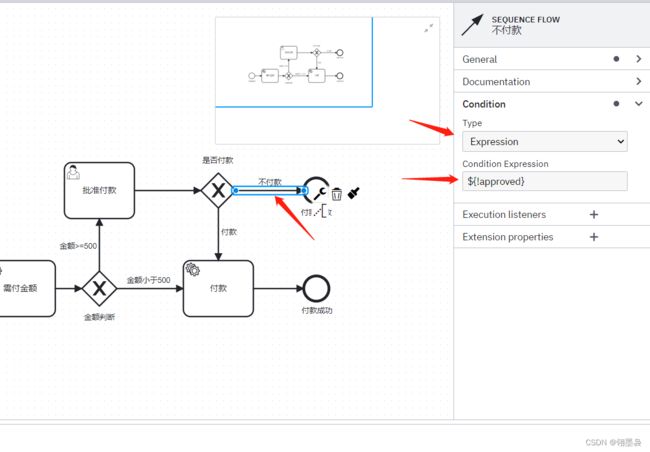
使用流程
1.使用camunda-modeler绘制流程图
2.点击流程图空白处设置流程id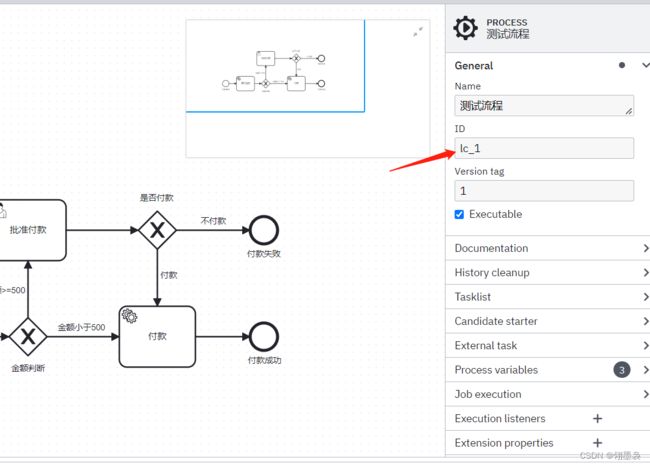
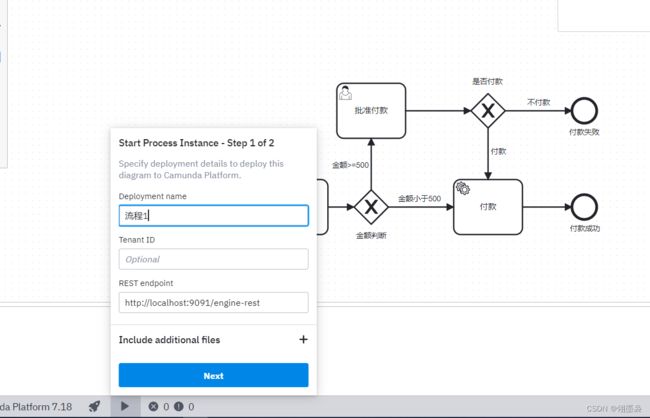
3.启动后台(可进入localhost:端口/camunda/app/cockpit/default/#/login)的情况下,如下图进行部署至http://localhost:端口号/engine-rest。
上述流程图xml
      Flow_03ld858


      Flow_1wbv7x2
      Flow_0ios1ht
      Flow_0uifauc


      Flow_0uifauc


      Flow_13bfg5g
      Flow_0qaxuvo


      Flow_1296l8i
      Flow_13bfg5g
      Flow_1wbv7x2


      Flow_0qaxuvo
      Flow_0n3lkgl
      Flow_0ios1ht


      Flow_0n3lkgl


      ${amount1>=500}


      ${!approved}


      ${amount1<500}


      ${approved}


      Flow_03ld858
      Flow_1296l8i
java使用测试
流程图绑定的java类(实现JavaDelegate后重新execute方法):AmountObtained
package ceshi.camunda;

import org.camunda.bpm.engine.delegate.DelegateExecution;
import org.camunda.bpm.engine.delegate.JavaDelegate;
import java.util.logging.Logger;


public class AmountObtained implements JavaDelegate {

    private final static Logger LOGGER = Logger.getLogger("OBTAINED-REQUESTS");

    @Override
    public void execute(DelegateExecution execution) {
        execution.setVariable("amount1",999);//添加流程参数amount1值为999
        LOGGER.info("amount1 " + execution.getVariable("amount1"));//打印流程参数amount1
    }
}
流程图绑定的java类:Pay
package ceshi.camunda;

import org.camunda.bpm.engine.delegate.DelegateExecution;
import org.camunda.bpm.engine.delegate.JavaDelegate;

import java.util.logging.Logger;

public class Pay implements JavaDelegate {

    private final static Logger LOGGER = Logger.getLogger("PAY-REQUESTS");

    @Override
    public void execute(DelegateExecution execution) {
        LOGGER.info("付款金额:amount " + execution.getVariable("amount"));//打印用户表单输入的金额
        LOGGER.info("付款项目:item " + execution.getVariable("item"));
        LOGGER.info("---付款过程---");
        LOGGER.info("最终付款结果:"+(boolean)execution.getVariable("approved"));
    }
}
启动一个流程实例
 @Autowired
    private RuntimeService runtimeService;

runtimeService.startProcessInstanceByKey("lc_1");//lc_1为流程id
点击任务列表

发现流程直接进行到了批量付款
原因是我们在需付进行金额绑定的java类中设置的流程属性值为999,而我们判断的表达式时amount1>=500

回到控制台任务列表,点击表单输入值点击完成
 发现打印了一下参数(触发了付款节点绑定的java类),至此一次完整流程走完

补充:
1.指定用户执行(直接给变量赋值即可指定用户)同步系统用户方法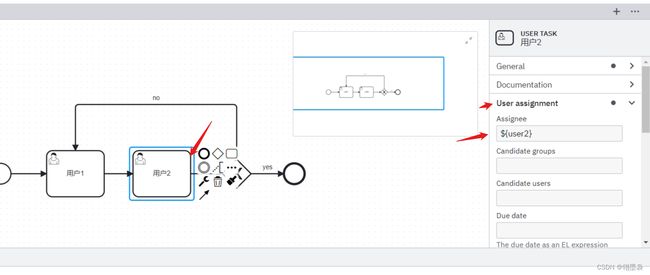
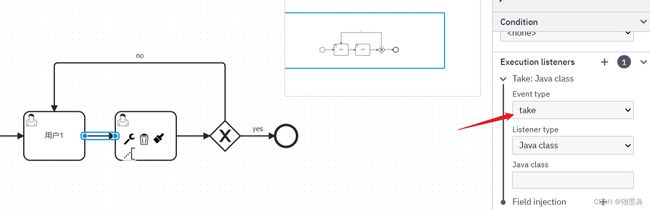
2.节点监听(流程运行到这里触发方法)可选择进入节点执行或完成节点执行等

public class TaskListener implements ExecutionListener {
    @Autowired
    private static RepositoryService repositoryService;

    @Override
    public void notify(DelegateExecution execution) throws Exception {
        //要执行的业务逻辑
    }
}