利用binder的简单跨进程通讯架构
一、binder服务端及客户端基本架构
1.服务端具体实现
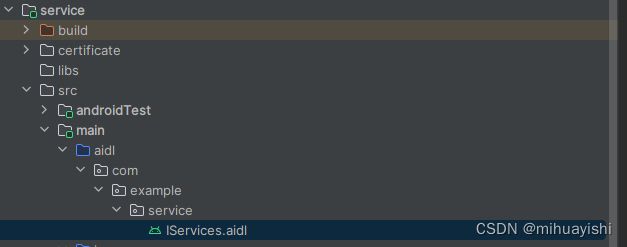
(1)添加一个aidl 来进行和binder交互。
IServices.aidl
// IServices.aidl
package com.example.service;

// Declare any non-default types here with import statements

interface IServices {
        int add(int a, int b);
}
(2)然后通过服务进行实现,对其中的方法进行重写。
MyService.kt
package com.example.service

import android.app.Service
import android.content.Intent
import android.os.IBinder
import android.util.Log

class MyService : Service() {

    private var mBinder: IBinder? = null

    override fun onBind(intent: Intent): IBinder {
        mBinder = MyBinder()
        return mBinder!!
    }

    inner class MyBinder : IServices.Stub() {
        override fun add(a: Int, b: Int): Int {
            return a + b
        }
    }
}
(3)针对客户端的绑定,服务端进行意图定义
AndroidManifest.xml
<manifest xmlns:android="http://schemas.android.com/apk/res/android"
    package="com.example.service"
    >

    <application
        android:allowBackup="true"
        android:icon="@mipmap/ic_launcher"
        android:label="@string/app_name"
        android:roundIcon="@mipmap/ic_launcher_round"
        android:supportsRtl="true"
        android:theme="@style/Theme.Client">
        <service
            android:name=".MyService"
            android:enabled="true"
            android:exported="true">

            <intent-filter>
                <action android:name="com.example.client.MyService" />
            intent-filter>

        service>

        <activity
            android:name=".MainActivity"
            android:exported="true">
            <intent-filter>
                <action android:name="android.intent.action.MAIN" />

                <category android:name="android.intent.category.LAUNCHER" />
            intent-filter>
        activity>
    application>

manifest>
2.客户端具体实现
(1)添加aidl,来进行客户端的调用定义
IServices.aidl
// IServices.aidl
package com.example.service;

// Declare any non-default types here with import statements

interface IServices {
        int add(int a, int b);
}
tips:这里需要相同的package com.example.service;和服务端,否则调用 Binder invocation to an incorrect interface 报错。
(2)通过Activity来进行绑定服务
MainActivity.kt
package com.example.client

import android.content.ComponentName
import android.content.Intent
import android.content.ServiceConnection
import android.os.Bundle
import android.os.IBinder
import android.util.Log
import android.widget.Button
import androidx.appcompat.app.AppCompatActivity
import com.example.service.IServices

class MainActivity : AppCompatActivity(), ServiceConnection {

    private var mServices: IServices? = null

    override fun onCreate(savedInstanceState: Bundle?) {
        super.onCreate(savedInstanceState)
        setContentView(R.layout.activity_main)
        findViewById<Button>(R.id.btn_1).setOnClickListener {
            val intent: Intent =
                Intent("com.example.client.MyService").setPackage("com.example.service")
            bindService(intent, this, BIND_AUTO_CREATE)
        }
        findViewById<Button>(R.id.btn_2).setOnClickListener {
            val result = mServices!!.add(1, 6)
            Log.d(TAG, "reseult=$result")
        }
    }

    override fun onServiceConnected(name: ComponentName?, service: IBinder?) {

        mServices = IServices.Stub.asInterface(service)
        Log.d(TAG, "onServiceConnected$mServices")
    }

    override fun onServiceDisconnected(name: ComponentName?) {
        mServices = null
    }

}
tips:这里有可能出现绑定不上的情况,一般是权限不足,这里可以通过改变服务端的apk类型为系统apk来进行清单文件的注册,完成客户端能够进行调用,或者通过 queries 来进行
<manifest xmlns:android="http://schemas.android.com/apk/res/android"
    xmlns:tools="http://schemas.android.com/tools">

    <application
        android:allowBackup="true"
        android:dataExtractionRules="@xml/data_extraction_rules"
        android:fullBackupContent="@xml/backup_rules"
        android:icon="@mipmap/ic_launcher"
        android:label="@string/app_name"
        android:roundIcon="@mipmap/ic_launcher_round"
        android:supportsRtl="true"
        android:theme="@style/Theme.Client"
        tools:targetApi="31">
        <activity
            android:name=".MainActivity"
            android:exported="true">
            <intent-filter>
                <action android:name="android.intent.action.MAIN" />

                <category android:name="android.intent.category.LAUNCHER" />
            intent-filter>
        activity>
    application>

    <queries>
        <intent>
            <action android:name="com.example.client.MyService" />
        intent>
    queries>
manifest>
com.example.client.MyService 这个服务。
具体来说,
在你的示例中,通过指定
这样的声明可以在需要与其他应用程序组件(例如服务)交互的场景下使用。在 Android 11 中,如果你的应用程序尝试使用 startService()、bindService() 等方法与其他应用程序的服务进行通信,而目标服务的包名和 action 没有在
请注意,使用


