CentOS k8s1.20.9集群配套KubesPhere3.1.1安装
文章目录
- CentOS k8s集群 KubesPhere安装
-
- 一、k8s集群
-
- 1、基础环境准备
- 2、安装docker
- 3、安装kubelete、kubeadm、kubectl
- 4、部署master节点(171)
- 5、安装网络组件(flannel):
- 6、节点加入
- 二、KubeSphere
-
- 1、准备helm 和 tiller(helm v3的版本不需要再安装tiller)
- 2、安装OpenEBS
- 3、开始kubesphere最小安装
CentOS k8s集群 KubesPhere安装
各组件版本表:
| 组件名称 | 组件版本 |
|---|---|
| docker | 20.10.7 |
| k8s | 1.20.9 |
| helm | 3.7.1 |
| KubesPhere | 3.1.1 |
一、k8s集群
1、基础环境准备
由于我的centos7.5是最小安装,所以先安装一下工具集
yum install -y conntrack ntpdate ntp ipvsadm ipset jq iptables curl sysstat libseccomp wget vim net-tools git iproute lrzsz bash-completion tree bridge-utils unzip bind-utils gcc
然后进行关闭防火墙等操作
# 1.关闭防火墙
systemctl stop firewalld && systemctl disable firewalld
# 2.置空iptables
yum -y install iptables-services && systemctl start iptables && systemctl enable iptables && iptables -F && service iptables save
# 3.关闭selinux
#闭swap分区【虚拟内存】并且永久关闭虚拟内存
swapoff -a && sed -i '/ swap / s/^\(.*\)$/#\1/g' /etc/fstab
#关闭selinux
setenforce 0 && sed -i 's/^SELINUX=.*/SELINUX=disabled/' /etc/selinux/config
# 4.升级Linux内核为4.4的版本  这里升级内核是因为k8s在3.10的内核下不稳定,升级内核(选做)
rpm -Uvh http://www.elrepo.org/elrepo-release-7.0-4.el7.elrepo.noarch.rpm
#安装内核(根据自己的需要选择内核版本)
# 阿里内核镜像仓库 http://mirrors.aliyun.com/elrepo/kernel/el7/x86_64/RPMS/
# 下载自己想要的rpm 我这里下载的4.4.245版本的内核
wget http://mirrors.aliyun.com/elrepo/kernel/el7/x86_64/RPMS/kernel-lt-4.4.245-1.el7.elrepo.x86_64.rpm
yum -y install  kernel-lt-4.4.245-1.el7.elrepo.x86_64.rpm
# 查看系统目前内核
awk -F\' '$1=="menuentry " {print i++ " : " $2}' /etc/grub2.cfg
# 修改默认引导版本(0就是刚才查看的我新安装的内核序号)
grub2-set-default 0

#重启生效
reboot
#查看当前内核版本
uname -r

# 5.设置iptable
cat > kubernetes.conf <<EOF
net.bridge.bridge-nf-call-iptables=1
net.bridge.bridge-nf-call-ip6tables=1
net.ipv4.ip_forward=1
net.ipv4.tcp_tw_recycle=0
vm.swappiness=0
vm.overcommit_memory=1
vm.panic_on_oom=0
fs.inotify.max_user_instances=8192
fs.inotify.max_user_watches=1048576
fs.file-max=52706963
fs.nr_open=52706963
net.ipv6.conf.all.disable_ipv6=1
net.netfilter.nf_conntrack_max=2310720
EOF
#将优化内核文件拷贝到/etc/sysctl.d/文件夹下,这样优化文件开机的时候能够被调用
cp kubernetes.conf /etc/sysctl.d/kubernetes.conf
#手动刷新,让优化文件立即生效
sysctl -p /etc/sysctl.d/kubernetes.conf
#如果这步出错,提示xxx:No such file or directory
#可能跟我遇到的一样,看这个文章 https://blog.csdn.net/endless_fighting/article/details/122798452?spm=1001.2014.3001.5501

# 6.调整系统临时区 --- 如果已经设置时区,可略过
#设置系统时区为中国/上海
timedatectl set-timezone Asia/Shanghai
#将当前的 UTC 时间写入硬件时钟
timedatectl set-local-rtc 0
#重启依赖于系统时间的服务
systemctl restart rsyslog
systemctl restart crond

# 7.关闭系统不需要的服务
systemctl stop postfix && systemctl disable postfix
2、安装docker
sudo yum remove docker*
sudo yum install -y yum-utils

#配置docker的yum地址
sudo yum-config-manager \
--add-repo \
http://mirrors.aliyun.com/docker-ce/linux/centos/docker-ce.repo


#安装指定版本
sudo yum install -y docker-ce-20.10.7 docker-ce-cli-20.10.7 containerd.io-1.4.6

#	启动&开机启动docker
systemctl enable docker --now

# docker加速配置
sudo mkdir -p /etc/docker
sudo tee /etc/docker/daemon.json <<-'EOF'
{
  "registry-mirrors": ["https://82m9ar63.mirror.aliyuncs.com"],
  "exec-opts": ["native.cgroupdriver=systemd"],
  "log-driver": "json-file",
  "log-opts": {
    "max-size": "100m"
  },
  "storage-driver": "overlay2"
}
EOF
sudo systemctl daemon-reload
sudo systemctl restart docker
3、安装kubelete、kubeadm、kubectl
#配置k8s的yum源地址
cat <<EOF | sudo tee /etc/yum.repos.d/kubernetes.repo
[kubernetes]
name=Kubernetes
baseurl=http://mirrors.aliyun.com/kubernetes/yum/repos/kubernetes-el7-x86_64
enabled=1
gpgcheck=0
repo_gpgcheck=0
gpgkey=http://mirrors.aliyun.com/kubernetes/yum/doc/yum-key.gpg
   http://mirrors.aliyun.com/kubernetes/yum/doc/rpm-package-key.gpg
EOF


#安装 kubelet,kubeadm,kubectl
sudo yum install -y kubelet-1.20.9 kubeadm-1.20.9 kubectl-1.20.9

#启动kubelet
sudo systemctl enable --now kubelet
4、部署master节点(171)
# 我的主节点是192.168.0.171
kubeadm init \
--apiserver-advertise-address=192.168.0.171 \
--image-repository registry.aliyuncs.com/google_containers \
--kubernetes-version v1.20.9 \
--service-cidr=10.96.0.0/12 \
--pod-network-cidr=10.244.0.0/16
完成后会有如下打印:
Your Kubernetes control-plane has initialized successfully!

To start using your cluster, you need to run the following as a regular user:

  mkdir -p $HOME/.kube
  sudo cp -i /etc/kubernetes/admin.conf $HOME/.kube/config
  sudo chown $(id -u):$(id -g) $HOME/.kube/config

Alternatively, if you are the root user, you can run:

  export KUBECONFIG=/etc/kubernetes/admin.conf

You should now deploy a pod network to the cluster.
Run "kubectl apply -f [podnetwork].yaml" with one of the options listed at:
  https://kubernetes.io/docs/concepts/cluster-administration/addons/

Then you can join any number of worker nodes by running the following on each as root:

kubeadm join 192.168.0.171:6443 --token 6xmb89.qob0p1siuttplf53 \
    --discovery-token-ca-cert-hash sha256:2a0a00dfe950bcfc21fc326f17e6ba8efb6d27576a664971675f9108fbaeab08
根据提示执行命令:
mkdir -p $HOME/.kube
sudo cp -i /etc/kubernetes/admin.conf $HOME/.kube/config
sudo chown $(id -u):$(id -g) $HOME/.kube/config
5、安装网络组件(flannel):
如果后面的kubesphere要开启devops功能就安装flannel
#fannel地址: https://raw.githubusercontent.com/coreos/flannel/master/Documentation/kube-flannel.yml
curl https://raw.githubusercontent.com/coreos/flannel/master/Documentation/kube-flannel.yml -O
#如果下载不了就用上面的网址直接访问复制下来
kubectl apply -f kube-flannel.yml
kubectl get pod -A
#等全部running
6、节点加入
172,173节点分别执行前面给的命令加入
kubeadm join 192.168.0.171:6443 --token 6xmb89.qob0p1siuttplf53 \
    --discovery-token-ca-cert-hash sha256:2a0a00dfe950bcfc21fc326f17e6ba8efb6d27576a664971675f9108fbaeab08
在主节点查看node情况
[root@k8sMaster local]# kubectl get nodes
NAME        STATUS     ROLES                  AGE   VERSION
k8smaster   Ready      control-plane,master   17m   v1.20.9
k8snode1    NotReady   <none>                 27s   v1.20.9
k8snode2    NotReady   <none>                 14s   v1.20.9
等全部ready了就代表k8s集群搭建完成了。
二、KubeSphere
1、准备helm 和 tiller(helm v3的版本不需要再安装tiller)
helm可以选择用官方的一键脚本或者下载二进制包进行安装
https://helm.sh/zh/docs/topics/version_skew/这里是官网的helm和k8s的版本对照表
这是官方给的命令:
$ curl -fsSL -o get_helm.sh https://raw.githubusercontent.com/helm/helm/main/scripts/get-helm-3
$ chmod 700 get_helm.sh
$ ./get_helm.sh
我采取二进制安装
#安装socat
[root@k8s-master local]# yum install -y socat
#下载helm二进制包去官方GitHub  https://github.com/helm/helm/releases
[root@k8s-master local]# tar -zxvf helm-v3.7.1-linux-amd64.tar.gz
linux-amd64/
linux-amd64/helm
linux-amd64/LICENSE
linux-amd64/README.md
#移动文件
[root@k8s-master local]# mv linux-amd64/helm /usr/local/bin/helm
#安装成功查看版本
[root@k8s-master local]# helm version
version.BuildInfo{Version:"v3.7.1", GitCommit:"1d11fcb5d3f3bf00dbe6fe31b8412839a96b3dc4", GitTreeState:"clean", GoVersion:"go1.16.9"}
helm安装成功
2、安装OpenEBS
去除master节点的taint
[root@k8sMaster bin]# kubectl describe node k8smaster | grep Taint
Taints:             node-role.kubernetes.io/master:NoSchedule
[root@k8sMaster bin]# kubectl taint nodes k8smaster node-role.kubernetes.io/master:NoSchedule-
node/k8smaster untainted
[root@k8sMaster bin]# kubectl describe node k8smaster | grep Taint
Taints:             <none>
开始安装OpenEBS
#添加OpenEBS LocalPV仓库到helm
[root@k8s-master local]# helm repo add openebs-localpv https://openebs.github.io/dynamic-localpv-provisioner
"openebs-localpv" has been added to your repositories
#使用helm安装openebs
[root@k8s-master local]# helm install openebs openebs-localpv/localpv-provisioner --namespace openebs --create-namespace
NAME: openebs
LAST DEPLOYED: Thu Feb  3 13:38:24 2022
NAMESPACE: openebs
STATUS: deployed
REVISION: 1
TEST SUITE: None
NOTES:
The OpenEBS Dynamic LocalPV Provisioner has been installed.
Check its status by running:
$ kubectl get pods -n openebs

Use `kubectl get bd -n openebs` to list the
blockdevices attached to the Kubernetes cluster nodes.

Get started with the Dynamic LocalPV Provisioner Quickstart guide at:
https://github.com/openebs/dynamic-localpv-provisioner/blob/develop/docs/quickstart.md

For more information, visit our Slack at https://openebs.io/community or view
the OpenEBS documentation online at https://openebs.io/docs
#过几分钟查看安装情况
[root@k8s-master local]# kubectl get pod -n openebs
NAME                                           READY   STATUS    RESTARTS   AGE
openebs-localpv-provisioner-76f75ffc57-whssp   1/1     Running   0          9m28s
openebs-ndm-4n9bc                              1/1     Running   0          9m28s
openebs-ndm-d4kdv                              1/1     Running   0          9m28s
openebs-ndm-operator-6c8b775b45-p626k          1/1     Running   0          9m28s
openebs-ndm-s99sn                              1/1     Running   0          9m28s

[root@k8s-master local]# kubectl get sc
NAME               PROVISIONER        RECLAIMPOLICY   VOLUMEBINDINGMODE      ALLOWVOLUMEEXPANSION   AGE
openebs-device     openebs.io/local   Delete          WaitForFirstConsumer   false                  10m
openebs-hostpath   openebs.io/local   Delete          WaitForFirstConsumer   false                  10m
#设置默认sc
[root@k8s-master local]# kubectl patch storageclass openebs-hostpath -p '{"metadata": {"annotations":{"storageclass.kubernetes.io/is-default-class":"true"}}}'
storageclass.storage.k8s.io/openebs-hostpath patched
[root@k8s-master local]# kubectl get sc
NAME                         PROVISIONER        RECLAIMPOLICY   VOLUMEBINDINGMODE      ALLOWVOLUMEEXPANSION   AGE
openebs-device               openebs.io/local   Delete          WaitForFirstConsumer   false                  11m
openebs-hostpath (default)   openebs.io/local   Delete          WaitForFirstConsumer   false                  11m
注意:此时不要给master加上污点,否者导致后面的pods安装不上(openldap,redis),待kubesphere安装完成后加上污点
3、开始kubesphere最小安装
https://github.com/kubesphere/ks-installer/blob/release-3.1/scripts/kubesphere-delete.sh先到官方的GitHub上下载个卸载脚本,以防安装失败重新安装
[root@k8s-master local]# wget https://github.com/kubesphere/ks-installer/blob/release-3.1/scripts/kubesphere-delete.sh
官方给的两条命令我这没办法直接用,只能先直接访问链接把yaml下载下来了
# 官方命令
kubectl apply -f https://github.com/kubesphere/ks-installer/releases/download/v3.1.1/kubesphere-installer.yaml

kubectl apply -f https://github.com/kubesphere/ks-installer/releases/download/v3.1.1/cluster-configuration.yaml

#先通过链接下载下来
修改cluster-configuration.yaml文件将devops这里设置为true,这个地方也可以先不改等安好kubesphere之后再在里面的组件里更新配置文件添加,官网有介绍可拔插组件
按照官网给的命令执行
[root@k8sMaster local]# kubectl apply -f kubesphere-installer.yaml
[root@k8sMaster local]# kubectl apply -f cluster-configuration.yaml
[root@k8sMaster local]# kubectl logs -n kubesphere-system $(kubectl get pod -n kubesphere-system -l app=ks-install -o jsonpath='{.items[0].metadata.name}') -f
#日志太长我就不全复制过来了 日志可以看到4个成功状态,还有如下控制台地址和默认的用户名密码
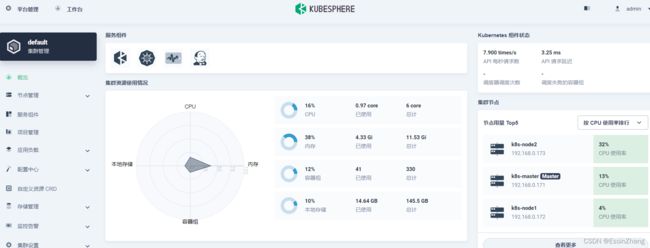
Console: http://192.168.0.171:30880
Account: admin
Password: P@88w0rd
[root@k8sMaster local]# kubectl get svc/ks-console -n kubesphere-system
NAME TYPE CLUSTER-IP EXTERNAL-IP PORT(S) AGE
ks-console NodePort 10.96.142.74 <none> 80:30880/TCP 36m
# 把之前的traint加回去
[root@k8sMaster local]#  kubectl taint nodes k8smaster node-role.kubernetes.io/master=:NoSchedule
node/k8smaster tainted
[root@k8sMaster local]# kubectl describe node k8smaster | grep Taint
Taints:             node-role.kubernetes.io/master:NoSchedule
第一次使用默认的密码登陆后会直接让修改密码,根据提示修改个强度高的密码就行了
```bash
# 把之前的traint加回去
[root@k8sMaster local]#  kubectl taint nodes k8smaster node-role.kubernetes.io/master=:NoSchedule
node/k8smaster tainted
[root@k8sMaster local]# kubectl describe node k8smaster | grep Taint
Taints:             node-role.kubernetes.io/master:NoSchedule
访问ip:30880进入页面,第一次使用默认的密码登陆后会直接让修改密码,根据提示修改个强度高的密码就行了