CentOS安装maxwell
CentOs安装maxwell
-
- 一、简介
- 二、准备工作
- 三、安装
-
- 1、下载安装包
- 2、解压
- 3、编写配置文件
- 4、启动maxwell
- 5、验证
- 6、停止maxwell
- 四、说明
-
- 1、更新数据
- 2、插入数据
- 3、删除数据
- 五、遇到问题
一、简介
maxwell是由美国Zendesk公司开源,它通过读取mysql的binlog日志,将数据变更以JSON的方式发送给Kafka, Kinesis等流数据处理平台。
This is Maxwell’s daemon, a change data capture application that reads MySQL binlogs and writes data changes as JSON to Kafka, Kinesis, and other streaming platforms.
官网地址
源码地址
二、准备工作
本次实现mysql数据同步给kafka,所以mysql与kafka需要提前准备好。
mysql表结构如下:
CREATE TABLE `user_info` (
  `id` int NOT NULL AUTO_INCREMENT,
  `user_id` int NOT NULL,
  `username` varchar(255) NOT NULL,
  `email` varchar(255) NOT NULL,
  `phone_number` varchar(30) DEFAULT NULL,
  `status` enum('active','inactive') DEFAULT 'active',
  `score` int unsigned DEFAULT NULL,
  PRIMARY KEY (`id`)
) ENGINE=InnoDB AUTO_INCREMENT=35464335 DEFAULT CHARSET=utf8mb4 COLLATE=utf8mb4_0900_ai_ci
特别注意:需要启用mysql的binlog
vim /etc/my.cnf
增加如下内容:
#数据库id
server-id = 1
#该参数的值会作为binlog的文件名
log-bin=mysql-bin
#binlog类型,maxwell要求为row类型
binlog_format=row
三、安装
本次使用版本:V1.29.2
注:maxwell-1.30.0及以上版本不再支持JDK1.8
1、下载安装包
下载安装包V1.29.2
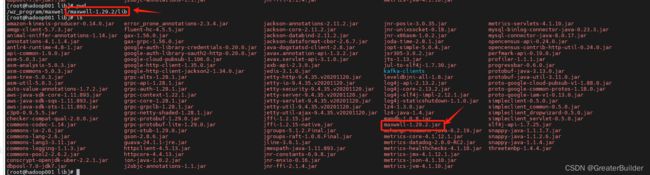
2、解压
tar -zxvf maxwell-1.29.2.tar.gz
3、编写配置文件
在解压目录下给了一个示例文件config.properties.example。
cp config.properties.example config.properties
编辑内容参考如下:
# tl;dr config
log_level=info

#maxwell同步数据的去向,支持stdout|file|kafka|kinesis|pubsub|sqs|rabbitmq|redis等
producer=kafka
kafka.bootstrap.servers=hadoop001:9092,hadoop002:9092,hadoop003:9092
#kafka的topic如下是动态配置
kafka_topic=%{database}_%{table}

# mysql login info
host=***********
port=3306
user=root
password=************
jdbc_options=useSSL=false&serverTimezone=Asia/Shanghai&useUnicode=true&characterEncoding=utf8
4、启动maxwell
进入解压目录执行如下命令:
./bin/maxwell --config ./config.properties --daemon
查看日志已启动成功:

5、验证
启动一个消费者,在数据库操作数据,然后观察kafka
kafka-console-consumer.sh --bootstrap-server hadoop001:9092 --topic hadoop_user_info

6、停止maxwell
ps -ef | grep maxwell | grep -v grep | grep maxwell | awk '{print $2}' | xargs kill -9
四、说明
maxwell同步输出格式如下:
1、更新数据
UPDATE `hadoop`.`user_info` SET `id` = '148254', `user_id` = '8321174' WHERE (`id` = '1482');
{
	"database": "hadoop",
	"table": "user_info",
	"type": "update",
	"ts": 1705314481,
	"xid": 10903,
	"commit": true,
	"data": {
		"id": 148254,
		"user_id": 8321174,
		"username": "batesanthony",
		"email": "[email protected]",
		"phone_number": "+1-982-342-3093x988",
		"status": "inactive",
		"score": 99
	},
	"old": {
		"id": 1482,
		"user_id": 832117
	}
}
2、插入数据
INSERT INTO `hadoop`.`user_info` (`id`, `user_id`, `username`, `email`, `phone_number`, `status`, `score`) VALUES ('14832247', '57377145', 'joseph90', '[email protected]', '295-683-4540x37958', 'active', '100');
{
	"database": "hadoop",
	"table": "user_info",
	"type": "insert",
	"ts": 1705314503,
	"xid": 10966,
	"commit": true,
	"data": {
		"id": 14832247,
		"user_id": 57377145,
		"username": "joseph90",
		"email": "[email protected]",
		"phone_number": "295-683-4540x37958",
		"status": "active",
		"score": 100
	}
}
3、删除数据
DELETE FROM `hadoop`.`user_info` WHERE (`id` = '1483');
{
	"database": "hadoop",
	"table": "user_info",
	"type": "delete",
	"ts": 1705314531,
	"xid": 11056,
	"commit": true,
	"data": {
		"id": 1483,
		"user_id": 573771,
		"username": "joseph90",
		"email": "[email protected]",
		"phone_number": "295-683-4540x37958",
		"status": "active",
		"score": 100
	}
}
JSON字段说明如下:
| 字段 | 说明 |
|---|---|
| database | 同步数据所属的数据库 |
| table | 同步数据所属的数据库表 |
| type | 数据变更的类型(insert、update、delete) |
| ts | 数据同步的时间戳 |
| xid | 事务id |
| commit | 事务提交标志 |
| data | 同步的具体数据属性与值 |
| old | 在update类型中,表示变更的相关字段之前的值 |
五、遇到问题
- java.lang.RuntimeException: error: unhandled character set ‘utf8mb3’
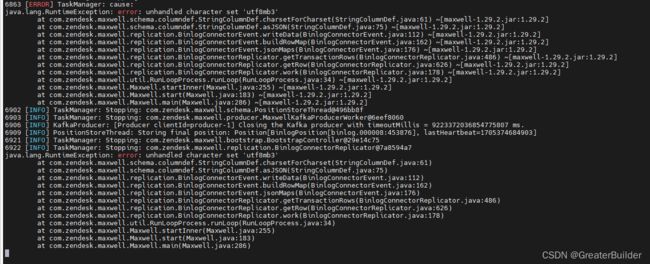
解决该问题可修改源码,然后重新打包替换掉对应的jar即可。
详情可以参考这篇文章