详细的springboot3.1.x 集成springboot-admin3.1.x监控,解决Httptrace功能丢失问题
详细的springboot3.1.x 集成springboot-admin3.1.x监控,解决Httptrace功能丢失问题
- Spring Boot Admin 介绍及使用
-
- 轻量级spring boot应用监控(详细介绍自行脑补):
- 注意事项
- 应用集成
-
- 使用环境
- springboot-admin同springboot版本对应关系(版本必须对应)
- 代码实现
-
- maven依赖
- 配置文件application.yml种放开监控检查(必须放开,服务器端无法采集数据)
- 服务端开启安全认证(服务器端配置)
- 服务端启动加入开启服务注解@EnableAdminServer (服务器端配置)
- 安全配置项 服务器端都接入,否则客户端会报401
- 客户端放开监控检查
- 客户端服务注册到服务端
- 附加项:如果需要增加客户端日志上报到监控平台配置,增加日志监控点
- 客户端security
- 监控页面
-
- 浏览器输入监控服务端访问地址
- http trace跟踪功能
-
- spring boot admin http监控功能缺少说明
- 增加http trace功能
Spring Boot Admin 介绍及使用
轻量级spring boot应用监控(详细介绍自行脑补):
- spring boot admin监控使用文档
- github源码地址
- 国内源码镜像,可能会与新版本存在延迟
注意事项
spring boot admin 分为 服务端 server 和被监控的客户端 client;服务器端启动后,客户端端自动注册服务信息到服务器端(如果试spring cloud服务客户端不需要注册到spring boot admin 服务器端,正常注册到服务器中心如:nacos或者eureka,spring boot admin 服务器端自动从注册中心拉取 );服务端提供监控的可视化界面UI,客户端通过暴露的监控点(actuator)提供应用的系统信息、日志、内存、线程等信息给服务端,服务器端通过文字和图表进行展示。
应用集成
使用环境
- jdk17
- springboot v3.1.0
- spring boot admin v3.1.0
- windows10 centos7.9
springboot-admin同springboot版本对应关系(版本必须对应)
| springboot version | springboot-admin version2 |
|---|---|
| 2.5.x | 2.5.x |
| 3.0.x | 3.0.x |
| 3.1.x | 3.1.x |
代码实现
maven依赖
<dependency>
    <groupId>org.springframework.bootgroupId>
    <artifactId>spring-boot-starter-actuatorartifactId>
    <exclusions>
        <exclusion>
            <artifactId>HdrHistogramartifactId>
            <groupId>org.hdrhistogramgroupId>
        exclusion>
    exclusions>
dependency>
<dependency>
    <groupId>de.codecentricgroupId>
    <artifactId>spring-boot-admin-starter-serverartifactId>
    <version>3.0.4version>
dependency>

<dependency>
    <groupId>org.springframework.bootgroupId>
    <artifactId>spring-boot-starter-securityartifactId>
dependency>
<dependency>
    <groupId>de.codecentricgroupId>
    <artifactId>spring-boot-admin-starter-clientartifactId>
    <version>3.0.4version>
dependency>

<dependency>
    <groupId>org.springframework.bootgroupId>
    <artifactId>spring-boot-starter-securityartifactId>
dependency>
配置文件application.yml种放开监控检查(必须放开,服务器端无法采集数据)
#配置可监控信息
management:
  #对外开放某个监控点
  endpoint:
    #health必须开
    health:
      show-details: always
      enabled: true
    #其他
    beans:
      enabled: true
  endpoints:
    #对web开启的监控点
    web:
      exposure:
        include: "*"
    #对外开放所有监控点
    enabled-by-default: true
服务端开启安全认证(服务器端配置)
spring:
  application:
    name: ${server.servlet.context-path}
    ## spring boot admin 登录
  security:
    user:
      name: admin #管理界面登录账户
      password: admin #管理界面登录密码
服务端启动加入开启服务注解@EnableAdminServer (服务器端配置)
@EnableAdminServer //开启健康
@SpringBootApplication
public class BootMonitorApplication {

    public static void main(String[] args) {
        SpringApplication.run(BootMonitorApplication.class, args);
    }

}
安全配置项 服务器端都接入,否则客户端会报401
import de.codecentric.boot.admin.server.config.AdminServerProperties;
import org.springframework.context.annotation.Bean;
import org.springframework.context.annotation.Configuration;
import org.springframework.security.config.annotation.web.builders.HttpSecurity;
import org.springframework.security.config.annotation.web.configuration.WebSecurityCustomizer;
import org.springframework.security.web.SecurityFilterChain;

import static org.springframework.security.config.Customizer.withDefaults;

/**
 * 启用security安全防护
 *
 * @author Yang douya
 * @date 2023/6/19 15:40
 */
@Configuration
public class BootAdminMonitorSecurityConfig {

    private final String adminContextPath;

    public BootAdminMonitorSecurityConfig(AdminServerProperties adminServerProperties) {
        this.adminContextPath = adminServerProperties.getContextPath();
    }

    /**
     * 增加 springboot 服务端安全验证 解决客户端注册报401
     *
     * 注释必须登录才能进入使用
     *
     * @param http
     * @return
     * @throws Exception
     * @Bean protected SecurityFilterChain filterChain(HttpSecurity http) throws Exception {
     * return http.authorizeHttpRequests((authorizeRequests) -> authorizeRequests.anyRequest().permitAll())
     * .csrf().disable().build();
     * }
     */

    @Bean
    public SecurityFilterChain filterChain(HttpSecurity http) throws Exception {
        http.authorizeHttpRequests((requestMatcherRegistry) -> requestMatcherRegistry.anyRequest().authenticated())
                .httpBasic(withDefaults());
        return http.build();
    }

    /**
     * 客户端注册直接放过 解决服务端增加登录后客户端无法注册一直报401问题
     *
     * @return
     */
    @Bean
    public WebSecurityCustomizer webSecurityCustomizer() {
        return (web) -> web.ignoring().requestMatchers(adminContextPath + "/instances", adminContextPath + "/actuator/**");
    }
}
至此服务端配置完成。下面配置客户端application.yml
客户端放开监控检查
#配置可监控信息
management:
  #对外开放某个监控点
  endpoint:
    #health必须开
    health:
      show-details: always
      enabled: true
    #其他
    beans:
      enabled: true
  endpoints:
    #对web开启的监控点
    web:
      exposure:
        include: "*"
    #对外开放所有监控点
    enabled-by-default: true
客户端服务注册到服务端
spring:
  application:
    name: ${server.servlet.context-path}
    ## spring boot admin
  boot:
    admin:
      client:
        #监控服务器地址 server端
        url: http://(服务器端IP):(服务器端端口)/(服务端地址)/
        username: admin # 服务器端配置登录账户
        password: admin # 服务器端配置登录密码
附加项:如果需要增加客户端日志上报到监控平台配置,增加日志监控点
management:
  #对外开放某个监控点
  endpoint:
    #health必须开
    health:
      show-details: always
      enabled: true
    #其他
    beans:
      enabled: true
    # 上报日志到监控 客户端上报日志文件位置
    logfile:
      external-file: /home/app-server/projects/my-app/logs/info.log (这里是应用输出日志目录地址)
  endpoints:
    #对web开启的监控点
    web:
      exposure:
        include: "*"
    #对外开放所有监控点
    enabled-by-default: true
客户端security
import org.springframework.context.annotation.Bean;
import org.springframework.context.annotation.Configuration;
import org.springframework.security.config.annotation.web.builders.HttpSecurity;
import org.springframework.security.web.SecurityFilterChain;

/**
 * @author Yang douya
 * @date 2023/6/19 15:40
 */
@Configuration
public class BootAdminMonitorSecurityConfig {

    /**
     * 增加 springboot 服务端安全验证 解决客户端注册报401
     *
     * @param http
     * @return
     * @throws Exception
     */
    @Bean
    protected SecurityFilterChain filterChain(HttpSecurity http) throws Exception {
        return http.authorizeHttpRequests((authorizeRequests) -> authorizeRequests.anyRequest().permitAll())
                .csrf().disable().build();
    }
}
启动服务器端应用 和 客户端应用
监控页面
浏览器输入监控服务端访问地址
输入登录密码 这里配置的是 admin/admin

进入服务页
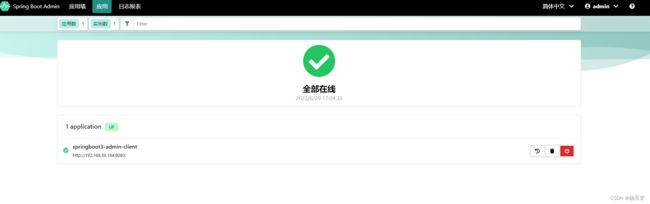
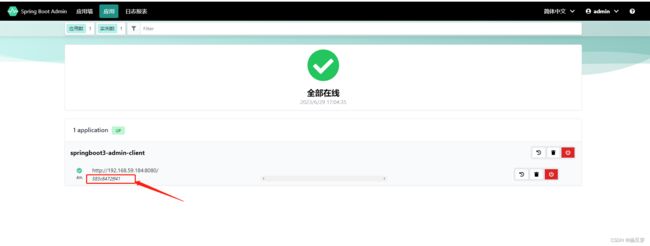
点击打开注册的应用
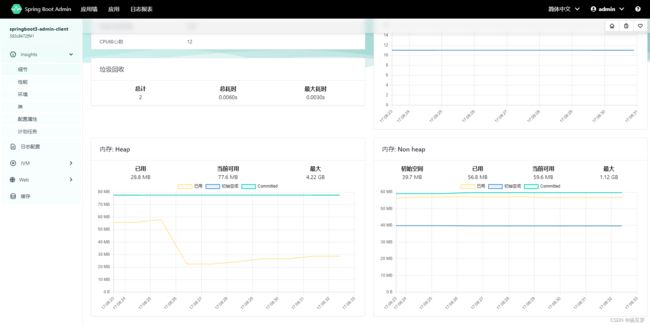
系统监控参数
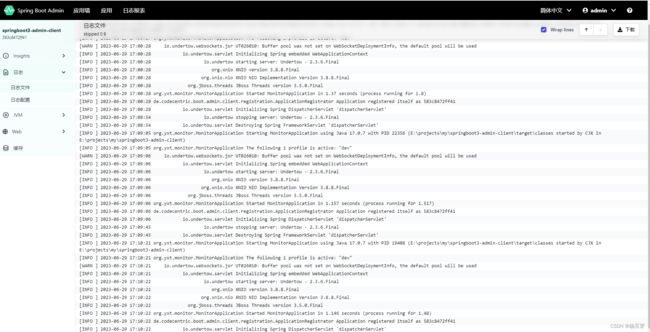
在线日志
http trace跟踪功能
spring boot admin http监控功能缺少说明
spring boot默认取消http监控,所以在spring boot admin 监控面板中没有http监控功能,官方文档:
spring boot文档 入口

增加http trace功能
1、springboot3.x 之前版本可以自行注入 InMemoryHttpTraceRepository 开启http监控
/**
 * 开启http跟踪记录
 *
 * @author Yang douya
 * @date 2022/8/106 10:20
 */
@Configuration
public class HttpTraceConfig {

    @Bean
    public InMemoryHttpTraceRepository getInMemoryHttpTrace(){
        return new InMemoryHttpTraceRepository();
    }

}
2、spirngboot后续版本中是不能直接注入InMemoryHttpTraceRepository 开启,而且使用httpExchanges开启http trace记录
spring boot http trace跟踪文档说明 简单解释为:开启http trace是存在性能问题的,建议在生产环境呢使用建议使用 生产就绪的跟踪或可观测性解决方案,如Zipkin或OpenTelemetry。或者,您可以创建自己的HttpExchangeRepository。
自行开启HttpExchangeRepository功能:
/**
* http监控 将http请求情况提交springboot-admin 开启http监控
*
* 生成环境回存在一些性能问题,官方建议使用 zipKin等开源框架接入
*
* @author Yang douya
* @date 2023/6/29 15:55
*/
@Configuration
public class ActuatorConfiguration {

   @Bean
   public HttpExchangeRepository httpTraceRepository() {
       InMemoryHttpExchangeRepository repository = new InMemoryHttpExchangeRepository();
       // 默认保存1000条http请求记录
       repository.setCapacity(1000);
       return repository;
   }
}
重启客户端,重新进入监控:
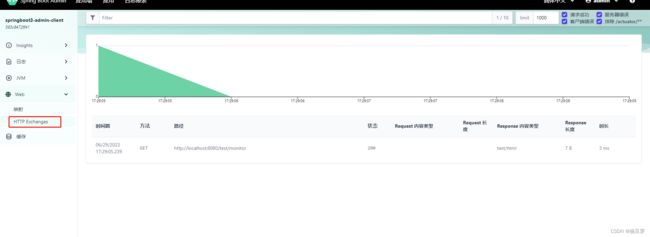
完成
参考集成代码:
服务端代码 => 点击获取
客户端代码 => 点击获取