ffmpeg 解码ts格式
While working on a game project in TS, we found ourselves needing a PNG decoder to create our objects metadata from pictures in a generic way.
在TS中开发游戏项目时,我们发现自己需要PNG解码器以通用方式从图片创建对象元数据。
We are coding using TS/JS in the browser, so the obvious solution is to use Canvas, but that wouldn’t be fun wouldn't it? So I decided to lookup the PNG format to create a decoder that will fit our needs.
我们在浏览器中使用TS / JS进行编码,因此显而易见的解决方案是使用Canvas,但这不是很有趣吗? 因此,我决定查找PNG格式以创建适合我们需求的解码器。
Other than the official documentation, which can be heavy to read at first, i didn’t find much examples of how to implement that quickly, so I decided to share my experience and I hope it will help some of you getting started
除了起初阅读起来可能很繁琐的官方文档之外,我没有找到很多如何快速实施的示例,所以我决定分享自己的经验,希望对您有所帮助。
Introduction
介绍
I. Read the file and extract the data
I.读取文件并提取数据
II. Understand PNG file’s format
二。 了解PNG文件的格式
III. Parsing the metadata we need
三, 解析我们需要的元数据
IV. Parsing the image content
IV。 解析图像内容
In my project, I used a class Color to store the file’s pixel, but for our example, i’m going to output the results as an array of Uint8Array. Each array will store the information about one pixel (RGBA). Below is an example of the result we want implemented using canvas so you can see where we’re going. The index.html file is only there to have a visual representation of what we’re doing, it may seems useless for the first example (using canvas) but it will help us later.
在我的项目中,我使用了Color类来存储文件的像素,但是对于我们的示例,我将结果输出为Uint8Array数组。 每个阵列将存储有关一个像素(RGBA)的信息。 下面是我们要使用画布实现的结果的示例,以便您可以看到要进行的操作。 index.html文件只是在视觉上表示我们正在做的事情,对于第一个示例(使用画布)来说似乎没有用,但稍后会对我们有所帮助。
The code for the Canvas version is available here : https://github.com/achiev-open/png-decoder-intro/tree/1-canvas-example
Canvas版本的代码可在此处获取: https : //github.com/achiev-open/png-decoder-intro/tree/1-canvas-example
All of the usefull code is located in src/index.ts. This implementation isn’t the subject of our article so I won’t go into the details, however, note that the code simply loads the picture into a canvas, then uses the canvas API to extract the image data.
所有有用的代码都位于src / index.ts中 。 此实现不是本文的主题,因此我将不做详细介绍,但是请注意,代码只是将图片加载到画布中,然后使用canvas API提取图像数据。
Now that we’ve seen the easy way, let’s understand how it works by reinventing the wheel. The first start is obviously this kind of official documentation : https://www.w3.org/TR/PNG/ or http://www.libpng.org/pub/png/spec/
既然我们已经看到了简单的方法,那么让我们通过重新发明轮子来了解其工作原理。 显然,第一个起点就是这种官方文档: https : //www.w3.org/TR/PNG/或http://www.libpng.org/pub/png/spec/
But I get it, they can be confusing, there is a lot of content, with each section redirecting towards another, so let’s find out where to start !
但是我明白了,它们可能会造成混乱,其中包含很多内容,每个部分都重定向到另一个部分,所以让我们找出从哪里开始!
Today, we won’t recreate a fully functionnal PNG decoder : our goal here is to understand enough to be able to start. Let’s focus on one specific colour type ( True colour with alpha ) and ignore some metadata like interlacing or palette. Our decoder will only understand some PNG file.
今天,我们将不会重新创建功能齐全的PNG解码器:我们的目标是要足够了解才能开始。 让我们关注一种特定的颜色类型(带alpha的真彩色),并忽略一些隔行扫描或调色板之类的元数据。 我们的解码器只会了解一些PNG文件。
If there is interest for that, we’ll see in another article how to implement the other elements. If you don’t understand all the terms used in the previous sentences, don’t worry, we will explain everything soon.
如果对此感兴趣,我们将在另一篇文章中看到如何实现其他元素。 如果您不理解前面句子中使用的所有术语,请放心,我们将尽快解释所有内容。
一,读取文件并提取数据 (I. Read the file and extract data)
We need data to work, so our first step will be to read the file content from a URL and turn it into an ArrayBuffer. We will try to keep the code simple to focus on the new concepts here.
我们需要数据才能工作,所以第一步将是从URL读取文件内容并将其转换为ArrayBuffer 。 我们将尝试使代码保持简单,以集中于此处的新概念。
Let’s edit our index file to load the picture from the assets :
让我们编辑索引文件以从资源加载图片:
(async function init() {const fileUri = "/assets/screen.png";const httpResponse = await fetch(fileUri);if (!httpResponse.ok) throw new Error(`${fileUri} not found`);const buffer: ArrayBuffer = await httpResponse.arrayBuffer();const bytes: Uint8Array = new Uint8Array(buffer); // File data to decode
})();
Let’s create a new class PngImage in src/png-image.ts. PngImage will take the Uint8Array as parameter, and will decode it.
让我们在src / png-image.ts中创建一个新的PngImage类。 PngImage将采用Uint8Array作为参数,并将对其进行解码。
export default class PngImage {public content: Array = [];constructor(bytes: Uint8Array) {
    }
}
When we are done, the content will contains our pixels definitions. Now we can call it in the index :
完成后,内容将包含我们的像素定义。 现在我们可以在索引中调用它:
const image = new PngImage(bytes);You can find the code from this step here : https://github.com/achiev-open/png-decoder-intro/tree/2-read-file-content
您可以在此步骤中找到代码: https : //github.com/achiev-open/png-decoder-intro/tree/2-read-file-content
二。 了解Png文件的格式 (II. Understand Png file’s format)
First of all, to be sure that we are loading a png file, we are going to check the magic number.
首先,为确保我们正在加载png文件,我们将检查幻数。
A magic number is a sequence of bytes present in all the files of a certain format ( often at the beginning ). It’s a way to recognize the format of the file. For PNG files, the magic number is 89 50 4E 47 0D 0A 1A 0A at the beginning of the file. Let’s verify that :
幻数是某种格式的所有文件中通常存在的字节序列(通常在开头)。 这是一种识别文件格式的方法。 对于PNG文件,文件开头的幻数为89 50 4E 47 0D 0A 1A 0A。 让我们验证一下:
export default class PngImage {public content: Array = [];constructor(bytes: Uint8Array) {const magicNumberBytes = bytes.slice(0, 8);const magicNumber = Buffer.from(magicNumberBytes).toString("hex");if (magicNumber !== "89504e470d0a1a0a") throw new Error("Not a png file");
    }
}
Nothing complex here, we read the first 8 bytes, convert them to an hex string and compare it with the value we expect.
这里没什么复杂的,我们读取前8个字节,将它们转换为十六进制字符串,并将其与我们期望的值进行比较。
Now begins the real work. A png file contains a series of chunk with a simple format :
现在开始实际工作。 png文件包含一系列具有简单格式的块:
4 bytes : The length of the data
4字节 :数据长度
4 bytes : The type of the chunk
4个字节 :块的类型
[length] bytes : The data
[length]个字节 : 数据
4 bytes : CRC, here to detect accidental changes in data, we won’t detail that in this article
4个字节 : CRC ,此处用于检测数据的意外更改,在本文中我们将不再详细介绍
In this article, we will only focus on the chunk we need to decode true colour with alpha files, but you can find details about all possible types in the official documentation.
在本文中,我们将只关注需要用alpha文件解码真彩色的块,但是您可以在官方文档中找到有关所有可能类型的详细信息。
Our first step will be to list all the chunk presents in the file. We will create a new class PngChunk to parse them. It will take a Uint8Array starting at the beginning of the chunk and ending at the end of the file.
我们的第一步将是列出文件中存在的所有块。 我们将创建一个新类PngChunk来解析它们。 Uint8Array将在块的开头开始,并在文件的末尾结束。
export default class PngChunk {public totalLength: number;public dataLength: number;public type: string;public data: Uint8Array;public crc: Uint8Array;constructor(bytes: Uint8Array) {this.dataLength = this.getLength(bytes);this.type = this.getType(bytes);this.data = this.getData(bytes);this.crc = this.getCRC(bytes);this.totalLength = this.dataLength + 12;
    }private getLength(bytes: Uint8Array): number {const length_bytes: Uint8Array = bytes.slice(0, 4);const buffer = Buffer.from(length_bytes);return buffer.readUIntBE(0, length_bytes.length);
    }private getType(bytes: Uint8Array): string {const type_byte: Uint8Array = bytes.slice(4, 8);return (new TextDecoder("ascii")).decode(type_byte);
    }private getData(bytes: Uint8Array): Uint8Array {return bytes.slice(8, 8 + this.dataLength);
    }private getCRC(bytes: Uint8Array): Uint8Array {return bytes.slice(8 + this.dataLength, 8 + this.dataLength + 4);
    }
}
Now let’s use it into our PngImage.
现在,将其用于我们的PngImage中。
import PngChunk from "./png-chunk";export default class PngImage {public content: Array = [];constructor(bytes: Uint8Array) {const magicNumberBytes = bytes.slice(0, 8);const magicNumber = Buffer.from(magicNumberBytes).toString("hex");if (magicNumber !== "89504e470d0a1a0a") throw new Error("Not a png file");let pos = 8;while (pos < bytes.length) {const chunk = new PngChunk(bytes.slice(pos));
            // We will parse the data here depending on the chunk type
            pos += chunk.totalLength;
        }
    }
}
To understand the meaning of the data contained in our chunks, we can look at :
要了解包含在我们的块中的数据的含义,我们可以看一下:
https://en.wikipedia.org/wiki/Portable_Network_Graphics#File_format for a light version
https://en.wikipedia.org/wiki/Portable_Network_Graphics#File_format精简版
https://www.w3.org/TR/PNG/#4Concepts.FormatTypes for the details
https://www.w3.org/TR/PNG/#4Concepts.FormatTypes了解详细信息
The code for this step can be found here : https://github.com/achiev-open/png-decoder-intro/tree/3-parse-chunk
可在以下位置找到此步骤的代码: https : //github.com/achiev-open/png-decoder-intro/tree/3-parse-chunk
三, 解析我们需要的元数据 (III. Parsing the metadata we need)
As we said before, we won’t handle all the metadata, but we still need to understand some of them. Every informations we need for this example are in the chunk of type “IHDR”.
如前所述,我们不会处理所有元数据,但是我们仍然需要了解其中的一些元数据。 我们在此示例中需要的所有信息都在“ IHDR”类型的块中。
This is the image header, it contains information about how it was encoded, its size … As we won’t implement a full PNG decoder, we are going to verify that the file is encoded the right way for our needs before processing it.
这是图像标题,其中包含有关其编码方式,大小的信息……由于我们不会实现完整的PNG解码器,因此在处理文件之前,我们将验证文件的编码方式是否符合我们的需求。
Information about how the data are stored in the IHDR chunk can be found there https://www.w3.org/TR/PNG/#11IHDR. Let’s sum up :
有关如何在IHDR块中存储数据的信息, 请参见https://www.w3.org/TR/PNG/#11IHDR 。 让我们总结一下:
width ( 4 bytes ) : The width of our image
宽度 (4个字节) :我们图像的宽度
height ( 4 bytes ) : The height of our image
height (4个字节) :图像的高度
bitDepth ( 1 byte ) : define the number of bits by pixels, in this article we will only handle files with bitDepth equals to 8.
bitDepth (1个字节) :按像素定义位数,在本文中,我们将仅处理bitDepth等于8的文件。
colourType ( 1 byte ): there is 5 possible ways of storing colors :
colourType (1个字节) :有5种可能的颜色存储方式:
- Greyscale (0) : Each pixel is a greyscale sample 灰度(0):每个像素都是灰度样本
- True colour (2) : Each pixel is an R,G,B triple 真彩色(2):每个像素都是R,G,B三元组
- Indexed-colour (3) : Each pixel is a palette index ( palette is defined mainly by the PLTE chunk ) 索引色(3):每个像素都是调色板索引(调色板主要由PLTE块定义)
- Greyscale with alpha (4) : Each pixel is a greyscale sample followed by an alpha sample 带有alpha(4)的灰度:每个像素都是灰度样本,后跟一个alpha样本
- True colour with alpha (6) : Each pixel is an R,G,B triple followed by an alpha sample 带有Alpha(6)的真彩色:每个像素为R,G,B三元组,后跟一个alpha样本
As said before, we will work on the “True colour with alpha” type here.
如前所述,我们将在此处使用“ True color with alpha”类型。
compressionMethod ( 1 byte ): Indicate how the image data was compressed, currently only the value 0 is defined in international standard, it means the data was compressed using deflate/inflate compression (zlib)
compressionMethod (1个字节) :指示如何压缩图像数据,目前国际标准中仅定义了值0,这意味着使用deflate / inflate压缩(zlib)压缩了数据
filterMethod ( 1 byte ): define the set of filters applied to our data, we will detail that later. We will only handle the value 0 in this example.
filterMethod (1个字节) :定义应用于我们的数据的过滤器集,我们将在后面详细介绍。 在此示例中,我们将仅处理值0。
interlacedMethod ( 1 byte ): 0 means there is no interlace and the pixels are stored sequentially from left to right. We won’t support file with interlacing in this example.
interlacedMethod (1 byte) :0表示没有隔行,并且像素从左到右顺序存储。 在此示例中,我们将不支持隔行扫描的文件。
Now that we now what’s is in the IHDR chunk, we can implement that :
现在,我们现在有了IHDR块中的内容,我们可以实现它:
import PngChunk from "./png-chunk";export default class PngImage {public content: Array = [];public width: number = -1;public height: number = -1;private bitDepth: number = -1;private colourType: number = -1;private compressionMethod: number = -1;private filterMethod: number = -1;private interlaceMethod: number = -1;constructor(bytes: Uint8Array) {const magicNumberBytes = bytes.slice(0, 8);const magicNumber = Buffer.from(magicNumberBytes).toString("hex");if (magicNumber !== "89504e470d0a1a0a") throw new Error("Not a png file");let pos = 8;while (pos < bytes.length) {const chunk = new PngChunk(bytes.slice(pos));switch (chunk.type) {case "IHDR":this.parseIHDRChunk(chunk);break;
            }
            // We will parse the data here depending on the chunk type
            pos += chunk.totalLength;
        }
    }private parseIHDRChunk(chunk: PngChunk) {this.width = Buffer.from(chunk.data.slice(0, 4)).readUIntBE(0, 4);this.height = Buffer.from(chunk.data.slice(4, 8)).readUIntBE(0, 4);this.bitDepth = chunk.data.slice(8,9)[0];if (this.bitDepth !== 8) throw new Error("bitDepth not supported");this.colourType = chunk.data.slice(9, 10)[0];if (this.colourType !== 6) throw new Error("colourType not supported");this.compressionMethod = chunk.data.slice(10, 11)[0];if (this.compressionMethod !== 0) throw new Error("compressionMethod not supported");this.filterMethod = chunk.data.slice(11, 12)[0];if (this.filterMethod !== 0) throw new Error("filterMethod not supported");this.interlaceMethod = chunk.data.slice(12, 13)[0];if (this.interlaceMethod !== 0) throw new Error("Interlacing not supported");
    }
}
We now have everything we need to process the data we want and reject PNG file that we know we can’t process. The full code for this section can be found here : https://github.com/achiev-open/png-decoder-intro/tree/4-ihdr-chunk
现在,我们拥有处理所需数据并拒绝我们知道无法处理的PNG文件所需的一切。 该部分的完整代码可以在这里找到: https : //github.com/achiev-open/png-decoder-intro/tree/4-ihdr-chunk
IV。 解析图像内容 (IV. Parsing the image content)
The png data are stored in chunks of type “IDAT”. Keep in mind that a file can contains multiple IDAT chunk, so we have to read and concat them all before processing the content. A chunk of type “IEND” will indicate that all the IDAT chunks have been given.
png数据存储在“ IDAT”类型的块中。 请记住,一个文件可以包含多个IDAT块,因此在处理内容之前,我们必须先读取并合并它们。 类型为“ IEND”的块将指示所有IDAT块均已给出。
Let’s add the code to get the full data array :
让我们添加代码以获取完整的数据数组:
export default class PngImage {
    (...)private idatData: Uint8Array = new Uint8Array();constructor(bytes: Uint8Array) {
        (...)let pos = 8;while (pos < bytes.length) {const chunk = new PngChunk(bytes.slice(pos));switch (chunk.type) {case "IHDR":this.parseIHDRChunk(chunk);break;case "IDAT":this.addIDATChunk(chunk);break;case "IEND":this.parseIDATData();break;
            }
            pos += chunk.totalLength;
        }
    }private parseIHDRChunk(chunk: PngChunk) { ... }private addIDATChunk(chunk: PngChunk) {const tmp = this.idatData;this.idatData = new Uint8Array(tmp?.length + chunk.data.length);this.idatData.set(tmp);this.idatData.set(chunk.data, tmp.length);
    }private parseIDATData() {    }
}
Now we have the full data array stored in this.idatData. As indicated in the metadata, the data array is encoded using zlib. We are going to use the module pako ( https://www.npmjs.com/package/pako ) to decode it.
现在我们将完整的数据数组存储在this.idatData中。 如元数据中所示,数据数组使用zlib进行编码。 我们将使用模块pako( https://www.npmjs.com/package/pako )对其进行解码。
$> npm install --save pako
$> npm i --save-dev @types/pako
Update the png-image.ts file with the following :
使用以下命令更新png-image.ts文件:
import PngChunk from "./png-chunk";import pako from "pako";export default class PngImage {
    (...)constructor(bytes: Uint8Array) {
        (...)
    }private parseIHDRChunk(chunk: PngChunk) {...}private addIDATChunk(chunk: PngChunk) {...}private parseIDATData() {const data = pako.inflate(this.idatData);
    }
}
The variable data now contains our pixels information decoded. According to the documentation for true colour with alpha, the data is formatted in a way that for each line of the image we have :
变量数据现在包含已解码的像素信息。 根据有关带有Alpha的真彩色的文档,对数据进行格式化的方式是,对于图像的每一行,我们都会:
- 1 byte indicating the filter to apply for this line 1个字节,指示要应用于此行的过滤器
- 4 bytes for each pixel of the line indicating the value to use in the computation for R,G,B,A in this order 该行的每个像素4个字节,按此顺序指示用于R,G,B,A计算的值
Our first step here will be to identify the filter and the list of pixels data for each line :
我们的第一步是确定每行的过滤器和像素数据列表:
private parseIDATData() {const data = pako.inflate(this.idatData);let pos = 0;const scanlineLength: number = this.width * 4 + 1; // 4 bytes per pixel + 1 for the filterwhile (pos < data.length) {const line = data.slice(pos, pos + scanlineLength);const filter = line[0];const pixelsData = [];let linePos = 1;while (linePos < line.length) {
            pixelsData.push(line.slice(linePos, linePos + 4));
            linePos += 4;
        }        // We will process the line data here        pos += scanlineLength;
    }
}
There is 5 differents filters in the set we handle ( remember in the IHDR section we allowed only one filterMethod ) :
我们处理的集合中有5种不同的过滤器(请记住,在IHDR部分中,我们只允许使用一个filterMethod):
- None (0) : The data is as it is 无(0):数据保持不变
- Sub (1) : The data indicates the difference between the pixel we want and the one directly to it’s left. If there is no pixel we use [0,0,0,0] Sub(1):数据表示我们想要的像素与直接位于其左侧的像素之间的差异。 如果没有像素,则使用[0,0,0,0]
- Up (2) : It’s the same as sub, but based on the pixel above the one we want 上(2):与sub相同,但基于我们想要的像素上方的像素
- Average (3) : The data indicates the difference between the pixel we want, and the average of the pixel at the left and the one above 平均(3):数据表示我们想要的像素与左侧和上方像素的平均值之差
- Paeth (4) : The data indicates the difference between the pixel we want, and a value computed from the pixel at the left, the one above, and the one diagonally to the upper left Paeth(4):数据表示我们想要的像素与从左侧,上方的像素和左上角对角的像素计算出的值之间的差
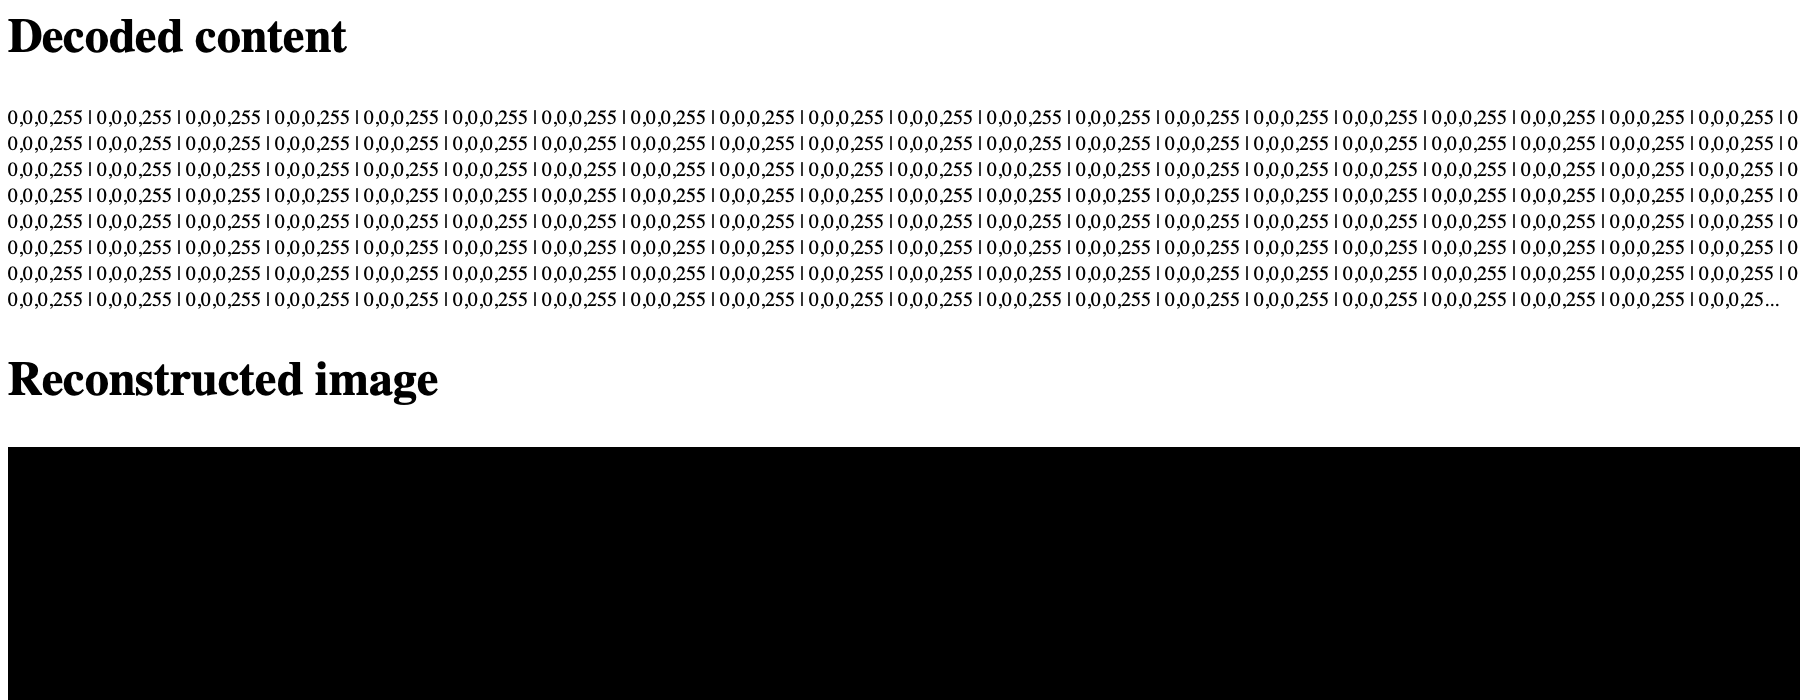
First, let’s add some code so we can see the result, then let’s process in black every line that we don’t know how to handle. ( All for now as we haven’t implemented any filter yet )
首先,让我们添加一些代码,以便我们可以看到结果,然后让我们将不知道如何处理的每一行涂成黑色。 (因为我们还没有实现任何过滤器,所以目前所有)
private parseIDATData() {
    (...)while (pos < data.length) {
        (...)while (linePos < line.length) {...}switch (filter) {default:
                pixelsData.map(() => {this.content.push(new Uint8Array([0, 0, 0, 255]));
                });break;
        }
        pos += scanlineLength;
    }
}
and in index.ts :
和在index.ts中:
const image = new PngImage(bytes);if (image.content?.length) {const htmlContent = document.getElementById("content");if (htmlContent) {
        htmlContent.innerText = image.content.join(" | ").slice(0, 2000) + "...";
    }const htmlCanvas: HTMLCanvasElement = document.getElementById("canvas") as HTMLCanvasElement;
    htmlCanvas.width = image.width;
    htmlCanvas.height = image.height;if (htmlCanvas) {const htmlCtx = htmlCanvas.getContext("2d");const imageData = new ImageData(image.width, image.height);
        image.content.map((pixel, i) => {
            imageData.data[i * 4] = pixel[0];
            imageData.data[i * 4 + 1] = pixel[1];
            imageData.data[i * 4 + 2] = pixel[2];
            imageData.data[i * 4 + 3] = pixel[3];
        });
        htmlCtx?.putImageData(imageData , 0, 0);
    }
}
If you run the code and open your browser at http://localhost:8080 you should see something like this :
如果运行代码并在http:// localhost:8080上打开浏览器,则应该看到类似以下内容:
A) The filter “None” ( filter == 0)
A)过滤器“无”(过滤器== 0)
This is the easiest one as the data is given unfiltered :
这是最简单的一种,因为数据是未经过滤的:
switch (filter) {case 0: // Nonethis.content = this.content.concat(pixelsData);break;default:
        pixelsData.map(() => {this.content.push(new Uint8Array([0, 0, 0, 255]));
        });break;
}
If you look at the result in your browser, you may notice that the first line of pixels now contains series of [0,0,0,0] instead of the black pixels [0,0,0,255].
如果在浏览器中查看结果,可能会注意到第一行像素现在包含[0,0,0,0]系列,而不是黑色像素[0,0,0,255]。
[0,0,0,0] means transparent so you don’t see a real change in the reconstructed image yet as we just converted one line of transparent pixels.
[0,0,0,0]表示透明,因此您只看到一行透明像素,就看不到重构图像的真正变化。
B) The filter “Sub” ( filter == 1)
B)过滤器“ Sub”(过滤器== 1)
The data indicate the difference between the pixel we want and the one directly to it’s left. If there is no pixel to the left we use [0,0,0,0] :
数据表明我们想要的像素与直接剩下的像素之间的差异。 如果左侧没有像素,则使用[0,0,0,0]:
(...) case 1: // Add this case to the filterthis.content = this.content.concat(this.parseSubFilter(pixelsData));break;
(...)private parseSubFilter(pixelsData: Array): Array {const content: Array = [];let previousArray = new Uint8Array([0, 0, 0, 0]);
    pixelsData.map((pixel: any) => {let newArray: Uint8Array = new Uint8Array([
            (pixel[0] + previousArray[0]) % 256,
            (pixel[1] + previousArray[1]) % 256,
            (pixel[2] + previousArray[2]) % 256,
            (pixel[3] + previousArray[3]) % 256,
        ]);
        previousArray = newArray;
        content.push(newArray);
    });return content;
}
Now we should start to see some result :
现在我们应该开始看到一些结果:
C) The filter “Up” ( filter == 2)
C)过滤器“ Up”(过滤器== 2)
The filter “UP” is the same as sub, but based on the pixel above the one we are computing :
过滤器“ UP”与sub相同,但基于我们正在计算的像素上方的像素:
(...)
case 2: // Upthis.content = this.content.concat(this.parseUpFilter(pixelsData, {
        pos,
        scanlineLength,
    }));break;
(...)private parseUpFilter(pixelsData: Array, metadata: any): Array {const content: Array = [];const previousLinePixels = this.content.slice((metadata.pos / metadata.scanlineLength - 1) * this.width,  (metadata.pos / metadata.scanlineLength - 1) * this.width + this.width);
    pixelsData.map((pixel: any, i: number) => {let previousArray = previousLinePixels[i];let newArray: Uint8Array = new Uint8Array([
            (pixel[0] + previousArray[0]) % 256,
            (pixel[1] + previousArray[1]) % 256,
            (pixel[2] + previousArray[2]) % 256,
            (pixel[3] + previousArray[3]) % 256,
        ]);
        content.push(newArray);
    });return content;
}
You should see new line appearing on your computed image :
您应该看到新行显示在您的计算图像上:
As you will see, some colours seems weird. That’s because we base our computation on the previous line, and our code does not handle properly every lines yet. It will fix itself with the implementation of the two missing filters
如您所见,有些颜色看起来很奇怪。 这是因为我们的计算基于上一行,并且我们的代码尚未正确处理每一行。 它将通过缺少两个过滤器的实现来修复自身
D) The filter “Average” ( filter == 3)
D)过滤器“ Average”(过滤器== 3)
Average filter is similar to up and sub, but using the average value between the pixel above and the one at the left as difference.
平均滤波器类似于上和下子,但使用上方像素和左侧像素之间的平均值作为差异。
(...)case 3:this.content = this.content.concat(this.parseAverageFilter(pixelsData, {
        pos,
        scanlineLength,
    }));break;
(...)private parseAverageFilter(pixelsData: Array, metadata: any): Array {const content: Array = [];const previousLinePixels = this.content.slice((metadata.pos / metadata.scanlineLength - 1) * this.width,  (metadata.pos / metadata.scanlineLength - 1) * this.width + this.width);let previousPixel: any = [0, 0, 0, 0];
    pixelsData.map((pixel: any, i: number) => {let left = previousPixel;let up = previousLinePixels[i];let newArray: Uint8Array = new Uint8Array([
            (pixel[0] + Math.floor((left[0] + up[0]) / 2)) % 256,
            (pixel[1] + Math.floor((left[1] + up[1]) / 2)) % 256,
            (pixel[2] + Math.floor((left[2] + up[2]) / 2)) % 256,
            (pixel[3] + Math.floor((left[3] + up[3]) / 2)) % 256,
        ]);
        previousPixel = newArray;
        content.push(previousPixel);
    });return  content;
}
You should see some new lines especially at the bottom of the picture
您应该看到一些新行,尤其是在图片的底部
E) The filter “Paeth” ( filter == 4)
E)过滤器“ Paeth”(过滤器== 4)
And finally our last filter ! This one uses as difference a value computed from the pixel at the left, the one above, and the one a its left.
最后是我们的最后一个过滤器! 该值使用从左边的像素,上面的一个像素及其左边的像素计算出的值作为差值。
(...)case 4:this.content = this.content.concat(this.parsePaethFilter(pixelsData, {
        pos,
        scanlineLength,
    }));break;
(...)private parsePaethFilter(pixelsData: Array, metadata: any): Array {const content: Array = [];const previousLinePixels = this.content.slice((metadata.pos / metadata.scanlineLength - 1) * this.width,  (metadata.pos / metadata.scanlineLength - 1) * this.width + this.width);let previousPixel: any = [0, 0, 0, 0];
    pixelsData.map((pixel: any, i: number) => {let left = previousPixel;let up = previousLinePixels[i];let upperleft = i ? previousLinePixels[i - 1] : [0, 0, 0, 0];let bytes = pixel.map((byte: any, byte_index: number) => {const p = left[byte_index] + up[byte_index] - upperleft[byte_index];const pa = Math.abs(p - left[byte_index]);const pb = Math.abs(p - up[byte_index]);const pc = Math.abs(p - upperleft[byte_index]);if (pa <= pb && pa <= pc) return (byte + left[byte_index]);else if (pb <= pc) return (byte + up[byte_index]);else return (byte + upperleft[byte_index]);
        });
        previousPixel = bytes;
        content.push(previousPixel);
    });return content;
}
And that’s it ! Now that we handle every filter, you should have the full image in your browser, meaning we have successfully decoded all the data !
就是这样! 现在我们已经处理了所有过滤器,您应该在浏览器中拥有完整的图像,这意味着我们已经成功解码了所有数据!
Of course our decoder is still missing a lot of features, but I hope this introduction helped you understand how PNG file are encoded and how to start working with it.
当然,我们的解码器仍然缺少许多功能,但是我希望本文能帮助您了解PNG文件的编码方式以及如何开始使用它。
The full code is available at https://github.com/achiev-open/png-decoder-intro
完整代码可在https://github.com/achiev-open/png-decoder-intro获得
普通英语JavaScript (JavaScript In Plain English)
Enjoyed this article? If so, get more similar content by subscribing to Decoded, our YouTube channel!
喜欢这篇文章吗? 如果是这样,请订阅我们的YouTube频道解码,以获得更多类似的内容!
翻译自: https://medium.com/javascript-in-plain-english/understanding-and-decoding-png-format-example-in-ts-b31fdde1151b
ffmpeg 解码ts格式