Spring Security 6.x 系列(12)—— Form表单认证登录注销自定义配置
一、前言
在本系列文章中介绍了 Form 表单认证和注销流程,对部分源码也进行详细分析。
本章主要学习 Spring Security 中表单认证登录注销的相关自定义配置。
二、自定义登录页面
Spring Security 表单认证默认规则中对未认证的请求会重定向到默认登录页面,也支持自定义设置登录页面。
2.1 整合 Thymeleaf 模版引擎
2.1.1 pom 依赖
完整 pom.xml:
<project xmlns="http://maven.apache.org/POM/4.0.0" xmlns:xsi="http://www.w3.org/2001/XMLSchema-instance"
         xsi:schemaLocation="http://maven.apache.org/POM/4.0.0 https://maven.apache.org/xsd/maven-4.0.0.xsd">
    <modelVersion>4.0.0modelVersion>

    <parent>
        <artifactId>spring-securityartifactId>
        <groupId>com.gmgroupId>
        <version>0.0.1-SNAPSHOTversion>
    parent>

    <artifactId>form-security-customartifactId>
    <packaging>jarpackaging>
    <description>form表单登录示例(自定义)description>

    <dependencies>
        <dependency>
            <groupId>org.springframework.bootgroupId>
            <artifactId>spring-boot-starter-webartifactId>
        dependency>
        <dependency>
            <groupId>org.springframework.bootgroupId>
            <artifactId>spring-boot-starter-securityartifactId>
        dependency>
        <dependency>
            <groupId>org.springframework.bootgroupId>
            <artifactId>spring-boot-starter-thymeleafartifactId>
        dependency>
        <dependency>
            <groupId>org.thymeleaf.extrasgroupId>
            <artifactId>thymeleaf-extras-springsecurity6artifactId>
        dependency>
        <dependency>
            <groupId>org.springframework.securitygroupId>
            <artifactId>spring-security-testartifactId>
            <scope>testscope>
        dependency>
    dependencies>
project>
2.1.2 Thymeleaf 配置
src/main/resources/application.yaml:
server:
  port: 9000

logging:
  level:
    org.springframework.security: TRACE

spring:
  thymeleaf:
    #配置模板路径,默认是templates
    prefix: classpath:/templates/
    #文件后缀
    suffix: .html
    #编码
    encoding: UTF-8
    #内容类别
    content-type: text/html
    #模板的模式,支持 HTML, XML TEXT JAVASCRIPT
    mode: HTML
    #开发时建议设置为false,否则会有缓存,导致页面没法及时看到更新后的效果。
    cache: false
2.2 创建登录页
在 src/main/resources/templates 目录下创建一个简单的登录页 login.html :
DOCTYPE html>
<html xmlns="http://www.w3.org/1999/xhtml" xmlns:th="https://www.thymeleaf.org" xmlns:sec="http://www.thymeleaf.org/extras/spring-security">
<head>
    <meta charset="UTF-8">
    <meta name="viewport" content="width=device-width, initial-scale=1.0">
    <title>登录title>

    <link rel="stylesheet" href="https://cdn.jsdelivr.net/npm/[email protected]/dist/css/bootstrap.min.css">
    <style>
        body {
            background-color: #f8f9fa;
        }
        .login-container {
            max-width: 400px;
            margin: 0 auto;
            margin-top: 100px;
            padding: 20px;
            border-radius: 5px;
            box-shadow: 0 0 10px rgba(0, 0, 0, 0.1);
            background-color: #fff;
        }
        .custom-alert {
            background-color: #FFD2D2;
            padding: 10px;
            border-radius: 5px;
            display: flex;
            align-items: center;
            justify-content: center;
            text-align: center;
            min-height: 50px; /* 设置最小高度 */
        }
    style>
head>
<body>
<div class="container">
    <div class="row justify-content-center">
        <div class="col-md-6 login-container">
            <h2 class="text-center mb-4">Loginh2>
            <form th:action="@{/login}" method="post">
                <div th:if="${exception}" class="custom-alert"><p th:text="${exception}">p>div>
                <div th:if="${logout}" class="custom-alert"><p th:text="${logout}">p>div>
                <div class="mb-3">
                    <input type="hidden" th:name="${_csrf.parameterName}" th:value="${_csrf.token}"/>
                    <label for="username" class="form-label">用户名label>
                    <input type="text" class="form-control" id="username" name="username" required>
                div>
                <div class="mb-3">
                    <label for="password" class="form-label">密码label>
                    <input type="password" class="form-control" id="password" name="password" required>
                div>
                <button type="submit" class="btn btn-primary w-100">Loginbutton>
            form>
        div>
    div>
div>


<script src="https://cdn.jsdelivr.net/npm/[email protected]/dist/js/bootstrap.bundle.min.js">script>
body>
html>
是处理开启CSRF保护所需参数是显示认证相关异常,稍后详细介绍是显示注册相关信息,稍后详细介绍
2.3 创建 Controller 访问控制
新建 LoginController.java:
@Controller
@Slf4j
class LoginController {

    /**
     * 登录页面
     *
     * @return
     */
    @GetMapping("/login")
    String login() {
        return "login";
    }
}
2.4 Spring Security 配置
@Configuration
@EnableWebSecurity(debug = true)
public class SecurityConfig {

    /**
     * 构建SecurityFilterChain
     *
     * @param http
     * @return
     * @throws Exception
     */
    @Bean
    SecurityFilterChain defaultSecurityFilterChain(HttpSecurity http) throws Exception {
        // 配置所有http请求必须经过认证
        http.authorizeHttpRequests(authorizeRequests ->
                authorizeRequests.requestMatchers(new String[]{"/favicon.ico", "/custom/error", "/error", "/logout/success"}).permitAll()
                        .anyRequest().authenticated());

        // 开启表单认证(默认配置)
        // http.formLogin(Customizer.withDefaults());

        // 表单认证自定义配置
        http.formLogin(form ->
                form.loginPage("/login").permitAll() // /login,需permitAll放开访问控制并配置对应的controller请求地址
                        .loginProcessingUrl("/login") // form表单登录处理请求URL(POST)
                        .usernameParameter("username") // form表单用户名参数名称
                        .passwordParameter("password") // form表单密码参数名称
        );
        // 开启 CSRF 保护
        http.csrf(Customizer.withDefaults());
        // 禁止 CSRF 保护
        // http.csrf(csrf -> csrf.disable());
        // 构造器构建SecurityFilterChain对象
        return http.build();
    }

    /**
     * 配置登录名密码
     *
     * @return
     */
    @Bean
    public UserDetailsService userDetailsService() {
        UserDetails user = User.withUsername("admin").password("{noop}123").roles("USER").build();
        return new InMemoryUserDetailsManager(new UserDetails[]{user});
    }
}
loginPage("/login").permitAll():配置URL生成登录页面,常与Controller配合使用,必须是POST。loginProcessingUrl("/login"):配置登录请求处理URL,用于修改UsernamePasswordAuthenticationFilter中拦截登录处理请求URL地址。usernameParameter("username"):配置用户名参数名称 ,用于修改UsernamePasswordAuthenticationFilter中拦截登录处理请求用户名对应的参数名称。passwordParameter("password"):配置密码参数名称 ,用于修改UsernamePasswordAuthenticationFilter中拦截登录处理请求密码对应的参数名称。
2.5 效果

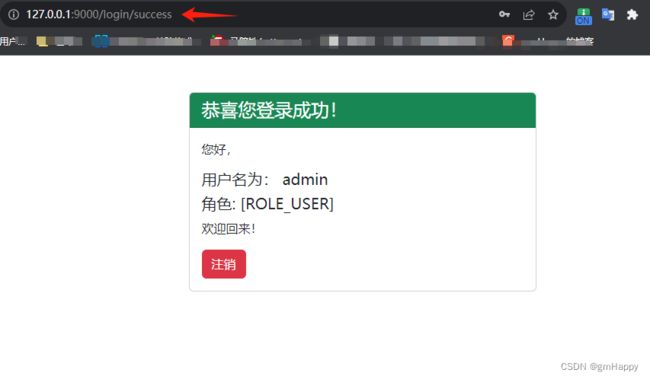
三、自定义登录成功请求转发/重定向地址
3.1 创建登录成功页
在 src/main/resources/templates 目录下创建一个简单的登录成功页面 success.html :
3.2 创建 Controller 访问控制
在 LoginController.java 新增:
/**
 * 登录成功页面
 *
 * @return
 */
@RequestMapping("/login/success")
String success() {
    return "success";
}
3.3 Spring Security 配置
@Configuration
@EnableWebSecurity(debug = true)
public class SecurityConfig {

    /**
     * 构建SecurityFilterChain
     *
     * @param http
     * @return
     * @throws Exception
     */
    @Bean
    SecurityFilterChain defaultSecurityFilterChain(HttpSecurity http) throws Exception {
        // 配置所有http请求必须经过认证
        http.authorizeHttpRequests(authorizeRequests ->
                authorizeRequests.requestMatchers(new String[]{"/favicon.ico", "/custom/error", "/error", "/logout/success"}).permitAll()
                        .anyRequest().authenticated());

        // 开启表单认证(默认配置)
        // http.formLogin(Customizer.withDefaults());

        // 表单认证自定义配置
        http.formLogin(form ->
                form.loginPage("/login").permitAll() // /login,需permitAll放开访问控制并配置对应的controller请求地址
                        .loginProcessingUrl("/login") // form表单登录处理请求URL(POST)
                        .usernameParameter("username") // form表单用户名参数名称
                        .passwordParameter("password") // form表单密码参数名称
                        //.successForwardUrl("/login/success") // 登录成功请求转发URL(请求转发地址栏不变)
                        .defaultSuccessUrl("/login/success") // 登录成功请求重定向URL(重定向地址栏变)
        );
        // 开启 CSRF 保护
        http.csrf(Customizer.withDefaults());
        // 禁止 CSRF 保护
        // http.csrf(csrf -> csrf.disable());
        // 构造器构建SecurityFilterChain对象
        return http.build();
    }

    /**
     * 配置登录名密码
     *
     * @return
     */
    @Bean
    public UserDetailsService userDetailsService() {
        UserDetails user = User.withUsername("admin").password("{noop}123").roles("USER").build();
        return new InMemoryUserDetailsManager(new UserDetails[]{user});
    }
}
-
successForwardUrl("/login/success"):配置登录成功请求转发URL(请求转发地址栏不变),常与Controller配合使用,详情请见:ForwardAuthenticationSuccessHandler。 -
defaultSuccessUrl("/login/success"):配置登录成功请求重定向URL(重定向地址栏变),常与Controller配合使用,详情请见:SavedRequestAwareAuthenticationSuccessHandler。
3.4 效果
3.4.1 请求转发效果

3.4.2 重定向效果
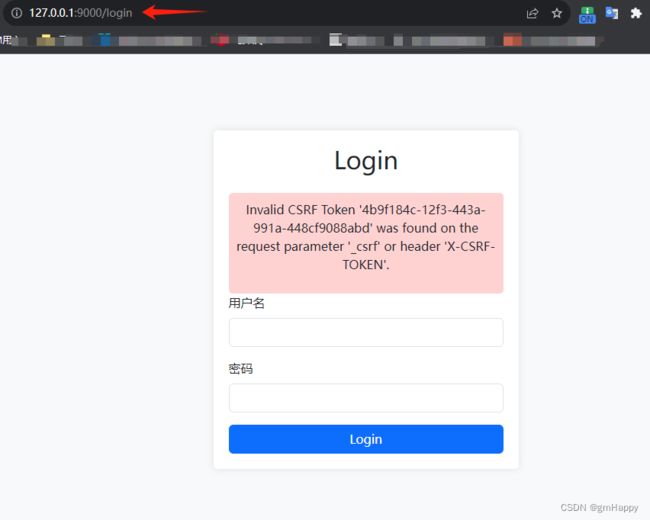
四、自定义登录失败请求转发/重定向地址
4.1 创建登录失败页
登录失败页采用原登录页,显示各类登录异常。
4.2 创建 Controller 访问控制
/**
 * 登录失败页面
 *
 * @return
 */
@RequestMapping("/custom/error")
String failure(HttpServletRequest request, Model model) {
    // 以下是配置failureForwardUrl方式获取登录异常
    Object exception = request.getAttribute(WebAttributes.AUTHENTICATION_EXCEPTION);
    if (exception != null) {
        if (exception instanceof BadCredentialsException) {
            BadCredentialsException badCredentialsException = (BadCredentialsException) exception;
            model.addAttribute("exception", badCredentialsException.getMessage());
            return "login";
        }
    }
    exception = request.getAttribute(WebAttributes.ACCESS_DENIED_403);
    if (exception instanceof AccessDeniedException) {
        AccessDeniedException accessDeniedException = (AccessDeniedException) exception;
        model.addAttribute("exception", accessDeniedException.getMessage());
        return "login";
    }
    // 以下是配置failureUrl方式获取登录异常
    HttpSession session = request.getSession(false);
    if (session != null) {
        exception = request.getSession().getAttribute(WebAttributes.AUTHENTICATION_EXCEPTION);
        model.addAttribute("exception", ((AuthenticationException) exception).getMessage());
        return "login";
    }
    return "login";
}
注意:
根据Spring Security中失败请求处理的配置不同获取异常的方式也是多样的。
4.3 Spring Security 配置
@Configuration
@EnableWebSecurity(debug = true)
public class SecurityConfig {

    /**
     * 构建SecurityFilterChain
     *
     * @param http
     * @return
     * @throws Exception
     */
    @Bean
    SecurityFilterChain defaultSecurityFilterChain(HttpSecurity http) throws Exception {
        // 配置所有http请求必须经过认证
        http.authorizeHttpRequests(authorizeRequests ->
                authorizeRequests.requestMatchers(new String[]{"/favicon.ico", "/custom/error", "/error", "/logout/success"}).permitAll()
                        .anyRequest().authenticated());

        // 开启表单认证(默认配置)
        // http.formLogin(Customizer.withDefaults());

        // 表单认证自定义配置
        http.formLogin(form ->
                form.loginPage("/login").permitAll() // /login,需permitAll放开访问控制并配置对应的controller请求地址
                        .loginProcessingUrl("/login") // form表单登录处理请求URL(POST)
                        .usernameParameter("username") // form表单用户名参数名称
                        .passwordParameter("password") // form表单密码参数名称
                        //.successForwardUrl("/login/success") // 登录成功请求转发URL(请求转发地址栏不变)
                        .defaultSuccessUrl("/login/success") // 登录成功请求重定向URL(重定向地址栏变)
                        .failureForwardUrl("/custom/error") // 登录失败请求转发URL(请求转发地址栏不变)
                        //.failureUrl("/custom/error") // 登录失败请求重定向URL(重定向地址栏变)(POST)
        );

       // 配置AccessDeniedException异常处理请求URL(POST),主要是是处理401 BadCredentialsException 和 403 AccessDeniedException 异常
        http.exceptionHandling(exception -> exception.accessDeniedPage("/custom/error"));
        // 开启 CSRF 保护
        http.csrf(Customizer.withDefaults());
        // 禁止 CSRF 保护
        // http.csrf(csrf -> csrf.disable());
        // 构造器构建SecurityFilterChain对象
        return http.build();
    }

    /**
     * 配置登录名密码
     *
     * @return
     */
    @Bean
    public UserDetailsService userDetailsService() {
        UserDetails user = User.withUsername("admin").password("{noop}123").roles("USER").build();
        return new InMemoryUserDetailsManager(new UserDetails[]{user});
    }
}
-
failureForwardUrl("/custom/error"):配置登录失败跳转请求URL,常与Controller配合使用,详情请见:ForwardAuthenticationFailureHandler。 -
failureUrl("/custom/error"):配置登录失败请求重定向URL(重定向地址栏变),常与Controller配合使用,详情请见:SimpleUrlAuthenticationFailureHandler。 -
http.exceptionHandling(exception -> exception.accessDeniedPage("/custom/error")):配置AccessDeniedException异常处理调整URL,主要是是处理401 BadCredentialsException和403 AccessDeniedException异常,详情请见:AccessDeniedHandlerImpl。
4.4 效果

五、自定义登录成功/失败处理器
目前基本都是前后端分离,基于 JSON 实现交与,后端中并没有任何页面,也不需要跳转地址,只需要告知前端登录成功返回用户信息即可,然后由前端进行页面跳转。
5.1 自定义登录成功处理器
在上篇录流程分析过,登录成功后会调用登录成功处理器(默认SavedRequestAwareAuthenticationSuccessHandler)进行页面跳转,那么只需要自定义登录成功处理器,就可以直接实现 JSON 返回,AuthenticationsuccessHandler 接口用于处理用户身份验证成功后的处理策略,实现可以随心所欲:
public class JsonAuthenticationSuccessHandler implements AuthenticationSuccessHandler {

    /**
     * 登录成功后直接返回 JSON
     *
     * @param request        请求
     * @param response       响应
     * @param authentication 成功认证的用户信息
     */
    @Override
    public void onAuthenticationSuccess(HttpServletRequest request, HttpServletResponse response, Authentication authentication) throws IOException, ServletException {
        response.setContentType("application/json;charset=utf-8"); // 返回JSON
        response.setStatus(HttpStatus.OK.value());  // 状态码 200
        Map<String, Object> result = new HashMap<>(); // 返回结果
        result.put("msg", "登录成功");
        result.put("code", 200);
        result.put("data", authentication);
        response.getWriter().write(JSONUtil.toJsonStr(result));
    }
}
5.2 自定义登录失败处理器
在上篇录流程分析过,登录失败后会调用登录失败处理器(默认SimpleUrlAuthenticationFailureHandler)进行页面跳转,那么只需要自定义登录失败处理器,就可以直接实现 JSON 返回,AuthenticationFailureHandler 接口用于处理用户身份验证成功后的处理策略,实现可以随心所欲:
public class JsonAuthenticationFailureHandler implements AuthenticationFailureHandler {
    @Override
    public void onAuthenticationFailure(HttpServletRequest request, HttpServletResponse response, AuthenticationException exception) throws IOException, ServletException {
        response.setContentType("application/json;charset=utf-8"); // 返回JSON
        response.setStatus(HttpStatus.BAD_REQUEST.value());  // 状态码 400
        Map<String, Object> result = new HashMap<>(); // 返回结果
        result.put("msg", "登录失败");
        result.put("code", 400);
        result.put("data", exception.getMessage());
        response.getWriter().write(JSONUtil.toJsonStr(result));
    }
}
六、自定义注销配置
6.1 创建注销确认页
在 src/main/resources/templates 目录下创建一个简单的登录成功页面 logout_confirm.html :
DOCTYPE html>
<html xmlns="http://www.w3.org/1999/xhtml" xmlns:th="https://www.thymeleaf.org" xmlns:sec="http://www.thymeleaf.org/extras/spring-security">
<head>
    <meta charset="UTF-8">
    <meta name="viewport" content="width=device-width, initial-scale=1.0">
    <title>Logout Confirmationtitle>

    <link rel="stylesheet" href="https://cdn.jsdelivr.net/npm/[email protected]/dist/css/bootstrap.min.css">
head>
<body>
<div class="container mt-5">
    <div class="row justify-content-center">
        <div class="col-md-6">
            <div class="card">
                <div class="card-header bg-danger text-white">
                    <h4 class="mb-0">确认注销h4>
                div>
                <div class="card-body" sec:authorize="${isAuthenticated()}">
                    <p>您确定要注销吗?p>
                    <p>用户名: <span th:text="${#authentication.name}">span>p>
                    <div sec:authorize="${isAuthenticated()}">
                        <form th:action="@{/logout}" method="post">
                            <input type="hidden" th:name="${_csrf.parameterName}" th:value="${_csrf.token}"/>
                            <a href="/login/success" class="btn btn-success me-2">取消a>
                            <input type="submit" class="btn btn-danger" value="确认注销" />
                        form>
                    div>
                div>
            div>
        div>
    div>
div>


<script src="https://cdn.jsdelivr.net/npm/[email protected]/dist/js/bootstrap.bundle.min.js">script>
body>
html>
6.2 创建 Controller 访问控制
/**
 * 注销成功页面
 *
 * @return
 */
@RequestMapping("/logout/success")
String logoutSuccess(HttpServletRequest request, Model model) {
    model.addAttribute("logout", "您已登出");
    return "login";
}

/**
 * 注销确认页面
 *
 * @return
 */
@RequestMapping("/custom/logout")
String logoutConfirm(HttpServletRequest request, Model model) {
    return "logout_confirm";
}
6.3 Spring Security 配置
@Configuration
@EnableWebSecurity(debug = true)
public class SecurityConfig {

    /**
     * 构建SecurityFilterChain
     *
     * @param http
     * @return
     * @throws Exception
     */
    @Bean
    SecurityFilterChain defaultSecurityFilterChain(HttpSecurity http) throws Exception {
        // 配置所有http请求必须经过认证
        http.authorizeHttpRequests(authorizeRequests ->
                authorizeRequests.requestMatchers(new String[]{"/favicon.ico", "/custom/error", "/error", "/logout/success"}).permitAll()
                        .anyRequest().authenticated());


        // 开启表单认证(默认配置)
        // http.formLogin(Customizer.withDefaults());

        // 表单认证自定义配置
        http.formLogin(form ->
                form.loginPage("/login").permitAll() // /login,需permitAll放开访问控制并配置对应的controller请求地址
                        .loginProcessingUrl("/login") // form表单登录处理请求URL(POST)
                        .usernameParameter("username") // form表单用户名参数名称
                        .passwordParameter("password") // form表单密码参数名称
                        .successForwardUrl("/login/success") // 登录成功请求转发URL(请求转发地址栏不变)
                        //.defaultSuccessUrl("/login/success") // 登录成功请求重定向URL(重定向地址栏变)
                        .failureForwardUrl("/custom/error") // 登录失败请求转发URL(请求转发地址栏不变)
                        //.failureUrl("/custom/error") // 登录失败请求重定向URL(重定向地址栏变)
        );

        // 配置AccessDeniedException异常处理调整URL,主要是是处理401 BadCredentialsException 和 403 AccessDeniedException 异常
        http.exceptionHandling(exception -> exception.accessDeniedPage("/custom/error"));

        // 登出自定义配置
        http.logout(logout -> logout.logoutSuccessUrl("/logout/success") // 自定义注销成功后跳转请求URL(POST)
                //.logoutUrl("/logout") // 自定义单个注销处理请求URL(开启CSRF保护时POST,关闭开启CSRF保护时POST GET PUT DELETE)
                .logoutRequestMatcher(new OrRequestMatcher(
                        new AntPathRequestMatcher("/logout","POST"), // 未配置 LogoutSuccessHandler 时,执行默认的 LogoutSuccessHandler
                        new AntPathRequestMatcher("/logout2","GET"),
                        new AntPathRequestMatcher("/logout2","GET")
                )) // 自定义注销处理请求拦截组合
                .defaultLogoutSuccessHandlerFor(new LogoutSuccessHandler() { // 通过添加多个来实现从不同注销处理请求URL退出执行不同的逻辑
                    @Override
                    public void onLogoutSuccess(HttpServletRequest request, HttpServletResponse response, Authentication authentication) throws IOException, ServletException {
                        response.setContentType("application/json;charset=UTF-8");
                        Map<String, Object> result = new HashMap<String, Object>();
                        result.put("status", 200);
                        result.put("msg", "使用logout1注销成功!");
                        ObjectMapper om = new ObjectMapper();
                        String s = om.writeValueAsString(result);
                        response.getWriter().write(s);
                    }
                }, new AntPathRequestMatcher("/logout1", "GET"))
                .defaultLogoutSuccessHandlerFor(new LogoutSuccessHandler() {
                    @Override
                    public void onLogoutSuccess(HttpServletRequest request, HttpServletResponse response, Authentication authentication) throws IOException, ServletException {
                        response.setContentType("application/json;charset=UTF-8");
                        Map<String, Object> result = new HashMap<String, Object>();
                        result.put("status", 200);
                        result.put("msg", "使用logout2注销成功!");
                        ObjectMapper om = new ObjectMapper();
                        String s = om.writeValueAsString(result);
                        response.getWriter().write(s);
                    }
                }, new AntPathRequestMatcher("/logout2", "GET")).addLogoutHandler(new LogoutHandler() {
                    @Override
                    public void logout(HttpServletRequest request, HttpServletResponse response, Authentication authentication) {
                        System.out.println("-----自定义注销处理器------");
                    }
                })
        );

        // 开启 CSRF 保护
        http.csrf(Customizer.withDefaults());
        // 禁止 CSRF 保护
        // http.csrf(csrf -> csrf.disable());
        // 构造器构建SecurityFilterChain对象
        return http.build();
    }

    /**
     * 配置登录名密码
     *
     * @return
     */
    @Bean
    public UserDetailsService userDetailsService() {
        UserDetails user = User.withUsername("admin").password("{noop}123").roles("USER").build();
        return new InMemoryUserDetailsManager(new UserDetails[]{user});
    }
}
logoutUrl("/logout"):配置单个登录请求处理URL,用于修改LogoutFilter中拦截登录处理请求URL地址。在上文介绍过:开启
CSRF保护时匹配POST请求类型,关闭开启CSRF保护时匹配POST、GET、PUT、DELETE请求类型。logoutRequestMatcher(...):配置组合式请求处理匹配规则,用于不同的登录请求处理匹配不同的处理规则。defaultLogoutSuccessHandlerFor(...):配置基于不同的登录请求处理匹配不同的注销成功处理器。addLogoutHandler(...):配置添加自定义注销处理器。自定义注销处理器会添加到执行首位,并不会删除默认添加的处理器。
- 自定义清理项:
-
clearAuthentication(true):清理Authentication,默认true -
deleteCookies("",""):删除某些指定cookie -
invalidateHttpSession(true):设置当前登录用户Session(保存登录后的用户信息)无效,默认true
-
6.4 效果
6.4.1 登录确认效果


6.4.2 自定义注销成功处理器效果
