esp32-s3训练自己的数据进行目标检测、图像分类
esp32-s3训练自己的数据进行目标检测、图像分类
-
- 一、下载项目
- 二、环境
- 三、训练和导出模型
- 四、部署模型
- 五、存在的问题
esp-idf的安装参考我前面的文章: esp32cam和esp32-s3烧录human_face_detect实现人脸识别
一、下载项目
- 训练、转换模型:ModelAssistant(main)
- 部署模型:sscma-example-esp32(1.0.0)
- 说明文档:sscma-model-zoo
二、环境
python3.8 + CUDA11.7 + esp-idf5.0
# 主要按照ModelAssistant/requirements_cuda.txt,如果训练时有库不兼容的问题可参考下方
torch                        2.0.0+cu117
torchaudio                   2.0.1+cu117
torchvision                  0.15.1+cu117
yapf                         0.40.2
typing_extensions            4.5.0
tensorboard                  2.13.0
tensorboard-data-server      0.7.2
tensorflow                   2.13.0
keras                        2.13.1
tensorflow-estimator         2.13.0
tensorflow-intel             2.13.0
tensorflow-io-gcs-filesystem 0.31.0
sscma                        2.0.0rc3
setuptools                   60.2.0
rich                         13.4.2
Pillow                       9.4.0
mmcls                        1.0.0rc6
mmcv                         2.0.0
mmdet                        3.0.0
mmengine                     0.10.1
mmpose                       1.2.0
mmyolo                       0.5.0
三、训练和导出模型
- step 1: 将voc格式的标注文件转换为edgelab的训练格式,并按8:2的比例划分为训练集和验证集
import os
import json
import pandas as pd
from xml.etree import ElementTree as ET
from PIL import Image
import shutil
import random
from tqdm import tqdm

# Set paths
voc_path = 'F:/datasets/VOCdevkit/VOC2007'
train_path = 'F:/edgelab/ModelAssistant/datasets/myself/train'
valid_path = 'F:/edgelab/ModelAssistant/datasets/meself/valid'

# 只读取有目标的,且属于需要训练的类别
classes = ["face"]

# Create directories if not exist
if not os.path.exists(train_path):
    os.makedirs(train_path)
if not os.path.exists(valid_path):
    os.makedirs(valid_path)

# Get list of image files
image_files = os.listdir(os.path.join(voc_path, 'JPEGImages'))
random.seed(0)
random.shuffle(image_files)

# Split data into train and valid
train_files = image_files[:int(len(image_files)*0.8)]
valid_files = image_files[int(len(image_files)*0.8):]

# Convert train data to COCO format
train_data = {'categories': [], 'images': [], 'annotations': []}
train_ann_id = 0
train_cat_id = 0
img_id = 0
train_categories = {}
for file in tqdm(train_files):
    # Add annotations
    xml_file = os.path.join(voc_path, 'Annotations', file[:-4] + '.xml')
    tree = ET.parse(xml_file)
    root = tree.getroot()
    for obj in root.findall('object'):
        category = obj.find('name').text
        if category not in classes:
            continue
        if category not in train_categories:
            train_categories[category] = train_cat_id
            train_cat_id += 1
        category_id = train_categories[category]
        bbox = obj.find('bndbox')
        x1 = int(bbox.find('xmin').text)
        y1 = int(bbox.find('ymin').text)
        x2 = int(bbox.find('xmax').text)
        y2 = int(bbox.find('ymax').text)
        width = x2 - x1
        height = y2 - y1
        ann_info = {'id': train_ann_id, 'image_id': img_id, 'category_id': category_id, 'bbox': [x1, y1, width, height],
                   'area': width*height, 'iscrowd': 0}
        train_data['annotations'].append(ann_info)
        train_ann_id += 1

    if len(root.findall('object')):
        # 只有有目标的图片才加进来
        image_id = img_id
        img_id += 1
        image_file = os.path.join(voc_path, 'JPEGImages', file)
        shutil.copy(image_file, os.path.join(train_path, file))
        img = Image.open(image_file)
        image_info = {'id': image_id, 'file_name': file, 'width': img.size[0], 'height': img.size[1]}
        train_data['images'].append(image_info)


# Add categories
for category, category_id in train_categories.items():
    train_data['categories'].append({'id': category_id, 'name': category})

# Save train data to file
with open(os.path.join(train_path, '_annotations.coco.json'), 'w') as f:
    json.dump(train_data, f, indent=4)

# Convert valid data to COCO format
valid_data = {'categories': [], 'images': [], 'annotations': []}
valid_ann_id = 0
img_id = 0
for file in tqdm(valid_files):
    # Add annotations
    xml_file = os.path.join(voc_path, 'Annotations', file[:-4] + '.xml')
    tree = ET.parse(xml_file)
    root = tree.getroot()
    for obj in root.findall('object'):
        category = obj.find('name').text
        if category not in classes:
            continue
        category_id = train_categories[category]
        bbox = obj.find('bndbox')
        x1 = int(bbox.find('xmin').text)
        y1 = int(bbox.find('ymin').text)
        x2 = int(bbox.find('xmax').text)
        y2 = int(bbox.find('ymax').text)
        width = x2 - x1
        height = y2 - y1
        ann_info = {'id': valid_ann_id, 'image_id': img_id, 'category_id': category_id, 'bbox': [x1, y1, width, height],
                   'area': width*height, 'iscrowd': 0}
        valid_data['annotations'].append(ann_info)
        valid_ann_id += 1

    if len(root.findall('object')):
        # Add image
        image_id = img_id
        img_id += 1
        image_file = os.path.join(voc_path, 'JPEGImages', file)
        shutil.copy(image_file, os.path.join(valid_path, file))
        img = Image.open(image_file)
        image_info = {'id': image_id, 'file_name': file, 'width': img.size[0], 'height': img.size[1]}
        valid_data['images'].append(image_info)

# Add categories
valid_data['categories'] = train_data['categories']

# Save valid data to file
with open(os.path.join(valid_path, '_annotations.coco.json'), 'w') as f:
    json.dump(valid_data, f, indent=4)
- step 2: 参考Face Detection - Swift-YOLO下载模型权重文件和训练
python tools/train.py configs/yolov5/yolov5_tiny_1xb16_300e_coco.py \
--cfg-options  \
    work_dir=work_dirs/face_96 \
    num_classes=3 \
    epochs=300  \
    height=96 \
    width=96 \
    batch=128 \
    data_root=datasets/face/ \
    load_from=datasets/face/pretrain.pth
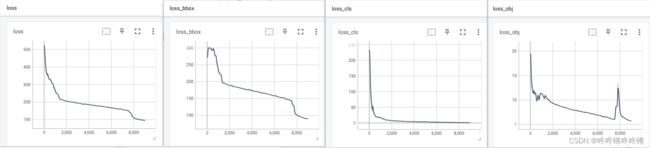
- step 3: 训练过程可视化tensorboard
cd work_dirs/face_96/20231219_181418/vis_data
tensorboard --logdir=./
然后按照提示打开http://localhost:6006/
- step 4: 导出模型
python tools/export.py configs/yolov5/yolov5_tiny_1xb16_300e_coco.py ./work_dirs/face_96/best_coco_bbox_mAP_epoch_300.pth --target tflite onnx
--cfg-options  \
    work_dir=work_dirs/face_96 \
    num_classes=3 \
    epochs=300  \
    height=96 \
    width=96 \
    batch=128 \
    data_root=datasets/face/ \
    load_from=datasets/face/pretrain.pth
这样就会在./work_dirs/face_96路径下生成best_coco_bbox_mAP_epoch_300_int8.tflite文件了。
四、部署模型
- step 1: 将
best_coco_bbox_mAP_epoch_300_int8.tflite复制到F:\edgelab\sscma-example-esp32-1.0.0\model_zoo路径下 - 参照edgelab-example-esp32-训练和部署一个FOMO模型将模型转换为C语言文件,并将其放入到
F:\edgelab\sscma-example-esp32-1.0.0\components\modules\model路径下
python tools/tflite2c.py --input ./model_zoo/best_coco_bbox_mAP_epoch_300_int8.tflite --name yolo --output_dir ./components/modules/model --classes face
这样会生成./components/modules/model/yolo_model_data.cpp和yolo_model_data.h两个文件。
- step 3: 利用idf烧录程序
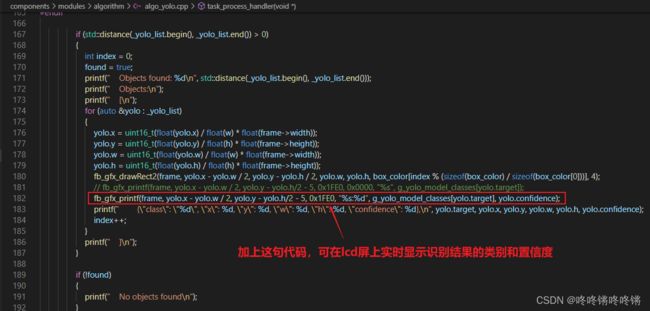
fb_gfx_printf(frame, yolo.x - yolo.w / 2, yolo.y - yolo.h/2 - 5, 0x1FE0, "%s:%d", g_yolo_model_classes[yolo.target], yolo.confidence);
打开esp-idf cmd
cd F:\edgelab\sscma-example-esp32-1.0.0\examples\yolo
idf.py set-target esp32s3
idf.py menuconfig
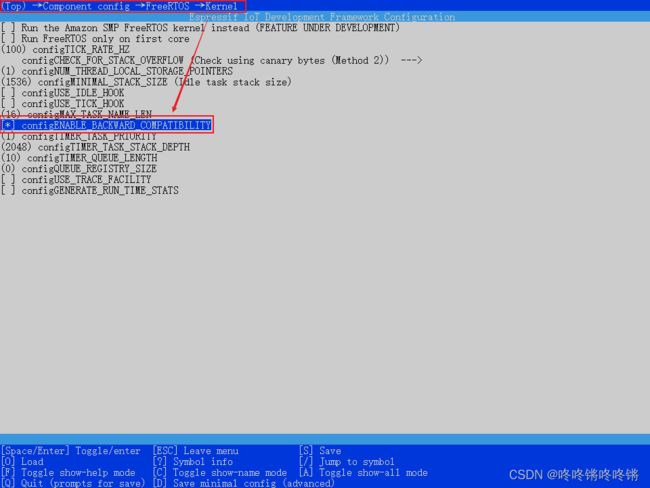 勾选上方的这个选项不然报错
E:/Softwares/Espressif/frameworks/esp-idf-v5.0.4/components/driver/deprecated/driver/i2s.h:27:2: warning: #warning "This set of I2S APIs has been deprecated, please include 'driver/i2s_std.h', 'driver/i2s_pdm.h' or 'driver/i2s_tdm.h' instead. if you want to keep using the old APIs and ignore this warning, you can enable 'Suppress leagcy driver deprecated warning' option under 'I2S Configuration' menu in Kconfig" [-Wcpp]
   27 | #warning "This set of I2S APIs has been deprecated, \
      |  ^~~~~~~
ninja: build stopped: subcommand failed.
ninja failed with exit code 1, output of the command is in the F:\edgelab\sscma-example-esp32-1.0.0\examples\yolo\build\log\idf_py_stderr_output_27512 and F:\edgelab\sscma-example-esp32-1.0.0\examples\yolo\build\log\idf_py_stdout_output_27512
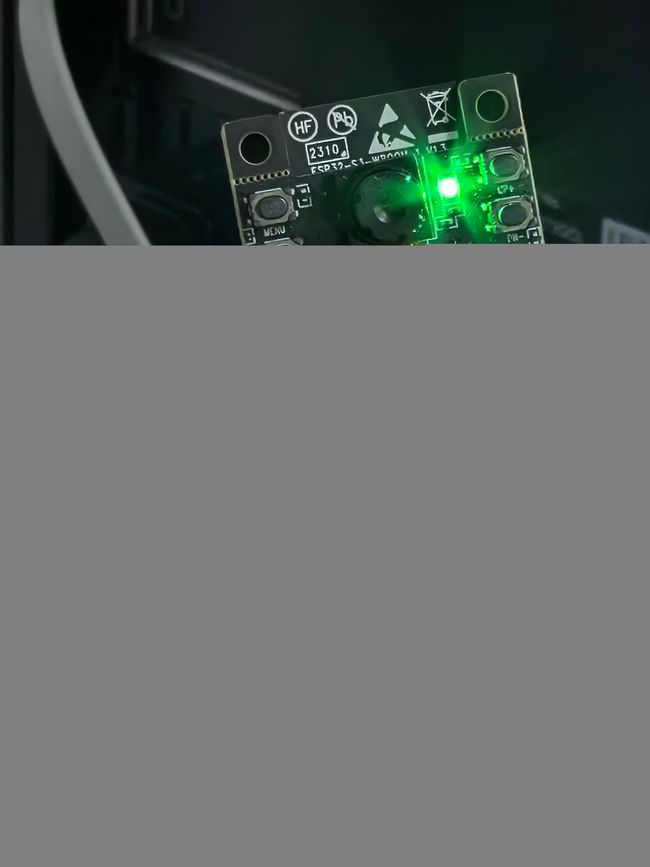
idf.py flash monitor -p COM3
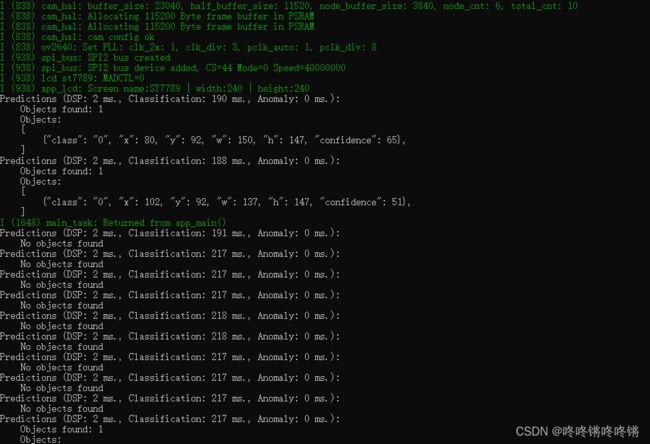
lcd端也能实时显示识别结果,输入大小为96x96时推理时间大概200ms,192x192时时间大概660ms
五、存在的问题
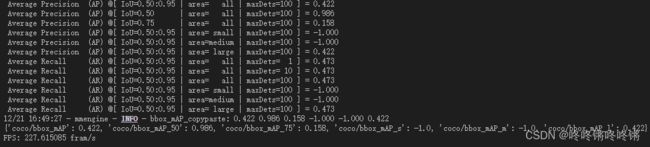
该链路中量化是比较简单的,在我的数据集上量化后精度大打折扣,应该需要修改量化算法,后续再说吧。
- 量化前
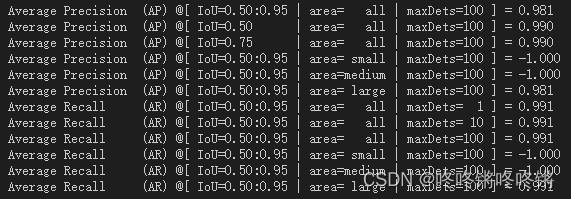
- 量化后