Ubuntu常用软件安装与问题解决(持续更新)
Ubuntu常用软件安装(持续更新)
| 日常软件 | 常用工具 | 开发工具 | 快捷键 | 安装问题 |
|---|---|---|---|---|
| Linux-QQ | 录屏-SimpleScreenRecorder | Qt5 | 截屏 | Could not get lock |
| 视频播放器-SMPlayer | Python3.8 | 录屏 | Fail to Fetch | |
| Pip3 | ModuleNotFound | |||
| PyCharm | ||||
| Manim-Community | ||||
| JAVA | ||||
| IDEA |
日常软件
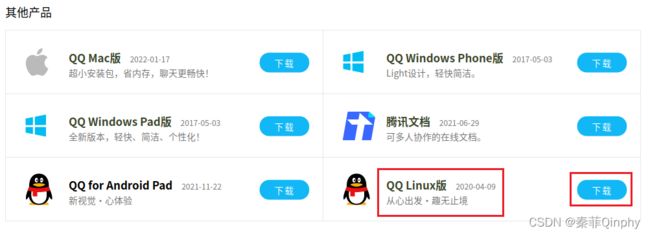
Linux-QQ
-
先去QQ官网,下载linux版的QQ:
-
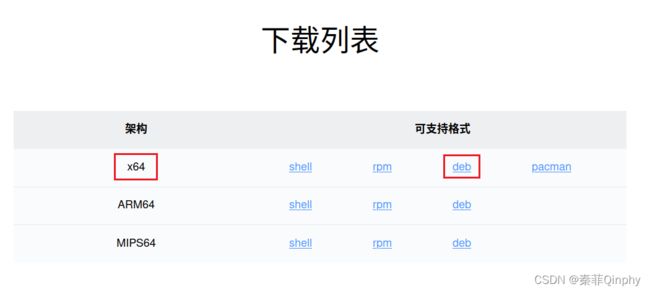
选择deb后缀的版本:
# 查看版本,一般都是x64
uname -a
-
安装命令:
# 到下载文件所在位置(一般是下载Download目录)中,打开终端,输入命令: sudo dpkg -i linuxqq_2.0.0-b2-1089_amd64.deb # 注意: linuxqq_2.0.0-b2-1089_amd64.deb是下载的安装包的名称 -
卸载命令:
sudo dpkg -r linuxqq
视频播放器-SMPlayer
安装命令:
sudo apt-add-repository ppa:rvm/smplayer
sudo apt-get update
sudo apt-get install smplayer smtube smplayer-skins smplayer-themes
注意: 网络不好容易失败,建议去ubuntu自带的安装软件搜索SMPlayer安装。
设置SMPlayer为默认播放器:
设置(Setting)->默认应用(Default Application)->找到Videos选择SMPlayer。
常用工具
录屏-SimpleScreenRecorder
安装命令:
sudo add-apt-repository -y ppa:maarten-baert/simplescreenrecorder
sudo apt-get update
sudo apt-get install simplescreenrecorder
如果想要删除apt-repository:
sudo add-apt-repository -r ppa:maarten-baert/simplescreenrecorder
开发工具
Qt5
安装命令:
sudo apt-get install cmake qt5-default qtcreator
卸载命令:
sudo apt-get remove qt5-default qtcreator
sudo apt-get autoremove
Python3.8
安装命令:
sudo apt-get install software-properties-common
sudo add-apt-repository ppa:deadsnakes/ppa
sudo apt-get update
sudo apt-get install python3.8
检测是否安装成功:
python3 --verion
Pip3
# 之前要安装python
sudo apt-get install python3-pip
PyCharm
安装命令:
sudo add-apt-repository ppa:viktor-krivak/pycharm
sudo apt-get update
sudo apt install pycharm
# 如果安装专业版:
sudo apt install pycharm-professional
默认保存项目路径:/home/你的用户名/PycharmProjects/你的项目名称。
卸载命令:
sudo apt remove --autoremove pycharm pycharm-professional
Manim-Community
安装命令:
sudo apt update
# 安装pycairo和pango
sudo apt install libcairo2-dev
sudo apt install libpango1.0-dev
# 安装ffmepg可能网络不好而error, 推荐修改镜像源为ustc的镜像源(详见"常见错误-Failed to fetch")
sudo apt install ffmpeg

# 这步之前要安装python和pip3
pip3 install manim
# 这里出现一个错误,安装pygments失败: 已安装pygment2.3.0版本,所以需要更新pygments
pip3 install --upgrade pygments
# 或者安装指定版本的pygments, 要选择2.6.0~3.0.0之间的版本
pip3 install pygments==2.6.0
JAVA
安装命令:
sudo apt-get install openjdk-8-jdk
# 不带版本号,默认安装最新版本(推荐java8)
sudo apt-get install openjdk
Idea
安装命令:
# 在之前要安装Java
sudo add-apt-repository ppa:mmk2410/intelij-idea
sudo apt-get update
# 安装社区版
sudo apt-get install intellij-idea-community
# 或者安装旗舰版
sudo apt-get install intellij-idea-ultimate
常用快捷键
截屏
-
Ubuntu自带截屏功能(不好用,因为他自动复制在剪切板上):
全屏: Ctrl+Alt+PrtSc
选取区域: Ctrl+Shift+PrtSc
-
Ubuntu自带截屏软件ScreenShot(自动保存图片在Pictures目录内):
自由选区: Shift+PrtSc
截取全屏: Alt+PrtSc
录屏
-
Ubuntu自带的ScreenShot软件可录屏为webm格式(建议使用SimpleScreenRecorder):
快捷键为: Ctrl+Alt+Shift+R(自动保存在Videos目录)
安装的常见问题
Could not get lock
问题描述:
E: Could not get lock /var/lib/apt/lists/lock - open (11: Resource temporarily unavailable)
E: Unable to lock directory /var/lib/apt/lists/
问题解决:
sudo rm -vf /var/lib/apt/lists/*
sudo apt-get update
Failed to fetch
问题描述:
E: Failed to fetch http://cn.archive.ubuntu.com/ubuntu/pool/universe/x/x264/libx264-155_0.155.2917+git0a84d98-2_amd64.deb  Connection failed [IP: 91.189.91.39 80]
E: Failed to fetch http://cn.archive.ubuntu.com/ubuntu/pool/universe/x/x265/libx265-179_3.2.1-1build1_amd64.deb  Connection failed [IP: 91.189.91.39 80]
E: Unable to fetch some archives, maybe run apt-get update or try with --fix-missing?

sudo apt-get update --fix-missing

Err:1 http://cn.archive.ubuntu.com/ubuntu focal InRelease
  Connection failed [IP: 91.189.91.39 80]
Err:2 http://security.ubuntu.com/ubuntu focal-security InRelease
  Connection failed [IP: 91.189.91.38 80]
Hit:3 http://ppa.launchpad.net/maarten-baert/simplescreenrecorder/ubuntu focal InRelease
Err:4 http://cn.archive.ubuntu.com/ubuntu focal-updates InRelease
  Connection failed [IP: 91.189.91.38 80]
Err:5 http://cn.archive.ubuntu.com/ubuntu focal-backports InRelease
  Connection failed [IP: 91.189.91.39 80]
Reading package lists... Done
W: Failed to fetch http://cn.archive.ubuntu.com/ubuntu/dists/focal/InRelease  Connection failed [IP: 91.189.91.39 80]
W: Failed to fetch http://cn.archive.ubuntu.com/ubuntu/dists/focal-updates/InRelease  Connection failed [IP: 91.189.91.38 80]
W: Failed to fetch http://cn.archive.ubuntu.com/ubuntu/dists/focal-backports/InRelease  Connection failed [IP: 91.189.91.39 80]
W: Failed to fetch http://security.ubuntu.com/ubuntu/dists/focal-security/InRelease  Connection failed [IP: 91.189.91.38 80]
W: Some index files failed to download. They have been ignored, or old ones used instead.
问题解决:
# 修改DNS地址
sudo echo "nameserver 8.8.8.8" | sudo tee /etc/resolv.conf > /dev/null
# 可换的DNS有:
# 114公共DNS: 114.114.114.114和114.114.115.115
# 阿里的DNS: 223.5.5.5和223.6.6.6、
# 腾讯的DNS: 119.29.29.29和182.254.116.116
# 百度的DNS: 180.76.76.76
# Google的DNS: 8.8.8.8和8.8.4.4

# 测试是否修改成功:
cat /etc/resolv.conf
# 重新更新
sudo apt-get update --fix-missing
如果老是遇到Fail to Fetch的问题,还可以添加镜像网站:
# 保险起见可以备份一下这个需要更改的文件
sudo cp /etc/apt/sources.list /etc/apt/sources.list.bak
sudo gedit /etc/apt/sources.list
添加如下镜像网站:
deb https://mirrors.ustc.edu.cn/ubuntu/ bionic main restricted universe multiverse
deb-src https://mirrors.ustc.edu.cn/ubuntu/ bionic main restricted universe multiverse
deb https://mirrors.ustc.edu.cn/ubuntu/ bionic-updates main restricted universe multiverse
deb-src https://mirrors.ustc.edu.cn/ubuntu/ bionic-updates main restricted universe multiverse
deb https://mirrors.ustc.edu.cn/ubuntu/ bionic-backports main restricted universe multiverse
deb-src https://mirrors.ustc.edu.cn/ubuntu/ bionic-backports main restricted universe multiverse
deb https://mirrors.ustc.edu.cn/ubuntu/ bionic-security main restricted universe multiverse
deb-src https://mirrors.ustc.edu.cn/ubuntu/ bionic-security main restricted universe multiverse
deb https://mirrors.ustc.edu.cn/ubuntu/ bionic-proposed main restricted universe multiverse
deb-src https://mirrors.ustc.edu.cn/ubuntu/ bionic-proposed main restricted universe multiverse

deb https://mirrors.tuna.tsinghua.edu.cn/ubuntu/ xenial main restricted universe multiverse
# deb-src https://mirrors.tuna.tsinghua.edu.cn/ubuntu/ xenial main restricted universe multiverse
deb https://mirrors.tuna.tsinghua.edu.cn/ubuntu/ xenial-updates main restricted universe multiverse
# deb-src https://mirrors.tuna.tsinghua.edu.cn/ubuntu/ xenial-updates main restricted universe multiverse
deb https://mirrors.tuna.tsinghua.edu.cn/ubuntu/ xenial-backports main restricted universe multiverse
# deb-src https://mirrors.tuna.tsinghua.edu.cn/ubuntu/ xenial-backports main restricted universe multiverse
deb https://mirrors.tuna.tsinghua.edu.cn/ubuntu/ xenial-security main restricted universe multiverse
# deb-src https://mirrors.tuna.tsinghua.edu.cn/ubuntu/ xenial-security main restricted universe multiverse

deb http://mirrors.aliyun.com/ubuntu/ trusty main multiverse restricted universe
deb http://mirrors.aliyun.com/ubuntu/ trusty-backports main multiverse restricted universe
deb http://mirrors.aliyun.com/ubuntu/ trusty-proposed main multiverse restricted universe
deb http://mirrors.aliyun.com/ubuntu/ trusty-security main multiverse restricted universe
deb http://mirrors.aliyun.com/ubuntu/ trusty-updates main multiverse restricted universe
deb-src http://mirrors.aliyun.com/ubuntu/ trusty main multiverse restricted universe
deb-src http://mirrors.aliyun.com/ubuntu/ trusty-backports main multiverse restricted universe
deb-src http://mirrors.aliyun.com/ubuntu/ trusty-proposed main multiverse restricted universe
deb-src http://mirrors.aliyun.com/ubuntu/ trusty-security main multiverse restricted universe
deb [arch=amd64] https://download.docker.com/linux/ubuntu xenial stable
# deb-src [arch=amd64] https://download.docker.com/linux/ubuntu xenial stable
# deb-src [arch=amd64] https://download.docker.com/linux/ubuntu xenial stable
deb-src http://mirrors.aliyun.com/ubuntu/ trusty-updates main multiverse restricted universe
# deb-src [arch=amd64] https://download.docker.com/linux/ubuntu xenial stable
ModuleNotFoundError
distutils
错误描述:
ModuleNotFoundError: No module named 'distutils.core'
解决办法: 安装pip
# 之前要安装python
sudo apt-get install python3-pip