springboot整合mybatis
整合Spring Boot与MyBatis框架的步骤如下:
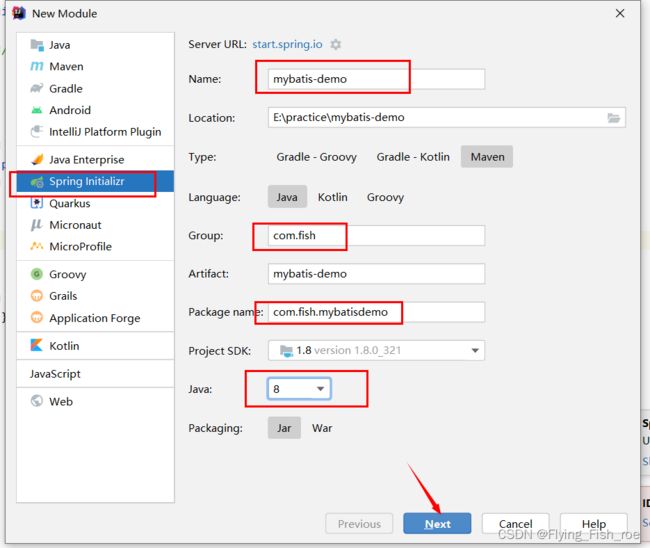
步骤1:创建Spring Boot项目
- 在IDE中创建一个新的Spring Boot项目。
步骤2:添加相关依赖
- 在项目的pom.xml文件中添加以下依赖:
            org.springframework.boot
            spring-boot-starter-web


            org.mybatis.spring.boot
            mybatis-spring-boot-starter
            2.1.4


            mysql
            mysql-connector-java
步骤3:配置数据库连接
- 在application.properties或application.yml文件中添加数据库连接的相关配置:
这里我就用properties
将username以及password还有db_name 换成自己的
   spring.datasource.url=jdbc:mysql://localhost:3306/db_name
    spring.datasource.username=db_username
    spring.datasource.password=db_password
    spring.datasource.driverClassName=com.mysql.jdbc.Driver
yml形式的
spring:
  datasource:
    url: jdbc:mysql://localhost:3306/db_name?useSSL=false&useUnicode=true&characterEncoding=utf-8&serverTimezone=Asia/Shanghai&allowMultiQueries=true
    username: your_name
    password: your_password
此外还要进行classpath的配置:
如果你想指定MyBatis的Mapper文件所在的类路径,可以在配置文件中添加以下配置:
YAML格式:
mybatis:
  mapper-locations: classpath:com/example/mapper/*.xml
Properties格式:
mybatis.mapper-locations=classpath:com/example/mapper/*.xml上述配置表示Mapper文件位于`com/example/mapper/`目录下,并且文件后缀为`.xml`。
此外,如果你的Mapper文件位于不同的路径下,也可以使用多个`classpath`来指定多个路径:
YAML格式:
mybatis:
  mapper-locations:
    - classpath:com/example/mapper1/*.xml
    - classpath:com/example/mapper2/*.xml
Properties格式:
mybatis.mapper-locations=classpath:com/example/mapper1/*.xml, classpath:com/example/mapper2/*.xml步骤4:创建实体类和Mapper接口以及配置类
- 在src/main/java目录下创建实体类和Mapper接口,实体类用于映射数据库表的字段,Mapper接口用于定义CRUD操作的方法。
@Configuration
@MapperScan("com.fish.mapper")
public class MybatisConfiguration {
}
步骤5:编写Mapper.xml文件
- 在src/main/resources目录下创建Mapper.xml文件,用于编写SQL语句和映射关系。
INSERT INTO user (name, email) VALUES (#{name}, #{email})
UPDATE user SET name = #{name}, email = #{email} WHERE id = #{id}
DELETE FROM user WHERE id = #{id}
当在MyBatis的Mapper.xml文件中编写SQL语句时,我们可以使用一些特殊的语法来实现动态的SQL拼接,比如:
1. If语句
在上述示例中,
2. Where语句与判断语句
在上述示例中,
3. Choose语句(类似于Java中的switch语句)
在上述示例中,
在上述示例的XML文件中,你可以看到以下SQL语句涉及到的语法:
- `