ambari的安装
一、准备工作
1、机器信息
| ip地址 | 机器名 |
|---|---|
| 172.18.1.22 | bgsbtsp0006-dqf |
| 172.18.1.23 | bgsbtsp0007-dqf |
| 172.18.1.24 | bgsbtsp0008-dqf |
| 172.18.1.25 | bgsbtsp0009-dqf |
| 172.18.1.26 | bgsbtsp0010-dqf |
2、创建ambari用户并初始化密码
[root@bgsbtsp0006-dqf ~]# for i in {22..26}; do ssh 172.18.1.$i "groupadd ambari && useradd -g ambari -d /home/ambari ambari"; done

[root@bgsbtsp0006-dqf ~]# for i in {22..26}; do ssh 172.18.1.$i "echo 'baifendian' | passwd --stdin ambari"; done
3、ambari用户之间打通key(root用户也需要免秘钥打通)
[root@bgsbtsp0006-dqf ~]# su - ambari
[ambari@bgsbtsp0006-dqf ~]$ ssh-keygen -t rsa

Generating public/private rsa key pair.

Enter file in which to save the key (/home/ambari/.ssh/id_rsa): Created directory '/home/ambari/.ssh'.
Enter passphrase (empty for no passphrase):
Enter same passphrase again:
Your identification has been saved in /home/ambari/.ssh/id_rsa.
Your public key has been saved in /home/ambari/.ssh/id_rsa.pub.
The key fingerprint is:
SHA256:sej6QxrYlRgpLZx+ib2ffIg3ttSe0hoCsSd04UDGVjo ambari@bgsbtsp0006-dqf
The key's randomart image is:
+---[RSA 2048]----+
| +++o.           |
| .B++.           |
| oE=o+ ..        |
| .o== o. o       |
|  ++.o. S        |
|  .++...         |
|    .B++.        |
|    o+@oo.       |
|    .++Bo        |
+----[SHA256]-----+
4、验证是否打通
[ambari@bgsbtsp0006-dqf ~]$ for i in {22..26};do ssh 172.18.1.$i "echo Ok";done
Ok
Ok
Ok
Ok
Ok
5、mysql的安装
mysql-5.5.39版本的安装
mysql-5.7.20版本的安装
6、后续要装hive组件,需要先在mysql中创建hived的源数据库
[ambari@bgsbtsp0006-dqf ~]$ mysql -uroot -p
Enter password:
[ambari@bgsbtsp0006-dqf ~]$ mysql -uroot -p
Enter password:
mysql> create database hive character set utf8;
Query OK, 1 row affected (0.00 sec)
mysql> create user hive identified by 'baifendian';
Query OK, 1 row affected (0.00 sec)
mysql> grant all privileges on hive.* to 'hive'@'localhost' identified BY 'baifendian';
Query OK, 0 rows affected, 1 warning (0.00 sec)
mysql> grant all privileges on hive.* to 'hive'@'172.18.1.22' identified BY 'baifendian';
Query OK, 0 rows affected, 1 warning (0.00 sec)
mysql> grant all privileges on hive.* to 'hive'@'bgsbtsp0006-dqf' identified BY 'baifendian';
Query OK, 0 rows affected, 1 warning (0.00 sec)
mysql> grant all privileges on hive.* to 'hive'@'%' identified BY 'baifendian';
Query OK, 0 rows affected, 1 warning (0.00 sec)
mysql> flush privileges;
Query OK, 0 rows affected (0.00 sec)
7、配置yum源
用的公司配好的yum源,可以自己配置,repo文件也需要放到agent端机器,(安装大数据组件需要)
[root@hadoop1 yum.repos.d]# cd /etc/yum.repos.d
 wget http://mirror.baifendian.com/yum/HDP/centos7/2.x/updates/2.6.1.0/hdp.repo
 wget http://mirror.baifendian.com/yum/HDP-UTILS-1.1.0.21/repos/centos7/hdp-util.repo
 wget http://mirror.baifendian.com/yum/ambari/centos7/ambari.repo
 wget http://mirror.baifendian.com/yum/centos/CentOS-Base.repo
 wget http://mirror.baifendian.com/yum/epel/epel.repo
8、时间同步
最简单的是手同步执行date -s 'xxx:xxx:xxx'
ntp时间同步服务器
9、检查防火墙
[root@hadoop1 opt]# service iptables status
[root@hadoop1 opt]# service iptables stop
10、检查java是否安装
jdk的tar包安装
二、开始安装ambari
1、ambari数据库创建(上面的内容是后来加的,所以和下面机器名称对不上,上面是为了部署大数据组件所做的准备,ambari的安装只需要在一台机器上即可。)
[ambari@hadoop1 opt]# mysql -uroot -p

mysql> create database ambari character set utf8;

mysql> create user ambari identified by '1234';

mysql> grant all privileges on ambari.* to 'ambari'@'localhost' identified by '1234';

mysql> grant all privileges on ambari.* to 'ambari'@'%' identified by '1234';

mysql> grant all privileges on ambari.* to 'ambari'@'192.168.30.145' identified by '1234';

mysql> flush privileges;
Query OK, 0 rows affected (0.00 sec)

mysql> quit;
Bye
三、ambari的安装
[root@hadoop1 opt]# yum install ambari-server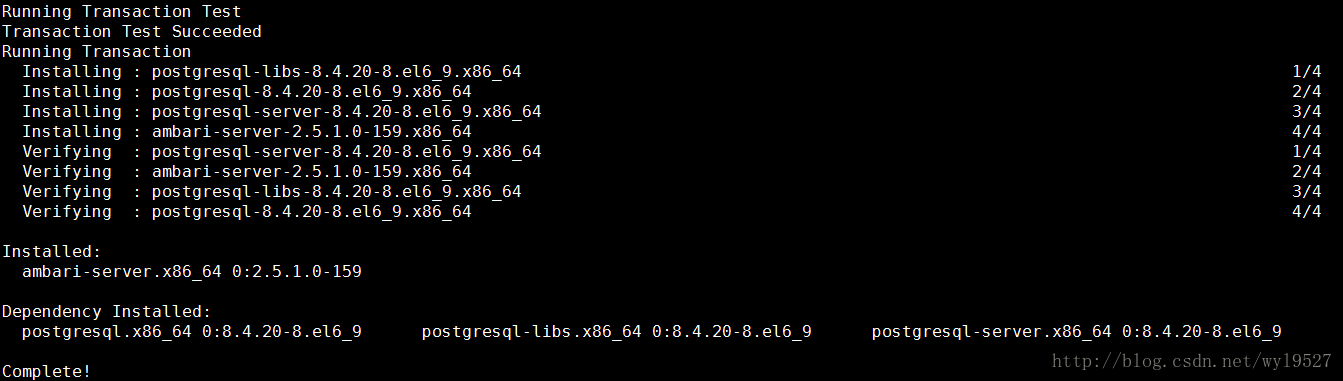
[root@hadoop1 opt]# ambari-server setup
解决方案:
#除了server端要升级mysql-connetor,agent端也需要安装,切记。
[root@hadoop1 opt]# yum install mysql-connector-java -y
[root@hadoop1 opt]# cd /usr/share/java/
[root@hadoop1 java]# ls
[root@hadoop1 opt]# ambari-server setup
[root@hadoop1 mysql]# ambari-server setup
Using python /usr/bin/python
Setup ambari-server
Checking SELinux...
SELinux status is 'disabled'
Customize user account for ambari-server daemon [y/n] (n)? y
Enter user account for ambari-server daemon (root):ambari
Adjusting ambari-server permissions and ownership...
Checking firewall status...
Checking JDK...
Do you want to change Oracle JDK [y/n] (n)? y
[1] Oracle JDK 1.8 + Java Cryptography Extension (JCE) Policy Files 8
[2] Oracle JDK 1.7 + Java Cryptography Extension (JCE) Policy Files 7
[3] Custom JDK
==============================================================================
Enter choice (1): 3
WARNING: JDK must be installed on all hosts and JAVA_HOME must be valid on all hosts.
WARNING: JCE Policy files are required for configuring Kerberos security. If you plan to use Kerberos,please make sure JCE Unlimited Strength Jurisdiction Policy Files are valid on all hosts.
Path to JAVA_HOME: /opt/java
Validating JDK on Ambari Server...done.
Completing setup...
Configuring database...
Enter advanced database configuration [y/n] (n)? y
Configuring database...
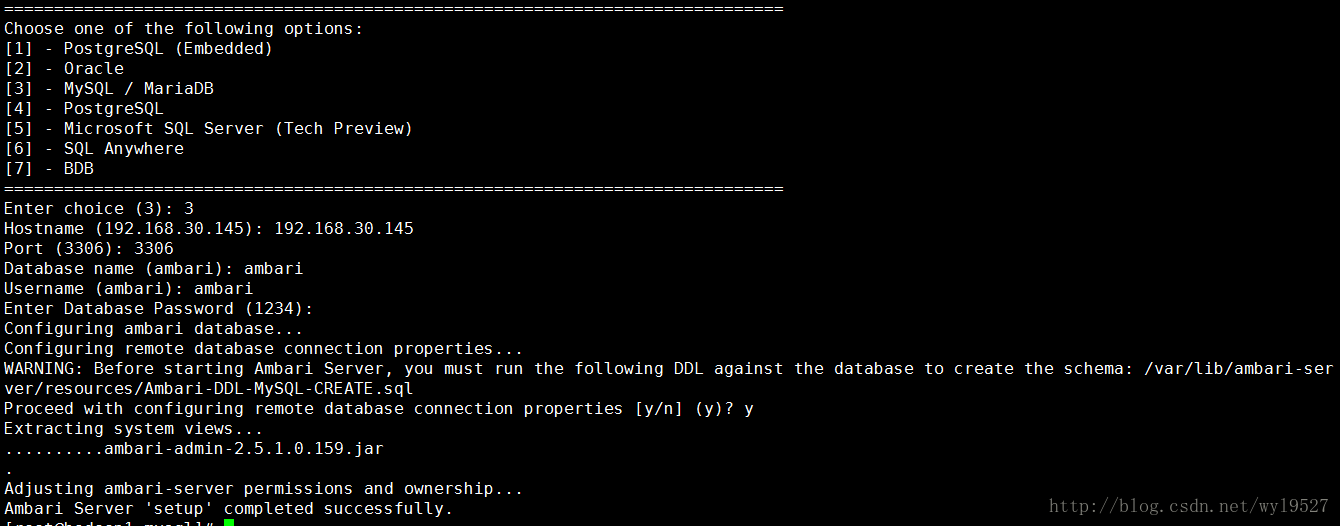
==============================================================================
Choose one of the following options:
[1] - PostgreSQL (Embedded)
[2] - Oracle
[3] - MySQL / MariaDB
[4] - PostgreSQL
[5] - Microsoft SQL Server (Tech Preview)
[6] - SQL Anywhere
[7] - BDB
==============================================================================
Enter choice (3): 3
Hostname (192.168.30.145): 192.168.30.145
Port (3306): 3306
Database name (ambari): ambari
Username (ambari): ambari
Enter Database Password (1234):
Configuring ambari database...
Configuring remote database connection properties...
WARNING: Before starting Ambari Server, you must run the following DDL against the database to create the schema: /var/lib/ambari-server/resources/Ambari-DDL-MySQL-CREATE.sql
Proceed with configuring remote database connection properties [y/n] (y)? y
Extracting system views...
..........ambari-admin-2.5.1.0.159.jar
.
Adjusting ambari-server permissions and ownership...
Ambari Server 'setup' completed successfully.
ambari数据库脚本导入
[ambari@bgs-8p80-udp-01 soft]# mysql -uambari -p

mysql> use ambari;
Database changed
mysql> source /var/lib/ambari-server/resources/Ambari-DDL-MySQL-CREATE.sql;

Query OK, 0 rows affected (0.03 sec)
Records: 0  Duplicates: 0  Warnings: 0
.....

Query OK, 0 rows affected (0.03 sec)
Records: 0  Duplicates: 0  Warnings: 0

Query OK, 0 rows affected (0.08 sec)
Records: 0  Duplicates: 0  Warnings: 0

Query OK, 0 rows affected (0.02 sec)
Records: 0  Duplicates: 0  Warnings: 0

Query OK, 0 rows affected (0.00 sec)
设置Setup-JDBC
[root@hadoop1 opt]# ambari-server setup --jdbc-db=mysql --jdbc-driver=/usr/share/java/mysql-connector-java.jar
Using python  /usr/bin/python
Setup ambari-server
Copying /usr/share/java/mysql-connector-java.jar to /var/lib/ambari-server/resources
If you are updating existing jdbc driver jar for mysql with mysql-connector-java.jar. Please remove the old driver jar, from all hosts. Restarting services that need the driver, will automatically copy the new jar to the hosts.
JDBC driver was successfully initialized.
Ambari Server 'setup' completed successfully.
启动ambari,默认端口是8080,如果端口被占用修改配置文件 /etc/ambari-server/conf/ambari.properties
默认情况下配置文件中没有这个选项,添加上就可以。
client.api.port=8090然后启动
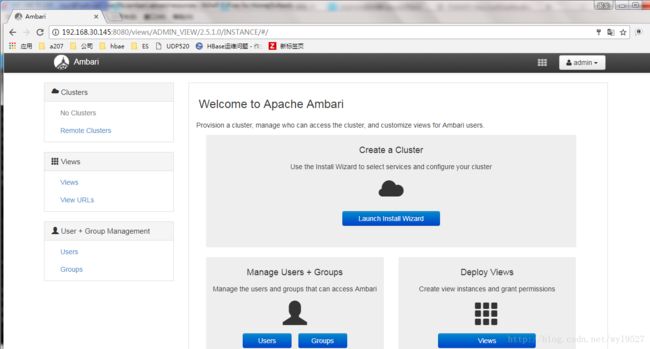
[root@hadoop1 opt]# ambari-server start在浏览器中的打开ambari的访问页面,用户名和密码默认为admin。