OpenGL再虐亿遍 - 多个帧缓存Framebuffer绘制到同一个铺满屏幕四边形Quad上
1 目的/需求
举个例子,假如我在一个帧缓存中专门绘制了Phong光照模型的物体,在另一个帧缓存中专门绘制了Pbr光照模型的物体,在第三个帧缓存中只绘制了只有单一颜色的物体,等于现在我有三个离屏渲染的帧缓存,我需要把他们都绘制到铺满整个屏幕的同一个四边形中,同时保证深度测试,即在同一场景中绘制不同光照模型的物体,同时,保证在物体绘制重叠区域,深度测试正确!
How to do ?
2 方法
2.1 比较笨比的方法
- 新建一个新的帧缓存用于存储合并多个帧缓存的结果,
- 同时新建一个shader,以每一个帧缓存的颜色缓存和深度缓存作为输入,手动比较所有帧缓存的深度缓存,深度缓存最小的(最接近于0)的相对应的帧缓存的颜色缓存取为当前像素点的颜色。
这个方法属于比较笨比的方法,这个过程等于需要手动执行深度测试来决定当前像素点的颜色。
参考链接:https://stackoverflow.com/questions/47541674/merging-two-separate-framebuffers-onto-default-framebuffer-after-depth-testing
shader参考:
顶点着色器:
#version 330 core

layout (location = 0) in vec3 vPosition;
layout (location = 1) in vec3 vNormal;
layout (location = 2) in vec2 vTexureCoords;

out vec2 TextureCoords;

void main()
{
	TextureCoords = vTexureCoords;
	gl_Position = vec4(vPosition,1.0);
}
片段着色器:
#version 330 core

in vec2 TextureCoords;

// 使用帧缓存数组相关全局参数
#define FRAMEBUFFER_MAX_SIZE 5
struct FramebufferTexture
{
        sampler2D ColorTexture;
        sampler2D DepthTexture;
};

uniform FramebufferTexture framebufferTexture[FRAMEBUFFER_MAX_SIZE];

uniform int FRAMEBUFFER_NUM;

// 相机透视投影远近平面
uniform float NearPlane;
uniform float FarPlane;

// Tip: 深度0距离眼睛最近,深度1距离眼睛最远
// (0.0,0.0,0.0)表示黑色,(1.0,1.0,1.0)表示白色
// 越黑代表离眼睛更近,越白代表离眼睛更远


// 透视投影下将片段深度值转换为线性深度值,而正视投影本身深度值就是线性的,不需要转换
// depth : 当前片段的深度值
// nearPlane : 近平面
// farPlane : 远平面
// 参考网址 :
// (1) https://learnopengl.com/Advanced-Lighting/Shadows/Shadow-Mapping
// (2) https://learnopengl-cn.github.io/05%20Advanced%20Lighting/03%20Shadows/01%20Shadow%20Mapping/
float PerspectiveProjectionLinearizeDepth(float depth,float nearPlane,float farPlane)
{
    float z = depth * 2.0 - 1.0; // Back to NDC
    float linearDepth =  (2.0 * nearPlane * farPlane) / (farPlane + nearPlane - z * (farPlane - nearPlane));
        linearDepth /= farPlane;
        return linearDepth;
}


// 得到所有深度图中深度值最小的元素索引
int GetMinDepthTextureIndex()
{
        float minDepth = texture(framebufferTexture[0].DepthTexture,TextureCoords).r;
        minDepth = PerspectiveProjectionLinearizeDepth(minDepth,NearPlane,FarPlane);
        int minIndex = 0;
        for(int i = 0; i < FRAMEBUFFER_NUM; ++i)
        {
                float tempDepth = texture(framebufferTexture[i].DepthTexture,TextureCoords).r;
                tempDepth = PerspectiveProjectionLinearizeDepth(tempDepth,NearPlane,FarPlane);

        if(tempDepth <= minDepth)
        {
                minIndex = i;
                minDepth = tempDepth;
        }
        }

        return minIndex;
}


out vec4 FragColor;

void main()
{
	  int index = GetMinDepthTextureIndex();

      FragColor = texture(framebufferTexture[index].ColorTexture,TextureCoords);
}
2.2 利用系统自带的深度测试
我们看上述的方法,有一个非常明显的缺点就是在计算每一个像素点的颜色时都需要对每一个像素点的深度值进行最小值求解,这是个效率很低的方法,但是它给我们提供了一个思路,就是我们需要将每一个帧缓存的深度值引入到深度测试中,那我们该怎么做呢?
- 就像平时我们将帧缓存绘制到铺满屏幕上的操作一样,画一个铺满屏幕的四边形,然后将帧缓存的颜色缓存绘制到该四边形上
- 将帧缓存的的深度缓存同时传入到shader中,同时取该像素在帧缓存中的深度值作为该像素点的深度值
- 同时在绘制四边形开启深度测试,这样在我们绘制多个帧缓存时会多次比较该像素点在每一个帧缓存的深度值,最后自动取的深度值最靠前的帧缓存颜色作为该像素点的颜色。
参考shader
顶点着色器:
#version 330 core

layout (location = 0) in vec3 vPosition;
layout (location = 1) in vec3 vNormal;
layout (location = 2) in vec2 vTexureCoords;

out vec2 TextureCoords;

void main()
{
	TextureCoords = vTexureCoords;
	gl_Position = vec4(vPosition,1.0);
}
片段着色器:
#version 330 core

in vec2 TextureCoords;

uniform sampler2D ScreenTexture;
uniform sampler2D DepthTexture;

uniform bool IsDepth;
uniform bool IsUseSingleColor;
uniform bool IsTransferDepth;

out vec4 FragColor;

void main()
{
	vec3 color = vec3(0.0,0.0,0.0);
	color = texture(ScreenTexture,TextureCoords).rgb;
	float depth = texture(DepthTexture,TextureCoords).r;
	gl_FragDepth = depth;
	FragColor = vec4(color,1.0);
}
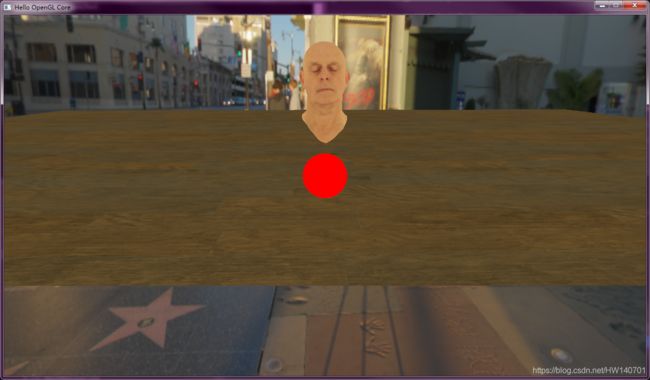
3 效果
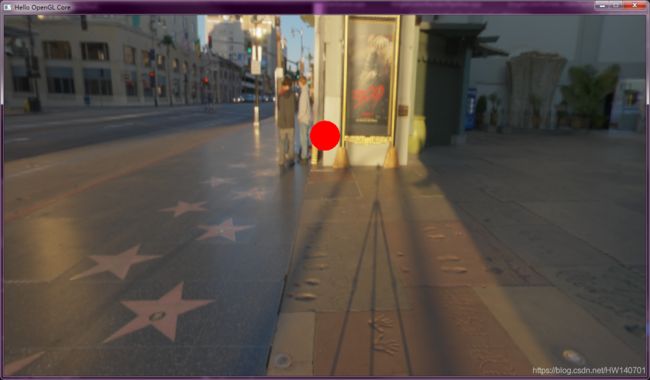
- 以单一颜色绘制的单独帧缓存
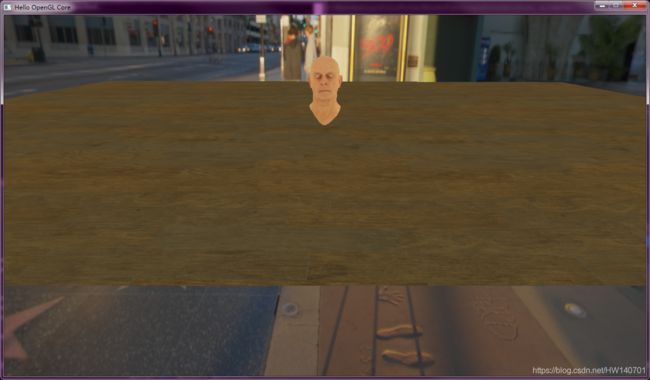
- 以单一纹理绘制的单独帧缓存
- 帧缓存合并
大家如果有兴趣可以访问我的个人站:http://www.stubbornhuang.com