ESP32开发笔记|基于eclipse创建一个标准工程
目录
前言
准备工作
修改component.mk
修改顶层makefile
编译测试
前言
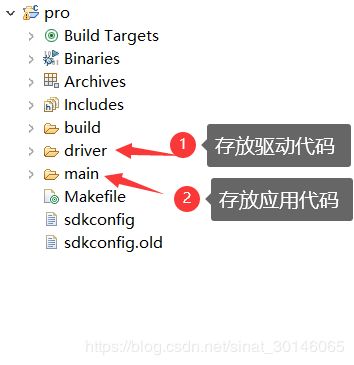
想必习惯了keil开发stm32等单片机的朋友都不太适应乐鑫提供的demo,我们可以通过改变makefile建立一个属于自己的工程,驱动和应用分离的结构...类似于下图所示。
准备工作
- 新建一个名叫started-pro的文件夹(注意!路径不能包含中文)
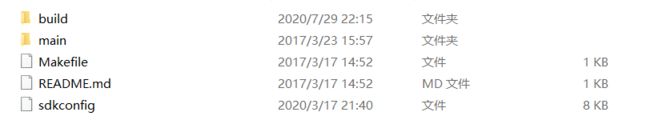
- 将esp32-dir\esp-idf\examples\get-started\hello_world目录下的文件copy到started-pro文件夹
- 在started-pro文件夹下再创建一个名叫driver的文件夹用来存放驱动文件
- 打开eclipse,将started-pro导入eclipse工作区,并按照基于windows下的Eclipse开发环境搭建配置该工程
- 在driver文件夹下新建led文件夹,并添加component.mk、led.c、led.h等文件,结构如下
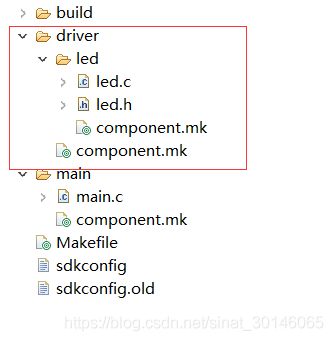
下面是驱动文件的内容:
/*
 * led.c
 *
 *  Created on: 2020年7月20日
 *      Author: dtj
 */
#include "led.h"


void led_init(void)
{
	gpio_config_t io_conf;

    io_conf.intr_type = GPIO_PIN_INTR_DISABLE;
    io_conf.mode = GPIO_MODE_OUTPUT;
    io_conf.pin_bit_mask = GPIO_OUTPUT_PIN_SEL;
    io_conf.pull_down_en = 0;
    io_conf.pull_up_en = 0;
    gpio_config(&io_conf);
}

void led_off(void)
{
	gpio_set_level(GPIO_OUTPUT_IO_0, 1);
}

void led_on(void)
{
	gpio_set_level(GPIO_OUTPUT_IO_0, 0);
}
/*
 * led.h
 *
 *  Created on: 2020年7月20日
 *      Author: dtj
 */

#ifndef DRIVER_INC_LED_H_
#define DRIVER_INC_LED_H_
#include "driver/gpio.h"


#define GPIO_OUTPUT_IO_0    32
#define GPIO_OUTPUT_PIN_SEL ((uint64_t)(((uint64_t)1)<
修改component.mk
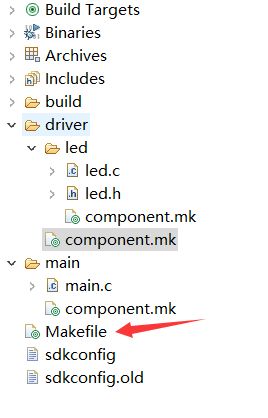
重点来了,component.mk大有文章,在上面我们看到,driver目录下其实不知一个component.mk,但我们只需要编辑driver根目录下的component.mk,led文件夹下的component.mk无需编辑。
#
# "main" pseudo-component makefile.
#
# (Uses default behaviour of compiling all source files in directory, adding 'include' to include path.)
COMPONENT_SRCDIRS := . \ led
COMPONENT_ADD_INCLUDEDIRS := $(COMPONENT_SRCDIRS) ..
如果你的driver下的驱动不只一个,例如oled、key等等,那么只需如下修改:
#
# "main" pseudo-component makefile.
#
# (Uses default behaviour of compiling all source files in directory, adding 'include' to include path.)
COMPONENT_SRCDIRS := . \ led \ oled \ key
COMPONENT_ADD_INCLUDEDIRS := $(COMPONENT_SRCDIRS) ..
修改顶层makefile
#
# This is a project Makefile. It is assumed the directory this Makefile resides in is a
# project subdirectory.
#

PROJECT_NAME := pro
EXTRA_COMPONENT_DIRS := $(abspath driver)
include $(IDF_PATH)/make/project.mk
- 这里有两个点需要注意,一是PROJECT_NAME,然后是EXTRA_COMPONENT_DIRS,如果你的工程名字叫 mypro 那么你只需要 修改PROJECT_NAME 为 PROJECT_NAME := mypro 即可。
- 关于EXTRA_COMPONENT_DIRS,想必你已经猜到了,它和你的顶层文件结构有关,通过设置它可以告诉编译器找到源文件的路径,如果你需要增加其他目录,则修改EXTRA_COMPONENT_DIRS即可。

- 这是我的main.c文件,注意引用led.h的写法
/* Hello World Example

   This example code is in the Public Domain (or CC0 licensed, at your option.)

   Unless required by applicable law or agreed to in writing, this
   software is distributed on an "AS IS" BASIS, WITHOUT WARRANTIES OR
   CONDITIONS OF ANY KIND, either express or implied.
*/
#include
#include "freertos/FreeRTOS.h"
#include "freertos/task.h"
#include "esp_system.h"
#include "nvs_flash.h"

#include "../driver/led/led.h"


void led_task(void *pvParameter)
{
	uint8_t gpio_level = 0;

	while(1)
	{
		if(gpio_level==0){
			led_off();
			gpio_level = 1;
		}else{
			led_on();
			gpio_level = 0;
		}
		vTaskDelay(1000 / portTICK_RATE_MS);
	}
}

void app_main()
{
    nvs_flash_init();
    led_init();
    xTaskCreate(&led_task, "led_task", 2048, NULL, 10, NULL);
}
编译测试
双击 make all指令(创建编译指令和烧录教程请参考基于windows下的Eclipse开发环境搭建), 我们将得到如下结果:

测试通过!
如果你也想和我们一起学习物联网,请加入“我的硬件-技术交流群”,内有源码,或关注公众号“Hi Iot”,里面有更多关于物联网的干货等着你!