centos6.5安装anaconda
- 下载anaconda
注意:下载linux的哪个python版本都无所谓,anaconda会自己装一个python的,直接下载就可以安装,不需要系统python环境支持。
装完后可以在用户的.bashrc 环境里加入:
alias python=’/export/home/lxw/anaconda3/bin/python3.7’
然后source .bashrc
https://www.anaconda.com/distribution/#download-section
- 生成验证码
![]()
1821d4b623ed449e0acb6df3ecbabd3944cffa98f96a5234b7a102a7c0853dc6 ./Anaconda2-2018.12-Linux-x86_64.sh
- 开始安装
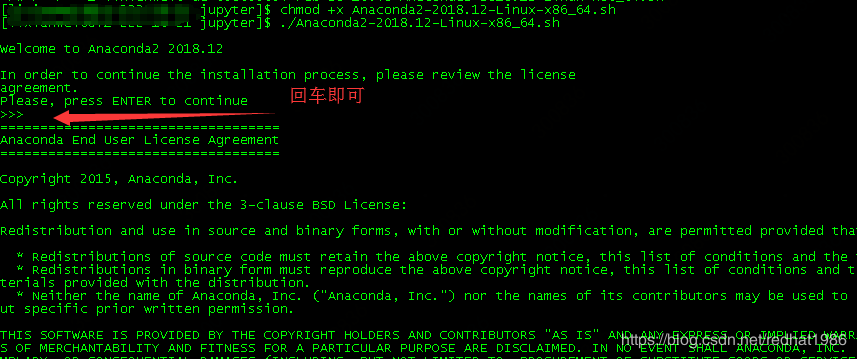
- 回车后显示的是license,按空格就到最后了,如下图:
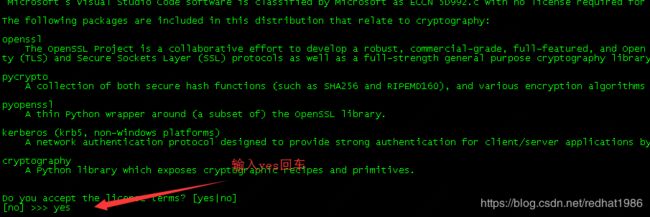
- 键入yes回车后会显示下图 ,如果直接点回车就会安装在默认目录:/home/xxxxx/anaconda2/,不建议装在此目录,因为安装文件非常大,所以我重新指定了安装目录:/export/juptyer/anaconda2/ 然后回车

- 回车后就开始安装了,会提示你是否初始化到默认这个/home/用户名/.bashrc目录,选yes就行,当然如果选no就需要自己手动指定一下环境了,官方给出的方案:


- 至此anaconda安装完成。
- 访问测试
[xx@xxxx-16-21 bin]# jupyter notebook
Traceback (most recent call last):
  File "/export/jupyter/anaconda2/bin/jupyter-notebook", line 11, in
    sys.exit(main())
  File "/export/jupyter/anaconda2/lib/python2.7/site-packages/jupyter_core/application.py", line 266, in launch_instance
    return super(JupyterApp, cls).launch_instance(argv=argv, **kwargs)
  File "/export/jupyter/anaconda2/lib/python2.7/site-packages/traitlets/config/application.py", line 657, in launch_instance
    app.initialize(argv)
  File "", line 2, in initialize
  File "/export/jupyter/anaconda2/lib/python2.7/site-packages/traitlets/config/application.py", line 87, in catch_config_error
    return method(app, *args, **kwargs)
  File "/export/jupyter/anaconda2/lib/python2.7/site-packages/notebook/notebookapp.py", line 1628, in initialize
    self.init_webapp()
  File "/export/jupyter/anaconda2/lib/python2.7/site-packages/notebook/notebookapp.py", line 1407, in init_webapp
    self.http_server.listen(port, self.ip)
  File "/export/jupyter/anaconda2/lib/python2.7/site-packages/tornado/tcpserver.py", line 143, in listen
    sockets = bind_sockets(port, address=address)
  File "/export/jupyter/anaconda2/lib/python2.7/site-packages/tornado/netutil.py", line 168, in bind_sockets
    sock.bind(sockaddr)
  File "/export/jupyter/anaconda2/lib/python2.7/socket.py", line 228, in meth
    return getattr(self._sock,name)(*args)
socket.error: [Errno 99] Cannot assign requested address
- 解决办法
[aaa@xxx2-16-21 ~]$ jupyter notebook --generate-config
Writing default config to: /home/aaa/.jupyter/jupyter_notebook_config.py
执行上面命令会生成一个文件,编辑这个文件:/home/aaa/.jupyter/jupyter_notebook_config.py,放开下面这两行注释
c.NotebookApp.ip = '127.0.0.1'
c.NotebookApp.open_browser = True
-
再次执行:

-
发现不报错了。ok至此结束
如果想改端口,还是在这个文件里改: /home/aaa/.jupyter/jupyter_notebook_config.py,我这里改成8000了,

另外默认启动后只能在本机浏览打开jupyter地址:http://127.0.0.1:8000如果想通过别的电脑打开地址,需要改下ip:

修改完以后重新启动(注意红圈内的token,在下一步登录的时候回用到):

-
打开浏览器登录,将上一步启动时候产生的token复制到密码框内,点击登录即可
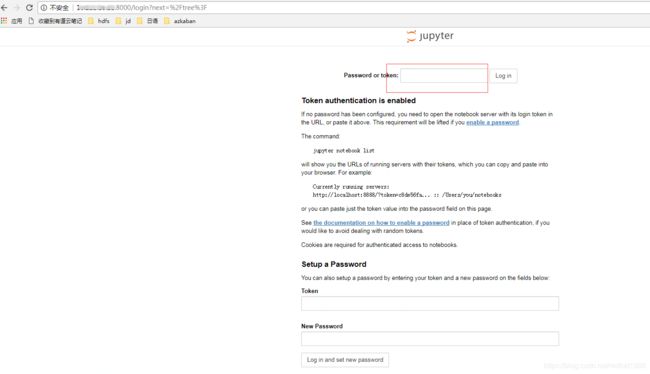
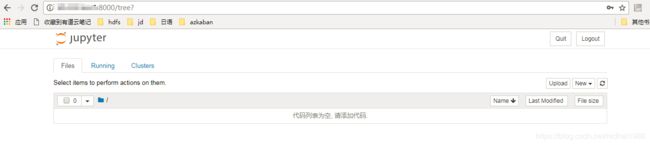
登录成功:

-
如果每次登录都复制token就太麻烦了,看第12步中界面里有个地址:

也就是:https://jupyter-notebook.readthedocs.io/en/stable/public_server.html
打开这个网址后:

这里已经说了,这是设置单用户的,要想设置多用户就用jupyterHub,现在先走一遍单用户的吧 -
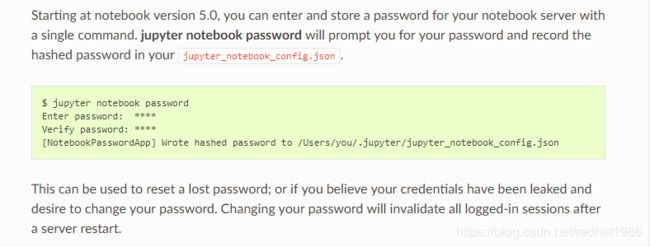
参考Automatic Password setup,设置密码:
一共有两种:1)通过页面初次登录时设置密码,也就是第12不种页面下面那个设置密码的地方

2)通过命令行设置密码:
注意:初次登录设置密码的功能是可以禁用的,还是在/home/aaa/.jupyter/jupyter_notebook_config.py配置文件中:

-
根据官方文档用命令行方式设置下密码:
1)顺手关闭更改密码功能:

2) 执行命令:jupyter notebook password,然后输入两次密码:
3)Preparing a hashed password,在python命令行下执行(注意密码和上一步的密码一样):
[aaa@xxx-16-21 ~]$ python
Python 2.7.15 |Anaconda, Inc.| (default, Dec 14 2018, 19:04:19)
[GCC 7.3.0] on linux2
Type "help", "copyright", "credits" or "license" for more information.
>>> from notebook.auth import passwd
>>> passwd()
Enter password:
Verify password:
'sha1:f3afc4c4a15d:a6c9a211576425bb7a88abcfeb59a39f4951b0e5'
这就是生产的hash码:sha1:f3afc4c4a15d:a6c9a211576425bb7a88abcfeb59a39f4951b0e5,copy出来一会儿会用到。
4)Adding hashed password to your notebook configuration file
编辑:vi /home/aaa/.jupyter/jupyter_notebook_config.py
c.NotebookApp.password = u'sha1:f3afc4c4a15d:a6c9a211576425bb7a88abcfeb59a39f4951b0e5'
5)重新启动:jupyter notebook
打开浏览器:
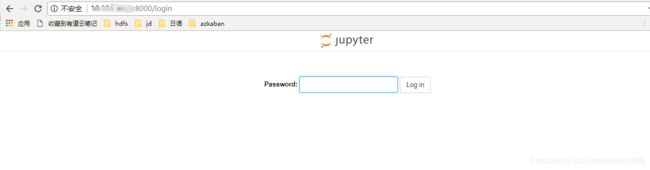
输入设置的密码后:
- Using SSL for encrypted communication
1)执行: openssl req -x509 -nodes -days 365 -newkey rsa:2048 -keyout mykey.key -out mycert.pem ,一路回车即可
[aaa@xxx-16-21 jupyter]$  openssl req -x509 -nodes -days 365 -newkey rsa:2048 -keyout mykey.key -out mycert.pem
Generating a RSA private key
.......................................................................................................................................................+++++
.........+++++
writing new private key to 'mykey.key'
-----
You are about to be asked to enter information that will be incorporated
into your certificate request.
What you are about to enter is what is called a Distinguished Name or a DN.
There are quite a few fields but you can leave some blank
For some fields there will be a default value,
If you enter '.', the field will be left blank.
-----
Country Name (2 letter code) [AU]:
State or Province Name (full name) [Some-State]:
Locality Name (eg, city) []:
Organization Name (eg, company) [Internet Widgits Pty Ltd]:
Organizational Unit Name (eg, section) []:
Common Name (e.g. server FQDN or YOUR name) []:
Email Address []:
生成两个文件:

2)编辑:vi /home/aaa/.jupyter/jupyter_notebook_config.py
c.NotebookApp.certfile = u’/absolute/path/to/your/certificate/mycert.pem’
c.NotebookApp.keyfile = u’/absolute/path/to/your/certificate/mykey.key’
顺便指定了下,此目录是登录以后显示的默认地址:
The directory to use for notebooks and kernels.
c.NotebookApp.notebook_dir = u’/export/jupyter/workspace/’
- JupyterHub(多用户管理)安装
安装很简单可以参考官网安装步骤:
https://jupyterhub.readthedocs.io/en/latest/quickstart.html#installation
conda install -c conda-forge jupyterhub  -f  /etc/jupyterhub/jupyterhub_config.py
校验命令:
jupyterhub -h
configurable-http-proxy -h
- 因为我8000端口被占用,所以改了端口,把改过的相关配置记录下:
c.JupyterHub.admin_access = True
c.JupyterHub.admin_users = {'linux sys user name'}
c.JupyterHub.bind_url = 'http://:8081'
c.JupyterHub.cleanup_proxy = True
c.JupyterHub.hub_bind_url = 'http://127.0.0.1:8083'
c.JupyterHub.hub_ip = 'xx.xx.35.12'
c.JupyterHub.hub_port = 8083
c.JupyterHub.ip = '0.0.0.0'
c.JupyterHub.port = 8081
c.JupyterHub.proxy_api_ip = 'xx.xx.35.12'
c.JupyterHub.proxy_api_port = 8084
c.Spawner.ip = 'xx.xx.35.12'
c.Authenticator.whitelist = {'linux sys user name1','linux sys user name2'}
c.LocalAuthenticator.create_system_users = True
c.PAMAuthenticator.encoding = 'utf8'
c.PAMAuthenticator.open_sessions = False
- 安装过程中遇到问题:raise KeyError(“User %s does not exist.” % user.name)
删除文件:jupyterhub.sqlite (一般在用户home目录)
- 其他各种No admin users, admin interface will be unavailable.或端口已经被占用等情况按照我上面的配置设置一下都可解决
- 启动命令:
1)可以直接:
jupyterhub
2)也可以加个配置文件,也许你按官网推荐的方式把jupyterhub_config.py文件放到了/etc/jupyterhub/目录下,那么启动命令:
jupyterhub -f /etc/jupyterhub/jupyterhub_config.py
3)启动时也可以加个debug模式,可以看下配置的东西
jupyterhub --debug
4)后台启动,同样也适用于jupyter notebook启动命令
nohup jupyterhub -f /etc/jupyterhub/jupyterhub_config.py > jupyterhub.log &