SpringBoot开发博客后端(个人练习笔记1)
目录
- 简介
- 创建项目
- 新建项目
- 设置项目环境
- 整合mybatis plus
- 1.添加依赖包
- 2.创建数据库
- 3.写配置文件
- 4.开启mapper接口扫描,添加分页插件
- 5.代码生成
- 测试1
- 未完,尚在学习中......
简介
参考别人的项目 超详细!4小时开发一个SpringBoot+vue前后端分离博客项目 来学习、练习,将笔记记录在此,方便复习、查看。
使用的是IDEA、SpringBoot、Mybatis Plus、MySQL。
感谢开源项目提供者:
作者:吕一明
项目代码:https://github.com/MarkerHub/vueblog
项目视频:https://www.bilibili.com/video/BV1PQ4y1P7hZ/
创建项目
新建项目

采用默认参数:

设置由于前端使用vue,所以起名为vueblog,同时修改包名,其余默认:

选择两个开发工具:
devtools:项目的热加载重启插件
lombok:简化代码的工具

添加Web:

添加MySQL的驱动:

设置文件存储位置:

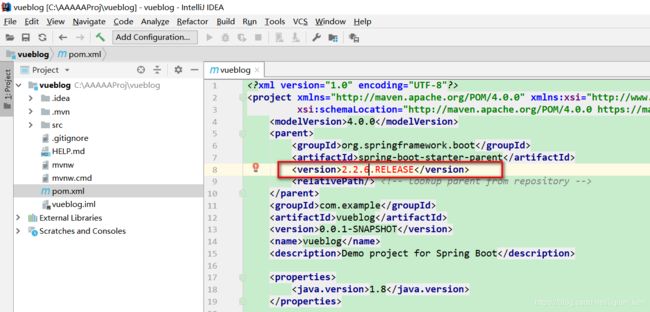
设置项目环境
版本修改为熟悉的2.2.6:
删除三个不需要的文件:

整合mybatis plus
1.添加依赖包
(因为涉及代码生成,还需要freemarker页面模板引擎)
       	<!--mp-->
        <dependency>
            <groupId>com.baomidou</groupId>
            <artifactId>mybatis-plus-boot-starter</artifactId>
            <version>3.2.0</version>
        </dependency>

       	<!--freemarker-->
        <dependency>
            <groupId>org.springframework.boot</groupId>
            <artifactId>spring-boot-starter-freemarker</artifactId>
        </dependency>

        <!--mp代码生成器-->
        <dependency>
            <groupId>com.baomidou</groupId>
            <artifactId>mybatis-plus-generator</artifactId>
            <version>3.2.0</version>
        </dependency>
2.创建数据库
数据库名称为:vueblog
USE `vueblog`;

/*Table structure for table `m_blog` */

DROP TABLE IF EXISTS `m_blog`;

CREATE TABLE `m_blog` (
  `id` BIGINT(20) NOT NULL AUTO_INCREMENT,
  `user_id` BIGINT(20) NOT NULL,
  `title` VARCHAR(255) NOT NULL,
  `description` VARCHAR(255) NOT NULL,
  `content` LONGTEXT,
  `created` DATETIME NOT NULL ON UPDATE CURRENT_TIMESTAMP,
  `status` TINYINT(4) DEFAULT NULL,
  PRIMARY KEY (`id`)
) ENGINE=INNODB  DEFAULT CHARSET=utf8mb4;

/*Data for the table `m_blog` */

/*Table structure for table `m_user` */

DROP TABLE IF EXISTS `m_user`;

CREATE TABLE `m_user` (
  `id` BIGINT(20) NOT NULL AUTO_INCREMENT,
  `username` VARCHAR(64) DEFAULT 'NULL',
  `avatar` VARCHAR(255) DEFAULT 'NULL',
  `email` VARCHAR(64) DEFAULT 'NULL',
  `password` VARCHAR(64) DEFAULT 'NULL',
  `status` INT(5) NOT NULL,
  `created` DATETIME DEFAULT NULL,
  `last_login` DATETIME DEFAULT NULL,
  PRIMARY KEY (`id`)
) ENGINE=INNODB  DEFAULT CHARSET=utf8;

/*Data for the table `m_user` */

INSERT  INTO `m_user`(`id`,`username`,`avatar`,`email`,`password`,`status`,`created`,`last_login`) VALUES (1,'markerhub','https://image-1300566513.cos.ap-guangzhou.myqcloud.com/upload/images/5a9f48118166308daba8b6da7e466aab.jpg',NULL,'96e79218965eb72c92a549dd5a330112',0,'2020-04-20 10:44:01',NULL);
3.写配置文件
点击application.properties文件,按住shift+F6,重名名为application.yml

将下列代码写入application.yml文件中:
# DataSource Config
spring:
  datasource:
    driver-class-name: com.mysql.cj.jdbc.Driver
    url: jdbc:mysql://localhost:3306/vueblog?useUnicode=true&useSSL=false&characterEncoding=utf8&serverTimezone=Asia/Shanghai
    username: root
    password: admin
mybatis-plus:
  mapper-locations: classpath*:/mapper/**Mapper.xml #mapper的xml文件的扫描路径

server:
  port: 8081  #设置端口
发现有标红:

需要删除(直接注释掉):

4.开启mapper接口扫描,添加分页插件
新建一个包:通过@mapperScan注解指定要变成实现类的接口所在的包,然后包下面的所有接口在编译之后都会生成相应的实现类。PaginationInterceptor是一个分页插件。

@Configuration
@EnableTransactionManagement
//开启mapper接口扫描
@MapperScan("com.example.mapper")
public class MybatisPlusConfig {
    @Bean
    public PaginationInterceptor paginationInterceptor() {
//        添加分页插件
        PaginationInterceptor paginationInterceptor = new PaginationInterceptor();
        return paginationInterceptor;
    }
}
5.代码生成
添加CodeGenerator类:

此类中包含的代码如下:
package com.example;

import com.baomidou.mybatisplus.core.exceptions.MybatisPlusException;
import com.baomidou.mybatisplus.core.toolkit.StringPool;
import com.baomidou.mybatisplus.core.toolkit.StringUtils;
import com.baomidou.mybatisplus.generator.AutoGenerator;
import com.baomidou.mybatisplus.generator.InjectionConfig;
import com.baomidou.mybatisplus.generator.config.*;
import com.baomidou.mybatisplus.generator.config.po.TableInfo;
import com.baomidou.mybatisplus.generator.config.rules.NamingStrategy;
import com.baomidou.mybatisplus.generator.engine.FreemarkerTemplateEngine;

import java.util.ArrayList;
import java.util.List;
import java.util.Scanner;

// 演示例子,执行 main 方法控制台输入模块表名回车自动生成对应项目目录中
public class CodeGenerator {

    /**
     *
     * 读取控制台内容
     *
     */
    public static String scanner(String tip) {
        Scanner scanner = new Scanner(System.in);
        StringBuilder help = new StringBuilder();
        help.append("请输入" + tip + ":");
        System.out.println(help.toString());
        if (scanner.hasNext()) {
            String ipt = scanner.next();
            if (StringUtils.isNotEmpty(ipt)) {
                return ipt;
            }
        }
        throw new MybatisPlusException("请输入正确的" + tip + "!");
    }

    public static void main(String[] args) {
        // 代码生成器
        AutoGenerator mpg = new AutoGenerator();

        // 全局配置
        GlobalConfig gc = new GlobalConfig();
        String projectPath = System.getProperty("user.dir");
        gc.setOutputDir(projectPath + "/src/main/java");
//        gc.setOutputDir("D:\\test");
        gc.setAuthor("redcod");
        gc.setOpen(false);
        // gc.setSwagger2(true); 实体属性 Swagger2 注解
        gc.setServiceName("%sService");
        mpg.setGlobalConfig(gc);

        // 数据源配置
        DataSourceConfig dsc = new DataSourceConfig();
        dsc.setUrl("jdbc:mysql://localhost:3306/vueblog?useUnicode=true&useSSL=false&characterEncoding=utf8&serverTimezone=UTC");
        // dsc.setSchemaName("public");
        dsc.setDriverName("com.mysql.cj.jdbc.Driver");
        dsc.setUsername("root");
        dsc.setPassword("123456");
        mpg.setDataSource(dsc);

        // 包配置
        PackageConfig pc = new PackageConfig();
        pc.setModuleName(null);
        pc.setParent("com.example");
        mpg.setPackageInfo(pc);

        // 自定义配置
        InjectionConfig cfg = new InjectionConfig() {
            @Override
            public void initMap() {
                // to do nothing
            }
        };

        // 如果模板引擎是 freemarker
        String templatePath = "/templates/mapper.xml.ftl";
        // 如果模板引擎是 velocity
        // String templatePath = "/templates/mapper.xml.vm";

        // 自定义输出配置
        List<FileOutConfig> focList = new ArrayList<>();
        // 自定义配置会被优先输出
        focList.add(new FileOutConfig(templatePath) {
            @Override
            public String outputFile(TableInfo tableInfo) {
                // 自定义输出文件名 , 如果你 Entity 设置了前后缀、此处注意 xml 的名称会跟着发生变化!!
                return projectPath + "/src/main/resources/mapper/"
                        + "/" + tableInfo.getEntityName() + "Mapper" + StringPool.DOT_XML;
            }
        });

        cfg.setFileOutConfigList(focList);
        mpg.setCfg(cfg);

        // 配置模板
        TemplateConfig templateConfig = new TemplateConfig();

        templateConfig.setXml(null);
        mpg.setTemplate(templateConfig);

        // 策略配置
        StrategyConfig strategy = new StrategyConfig();
        strategy.setNaming(NamingStrategy.underline_to_camel);
        strategy.setColumnNaming(NamingStrategy.underline_to_camel);
        strategy.setEntityLombokModel(true);
        strategy.setRestControllerStyle(true);
        strategy.setInclude(scanner("表名,多个英文逗号分割").split(","));
        strategy.setControllerMappingHyphenStyle(true);
        strategy.setTablePrefix("m_");
        mpg.setStrategy(strategy);
        mpg.setTemplateEngine(new FreemarkerTemplateEngine());
        mpg.execute();
    }
}
粘贴后,主要以下几个地方需要根据情况,进行更改:
①数据库的名称:jdbc:mysql://localhost:3306/vueblog?useUnicode=true,为vueblog。
②数据库密码:dsc.setPassword("123456");
③总的包名:pc.setParent("com.example");
④实体类名需要去掉前缀:strategy.setTablePrefix("m_");
比如SQL中的m_user表,对应实体类user
右击 代码区域 运行CodeGenerator 类的main函数,在控制台中输入SQL的表名,中间逗号隔开:

回车后,自动生成以下四个文件夹及里面的类:

测试1
在UserController中添加以下代码:
@RestController
@RequestMapping("/user")
public class UserController {
    @Autowired
    UserService userService;
    @GetMapping("/{id}")
    public Object test(@PathVariable("id") Long id) {
        return userService.getById(id);
    }
}
注意需要将默认启动工程修改为VueblogApplication:

然后开启调试,最后在浏览器中输入:http://localhost:8081/user/1,回车后可以见到:
