在windows10环境VS2015中使用Libtorch
参考资料:https://blog.csdn.net/gulingfengze/article/details/92013360
参考原文比本文更为详细,本文更偏向于个人的测试记录
环境:VS2015+OpenCV3.4.0+CUDA9.1+Cmake3
具体步骤:
1.进入pytorch.org官网,下载release版本LibTorch
2.PyTorch模型转换为Torch脚本
1.	import torch
2.	import torchvision
3.
4.	# An instance of your model.
5.	model = torchvision.models.resnet18()
6.
7.	# An example input you would normally provide to your model's forward() method.
8.	example = torch.rand(1, 3, 224, 224)
9.
10.	# Use torch.jit.trace to generate a torch.jit.ScriptModule via tracing.
11.	traced_script_module = torch.jit.trace(model, example)
12.	traced_script_module.save("model.pt")
然后运行该脚本,会生成一个 model.pt 文件,该文件就是C++需要调用的模型。
3. 准备C++测试代码和CMakelists.txt文件
首先,我在E:\StudyStudy\Match\code\pytorch路径下创建一个名为libtorch_test的文件夹,然后在该文件夹下分别创建C++测试代码(例如:example_app.cpp)和CMakelists.txt文件以及名为build的文件夹。
CMakelists.txt 内容如下:
cmake_minimum_required(VERSION 3.0 FATAL_ERROR)
project(example_app)

find_package(Torch REQUIRED)
find_package(OpenCV REQUIRED)

if(NOT Torch_FOUND)
    message(FATAL_ERROR "Pytorch Not Found!")
endif(NOT Torch_FOUND)

message(STATUS "Pytorch status:")
message(STATUS "    libraries: ${TORCH_LIBRARIES}")

message(STATUS "OpenCV library status:")
message(STATUS "    version: ${OpenCV_VERSION}")
message(STATUS "    libraries: ${OpenCV_LIBS}")
message(STATUS "    include path: ${OpenCV_INCLUDE_DIRS}")

add_executable(example_app example_app)
example_app.cpp 就是接下来要写的C++测试代码文件名。
C++测试代码文件(example-app.cpp)内容如下:
#include Libtorch_test下:

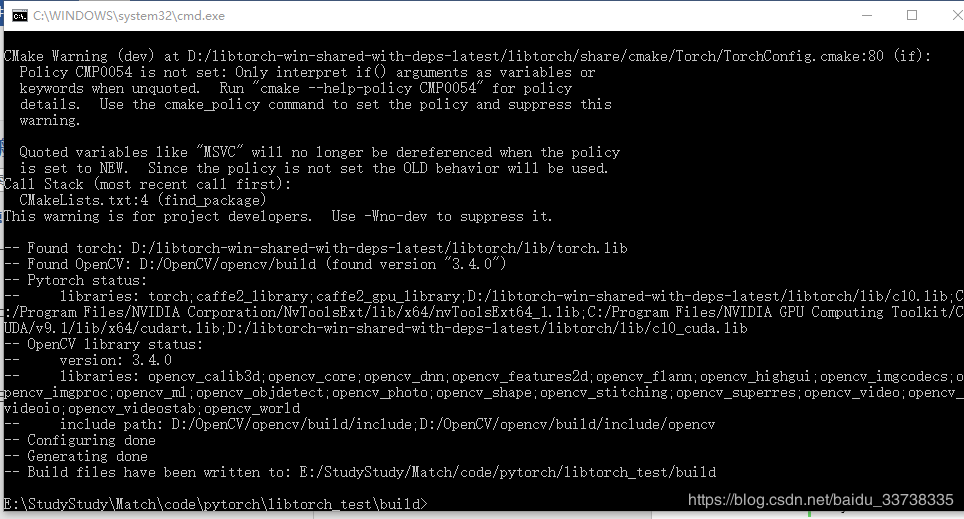
4. 准备好上述内容之后,先进入到build文件夹下,然后打开cmd终端或powershell终端,输入如下命令并执行:
cmake -DCMAKE_PREFIX_PATH=D:/OpenCV/opencv/build/x64/vc14/lib;D:/libtorch-win-shared-with-deps-latest/libtorch -DCMAKE_BUILD_TYPE=Release -G "Visual Studio 14 Win64" ..
其中:第一个是opencv的路径,第二个是libtorch的路径,第三个是使用的VS版本。Release版本,注意这里release和debug不兼容。
得到效果如下:
看下build文件夹下编译的内容:

5.右击example_app.vcxproj ,打开方式选择Microsoft Visual Studio 2015 打开程序,改为Release模式:
6.右键example_app设置为启动项目,release x64运行,报错,缺少dll
7. 这时需要到libtorch的lib路径下将dll文件复制到工程Example\build\Release中,如下

得到结果

遇到问题
- 各种报错,定义问题等
解决办法,注意注释//后加空格,注释完成后也要加空格,明显看到有的断点打不过去 - Libtorch新老版本不兼容问题
主要注意数据格式问题,新版的auto本身就是包含variable变量格式,不需要创建,转换会报错,直接赋值即可
