SpringBoot集成SSM,实现增删改查功能
github源码:https://github.com/xivinChen/SpringBoot
一.先介绍创建模块的另一种方式
1.点击Maven -> 勾选Create from archetype -> 选择 maven-archetype-quickstart


有时会需要点击 自动导入

2.工程目录
可以看到,这样创建的模块是相对干净的,需要我们手动的编写程序启动入口类、需要配置时还得创建配置文件。下一步见证。

3.完善模块
添加依赖,这种脚架添加模块不会自动引入相关依赖。这里主要引入父级版本号和spring-boot-starter依赖。
<project xmlns="http://maven.apache.org/POM/4.0.0" xmlns:xsi="http://www.w3.org/2001/XMLSchema-instance"
xsi:schemaLocation="http://maven.apache.org/POM/4.0.0 http://maven.apache.org/xsd/maven-4.0.0.xsd">
<modelVersion>4.0.0</modelVersion>
<parent>
<groupId>org.springframework.boot</groupId>
<artifactId>spring-boot-starter-parent</artifactId>
<version>2.2.2.RELEASE</version>
<relativePath/> <!-- lookup parent from repository -->
</parent>
<groupId>xyz.java1024</groupId>
<artifactId>springboot-ssm</artifactId>
<version>1.0-SNAPSHOT</version>
  junit
  junit
  4.11
  test
> 修改启动类,添加注解和修改main启动方法@SpringBootApplication
public class App
{
public static void main( String[] args )
{
SpringApplication.run(App.class,args);
}
}
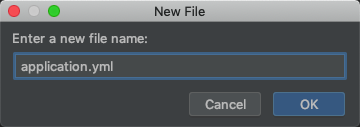
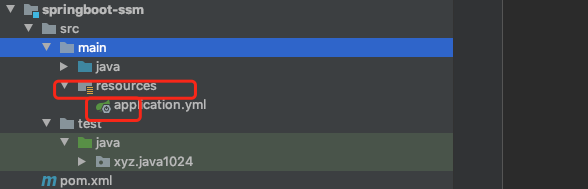
> 添加配置文件,先添加resouces文件夹,在创建application.yml配置文件。

> 细心的同学可以发现 resources 图标没有 黄色的横线

> 点击上图,进入如图,选择Modules -> 选中模块, 接着选中resources再点击Mark as 中 带黄色横线的Resources即可,点击ok


> 同时可见 yml后缀的配置文件的图标也发生了改变
> 下面我们开始配置文件,yml 提供更加简洁的编程方式,可读性也极高。如下,配置端口号 和 应用名称。server:
port: 8090
spring:
application:
name: springboot-ssm
### 4 改造完成,启动入口类查看效果。

## 二.SpringBoot 集成SSM
### 1.引入依赖 connector,druid,mybatis### 2.创建数据库 表CREATE TABLE user(
id int (11) NOT NULL AUTO_INCREMENT,
username varchar(64) NOT NULL,
tel VARCHAR(16) NOT NULL,
password VARCHAR(250) NOT NULL,
status TINYINT NOT NULL default 1,
created_at timestamp not null default CURRENT_TIMESTAMP ,
updated_at timestamp not null default CURRENT_TIMESTAMP ,
PRIMARY KEY (id)
) ENGINE=InnoDB DEFAULT CHARSET=utf8mb4;
package xyz.java1024.vo;
import java.io.Serializable;
import java.sql.Timestamp;
public class User implements Serializable {
private int id;

private String username;

private String tel;

private String password;

private int status;

private Timestamp createdAt;

private Timestamp updatedAt;

//get set省略
### 3.配置server:
port: 8090
扫描mapper.xml文件
mybatis:
mapper-locations:
- classpath:mapping/*.xml
spring:
application:
name: springboot-ssm
datasource:
type: com.alibaba.druid.pool.DruidDataSource
driver-class-name: com.mysql.cj.jdbc.Driver
url: jdbc:mysql://127.0.0.1:3306/springboot?serverTimezone=GMT%2B8&useUnicode=true&characterEncoding=utf-8&useSSL=false
username: root
password: 123zxc
### 3.mapper接口,在mapper包下创建UserMapper接口package xyz.java1024.mapper;
import xyz.java1024.vo.User;
import java.util.List;
public interface UserMapper {
int deleteByPrimaryKey(Integer id);

int insert(User record);

User selectByPrimaryKey(Integer id);

User selectByUsername(String username);

int updateByPrimaryKey(User record);

List list();
}
### 4.在resources文件夹下创建mapping目录用来存放mapper.xml文件,创建UserMapper.xml文件
;
id, username, tel, password, status, created_at, updated_at
delete from user
where id = #{id,jdbcType=INTEGER}
insert into user (username, tel, password, status, created_at, updated_at
)
values (#{username,jdbcType=VARCHAR}, #{tel,jdbcType=VARCHAR}, #{password,jdbcType=VARCHAR},
#{status,jdbcType=TINYINT}, #{createdAt,jdbcType=TIMESTAMP}, #{updatedAt,jdbcType=TIMESTAMP}
)
update user
set username = #{username,jdbcType=VARCHAR},
tel = #{tel,jdbcType=VARCHAR},password = #{password,jdbcType=VARCHAR},status = #{status,jdbcType=TINYINT},
created_at = #{createdAt,jdbcType=TIMESTAMP},
updated_at = #{updatedAt,jdbcType=TIMESTAMP}
where id = #{id,jdbcType=INTEGER}
### 5.扫描mapper接口,即在启动类加@MapperScan注解@SpringBootApplicationbr/>@MapperScan("xyz.java1024.mapper")
public class App
{
public static void main( String[] args )
{
SpringApplication.run(App.class,args);
}
}
### 6.编写UserController,省略service@RestControllerbr/>@RequestMapping("/user")
public class UserController {
@Autowired
private UserMapper userMapper;

@RequestMapping("/listByUser")
public List listByUser() {
    return userMapper.list();
}

@RequestMapping("/getOneUser")
public User getOneUser(int id) {
    return userMapper.selectByPrimaryKey(id);
}

@RequestMapping("/addUser")
public int addUser(User user) {
    return userMapper.insert(user);
}

@RequestMapping("/deleteUser")
public int deleteUser(int id) {
    return userMapper.deleteByPrimaryKey(id);
}
}
### 7.启动工程测试,浏览器输入localhost:8090/user/getOneUser?id=1

## 四.总结
> 体验完SpringBoot 的SSM后,比Spring下的SSM的确是方便的太多,不仅省去了复杂的各种依赖,在配置方面也极大的得到简化,这也是SpringBoot精妙之处。
> 注意:@MapperScan("")是扫描mapper接口,而
mybatis:
mapper-locations:
- classpath:mapping/*.xml
是配置mapper.xml文件