Android基础学习总结(六)——TextInputLayout+EditText 轻松实现登录界面
什么是TextInputLayout
Layout which wraps an {@link android.widget.EditText} (or descendant) to show a floating label when the hint is hidden due to the user inputting text.
意思就是:一个布局包裹了EditText(或者EditText的子类),在用户输入文本的时候显示一个浮动的提示标签。
TextInputLayout继承关系如下:
java.lang.Object
   ↳    android.view.View
       ↳    android.view.ViewGroup
           ↳    android.widget.LinearLayout
               ↳    android.support.design.widget.TextInputLayout
TextInputLayout的好处
传统的EditText,在用户输入信息的时,hint(提示)会自动消失,就如上图的中的第一行所示,这时候用户可能会忘记自己需要输入的内容是什么了,得删除所有的输入内容才可以看到hint的提示内容,这样的用户体验不太好。
而图二在用户输入的时候,hint会默认弹到上方,并且携带一个动画效果。它仅仅只是在EditText外包裹了一层TextInputLayout,然而就是这样一个小小的改动不仅提高了与用户交互的体验,而且解决了hint输入后消失的问题,唯一的不好就是“占地面积”大了一点,当然这一点点小瑕疵还是可以忽略的。
TextInputLayout的基本用法
1.首先要引入design和appcompat-v7兼容包:
compile 'com.android.support:design:25.2.0'
compile 'com.android.support:appcompat-v7:25.2.0'
2.布局文件
"http://schemas.android.com/apk/res/android"
xmlns:tools="http://schemas.android.com/tools"
xmlns:app="http://schemas.android.com/apk/res-auto"
android:id="@+id/activity_main"
android:layout_width="match_parent"
android:layout_height="match_parent"
android:focusable="true"
android:focusableInTouchMode="true"
tools:context="study.test3.MainActivity">
.support.design.widget.TextInputLayout
android:id="@+id/edit1"
android:layout_width="match_parent"
android:layout_height="wrap_content"
android:hint="请输入IP地址"
app:hintAnimationEnabled="true"
app:hintEnabled="true"
app:counterEnabled="true"
app:counterMaxLength="13"
app:counterTextAppearance="@style/Mystyle"
app:counterOverflowTextAppearance="@style/Mystyle2"
>
"@+id/edittext1"
android:layout_width="match_parent"
android:layout_height="wrap_content"
/>
.support.design.widget.TextInputLayout>
.support.design.widget.TextInputLayout
android:id="@+id/edit2"
android:layout_width="match_parent"
android:layout_height="wrap_content"
android:hint="请输入密码"
app:hintAnimationEnabled="true"
app:hintEnabled="true"
app:counterEnabled="true"
app:counterMaxLength="13"
app:counterTextAppearance="@style/Mystyle"
app:counterOverflowTextAppearance="@style/Mystyle2"
android:layout_below="@+id/edit1"
>
"@+id/edittext2"
android:layout_width="match_parent"
android:layout_height="wrap_content"
/>
.support.design.widget.TextInputLayout>
效果图

布局很好理解,就是给EditText包上一层就好,就下来看看常用具体属性有哪些
注意:
给EditText所在的父类布局添加如下属性:
android:focusable="true"
android:focusableInTouchMode="true"可将焦点转移到EditText的父类布局上,EditText在初始化的时候就不会获取到焦点
TextInputLayout的基本属性
- app:hintAnimationEnabled=”true” 设置是否可以使用动画,默认是true
- app:hintEnabled=”true” 设置是否可以使用hint属性,默认是true
- app:counterEnabled=”true”设置是否可以开启计数器,默认是false,这个功能可以很好的告诉用户目前输入的文字位数,已经告诉用户已经超标请不要在输入了。
- app:counterMaxLength=”13”设置计算器的最大字数限制
- app:counterTextAppearance=”@style/Mystyle”设置计算器正常的文字颜色和大小
- app:counterOverflowTextAppearance=”@style/Mystyle2”设置计算器越位后的计数器颜色和大小
- app:hintTextAppearance 设置上弹以后的文字的大小颜色等属性
附上MyStyle的代码(在style.xml):
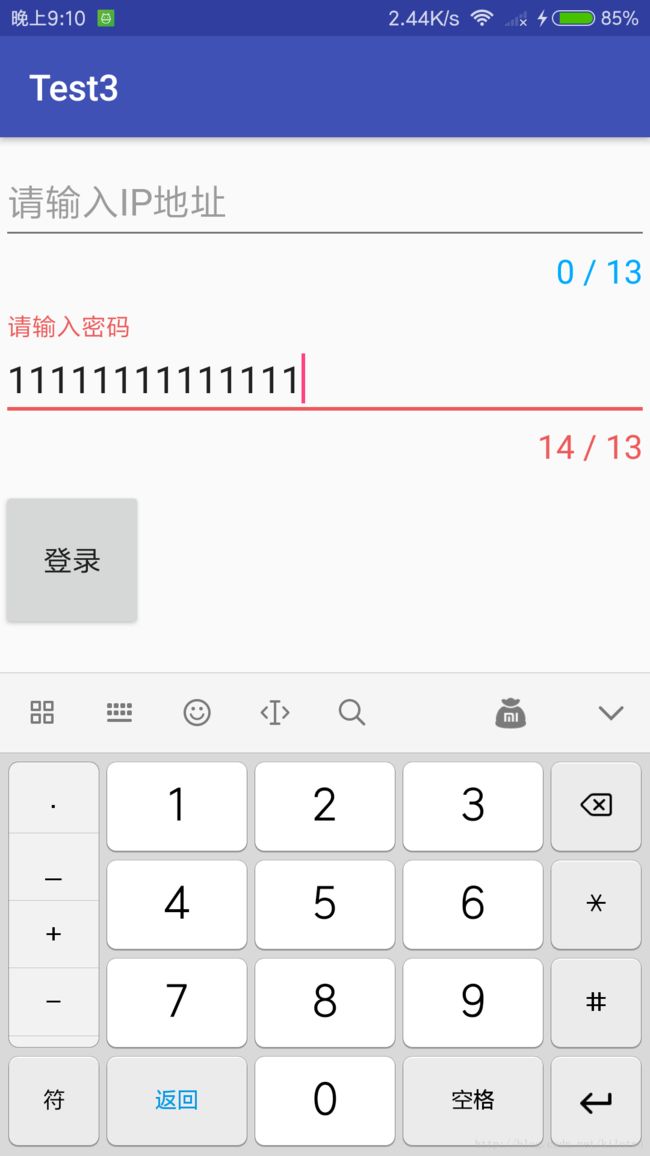
字数越界提示
TextInputLayout错误提示
TextInputLayout还可以处理错误并给出相应提示,比如我们添加一个登录按钮,点击登录按钮的时候要验证IP地址和密码长度为4-10个字符。
- setError 设置错误提示语句
- setErrorEnabled 设置是否显示错误
1.首先在布局上添加一个登录按钮:
2.添加验证用户名和密码方法,这里用到了Java正则表达式::
 public  boolean validateAccount(String ipStress)
    {
        if(ipStress.matches(regex))
        {
            return true;
        }else
        {
            textInputLayout.setError("Ip地址错误");
            return false;
        }

    }
    private boolean validatePassward(String passward) {
         if(!passward.matches(regex2))
        {
            textInputLayout2.setError("密码错误");
            return false;
        }
        if (passward.length()<4 ||passward.length() >10 )
        {
            textInputLayout2.setError("密码长度必须4-10位");
            return false;
        }else
            return true;
    }
3.给登录按钮设置点击事件,在触发点击事件的时候获取IP和密码,并验证IP和密码格式:
 Button btn_login= (Button) findViewById(R.id.btn1);
        btn_login.setOnClickListener(new View.OnClickListener() {
            @Override
            public void onClick(View view) {
                IpStress =editText.getText().toString();
                Passward =editText2.getText().toString();
                textInputLayout.setErrorEnabled(false);
                textInputLayout2.setErrorEnabled(false);
                if(validateAccount(IpStress) && validatePassward(Passward))
                {
                    Toast.makeText(MainActivity.this,"Login Success",Toast.LENGTH_SHORT).show();
                }
            }
        });
最终效果图:
总结
TextInputLayout+EditText 实现登录界面还是不难的,录制的gif比较渣像素虚心求教大佬,继续学习ing…