简易博客开发(2)----models, admin
django提供了非常方便的数据模型,可以非常简易的设计时间结构,URL结构,输入框等等,django都已经有编写好的数据结构,对于我这种初级编程来说再好没有,否则我就要自己写数据约束,格式,出错等
对于一个博客系统最基本包含三个要素,“作者”, “博客”,“标签”
#/myblog/myblog/blog/models.py
  1 from django.db import models
  2
  3 # Create your models here.
  4
  5 class Author(models.Model):                                          #作者信息
  6     """docstring for Author"""
  7     name = models.CharField(max_length=30)
  8     email = models.EmailField(blank=True)
  9     website = models.URLField(blank=True)
 10
 11     def __unicode__(self):                                           #方便查询时返回一个名字,否则是一个实例
 12         return self.name
 13
 14 class Tag(models.Model):                                             #标签
 15     """tag of book"""
 16     tag_name = models.CharField(max_length = 30)
 17     create_time = models.DateTimeField(auto_now_add =True )
 18
 19     def __unicode__(self):
 20         return self.tag_name
 21
 22 class blog(models.Model):                                            #博客
 23     title = models.CharField(max_length=50)                          #标题
 24     author = models.ForeignKey(Author)                               #作者 作者与博客是一对多的关系,一个博客只有一个作者,一个作者可以有多个博客
 25     tags = models.ManyToManyField(Tag, blank=True)                   #标签 标签与博客是多对多的关系,一个博客有多个标签,一个标签也可以有多个博客,因此初始化时不能直接赋值,它是一个列表
 26     content = models.TextField()                                     #内容
 27     date_time = models.DateTimeField(auto_now_add = True)
 28
 29     def __unicode__(self):
 30         return self.title
 31
 32     class Meta:
 33         ordering = ['-date_time']                                    #按照时间排序
 34
后台所对应的数据结构
同步数据库
[root@hding myblog]# python manage.py migrate
Operations to perform:
  Synchronize unmigrated apps: staticfiles, messages
  Apply all migrations: admin, contenttypes, auth, sessions
Synchronizing apps without migrations:
  Creating tables...
    Running deferred SQL...
  Installing custom SQL...
Running migrations:
  Rendering model states... DONE
  Applying contenttypes.0001_initial... OK
  Applying auth.0001_initial... OK
  Applying admin.0001_initial... OK
  Applying contenttypes.0002_remove_content_type_name... OK
  Applying auth.0002_alter_permission_name_max_length... OK
  Applying auth.0003_alter_user_email_max_length... OK
  Applying auth.0004_alter_user_username_opts... OK
  Applying auth.0005_alter_user_last_login_null... OK
  Applying auth.0006_require_contenttypes_0002... OK
  Applying sessions.0001_initial... OK
django 1.8.8 与 django 1.6 以前在models的重大改变在于如果你更改了数据库中的字段,你可以通过makemigrations更改,而在1.6以前一旦syncdb之后如果还需要加字段则只能在数据库中通过SQL语方直接进行操作,不能通过django实现,如现在把类blog改成类Blog
[root@hding myblog]# python manage.py  makemigrations
Migrations for 'blog':
  0001_initial.py:
    - Create model Author
    - Create model Blog
    - Create model Tag
    - Add field tags to blog
[root@hding myblog]# python manage.py migrate
Operations to perform:
  Synchronize unmigrated apps: staticfiles, messages
  Apply all migrations: admin, blog, contenttypes, auth, sessions
Synchronizing apps without migrations:
  Creating tables...
    Running deferred SQL...
  Installing custom SQL...
Running migrations:
  Rendering model states... DONE
  Applying blog.0001_initial... OK
数据在shell中的调试
[root@hding myblog]# python manage.py shell
Python 2.7.11 (default, Feb  4 2016, 07:16:42)
[GCC 4.1.2 20080704 (Red Hat 4.1.2-44)] on linux2
Type "help", "copyright", "credits" or "license" for more information.
(InteractiveConsole)
>>> from blog.models import Blog
>>> from blog.models import Author
>>> from blog.models import Tag
#增加创建数据
>>> author_1 = Author.objects.create(name ='terry')
>>> author_1
<Author: terry>
>>> tag_1 = Tag.objects.create(tag_name='python')
>>> tag_1
<Tag: python>
>> blog_1 = Blog.objects.create(title = 'hello world',
...                              author = author_1,
...                              content = 'this is a first web site for me')
>>> blog_1
<Blog: hello world>
>>> blog_1.tags.all()
[]
#给blog 增加tag
>>> blog_1.tags.add(tag_1)
>>> blog_1.tags.all()
[<Tag: python>]
>>> blog_1.date_time
datetime.datetime(2016, 2, 10, 7, 43, 2, 448507, tzinfo=<UTC>)              #时间自动添加
#简易创建方法直接对象实例化,但必需save,否则没有写进数据库,而用Author.objects.create()则是直接写到数据库中
>>> author_2 = Author(name='sumsan')
>>> author_2
<Author: sumsan>
>>> author_2.save()                                                         #必需save()才能确保写进数据库里
#查询单个数据和所有数据
>>> Author.objects.all()
[<Author: terry>, <Author: sumsan>]
>>> author= Author.objects.get(name='terry')                                #author为查到的名字为terry的实例
>>> author
<Author: terry>
>>> author_1
<Author: terry>
#创建由terry写的第二个博客
>>> blog_2 = Blog.objects.create(title='django',author=author_1,content='django is so easy to use')
>>> Blog.objects.all()
[<Blog: hello world>, <Blog: django>]
#查询terry写的所有博客
>>> author_1.blog_set.all()
[<Blog: hello world>, <Blog: django>]
#查询terry写的博客中题目为django的博客
>>> author_1.blog_set.get(title='django')
<Blog: django>
#新建tag_2,tag_3
>>> tag_2 = Tag(tag_name='django')
>>> tag_2.save()
>>> tag_3 = Tag.objects.create(tag_name='socket')
>>> Tag.objects.all()
[<Tag: python>, <Tag: django>, <Tag: socket>]
#blog_1增加django标签
>>> blog_1.tags.add(tag_2)
#blog_2增加django标签
>>> blog_2.tags.add(tag_2)
#查询含有django标签的博客
>>> tag_2.blog_set.all()
[<Blog: hello world>, <Blog: django>]
#查询blog_1含有的标签
>>> blog_1.tags.all()
[<Tag: python>, <Tag: django>]
#过滤查询
>>> blog_1.tags.filter(tag_name__icontains='dj')
[<Tag: django>]
>>> blog_1.tags.filter(tag_name__iexact='django')
[<Tag: django>]
#删除操作
>>> blog_1.tags.filter(tag_name__iexact='django').delete()
>>> blog_1.tags.filter(tag_name__iexact='django')
[]
在shell建立的数据在哪呢,可以在django自定义的admin后台看到
#新建超极用户
[root@hding myblog]# python manage.py createsuperuser
Username (leave blank to use 'root'): root
Email address: [email protected]
Password:
Password (again):
Superuser created successfully.
修改admin.py,只有在后台注册了,才能在admin后台进行管理
/myblog/myblog/blog/admin.py
1 from django.contrib import admin
2
3 # Register your models here.
4 from blog.models import Author,Tag,Blog
5
6 class AuthorAdmin(admin.ModelAdmin): #定制Author界面
7 list_display=('name','email','website') #分为name,email,website三列进行显示
8 search_field=('name')
9
10 class BlogAdmin(admin.ModelAdmin): #定制Blog界面
11 list_display = ('title','author','date_time')
12 list_filter = ('date_time',) #按照时间进行查看
15 filter_horizontal=('tags',) #tag水平选择
16
17 admin.site.register(Author, AuthorAdmin) #注册
18 admin.site.register(Blog,BlogAdmin)
19 admin.site.register(Tag)
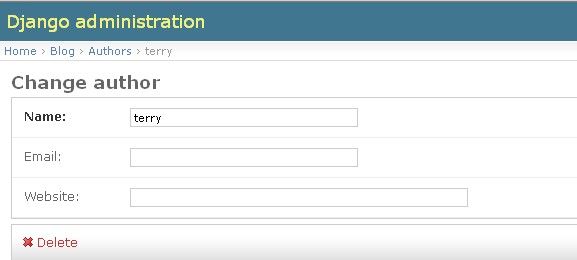
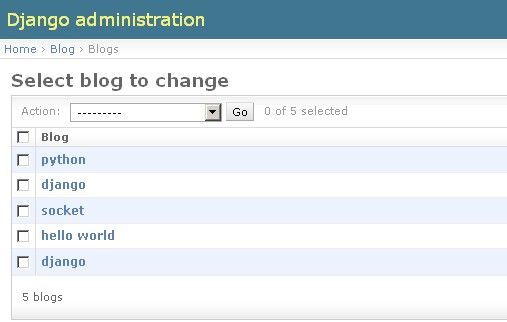
~ 老界面
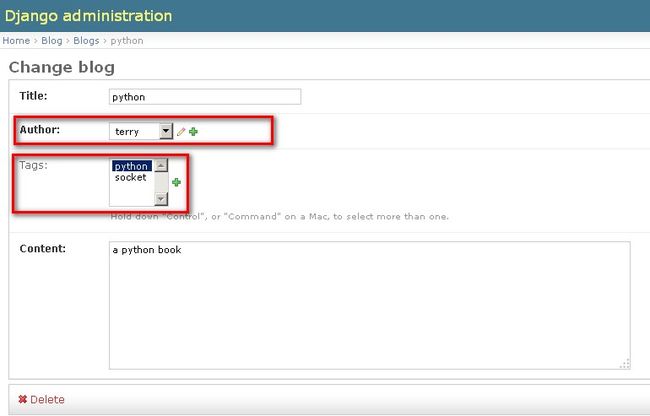
定制后的界面
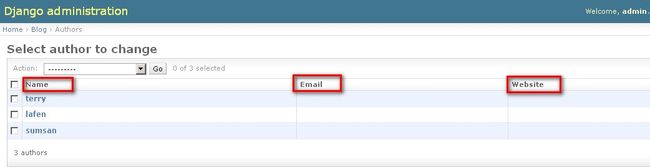
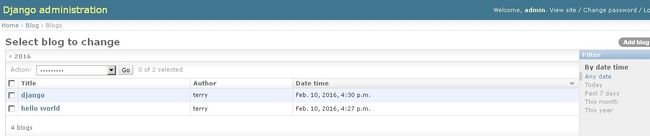
定制后的界面能够更加直观的看到内部的数据,admin也是可以自定义的,这是我们管理后台数据的地方,可以通过admin对数据库的数据进行增删改查,更加方便