#spring jar#
commons-logging-1.1.1.jar
commons-logging-api-1.1.jar
org.springframework.asm-3.1.3.RELEASE.jar
org.springframework.beans-3.1.3.RELEASE.jar
org.springframework.context-3.1.3.RELEASE.jar
org.springframework.context.support-3.1.3.RELEASE.jar
org.springframework.core-3.1.3.RELEASE.jar
org.springframework.expression-3.1.3.RELEASE.jar
org.springframework.web-3.1.3.RELEASE.jar
org.springframework.web.servlet-3.1.3.RELEASE.jar
#eclipse 版本#
Eclipse Java EE IDE for Web Developers.
Version: Kepler Service Release 1
Build id: 20130919-0819
#项目步骤#
1 新建dynamic web project
2 修改web.xml(添加servlet javaServlet负责根据 URL的路径结构进行分析,而调用相应的JavaBean进行业务逻辑处理。)
<?xml version="1.0" encoding="UTF-8"?>
<web-app xmlns:xsi="http://www.w3.org/2001/XMLSchema-instance"
	xmlns="http://java.sun.com/xml/ns/javaee"
	xsi:schemaLocation="http://java.sun.com/xml/ns/javaee http://java.sun.com/xml/ns/javaee/web-app_2_5.xsd"
	id="WebApp_ID" version="2.5">
	<display-name>abspring</display-name>
	<welcome-file-list>
		<welcome-file>index.html</welcome-file>
		<welcome-file>index.htm</welcome-file>
		<welcome-file>index.jsp</welcome-file>
		<welcome-file>default.html</welcome-file>
		<welcome-file>default.htm</welcome-file>
		<welcome-file>default.jsp</welcome-file>
	</welcome-file-list>
	<servlet>
		<description>这是我的第一个Servlet</description>
		<display-name>mvc</display-name>
		<servlet-name>mvc</servlet-name>
		<!-- dispatcher -->
		<servlet-class>org.springframework.web.servlet.DispatcherServlet</servlet-class>
		<init-param>
			<param-name>contextConfigLocation</param-name>
			<param-value>classpath:mvc-servlet.xml</param-value>
		</init-param>
		<load-on-startup>1</load-on-startup>
	</servlet>
	<servlet-mapping>
		<servlet-name>mvc</servlet-name>
		<url-pattern>*.do</url-pattern>
	</servlet-mapping>
	<!-- <servlet> <description></description> <display-name>helloworld</display-name>
		<servlet-name>helloworld</servlet-name> <servlet-class>com.spring.mvc.learning.helloworld</servlet-class>
		</servlet> <servlet-mapping> <servlet-name>helloworld</servlet-name> <url-pattern>/helloworld</url-pattern>
		</servlet-mapping> -->
</web-app>
3 在src中 spring的 配置xml(构建beans)
<?xml version="1.0" encoding="UTF-8"?>
<!-- org.springframework.web.servlet.view.InternalResourceView -->

<beans xmlns="http://www.springframework.org/schema/beans"
	xmlns:xsi="http://www.w3.org/2001/XMLSchema-instance" xmlns:tx="http://www.springframework.org/schema/tx"
	xmlns:aop="http://www.springframework.org/schema/aop" xmlns:context="http://www.springframework.org/schema/context"
	xmlns:util="http://www.springframework.org/schema/util" xmlns:p="http://www.springframework.org/schema/p"
	xmlns:cache="http://www.springframework.org/schema/cache" xmlns:jdbc="http://www.springframework.org/schema/jdbc"
	xsi:schemaLocation="http://www.springframework.org/schema/beans
http://www.springframework.org/schema/beans/spring-beans-3.0.xsd
http://www.springframework.org/schema/tx
http://www.springframework.org/schema/tx/spring-tx-3.0.xsd
http://www.springframework.org/schema/util
http://www.springframework.org/schema/util/spring-util-3.0.xsd
http://www.springframework.org/schema/cache
http://www.springframework.org/schema/cache/spring-cache.xsd
http://www.springframework.org/schema/task
http://www.springframework.org/schema/task/spring-task-3.0.xsd
http://www.springframework.org/schema/jdbc
http://www.springframework.org/schema/jdbc/spring-jdbc-3.0.xsd
http://www.springframework.org/schema/context
http://www.springframework.org/schema/context/spring-context-3.0.xsd">
<context:component-scan base-package="com.spring.mvc.control"></context:component-scan>
<bean class="org.springframework.web.servlet.view.InternalResourceViewResolver">
<property name="prefix" value="/WEB-INF/jsp/"></property>
<property name="suffix" value=".jsp"></property>
</bean>
</beans>
内部资源视图解析器的
前缀:就是http://localhost:8080/项目名称/ jsp
后缀:.jsp
4 新建 RequestMapping
@Controller
@RequestMapping("/xxxx")
package com.spring.mvc.control;

import org.springframework.stereotype.Controller;
import org.springframework.web.bind.annotation.RequestMapping;
import org.springframework.web.servlet.ModelAndView;

@Controller
@RequestMapping("/goods")
public class GoodControl {

	@RequestMapping("/add")
	public String addgoods()
	{
		return "add";
	}
	@RequestMapping("/list")
	public ModelAndView listgoods(String uname,String idcard)
	{
		ModelAndView mav=new ModelAndView();
		mav.addObject("uname",uname);
		mav.addObject("idcard",idcard);
		mav.setViewName("list");
		return mav;

	}
}
请求 :http://localhost:8080/项目名称/goods/add.do
5 新建内部资源
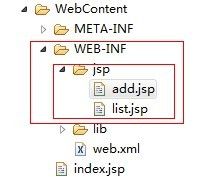
图 5 内部资源位置
add.jsp
<%@ page language="java" contentType="text/html; charset=utf-8"
	pageEncoding="utf-8"%>
<!DOCTYPE html PUBLIC "-//W3C//DTD HTML 4.01 Transitional//EN" "http://www.w3.org/TR/html4/loose.dtd">
<html>
<head>
<meta http-equiv="Content-Type" content="text/html; charset=utf-8">
<title>Insert title here</title>
</head>
<body>
	<form action="${pageContext.request.contextPath }/goods/list.do" method="post">
		<table>
			<tr>
				<td>户名:</td>
				<td><input type="text" name="uname"/></td>
			</tr>
			<tr>
				<td>身份证:</td>
				<td><input type="text" name="idcard"/></td>
			</tr>
			<tr>
				<td></td>
				<td><input type="submit" value="提交"/></td>
			</tr>
		</table>
	</form>
</body>
</html>
list.jsp
<%@ page language="java" contentType="text/html; charset=utf-8"
    pageEncoding="utf-8"%>
<!DOCTYPE html PUBLIC "-//W3C//DTD HTML 4.01 Transitional//EN" "http://www.w3.org/TR/html4/loose.dtd">
<html>
<head>
<meta http-equiv="Content-Type" content="text/html; charset=utf-8">
<title>Insert title here</title>
</head>
<body>
Hi,How are you?
${uname}
<br/>
your idcard : ${idcard }<br/>
real?

</body>
</html>
list.jsp 中 用到了 el表达式。
至此你可以调试你的web project了