wpf 学习笔记
1. 同时加载两个窗体
先添加一个子窗体,然后再app.xaml.cs里重写OnStartup方法
//app.xaml.cs

using System.Configuration;
using System.Data;
using System.Windows;

namespace WpfApp1
{
    ///
    /// Interaction logic for App.xaml
    ///
    public partial class App : Application
    {
        protected override void OnStartup(StartupEventArgs e)
        {
            base.OnStartup(e);
            subWindow sb = new subWindow(); //这是子窗口
            sb.Show();
        }
    }

}
参考链接:WPF一次性开启两个窗口 - 夜落璇玑 - 博客园 (cnblogs.com)
2.实现点击窗口任意位置拖动
1、注册3个事件如下:
// xaml里
参考链接:c# wpf 实现窗口任意区域点击拖动_wpf 拖动窗体-CSDN博客
3.实现一个透明、无边框、鼠标穿透的WPF窗体
参考链接:Simple WPF:实现一个透明、无边框、鼠标穿透的WPF窗体 - 知乎 (zhihu.com)
一步一步实现WPF透明化窗口_wpf透明窗体-CSDN博客
//设置 AllowsTransparency="True" WindowStyle="None" Background="Transparent"
4.去除标题栏
//设置 WindowStyle ="None"
5.按钮渐变色 鼠标悬停时按钮不变色 控件重叠
//设置grid的背景色
//调用
6. grid 分割线(圆角)
//圆角
7. textblock 样式(渐变色 )
//设置字体颜色
加分 8.textbox 样式(圆角)
第二种写法:
9.button
//设置圆角
//设置阴影
10.ComboBox(样式)
xaml:
//圆角
0
5
10
20
//允许编辑 设置IsEditable="True",即前面变成文本框形式
0
10
11
19
cs:
private void ComboBox_SelectionChanged(object sender, SelectionChangedEventArgs e)
{
int count = Convert.ToInt32(combobox.SelectedValue.ToString().Replace("System.Windows.Controls.ComboBoxItem: ", ""));
SubWindow subWindow = SubWindow.pwindow;
subWindow.Close();
SubWindow.hcount = count;
SubWindow subWindow2 = new SubWindow();
subWindow2.Show();
}
//动态生成Items
for(int i = 1; i <= SubWindow.count; i++)
{
combobox.Items.Add(i.ToString());
}ComboBox如何绑定多项值
wpf中可以利用绑定来实现:也不麻烦。
xaml:
2.combobox更改模版
11.在子窗口控制主窗口动态生成控件时,会出现两个相同的窗口
解决办法:
在主窗口里
 public static SubWindow pwindow = null;

     public SubWindow()
     {
         InitializeComponent();
         pwindow = this;   //将当前窗口给pwindow,方便在setting里使用
     }
在子窗口里,
 SubWindow subWindow = SubWindow.pwindow;
 subWindow.Close();  //关闭上一个窗口

 SubWindow.hcount = count;
 SubWindow subWindow2 = new SubWindow();
 subWindow2.Show();
12.RadioButton
13.slider
    调整


 public static int buttonSize = 0;

private void slider1_ValueChanged(object sender, RoutedPropertyChangedEventArgs e)
{
    string val = Convert.ToInt32(e.NewValue).ToString();
    //string msg = String.Format("Current value: {0}", val);
    this.textbox1.Text = val;
    buttonSize =Convert.ToInt32(val);
    SubWindow subWindow = SubWindow.pwindow;
    subWindow.Close();
    SubWindow subWindow2 = new SubWindow();
    subWindow2.Show();
}
14.动态生成控件
 private void CreateCanvas3()
 {
     LinearGradientBrush brush3 = (LinearGradientBrush)this.FindResource("Brush3");
     LinearGradientBrush brush2 = (LinearGradientBrush)this.FindResource("Brush2");
     Canvas canvas = new Canvas()
     {
         Margin = new Thickness(30 + buttonsize * 3 + Llength, 40 + buttonsize * 4 + hlength * 2, 90 + buttonsize * 3 + Llength, 40 + buttonsize * 3 + hlength * 2)
     };
     //成绩
     Border border = new Border()
     {
         BorderThickness = new Thickness(2),
         BorderBrush = System.Windows.Media.Brushes.WhiteSmoke,
         Background = brush3,
         CornerRadius = new CornerRadius(4),
         Margin = new Thickness(30 + buttonsize * 6, 20 + buttonsize * 6, 2 + buttonsize * 6, 0+buttonsize * 6),
         Height = 35 + buttonsize * 4,
         Width = 80 + buttonsize * 5
     };

     Label label = new Label()
     {
         Content = "123",
         FontSize = 14 + buttonsize * 2,
         Margin = new Thickness(15, 1, 15, 0),
         HorizontalContentAlignment = HorizontalAlignment.Center,
         VerticalContentAlignment = VerticalAlignment.Center,
     };
     //名称
     Border border2 = new Border()
     {
         BorderThickness = new Thickness(2,0,2,2),
         BorderBrush = System.Windows.Media.Brushes.WhiteSmoke,
         Background = brush3,
         CornerRadius = new CornerRadius(0,0,4,4),
         Margin = new Thickness(30 + buttonsize * 6, 53 + buttonsize * 6, 0 + buttonsize * 6, 0 + buttonsize * 6),
         Height = 35 + buttonsize * 4,
         Width = 80 + buttonsize * 5
     };
     Label label2 = new Label()
     {
         Content = "456",
         FontSize = 14 + buttonsize * 2,
         Margin = new Thickness(18, 1, 15, 0),
         HorizontalContentAlignment = HorizontalAlignment.Center,
         VerticalContentAlignment = VerticalAlignment.Center,
     };
     border.Child = label;
     border2.Child = label2;
     //组号
     Border border1 = new Border()
     {
         BorderThickness = new Thickness(2),
         BorderBrush = System.Windows.Media.Brushes.WhiteSmoke,
         Background = brush2,
         CornerRadius = new CornerRadius(50),
         Margin = new Thickness(15 + buttonsize * 4, 17 + buttonsize * 4, 0, 0),
         Height = 42 + buttonsize * 2,
         Width = 40 + buttonsize * 2
     };
     Label label1 = new Label()
     {
         Content = "1",
         FontSize = 14 + buttonsize * 2,
         HorizontalContentAlignment = HorizontalAlignment.Center,
         VerticalContentAlignment = VerticalAlignment.Center,
         Margin = new Thickness(0, 4, 0, 0),
         MinWidth = 40
     };
     border1.Child = label1;
     canvas.Children.Add(border);
     canvas.Children.Add(border2);
     canvas.Children.Add(border1);
     canvaswidth = 110;
     buttonwrap.Children.Add(canvas);
 }
15.控件右击事件
右击事件是MouseRightButtonUp
//windows.resource里定义一个ContextMenu


//右击事件是MouseRightButtonUp,右击之后出现ContextMenu里的设置


private void Mouse_RightButtonUp(object sender, MouseButtonEventArgs e)
{
    Grid sp = (Grid)sender;
    ContextMenu cm = new ContextMenu();
   ContextMenu ct= this.FindResource("ContextMenu") as ContextMenu;
   sp.ContextMenu = ct;
}


  //打开设置窗口
  private void MenuItem_Click(object sender, RoutedEventArgs e)
  {
      setting st = new setting();
      st.ShowDialog();
  }
16.窗体靠近屏幕左边隐藏,并生成一个小球
参考:
C# GetWindowRect用法-CSDN博客
c# 获取当前活动窗口句柄,获取窗口大小及位置 - jack_Meng - 博客园 (cnblogs.com)
WPF实现边缘依靠效果 - IPS99技术分享
C# 完美实现窗口边缘吸附功能 - 流泪的冰淇淋 - 博客园 (cnblogs.com)
wpf 如何让当前窗口隐藏_wpf 窗口关闭设置看不到-CSDN博客
wpf 类似于360加速球,的拖动和点击功能的实现_-CSDN问答
[小结][N种方法]实现WPF不规则窗体 - DebugLZQ - 博客园 (cnblogs.com)
WPF中控制窗口显示位置的三种方式 - LJD泊水 - 博客园 (cnblogs.com)
WPF中三种方法得到当前屏幕的宽和高_fullprimaryscreenheight-CSDN博客
在要隐藏的页面的xaml里:
cs:
//定义2个变量记录信息
Point _pressedPosition;
bool _isDragMoved = false;
[DllImport("user32.dll", CharSet = CharSet.Auto, ExactSpelling = true)]
public static extern IntPtr GetForegroundWindow();
[DllImport("user32.dll", CharSet = CharSet.Auto, ExactSpelling = true)]
public static extern int ShowWindow(IntPtr hwnd, int nCmdShow);
[DllImport("user32.dll")]
[return: MarshalAs(UnmanagedType.Bool)]
static extern bool GetWindowRect(IntPtr hWnd, ref RECT lpRect);
[StructLayout(LayoutKind.Sequential)]
public struct RECT
{
public int Left; //最左坐标
public int Top; //最上坐标
public int Right; //最右坐标
public int Bottom; //最下坐标
}
public static MainWindow pwindow=null;
public MainWindow()
{
InitializeComponent();
pwindow = this;
}
+ private void Grid_MouseLeftButtonDown(object sender, MouseButtonEventArgs e)
{
this.DragMove();
//获取当前屏幕的大小
// double screenheight = SystemParameters.PrimaryScreenHeight;
//this.Left = e.GetPosition(this).Y - 50;
_pressedPosition = e.GetPosition(this);
IntPtr myptr = GetForegroundWindow();
IntPtr awin = GetForegroundWindow(); //获取当前窗口句柄
RECT rect = new RECT();
GetWindowRect(awin, ref rect);
double x = rect.Left;
MessageBox.Show(x.ToString());
if (x <= 1)
{
this.ShowInTaskbar = false;
this.Visibility = Visibility.Hidden;
Hide window1 = new Hide();
//自定义控件显示位置
window1.WindowStartupLocation = WindowStartupLocation.Manual;
window1.Left = -50;
window1.Top = 5;
window1.Show();
}
}
//显示小球的界面:
cs里:
private void Grid_MouseLeftButtonDown(object sender, MouseButtonEventArgs e)
{
this.DragMove();
this.Left = e.GetPosition(this).Y-50;
}
private void Button_Click(object sender, RoutedEventArgs e)
{
MainWindow mainWindow = MainWindow.pwindow;
//mainWindow.Show();
mainWindow.ShowInTaskbar = true;
mainWindow.Visibility = Visibility.Visible;
//this.Visibility = Visibility.Hidden;
this.ShowInTaskbar = false;
this.Visibility=Visibility.Hidden;
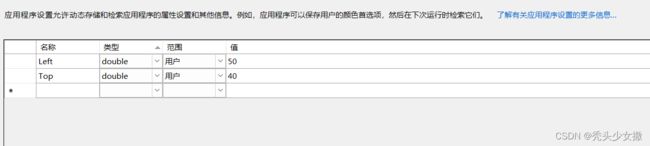
}17.wpf 记忆上次关闭时窗口的位置,并在下次打开时读取位置
参考:
WPF编程,窗口保持上次关闭时的大小与位置。_closing="window_closing-CSDN博客
若是没有settings文件,可以右击项目-添加-配置文件
1.在settings添加变量
2.在窗口关闭事件中保存窗口位置
private void Button_Click(object sender, RoutedEventArgs e)
{
    Settings.Default.Left =this.RestoreBounds.Left;
    Settings.Default.Top = this.RestoreBounds.Top;
    Settings.Default.Save();
    this.Close();
}
3.在窗口的构造函数中读取位置
 //读取配置文件
 try
 {
     //设置位置、大小
     //Rect restoreBounds = Properties.Settings.Default.MainRestoreBounds;
     //this.WindowState = WindowState.Normal;
     this.Left = Settings.Default.Left;
     this.Top = Settings.Default.Top;
 }
 catch { }
18.鼠标悬停事件
参考:WPF鼠标事件简介_wpf 鼠标悬浮事件-CSDN博客
19.窗口圆角
//在window里写入WindowStyle="None" AllowsTransparency="True" Background="Transparent" OpacityMask="White"


                123
20.wpf设置gif动图为背景
1.WpfAnimatedGIF
参考:
在WPF显示动态GIF图片 - 雨也绵绵 - 博客园 (cnblogs.com)
1.添加nuget包,安装WpfAnimatedGIF,
2.添加 xmlns:gif="http://wpfanimatedgif.codeplex.com"
3.引用:
调用:
2. ImageAnimator
参考:
WPF加载GIF的五种方式(Storyboard / WpfAnimatedGif / ImageAnimator / PictureBox / MediaElement) - WebEnh - 博客园 (cnblogs.com)
cs:
调用:
imgGifShow.ImageSource = GetGifImage(path);
更换动图或关闭时:要把ImageSource设为空,以防内存泄漏
if (imgPath.EndsWith(".gif"))
{
StopAnimate();
}
imgGifShow.ImageSource = null;
#region 显示动图
public BitmapSource GetGifImage(string path)
{
this.gifBitmap = new Bitmap(path);
imgPath = path;
this.bitmapSource = this.GetBitmapSource();
//this.imgGifShow.ImageSource = this.bitmapSource;
StartAnimate();
return bitmapSource;
}
///
/// 从System.Drawing.Bitmap中获得用于显示的那一帧图像的BitmapSource
///
///
/// Start
///
public void StartAnimate()
{
ImageAnimator.Animate(this.gifBitmap, this.OnFrameChanged);
}
///
/// Stop
///
public void StopAnimate()
{
ImageAnimator.StopAnimate(this.gifBitmap, this.OnFrameChanged);
}
///
/// 帧处理
///
private void OnFrameChanged(object sender, EventArgs e)
{
Dispatcher.BeginInvoke(DispatcherPriority.Normal, new Action(() =>
{
ImageAnimator.UpdateFrames(); // 更新到下一帧
if (this.bitmapSource != null)
{
this.bitmapSource.Freeze();
}
this.bitmapSource = this.GetBitmapSource();
this.imgGifShow.ImageSource = this.bitmapSource;
this.InvalidateVisual();
}));
}
private void Window_Closing(object sender, System.ComponentModel.CancelEventArgs e)
{
StopAnimate();
}
///
/// 删除本地 bitmap resource
///
[DllImport("gdi32.dll", CharSet = CharSet.Auto, SetLastError = true)]
[return: MarshalAs(UnmanagedType.Bool)]
static extern bool DeleteObject(IntPtr hObject);
#endregion21.倒计时功能
倒计时有三种写法:
1. DispatcherTimer:
DispatcherTimer是为 WPF 专门设计的,不然的话会提示界面资源被其他线程所拥有而无法更新界面。DispatcherTimer 是在 UI 线程跑的可以直接更新 UI
DispatcherTimer 定时器不是单独开启一个线程来运行定时器方法,而是和主线程是同一个线程,只是通过改变运行优先级来实现定时器,当定时器时间到了,主线程就转去执行定时器方法。因此DispatcherTimer定时器不要用来实现执行时间长的任务,不然会使主线程很卡,导致WPF界面很难看,用户不友好!
参考:WPF实现倒计时_wpf 倒计时-CSDN博客
xaml:
//签到按钮
cs:
private int Second = 10;
//倒计时
public void disTimer_Tick(object sender, EventArgs e)
{
Second--;
if (Second <0)
{
MessageBox.Show("倒计时已结束!", "系统提示", MessageBoxButton.OK, MessageBoxImage.Warning);
this.disTimer.Stop();//计时停止
//DJSBorder.Visibility = Visibility.Collapsed;
}
else
{
if (Second <= 3)
{
DaoJiShi.Foreground = System.Windows.Media.Brushes.Red;
}
else
{
DaoJiShi.Foreground = System.Windows.Media.Brushes.Yellow;
}
//判断是否处于UI线程上
//判断是否处于UI线程上
if (DaoJiShi.Dispatcher.CheckAccess())
{
DaoJiShi.Text = Second.ToString();
}
else
{
DaoJiShi.Dispatcher.BeginInvoke(DispatcherPriority.Normal, (Action)(() =>
{
DaoJiShi.Text = Second.ToString();
}));
}
}
}
private DispatcherTimer disTimer = new DispatcherTimer();
public void CountDown()
{
disTimer.Tick += new EventHandler(disTimer_Tick);//每一秒执行的方法
disTimer.Interval = new TimeSpan(10000000); //时间间隔为一秒。
//因为设置时间间隔后,计时开始后会先过一秒才开始显示倒数计时的时间,这么算起来相当于是多计时了一秒,
//所以要在计时开始前先设置textbox里的值
//然后在计时开始后就减一操作
DaoJiShi.Text = Second.ToString();
DaoJiShi.Foreground = System.Windows.Media.Brushes.Yellow;
disTimer.Start();//计时开始
}2.System.Timers.Timer
组件Timer是基于服务器的计时器,在属性中的毫秒Interval数过后,该计时器在应用程序中引发Elapsed事件。 可以将 对象配置为 Timer 仅引发一次事件,也可以使用 属性重复引发事件 AutoReset 。 通常, Timer 对象在类级别声明,以便只要需要,它就保留在范围内。 然后,可以处理其 Elapsed 事件以提供常规处理。 例如,假设关键服务器必须保持每周 7 天、每天 24 小时运行。 可以创建一个Timer服务,该服务使用 对象定期检查服务器并确保系统正常运行。 如果系统未响应,服务可能会尝试重启服务器或通知管理员。
Timer 是在非UI线程跑的,不能直接操作UI控件
System.Timers.Timer如果在 WPF 应用程序中使用 ,请注意,在System.Timers.Timer用户界面 (UI) 线程的线程上运行。 若要访问用户界面 (UI) 线程上的对象,需要使用Dispatcher.Invoke 或 BeginInvoke将操作
发布到用户界面 (UI) 线程
上。
  System.Timers.Timer timer = null;

 public StartBiaoJue(string value1)
 {
     InitializeComponent();

     timer = new System.Timers.Timer(1000);  //计时间隔为1秒
     timer.Elapsed += Timer_Elapsed;
     timer.AutoReset = true;
     timer.Enabled = true;   //开启计时
}

private void Timer_Elapsed(object sender, System.Timers.ElapsedEventArgs e)
{
    Second--;

    //创建一个委托,用于封装一个方法,在这里是封装了 控制更新控件 的方法
    Dispatcher.Invoke(() =>
    {
        // 更新UI元素
        DaoJiShi.Text = Second.ToString();   //文本框值更改
        if (Second <= 3 && Second >0)
        {
            DaoJiShi.Foreground = System.Windows.Media.Brushes.Red;
        }
        if (Second == 0)
        {
            timer.Enabled = false;       //关闭计时
            DJSBorder.Visibility = Visibility.Collapsed;

        }
    });
}

private void Timer_Elapsed(object sender, System.Timers.ElapsedEventArgs e)
{
    Second--;

    //创建一个委托,用于封装一个方法,在这里是封装了 控制更新控件 的方法
    Dispatcher.BeginInvoke(new Action(() =>
    {
        // 更新UI元素
        DaoJiShi.Text = Second.ToString();   //文本框值更改
        if (Second <= 3 && Second >0)
        {
            DaoJiShi.Foreground = System.Windows.Media.Brushes.Red;
        }
        if (Second == 0)
        {
            timer.Enabled = false;       //关闭计时
            DJSBorder.Visibility = Visibility.Collapsed;

        }
    });
}
3.System.Threading.Timer
System.Threading.Timer 是由线程池调用的。
所有的Timer对象只使用了一个线程来管理。这个线程知道下一个Timer对象在什么时候到期。下一个Timer对象到期时,线程就会唤醒,在内部调用ThreadPool 的 QueueUserWorkItem,将一个工作项添加到线程池队列中,使你的回调方法得到调用。如果回调方法的执行时间很长,计时器可能(在上个回调还没有完成的时候)再次触发。这可能造成多个线程池线程同时执行你的回调方法。
没实际用,因此没代码
可参考:Timer 类 (System.Threading) | Microsoft Learn
4.在倒计时暂停后再次启动时,接着上次没走完的秒数计时,而不是再走一秒
1.定义倒计时时,先不设置间隔
 timer.Elapsed += Timer_Elapsed;
 //timer.Interval = 1000;   //这一步先不定义
 timer.Enabled = false;

2.
   Stopwatch 可以测量一个时间间隔的运行时间,也可以测量多个时间间隔的总运行时间。一般用来测量代码执行所用的时间或者计算性能数据,在优化代码性能上可以使用Stopwatch来测量时间。
  private void Timer_Elapsed(object sender, ElapsedEventArgs e)
        {
            Dispatcher.Invoke(() =>
            {
                timer.Interval = 1000;
                _stopWatch.Restart();  //重新启动Stopwatch,记录每秒内
                second--;


                if (second <= 0)
                {
                    timer.Enabled = false;
                }
            });
        }

        //定义Stopwatch
        private Stopwatch _stopWatch = new Stopwatch();
        //private TimeSpan _baseInterval = TimeSpan.FromSeconds(1);
        public void StartDJS()    //开始倒计时事件
        {
            if (second > 0)
            {
                if (App.DJSStop)  //用来记录倒计时是否停止
                {
          //若是停止了就记录所走的毫秒数
         //若是时间大于1000毫秒也就是1秒,就设置倒计时时间间隔为10毫秒,即10毫秒后执行倒计时事件
         //若是小于1000毫秒,表明一秒没走完倒计时就暂停了,这时就用1000毫秒减去已经走的毫秒数,就是没走的毫秒数,在这个毫秒数的间隔后执行倒计时事件
                    if (_stopWatch.ElapsedMilliseconds >= 1000)
                    {
                        timer.Interval = 10;
                    }
                    else
                    {
                        timer.Interval = 1000 - _stopWatch.ElapsedMilliseconds;
                    }
                    timer.Enabled = true;
                    App.DJSStop = false;
                }
                else
                {
                    timer.Interval = 10;
                    timer.Start();
                }
            }
        }
        public void StopDJS()
        {
            timer.Enabled = false;
            _stopWatch.Stop();
            App.DJSStop = true;
        }
22.两个窗口间传值(委托)
1.主窗口向子窗口传值
1.可以在子窗口里定义一个变量用来接收值
子窗口cs里:

     public string test_str { get; set; }

        public child_window()
        {
            InitializeComponent();
        }

        private void Button_Click(object sender, RoutedEventArgs e)
        {
            tb_receive.Text = test_str;
        }
主窗口cs里:
    private void Button_Click(object sender, RoutedEventArgs e)
        {
            child_window child_Window = new child_window();
            child_Window.test_str = tb_message.Text;
            child_Window.Show();
        }

2.直接通过构造函数来实现 重载
子窗口构造函数改为:也可以再添加一个构造函数,多个构造函数只要参数不同,就不冲突。
    public child_window(string str)
        {
            InitializeComponent();
             tb_receive.Text=str;
        }
主窗口里:
    private void Button_Click(object sender, RoutedEventArgs e)
        {
            //把值当参数传到子窗口里
            child_window child_Window = new child_window(tb_message.Text);
            child_Window.Show();
        }
2.子窗口向主窗口传值(利用委托)
子窗口:
    public delegate void SendMessage(string value);
        public SendMessage sendMessage;
        public child_window()
        {
            InitializeComponent();
        }

        private void Button_Click(object sender, RoutedEventArgs e)
        {
            sendMessage(tb_send.Text);
        }


主窗口:
    public void Recevie(string value)
        {
            tb_recevie.Text = value;
        }

        public MainWindow()
        {
            InitializeComponent();
        }

        private void Button_Click(object sender, RoutedEventArgs e)
        {
            child_window child_Window = new child_window();
            child_Window.sendMessage = Recevie;
            child_Window.Show();
        }