huggingface(三)
HF笔记(三)
本篇文章通过一个简单的例子,来解释如何通过训练的模型,使用本地的数据集,对模型经行下游任务的实现。本片文章思路参考B站视频【翻遍整个B站,这绝对是2025讲的最好的HuggingFace教程,带你3小时吃透huggingface与Transformers,少走99%的弯路!】https://www.bilibili.com/video/BV1KTQcYUEeT?p=4&vd_source=1a0d4758ac4c6a667a8686daaa0d1b5e,最近B站好像涌现了不少这样的视频,感觉比较有学习意义,值得一看。
一、下载数据集与模型
下载数据集时,我们仿照huggingface(二)中的方法,下载lansinuote/ChnSentiCorp · Datasets at Hugging Face](https://huggingface.co/datasets/lansinuote/ChnSentiCorp)这一数据集:
from huggingface_hub import snapshot_download

# 下载数据集
snapshot_download(
    repo_id="lansinuote/ChnSentiCorp",  # 数据集的repo_id
    repo_type="dataset",                  # 指定类型为 dataset
    local_dir=r"F:\Python Project\Project\Natural Language Processing\huggingface\data\ChnSentiCorp",  # 本地保存路径(可以替换为自己的绝对路径)
    resume_download=True,                 # 支持断点续传
    token="hf_nkaCdM******AbEkbjLKvuZdEOTtV"  # 替换为你的 Hugging Face 令牌
)
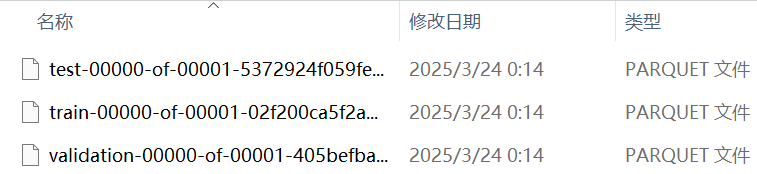
我们可以在这个文件的data文件夹下看到三个文件,分别是这组数据的训练集、测试集和校准集:
我们可以通过python代码来加载数据集字典(DatasetDict):
from datasets import load_dataset,load_from_disk

dataset = load_dataset(r"F:\Python Project\Project\Natural Language Processing\huggingface\data\ChnSentiCorp\data",
                      #split = 'train' #如果只想输出训练集信息,可以使用split参数)
print(dataset)

# dataset = load_from_disk(r"F:\Python Project\Project\Natural Language Processing\huggingface\data\ChnSentiCorp")
# print(dataset)
结果:
DatasetDict({
    train: Dataset({
        features: ['text', 'label'],
        num_rows: 9600
    })
    validation: Dataset({
        features: ['text', 'label'],
        num_rows: 1200
    })
    test: Dataset({
        features: ['text', 'label'],
        num_rows: 1200
    })
})
与我们从文件中观察到的数据是相同的,但这个只是这组数据的概述,我们想要进一步读取数据内容还需要一些步骤。
**注意:**我们这里不能直接使用dataset = load_from_disk(r"F:\Python Project\Project\Natural Language Processing\huggingface\data\ChnSentiCorp")来读取我们的数据,原因是load_from_disk()适合读取.arrow后缀的文件,所以我们可以在data目录下新建一个文件夹,将arrow类型的数据存放在里面:
dataset.save_to_disk(r"F:\Python Project\Project\Natural Language Processing\huggingface\data\CHN-arrow")
结果:
Saving the dataset (1/1 shards): 100%|██████████| 9600/9600 [00:00<00:00, 1597196.29 examples/s]
Saving the dataset (1/1 shards): 100%|██████████| 1200/1200 [00:00<00:00, 406457.63 examples/s]
Saving the dataset (1/1 shards): 100%|██████████| 1200/1200 [00:00<00:00, 598473.82 examples/s]
你会发现这三组数据分别被存放到了不同的文件夹中,分别对应训练集、测试集和校准集。
此时,我们可以使用load_from_disk读取数据。
from datasets import load_dataset,load_from_disk

# dataset = load_dataset(r"F:\Python Project\Project\Natural Language Processing\huggingface\data\ChnSentiCorp\data",
#                        #split='train'
#                        )
# dataset.save_to_disk(r"F:\Python Project\Project\Natural Language Processing\huggingface\data\CHN-arrow")

train_dataset = load_from_disk(r"F:\Python Project\Project\Natural Language Processing\huggingface\data\CHN-arrow\train")
print(train_dataset)
提取到训练数据的结果:
Dataset({
    features: ['text', 'label'],
    num_rows: 9600
})
随后,我们下载为我们本例中需要使用的模型——google-bert/bert-base-chinese,代码如下:
from huggingface_hub import snapshot_download

snapshot_download(
    repo_id="google-bert/bert-base-chinese",  # 数据集的repo_id
    #repo_type="dataset",                  # 指定类型为 dataset(下载模型时,将类型注释掉)
    local_dir=r"F:\cache_model\bert-base-chinese",  # 本地保存路径(可以替换为自己的绝对路径)
    resume_download=True,                 # 支持断点续传(可以不写,这个参数已经被新版的弃用了)
    token="hf_nkaCdM******AbEkbjLKvuZdEOTtV"  # 替换为你的 Hugging Face 令牌
)
二、下游任务设定——基于Bert的中文情感分析
2.1 定义下载数据集方法
为了得到我们的数据,我们需要编写一个名为load_data.py的文件来获取数据集中的内容。代码如下:
from datasets import load_from_disk
from torch.utils.data import Dataset

class Load_Dataset(Dataset):
    def __init__(self,split):
        self.dataset = load_from_disk(r'F:\Python Project\Project\Natural Language Processing\huggingface\data\CHN-arrow')
        if split == "train":
            self.dataset = self.dataset['train']
        elif split == "validation":
            self.dataset = self.dataset['validation']
        elif split == "test":
            self.dataset = self.dataset["test"]
        else:
            print("The name of dataset is incorrect")

    def __len__(self):
        return len(self.dataset)

    def __getitem__(self, item):
        text = self.dataset[item]["text"]
        label = self.dataset[item]["label"]
        return text,label

if __name__ == "__main__":
    dataset = Load_Dataset("train")
    for data in dataset:#输出训练数据
        print(data)
注意:我们在第一节中获得了arrow类型的数据,但这不算完。如果你直接执行这段代码,你会出现以下问题:
FileNotFoundError: Directory F:\Python Project\Project\Natural Language Processing\huggingface\data\CHN-arrow is neither a `Dataset` directory nor a `DatasetDict` directory.
经过学习,我找到了一篇文章https://blog.csdn.net/shizheng_Li/article/details/144811077https://blog.csdn.net/shizheng_Li/article/details/144811077。该文章说明,这是因为,Hugging Face 的 datasets 库会通过检查目录中的特定文件来确定一个目录是否是一个有效的 Dataset 或 DatasetDict 目录。主要通过以下几个文件来进行判断:
-
dataset_dict.json:这个文件是用于 DatasetDict 类型的数据集。DatasetDict 是一个包含多个数据集分割(如 train、validation 等)的字典。如果这个文件存在,Hugging Face 会认为该目录是一个 DatasetDict。
-
dataset_info.json:这个文件存储了数据集的元数据,包括数据集的特征、版本信息等。如果这个文件存在,Hugging Face 会根据它来加载数据集的结构。
-
state.json 指定arrow文件和split切分等。
所以我们需要把原来文件夹中的dataset_dict.json、dataset_info.json文件复制到CHN-arrow的根目录下,如下所示:

随后你就得到了以下的输出(部分):
('机器配置不均衡,CPU很高,硬盘小了点,没有摄像头,没有蓝牙,这两个应该是属于商务该有的配置,什么附件都没有送,竟然连安装和驱动一类的光盘都没有,我倒,太小气了!硬盘小就小点吧,但也应配个7200转的', 0)
('我定了2本书,为什么只发了一本,我使用了礼券,?31岁小美女的养颜经?这本书就没发货.订单号: 1450990450 能帮我查查吗?', 0)
('不装xp也就算了。给的驱动盘还是vista专用的。。。难道不带xp玩儿了?', 0)
2.2 模型定义
首先, 我们需要导入我们即将使用到的模型——bert-base-chinese。由于它是bert框架的模型,我们一般使用transformer库中的BertModel类来导入这个模型。 BertModel可以自适应地导入bert类型的大模型。我们创建一个名为net.py的文件,存储我们这个任务的网络结构。代码如下:
from transformers import BertModel
import torch

DEVICE = torch.device("cuda" if torch.cuda.is_available() else "cpu")
model_dir = r"F:\\cache_model\\bert-base-chinese"

pretrained_model = BertModel.from_pretrained(model_dir).to(DEVICE)
print(pretrained_model)
结果:
#输出的结果是bert模型的结构
BertModel(
  (embeddings): BertEmbeddings(
    # 词嵌入层:将词ID映射为768维向量(中文BERT的词表大小为21128)
    (word_embeddings): Embedding(21128, 768, padding_idx=0)  # padding_idx=0 表示索引0的token([PAD])不参与梯度更新
    # 位置嵌入层:最大支持512个位置(对应BERT最大输入长度)
    (position_embeddings): Embedding(512, 768)
    # 句子类型嵌入层:用于区分两个句子(如问答任务中的问题和上下文)
    (token_type_embeddings): Embedding(2, 768)
    # 层归一化:对嵌入结果进行标准化(768维向量,epsilon=1e-12防止除零)
    (LayerNorm): LayerNorm((768,), eps=1e-12, elementwise_affine=True)
    # Dropout层:随机丢弃10%的神经元防止过拟合
    (dropout): Dropout(p=0.1, inplace=False)
  )
  (encoder): BertEncoder(
    (layer): ModuleList(
      # BERT-base 包含12层Transformer编码层(0-11共12个)
      (0-11): 12 x BertLayer(
        (attention): BertAttention(
          (self): BertSdpaSelfAttention(
            # 自注意力机制中的Q/K/V矩阵(均从768维映射到768维)
            (query): Linear(in_features=768, out_features=768, bias=True)
            (key): Linear(in_features=768, out_features=768, bias=True)
            (value): Linear(in_features=768, out_features=768, bias=True)
            # 注意力权重Dropout(丢弃10%)
            (dropout): Dropout(p=0.1, inplace=False)
          )
          (output): BertSelfOutput(
            # 将注意力输出映射回768维
            (dense): Linear(in_features=768, out_features=768, bias=True)
            # 层归一化 + Dropout(与嵌入层参数一致)
            (LayerNorm): LayerNorm((768,), eps=1e-12, elementwise_affine=True)
            (dropout): Dropout(p=0.1, inplace=False)
          )
        )
        (intermediate): BertIntermediate(
          # 中间层:将768维扩展为3072维(用于增强模型容量)
          (dense): Linear(in_features=768, out_features=3072, bias=True)
          # 激活函数:GELU(比ReLU更平滑)
          (intermediate_act_fn): GELUActivation()
        )
        (output): BertOutput(
          # 将中间层输出压缩回768维(保持维度一致)
          (dense): Linear(in_features=3072, out_features=768, bias=True)
          # 层归一化 + Dropout
          (LayerNorm): LayerNorm((768,), eps=1e-12, elementwise_affine=True)
          (dropout): Dropout(p=0.1, inplace=False)
        )
      )
    )
  )
  (pooler): BertPooler(
    # 池化层:提取句子整体表示(取第一个token [CLS] 的向量)
    (dense): Linear(in_features=768, out_features=768, bias=True)
    # 激活函数:Tanh(将输出限制在[-1, 1]区间)
    (activation): Tanh()
  )
)
**接着,**我们定义一个非常简单的全连接层,对bert输出后的结果进行训练,类似于bert之后接一个MLP,进行二分类任务(完整代码如下):
from transformers import BertModel
import torch

DEVICE = torch.device("cuda" if torch.cuda.is_available() else "cpu")
model_dir = r"F:\\cache_model\\bert-base-chinese"

pretrained_model = BertModel.from_pretrained(model_dir).to(DEVICE)

class Model(torch.nn.Module):
    def __init__(self):
        super().__init__()
        self.fc = torch.nn.Linear(768,2)

    def forward(self,input_ids,attention_mask,token_type_ids):
        with torch.no_grad():
            out = pretrained_model(input_ids=input_ids,attention_mask=attention_mask,token_type_ids=token_type_ids)
        out = self.fc(out.last_hidden_state[:,0])
        out = out.softmax(dim=1)
        return out
注意: with torch.no_grad():意味着模型不参与后续网络的训练,也就是说我们不需要使用梯度下降来反向更新模型中的参数。
2.3 定义训练函数
我们创建一个名为train.py文件来实现模型下游任务的训练过程。具体代码如下:
import torch
from load_data import Load_Dataset  # 自定义数据集加载器(load_data.py文件)
from torch.utils.data import DataLoader
from net import Model  # 自定义模型结构(net.py文件)
from transformers import BertTokenizer, AdamW  # BERT相关组件

# 设置训练设备(GPU/CPU)
DEVICE = torch.device("cuda" if torch.cuda.is_available() else "cpu")
epoch = 5  # 训练轮数
model_dir = r"F:\\cache_model\\bert-base-chinese"  # 预训练模型路径

# 加载BERT分词器
token = BertTokenizer.from_pretrained(model_dir)

# 定义数据批处理函数
def collate_fn(data):
    # 分离句子和标签
    sentes = [i[0] for i in data]  # 提取文本数据
    label = [i[1] for i in data]   # 提取标签数据

    # BERT编码处理
    data = token.batch_encode_plus(
        batch_text_or_text_pairs=sentes,
        truncation=True,          # 截断过长文本
        padding="max_length",     # 填充到最大长度
        max_length = 350,         # 最大序列长度
        return_tensors="pt",      # 返回PyTorch张量
        return_length=True        # 返回实际长度
    )

    # 解包编码结果
    input_ids = data['input_ids']          # 文本ID表示
    attention_mask=data['attention_mask']  # 注意力掩码
    token_type_ids = data['token_type_ids']# 段落标记
    labels = torch.LongTensor(label)       # 转换为LongTensor

    return input_ids, attention_mask, token_type_ids, labels

# 创建训练数据集和数据加载器
train_dataset = Load_Dataset("train")
train_loader = DataLoader(
    dataset=train_dataset,
    batch_size=32,        # 每批数据量
    shuffle=True,          # 打乱数据顺序
    drop_last=True,        # 丢弃最后不足批次的数据
    collate_fn=collate_fn  # 使用自定义批处理函数
)

if __name__ == "__main__":
    print(DEVICE)  # 打印使用的设备
    model = Model().to(DEVICE)  # 注意:Model类需要正确定义

    # 设置优化器和损失函数
    optimizer = AdamW(model.parameters(), lr=5e-4)  # 使用AdamW优化器
    loss_func  = torch.nn.CrossEntropyLoss()        # 交叉熵损失函数

    # 训练循环
    model.train()
    for epoch in range(epoch):
        # 遍历训练数据
        for i, (input_ids, attention_mask, token_type_ids, labels) in enumerate(train_loader):
            input_ids = input_ids.to(DEVICE)
            attention_mask = attention_mask.to(DEVICE)
            token_type_ids = token_type_ids.to(DEVICE)
            labels = labels.to(DEVICE)
            out = model(input_ids, attention_mask, token_type_ids)# 前向传播
            loss = loss_func(out, labels)# 计算损失

            # 反向传播和优化
            optimizer.zero_grad()  # 清空梯度
            loss.backward()        # 反向传播
            optimizer.step()       # 更新参数
            if i % 5 == 0:
                out = out.argmax(dim=1)  # 获取预测结果
                acc = (out == labels).sum().item() / len(labels)  # 计算准确率
                print(epoch, i, loss.item(), acc)  # 输出当前状态
        torch.save(model.state_dict(), f"params/{epoch}bert.pt") # 保存模型参数
        print("参数保存成功")
结果:
3 0 0.4176948368549347 0.90625
3 5 0.38985922932624817 0.9375
3 10 0.49415409564971924 0.8125
.
.
.
3 295 0.4426736533641815 0.84375
参数保存成功
注意:你会发现,在训练过程中,acc好像在循环出现。这是因为模型过拟合了[捂脸]。不过没有关系,走到这一步你已经完成了该任务的80%。
2.4 测试模型效果
以下是使用第三个epoch来计算模型的acc值的代码:
import torch
from load_data import Load_Dataset
from torch.utils.data import DataLoader
from net import Model
from transformers import BertTokenizer

DEVICE = torch.device("cuda" if torch.cuda.is_available() else "cpu")
model_dir = r"F:\\cache_model\\bert-base-chinese"
token = BertTokenizer.from_pretrained(model_dir)

def collate_fn(data):
    sentes = [i[0] for i in data]
    label = [i[1] for i in data]

    data = token.batch_encode_plus(
        batch_text_or_text_pairs=sentes,
        truncation=True,
        padding="max_length",
        max_length = 350,
        return_tensors="pt",
        return_length=True
    )

    input_ids = data['input_ids']
    attention_mask=data['attention_mask']
    token_type_ids = data['token_type_ids']
    labels = torch.LongTensor(label)

    return input_ids,attention_mask,token_type_ids,labels

test_dataset = Load_Dataset("test")
test_loader = DataLoader(
    dataset=test_dataset,
    batch_size=32,
    shuffle=True,
    drop_last=True,
    collate_fn=collate_fn
)

if __name__ == "__main__":
    acc = 0
    total = 0
    model = Model().to(DEVICE)
    model.load_state_dict(torch.load("params/3bert.pt"))
    model.eval()
    for i,(input_ids,attention_mask,token_type_ids,labels) in enumerate(test_loader):
            input_ids,attention_mask,token_type_ids,labels = input_ids.to(DEVICE),\
            attention_mask.to(DEVICE),token_type_ids.to(DEVICE),labels.to(DEVICE)

            out = model(input_ids,attention_mask,token_type_ids)
            out = out.argmax(dim=1)
            acc += (out == labels).sum().item()
            total += len(labels)
    print(acc/total)
注意:test_dataset = Load_Dataset("test")一定不要忘记修改为test。结果如下:
0.893581081081081
2.5 交互测试
我们可以在控制台输入自己想说的话来让模型判断到底是正面的情绪还是负面的情绪,代码如下:
import torch
from net import Model
from transformers import BertTokenizer

DEVICE = torch.device("cuda" if torch.cuda.is_available() else "cpu")
names = ["负向评价","正向评价"]
model_dir = r"F:\\cache_model\\bert-base-chinese"

model = Model().to(DEVICE)
token = BertTokenizer.from_pretrained(model_dir)

def collate_fn(data):
    sentes = []
    sentes.append(data)

    data = token.batch_encode_plus(
        batch_text_or_text_pairs=sentes,
        truncation=True,
        padding="max_length",
        max_length = 350,
        return_tensors="pt",
        return_length=True
    )
    input_ids = data['input_ids']
    attention_mask=data['attention_mask']
    token_type_ids = data['token_type_ids']

    return input_ids,attention_mask,token_type_ids

def test():
    model.load_state_dict(torch.load("params/4bert.pt"))
    model.eval()
    while True:
        data = input("请你输入测试数据(“q”是退出)")
        if data == "q":
            print("evaluate ended")
            break
        input_ids,attention_mask,token_type_ids = collate_fn(data)
        input_ids,attention_mask,token_type_ids = input_ids.to(DEVICE),\
            attention_mask.to(DEVICE),token_type_ids.to(DEVICE)
        with torch.no_grad():
            out = model(input_ids,attention_mask,token_type_ids)
            out = out.argmax(dim=1)
            print("模型判定为",names[out],"\n")

if __name__ == "__main__":
    test()
结果:
请你输入测试数据(“q”是退出)今天的天气真好啊
模型判定为 正向评价

请你输入测试数据(“q”是退出)今天我心情不大好
模型判定为 负向评价
OK,本次模型下游任务实验就到此结束了,有兴趣的可以尝试更多分类的任务,或者使用不同的数据集、语言模型进行试验。
参考资料:
[1]https://blog.csdn.net/shizheng_Li/article/details/144811077https://blog.csdn.net/shizheng_Li/article/details/144811077
[2]【翻遍整个B站,这绝对是2025讲的最好的HuggingFace教程,带你3小时吃透huggingface与Transformers,少走99%的弯路!】https://www.bilibili.com/video/BV1KTQcYUEeT?p=8&vd_source=1a0d4758ac4c6a667a8686daaa0d1b5e