解锁Spring Boot中的设计模式—04.桥接模式:探索【桥接模式】的奥秘与应用实践!
桥接模式
桥接模式也称为桥梁模式、接口模式或者柄体(Handle and Body)模式,是将抽象部分与他的具体实现部分分离,使它们都可以独立地变化,通过组合的方式建立两个类之间的联系,而不是继承。
桥接模式是一种结构型设计模式,旨在将抽象部分与实现部分分离,使它们可以独立地变化。这种模式通过使用组合而不是继承的方式,可以更灵活地组织和管理代码。
结构:
- 抽象部分(Abstraction):定义抽象类或接口,并维护一个指向实现部分的引用。
- 扩充抽象类(Refined Abstraction):扩展抽象部分,可以添加更多的功能。
- 实现部分(Implementor):定义实现类接口,供抽象部分调用。
- 具体实现类(Concrete Implementor):实现实现部分的接口,提供具体的功能实现
优点:
- 解耦合:桥接模式能够将抽象部分和实现部分分离,使它们可以独立地进行变化。这种解耦合使得系统更加灵活和可维护。
- 扩展性:由于桥接模式采用了组合的方式而不是继承,因此更容易扩展和变化。新的抽象部分和实现部分可以独立地添加和修改,而不会对现有的代码产生影响。
- 隐藏实现细节:桥接模式可以隐藏实现的细节,使客户端代码只关注于抽象部分,而不需要关心具体的实现细节。这种隐藏可以减少系统中的耦合度,提高代码的可维护性和可理解性。
- 适应变化:桥接模式使得系统更加灵活和适应变化。通过抽象部分和实现部分的分离,系统可以更容易地应对需求的变化和新的功能的添加。
缺点:
- 增加复杂性:桥接模式引入了抽象部分和实现部分之间的桥梁,可能会增加系统的复杂性。特别是对于简单的系统,使用桥接模式可能会显得过于复杂。
- 理解成本:由于桥接模式涉及到多个类和接口之间的关系,可能会增加新成员对系统的理解成本。需要仔细地理解抽象部分和实现部分之间的关系,以及桥接模式的设计思想。
- 过度设计:在某些情况下,使用桥接模式可能会导致过度设计的问题。如果系统的抽象部分和实现部分之间的关系比较简单,使用桥接模式可能会显得不够自然和合适。
- 设计复用性:虽然桥接模式提高了系统的灵活性和扩展性,但如果不恰当地使用,可能会导致设计复用性下降。过度使用桥接模式可能会导致代码结构的过度抽象,使得代码变得难以理解和维护。
注意事项
- 桥接模式适用于系统中多个维度的变化。
- 避免过度设计,只有当两个维度中的一个或两个具有多个实现时才考虑使用桥接模式。
适用场景
- 系统有多个维度同时变化,且不希望使用多层继承。
- 想要在抽象和实现之间建立一个稳定的联系,但又不希望二者紧密耦合。
1.案例1-发送通知
需求
假设我们正在开发一个电商平台,该平台需要发送不同类型的通知给用户,例如电子邮件通知、短信通知、App推送通知等。同时,用户可能也有不同的偏好和设备,例如有些用户更喜欢通过邮件接收通知,而另一些用户则更倾向于使用手机App接收通知。
实现思路
- 通知接口(Notification):定义了发送通知的方法。
- 具体通知类(ConcreteNotification):实现了通知接口的具体通知类型,如邮件通知、短信通知、App推送通知等。
- 用户偏好(UserPreference):定义了用户的通知偏好,包含具体通知类,例如用户更喜欢接收邮件通知还是App推送通知。
- 用户类(User):包含用户的信息和偏好设置。
- 通知服务类(NotificationService):负责根据用户的偏好选择合适的通知方式进行发送。(包含用户信息)
Notification
+sendNotification(message)
EmailNotification
+sendNotification(message)
SMSNotification
+sendNotification(message)
AppNotification
+sendNotification(message)
UserPreference
+getNotification()
User
-preference: UserPreference
+receiveNotification(message)
NotificationService
+sendNotificationToUser(user, message)

1.1.通知接口
/**
 * 通知接口
 * @author 13723
 * @version 1.0
 * 2024/2/7 10:17
 */
public interface Notification {
	/**
	 * 通知
	 * @param message 通知消息
	 */
	void notify(String message);
}
1.1.2.具体通知类-APP
import org.slf4j.Logger;
import org.slf4j.LoggerFactory;
import java.lang.invoke.MethodHandles;

/**
 * APP通知类
 * @author 13723
 * @version 1.0
 * 2024/2/7 10:19
 */
public class APPNotification implements Notification{
	private static final Logger logger = LoggerFactory.getLogger(MethodHandles.lookup().lookupClass());

	/**
	 * APP通知
	 * @param message 通知消息
	 */
	@Override
	public void notify(String message) {
		logger.error("【APP通知】: {}", message);
	}
}
1.1.3.具体通知类-短信
import org.slf4j.Logger;
import org.slf4j.LoggerFactory;
import java.lang.invoke.MethodHandles;

/**
 * 邮箱通知类
 * @author 13723
 * @version 1.0
 * 2024/2/7 10:21
 */
public class EMailNotification implements Notification{
	private static final Logger logger = LoggerFactory.getLogger(MethodHandles.lookup().lookupClass());

	/**
	 * 邮箱通知
	 * @param message 通知消息
	 */
	@Override
	public void notify(String message) {
		logger.error("【邮件通知】: {}", message);
	}
}
1.1.4.具体通知类-邮箱
import org.slf4j.Logger;
import org.slf4j.LoggerFactory;
import java.lang.invoke.MethodHandles;

/**
 * 邮箱通知类
 * @author 13723
 * @version 1.0
 * 2024/2/7 10:21
 */
public class EMailNotification implements Notification{
	private static final Logger logger = LoggerFactory.getLogger(MethodHandles.lookup().lookupClass());

	/**
	 * 邮箱通知
	 * @param message 通知消息
	 */
	@Override
	public void notify(String message) {
		logger.error("【邮件通知】: {}", message);
	}
}
1.1.5.用户偏好类
import org.slf4j.Logger;
import org.slf4j.LoggerFactory;
import java.lang.invoke.MethodHandles;

/**
 * 用户偏好类
 * @author 13723
 * @version 1.0
 * 2024/2/7 10:23
 */
public class UserPreference {
	private static final Logger logger = LoggerFactory.getLogger(MethodHandles.lookup().lookupClass());
	/**
	 * 此处引入通知接口,实现桥接模式,将通知接口和用户偏好类解耦
	 */
	private Notification notification;

	/**
	 * 用户偏好
	 * @param notification 通知
	 */
	public UserPreference(Notification notification) {
		this.notification = notification;
	}

	public Notification getNotification() {
		return notification;
	}
}
1.1.6.用户类
import org.slf4j.Logger;
import org.slf4j.LoggerFactory;
import java.lang.invoke.MethodHandles;

/**
 * 用户类
 * @author 13723
 * @version 1.0
 * 2024/2/7 10:26
 */
public class User {
	private static final Logger logger = LoggerFactory.getLogger(MethodHandles.lookup().lookupClass());
	/**
	 * 用户名称
	 */
	private String name;

	/**
	 * 用户偏好
	 */
	private UserPreference userPreference;

	public User(String name, UserPreference userPreference) {
		this.name = name;
		this.userPreference = userPreference;
	}

	protected void receiveNotification(String message) {
		message = name + ":" + message;
		userPreference.getNotification().notify(message);
	}

}
1.1.7.服务通知类
import org.slf4j.Logger;
import org.slf4j.LoggerFactory;
import java.lang.invoke.MethodHandles;

/**
 * @author 13723
 * @version 1.0
 * 2024/2/7 10:37
 */
public class NotificationService {
	private static final Logger logger = LoggerFactory.getLogger(MethodHandles.lookup().lookupClass());


	/**
	 * 发送通知
	 * @param user 用户,用户里面已经设置好偏好通知了,偏好通知里面已经设置好具体的通知方式了
	 * @param message 通知消息
	 */
	public void sendNotification(User user, String message) {
		user.receiveNotification(message);
	}
}
1.1.8.测试类
import org.junit.jupiter.api.DisplayName;
import org.junit.jupiter.api.Test;
import org.slf4j.Logger;
import org.slf4j.LoggerFactory;
import java.lang.invoke.MethodHandles;

/**
 * 测试 桥梁模式-通知用户
 * @author 13723
 * @version 1.0
 * 2024/2/7 10:42
 */
public class NotificationTest {
	private static final Logger logger = LoggerFactory.getLogger(MethodHandles.lookup().lookupClass());


	@Test
	@DisplayName("测试通知用户")
	public void testNotification() {
		// 设置通知方式
		APPNotification appNotification = new APPNotification();
		SMSNotification smsNotification = new SMSNotification();

		// 设置用户偏好
		UserPreference zs = new UserPreference(appNotification);
		UserPreference ls = new UserPreference(smsNotification);

		// 设置用户
		User user1 = new User("张三", zs);
		User user2 = new User("李四", ls);


		// 通知服务
		NotificationService notificationService = new NotificationService();

		notificationService.sendNotification(user1, "你好,你的账号被人盗走了!请联系客户找回,85852555!");
		notificationService.sendNotification(user2, "你好,你的账号被人盗走了!请联系客户找回,85852555!");


	}
}

2.Spring代码-JdbcTemplate
2.1.案例
@SpringBootTest
public class BridgeTest {
	private static final Logger logger = LoggerFactory.getLogger(MethodHandles.lookup().lookupClass());

	@Test
	@DisplayName("测试template")
	public void test(){
		DriverManagerDataSource dataSource = new DriverManagerDataSource();
		dataSource.setDriverClassName("org.postgresql.Driver");
		dataSource.setUrl("jdbc:postgresql://192.168.1.56/postgres?currentSchema=gwstd");
		dataSource.setUsername("postgres");
		dataSource.setPassword("152564.lmy");
		JdbcTemplate jdbcTemplate = new JdbcTemplate();
		jdbcTemplate.setDataSource(dataSource);
		String sql = "select * from t_dec_order_head limit 1";
		List<Map<String, Object>> maps = jdbcTemplate.queryForList(sql);
		for (Map<String, Object> map : maps) {
			logger.error("result:{}",map);
		}
	}
}

JdbcTemplate 使用了桥接模式来实现数据库操作的抽象和实现的解耦合。这种模式使得应用程序能够专注于高级的业务逻辑,而不必关心底层数据库访问的细节。
JdbcTemplate 使用了以下几个关键角色:
- 抽象部分(Abstraction):
- 在
JdbcTemplate中,抽象部分代表了对数据库操作的抽象接口,例如JdbcTemplate类本身以及它的一些方法,如query()、update()等。 - 这些方法定义了客户端与数据库交互的高级操作,比如查询数据、更新数据等。
- 在
- 扩充抽象类(Refined Abstraction):
- 在 JdbcTemplate 中,扩充抽象部分是对抽象部分的扩展,可以添加更多的功能或者调整现有的功能。
- 例如,你可以创建自定义的 JdbcTemplate 子类,通过添加新的方法或者重写现有方法来实现更具体的数据库操作。
- 实现部分(Implementor):
- 在
JdbcTemplate中,实现部分代表了对底层数据库访问的实现,例如DataSource接口和各种数据库驱动实现。 - 这些实现提供了底层的数据库连接和操作功能,但不暴露给应用程序直接使用。
- 在
- 具体实现类(Concrete Implementor):
- 具体实现类是实现部分的具体实现,比如
DriverManagerDataSource、C3P0DataSource等。 - 它们提供了具体的数据库连接池实现、连接配置等功能。
- 具体实现类是实现部分的具体实现,比如
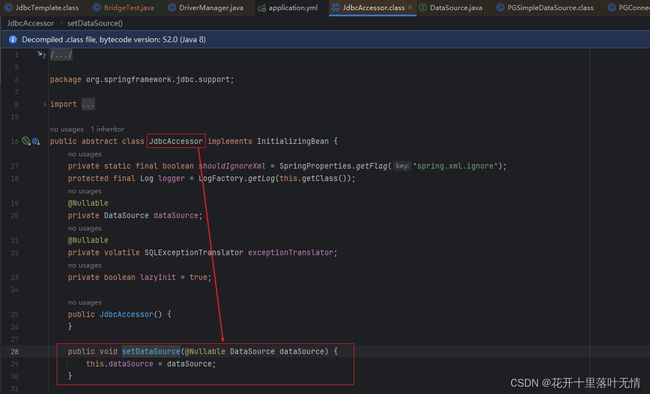
// 在创建JDBC的模板类时,需要传入数据源,这样JDBC的模板类才知道连接哪个数据库