Sentinel第一篇:流控
一、什么是sentinel
点击查看官方github
点击查看sentinel官网
Sentinel 是什么?
随着微服务的流行,服务和服务之间的稳定性变得越来越重要。Sentinel 以流量为切入点,从流量控制、熔断降级、系统负载保护等多个维度保护服务的稳定性。
Sentinel 具有以下特征
丰富的应用场景:Sentinel 承接了阿里巴巴近 10 年的双十一大促流量的核心场景,例如秒杀(即突发流量控制在系统容量可以承受的范围)、消息削峰填谷、集群流量控制、实时熔断下游不可用应用等。
完备的实时监控:Sentinel 同时提供实时的监控功能。您可以在控制台中看到接入应用的单台机器秒级数据,甚至 500 台以下规模的集群的汇总运行情况。
广泛的开源生态:Sentinel 提供开箱即用的与其它开源框架/库的整合模块,例如与 Spring Cloud、Dubbo、gRPC 的整合。您只需要引入相应的依赖并进行简单的配置即可快速地接入 Sentinel。
完善的 SPI 扩展点:Sentinel 提供简单易用、完善的 SPI 扩展接口。您可以通过实现扩展接口来快速地定制逻辑。例如定制规则管理、适配动态数据源等。
Sentinel 的主要特性
官网介绍

—句话解释,sentinel 替代了 Hystrix
Hystrix与Sentinel比较:
Hystrix
- 需要我们程序员自己手工搭建监控平台
- 没有一套web界面可以给我们进行更加细粒度化得配置流控、速率控制、服务熔断、服务降级
Sentinel
- 单独一个组件,可以独立出来。
- 直接界面化的细粒度统一配置。
约定 > 配置 > 编码
都可以写在代码里面,但是我们本次还是大规模的学习使用配置和注解的方式,尽量少写代码
二、Sentinel下载安装运行
官网介绍sentinel
服务使用中的各种问题:
- 服务雪崩
- 服务降级
- 服务熔断
- 服务限流
Sentinel 分为两个部分:
- 核心库(Java 客户端)不依赖任何框架/库,能够运行于所有 Java 运行时环境,同时对 Dubbo / Spring Cloud 等框架也有较好的支持。
- 控制台(Dashboard)基于 Spring Boot 开发,打包后可以直接运行,不需要额外的 Tomcat 等应用容器。
安装步骤
下载
- https://github.com/alibaba/Sentinel/releases
- 下载到本地sentinel-dashboard-1.7.0.jar
运行命令 java -jar sentinel-dashboard-1.7.0.jar 即可访问Sentinel管理界面
url:localhost:8080
登录账号密码均为sentinel
环境准备
- Java 8 环境
- 8080端口不能被占用

三、Sentinel初始化监控
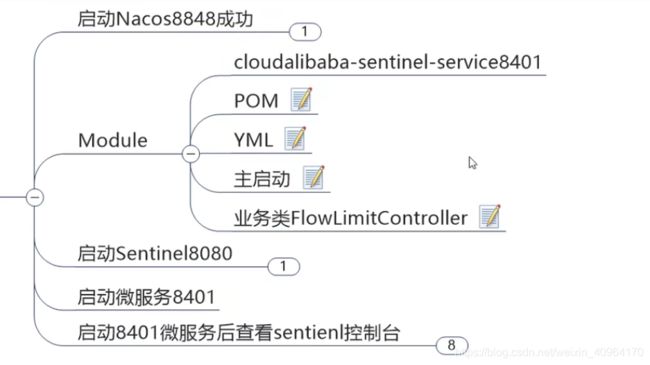
1、新建工程 - cloudalibaba-sentinel-service8401
2、POM
<?xml version="1.0" encoding="UTF-8"?>
<project xmlns="http://maven.apache.org/POM/4.0.0"
         xmlns:xsi="http://www.w3.org/2001/XMLSchema-instance"
         xsi:schemaLocation="http://maven.apache.org/POM/4.0.0 http://maven.apache.org/xsd/maven-4.0.0.xsd">
    <parent>
        <artifactId>springcloud</artifactId>
        <groupId>com.lian.springcloud</groupId>
        <version>1.0-SNAPSHOT</version>
    </parent>
    <modelVersion>4.0.0</modelVersion>

    <artifactId>cloudalibaba-sentinel-service8401</artifactId>

    <dependencies>
        <dependency><!-- 引入自己定义的api通用包,可以使用Payment支付Entity -->
            <groupId>com.lian.springcloud</groupId>
            <artifactId>cloud-api-commons</artifactId>
            <version>1.0-SNAPSHOT</version>
        </dependency>
        <!--SpringCloud ailibaba nacos -->
        <dependency>
            <groupId>com.alibaba.cloud</groupId>
            <artifactId>spring-cloud-starter-alibaba-nacos-discovery</artifactId>
        </dependency>
        <!--SpringCloud ailibaba sentinel-datasource-nacos 后续做持久化用到-->
        <!--将sentinel的流控规则持久化到nacos里-->
        <dependency>
            <groupId>com.alibaba.csp</groupId>
            <artifactId>sentinel-datasource-nacos</artifactId>
        </dependency>
        <!--SpringCloud ailibaba sentinel -->
        <dependency>
            <groupId>com.alibaba.cloud</groupId>
            <artifactId>spring-cloud-starter-alibaba-sentinel</artifactId>
        </dependency>
        <!--openfeign-->
        <dependency>
            <groupId>org.springframework.cloud</groupId>
            <artifactId>spring-cloud-starter-openfeign</artifactId>
        </dependency>
        <!-- SpringBoot整合Web组件+actuator -->
        <dependency>
            <groupId>org.springframework.boot</groupId>
            <artifactId>spring-boot-starter-web</artifactId>
        </dependency>
        <dependency>
            <groupId>org.springframework.boot</groupId>
            <artifactId>spring-boot-starter-actuator</artifactId>
        </dependency>
        <!--日常通用jar包配置-->
        <dependency>
            <groupId>org.springframework.boot</groupId>
            <artifactId>spring-boot-devtools</artifactId>
            <scope>runtime</scope>
            <optional>true</optional>
        </dependency>
        <dependency>
            <groupId>cn.hutool</groupId>
            <artifactId>hutool-all</artifactId>
            <version>4.6.3</version>
        </dependency>
        <dependency>
            <groupId>org.projectlombok</groupId>
            <artifactId>lombok</artifactId>
            <optional>true</optional>
        </dependency>
        <dependency>
            <groupId>org.springframework.boot</groupId>
            <artifactId>spring-boot-starter-test</artifactId>
            <scope>test</scope>
        </dependency>
    </dependencies>

</project>
3、yaml
server:
  port: 8401

spring:
  application:
    name: cloudalibaba-sentinel-service
  cloud:
    nacos:
      discovery:
        server-addr: localhost:8848 #Nacos服务注册中心地址
    sentinel:
      transport:
        dashboard: localhost:8080 #配置Sentinel dashboard地址
        port: 8719
      datasource: #<---------------------------关注点,添加Nacos数据源配置
        ds1:
          nacos:
            server-addr: localhost:8848
            dataId: cloudalibaba-sentinel-service
            groupId: DEFAULT_GROUP
            data-type: json
            rule-type: flow

management:
  endpoints:
    web:
      exposure:
        include: '*'

feign:
  sentinel:
    enabled: true # 激活Sentinel对Feign的支持,用于降级
4、主启动类
package com.lian.springcloud;

import org.springframework.boot.SpringApplication;
import org.springframework.boot.autoconfigure.SpringBootApplication;
import org.springframework.cloud.client.discovery.EnableDiscoveryClient;

@EnableDiscoveryClient
@SpringBootApplication
public class MainApp8401 {
    public static void main(String[] args) {
        SpringApplication.run(MainApp8401.class,args);
    }
}
5、业务类FlowLimitController
import com.alibaba.csp.sentinel.annotation.SentinelResource;
import com.alibaba.csp.sentinel.slots.block.BlockException;
import lombok.extern.slf4j.Slf4j;
import org.springframework.web.bind.annotation.GetMapping;
import org.springframework.web.bind.annotation.RequestParam;
import org.springframework.web.bind.annotation.RestController;

import java.util.concurrent.TimeUnit;

@RestController
@Slf4j
public class FlowLimitController {
    @GetMapping("/testA")
    public String testA()
    {
        return "------testA";
    }

    @GetMapping("/testB")
    public String testB()
    {
        log.info(Thread.currentThread().getName()+"\t"+"...testB");
        return "------testB";
    }
}
6、测试
启动Sentinel8080 - java -jar sentinel-dashboard-1.7.0.jar
启动微服务8401
启动8401微服务后查看sentienl控制台
刚启动,空空如也,啥都没有

Sentinel采用的懒加载说明
执行一次访问即可
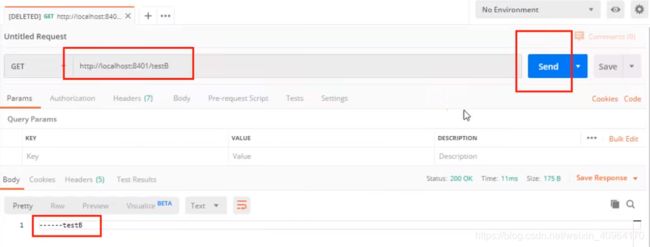
http://localhost:8401/testA
http://localhost:8401/testB
效果 - sentinel8080正在监控微服务8401

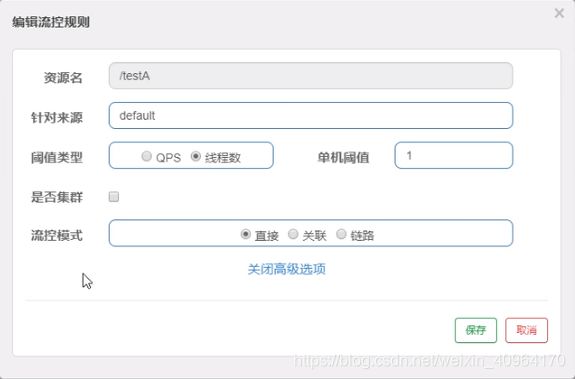
四、Sentinel流控规则简介

解释说明:
- 资源名:唯一名称,默认请求路径。
- 针对来源:Sentinel可以针对调用者进行限流,填写微服务名,默认default(不区分来源)。
- 阈值类型/单机阈值:
- QPS(每秒钟的请求数量)︰当调用该API的QPS达到阈值的时候,进行限流。
- 线程数:当调用该API的线程数达到阈值的时候,进行限流。
- 是否集群:不需要集群。
- 流控模式:
- 直接:API达到限流条件时,直接限流。
- 关联:当关联的资源达到阈值时,就限流自己。
- 链路:只记录指定链路上的流量(指定资源从入口资源进来的流量,如果达到阈值,就进行限流)【API级别的针对来源】。
- 流控效果:
- 快速失败:直接失败,抛异常。
- Warm up:根据Code Factor(冷加载因子,默认3)的值,从阈值/codeFactor,经过预热时长,才达到设置的QPS阈值。
- 排队等待:匀速排队,让请求以匀速的速度通过,阈值类型必须设置为QPS,否则无效。
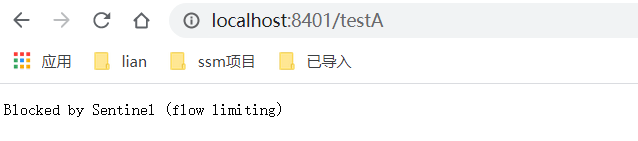
五、Sentinel流控-QPS直接失败
直接 -> 快速失败(系统默认)
表示1秒钟内查询1次就是OK,若超过次数1,就直接->快速失败,报默认错误

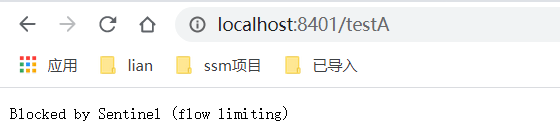
测试
快速多次点击访问http://localhost:8401/testA
返回页面 Blocked by Sentinel (flow limiting)
源码
com.alibaba.csp.sentinel.slots.block.flow.controller.DefaultController
思考?
直接调用默认报错信息,技术方面OK,但是,是否应该有我们自己的后续处理?类似有个fallback的兜底方法?
六、Sentinel流控-线程数直接失败
线程数:当调用该API的线程数达到阈值的时候,进行限流。
线程设置睡眠8秒钟
	@GetMapping("/testA")
    public String testA() {
        try {
            TimeUnit.SECONDS.sleep(8);
        } catch (InterruptedException e) {
            e.printStackTrace();
        }
        return "------testA";
    }
开启两个请求访问,不停的点击就会出错
七、Sentinel流控-关联
- 当自己关联的资源达到阈值时,就限流自己
- 当与A关联的资源B达到阀值后,就限流A自己(B惹事,A挂了)
设置testA
当关联资源/testB的QPS阀值超过1时,就限流/testA的Rest访问地址,当关联资源到阈值后限制配置好的资源名。

Postman模拟并发密集访问testB

访问testB成功
postman里新建多线程集合组

将访问地址添加进新新线程组
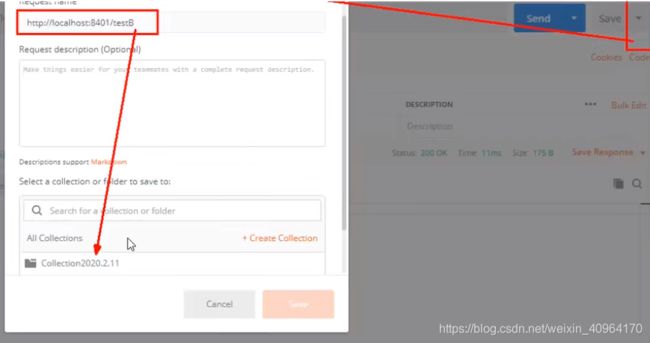

Run - 大批量线程高并发访问B
Postman运行后,点击访问http://localhost:8401/testA,发现testA挂了
结果Blocked by Sentinel(flow limiting)

链路:只记录指定链路上的流量(指定资源从入口资源进来的流量,如果达到阈值,就进行限流)【API级别的针对来源】
八、Sentinel流控-预热
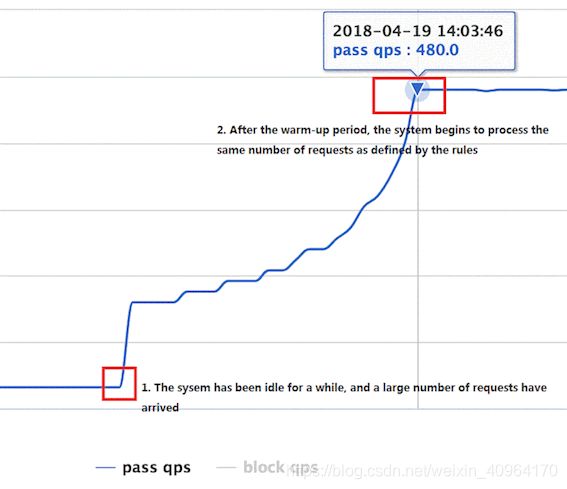
Warm Up(RuleConstant.CONTROL_BEHAVIOR_WARM_UP)方式,即预热/冷启动方式。当系统长期处于低水位的情况下,当流量突然增加时,直接把系统拉升到高水位可能瞬间把系统压垮。通过"冷启动",让通过的流量缓慢增加,在一定时间内逐渐增加到阈值上限,给冷系统一个预热的时间,避免冷系统被压垮。详细文档可以参考 流量控制 - Warm Up 文档,具体的例子可以参见 WarmUpFlowDemo。
通常冷启动的过程系统允许通过的 QPS 曲线如下图所示:
点击查看官网介绍预热
默认coldFactor为3,即请求QPS 从 threshold / 3开始,经预热时长逐渐升至设定的QPS阈值
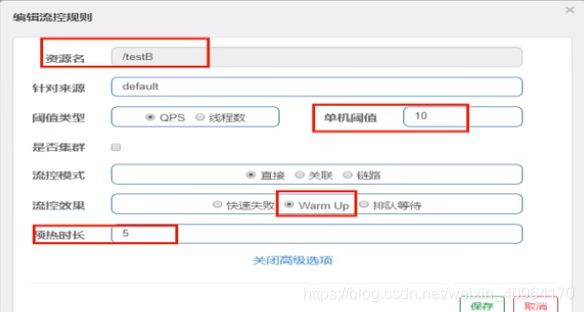
WarmUp配置
案例,阀值为10+预热时长设置5秒。
系统初始化的阀值为10/ 3约等于3,即阀值刚开始为3;然后过了5秒后阀值才慢慢升高恢复到10
测试
多次快速点击http://localhost:8401/testB - 刚开始不行,后续慢慢OK
应用场景
如:秒杀系统在开启的瞬间,会有很多流量上来,很有可能把系统打死,预热方式就是把为了保护系统,可慢慢的把流量放进来,慢慢的把阀值增长到设置的阀值。
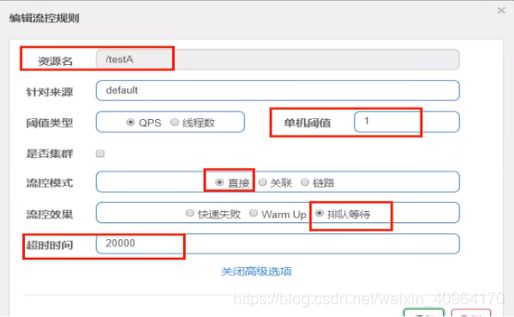
九、Sentinel流控-排队等待
匀速排队,让请求以均匀的速度通过,阀值类型必须设成QPS,否则无效。
设置:/testA每秒1次请求,超过的话就排队等待,等待的超时时间为20000毫秒。
匀速排队(RuleConstant.CONTROL_BEHAVIOR_RATE_LIMITER)方式会严格控制请求通过的间隔时间,也即是让请求以均匀的速度通过,对应的是漏桶算法。详细文档可以参考 流量控制 - 匀速器模式,具体的例子可以参见 PaceFlowDemo。
该方式的作用如下图所示:

这种方式主要用于处理间隔性突发的流量,例如消息队列。想象一下这样的场景,在某一秒有大量的请求到来,而接下来的几秒则处于空闲状态,我们希望系统能够在接下来的空闲期间逐渐处理这些请求,而不是在第一秒直接拒绝多余的请求。
注意:匀速排队模式暂时不支持 QPS > 1000 的场景。
点击查看匀速排队官网介绍
添加日志记录代码到FlowLimitController的testA方法
@RestController
@Slf4j
public class FlowLimitController {
    @GetMapping("/testA")
    public String testA()
    {
        log.info(Thread.currentThread().getName()+"\t"+"...testA");//<----
        return "------testA";
    }

    ...
}
Postman模拟并发密集访问testA

后台结果,不拒绝,1秒钟1个线程,轮流执行,和食堂打饭一样,一群人轮流打饭
