three.js 细一万倍教程 从入门到精通(三)
目录
五、详解PBR材质纹理
5.1、详解PBR物理渲染
5.2、标准网格材质与光照物理效果
5.3、置换贴图与顶点细分设置
5.4、设置粗糙度与粗糙度贴图
5.5、设置金属度与金属贴图
5.6、法线贴图应用
5.7、如何获取各种类型纹理贴图
5.8、纹理加载进度情况
单张图片加载
多张图片加载
5.9、详解环境贴图
5.10、经纬线映射贴图与HDR
经纬线映射贴图
HDR
六、详解灯光与阴影
6.1、灯光与阴影的关系与设置
6.2、平行光阴影属性与阴影相机原理
五、详解PBR材质纹理
5.1、详解PBR物理渲染
灯光属性:直接照明、间接照明、直接高光、间接高光、阴影、环境光闭塞。
表面属性:基础色、法线、高光、粗糙度、金属度。
5.2、标准网格材质与光照物理效果
案例1:【环境光】照射物体
// 灯光(环境光)
// 参数分别为光的颜色和光的强度
const light = new THREE.AmbientLight(0xffffff, 0.5);
scene.add(light)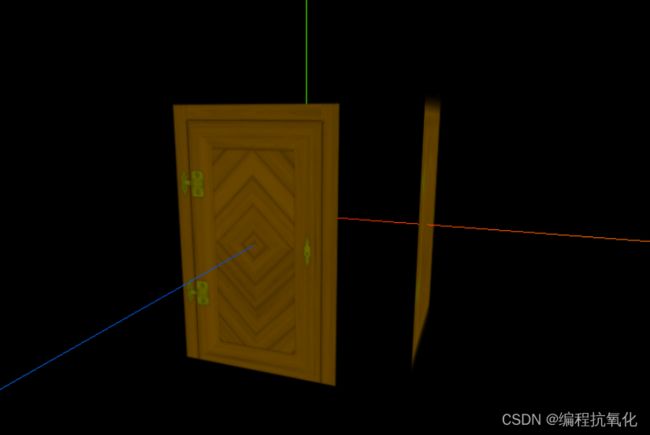
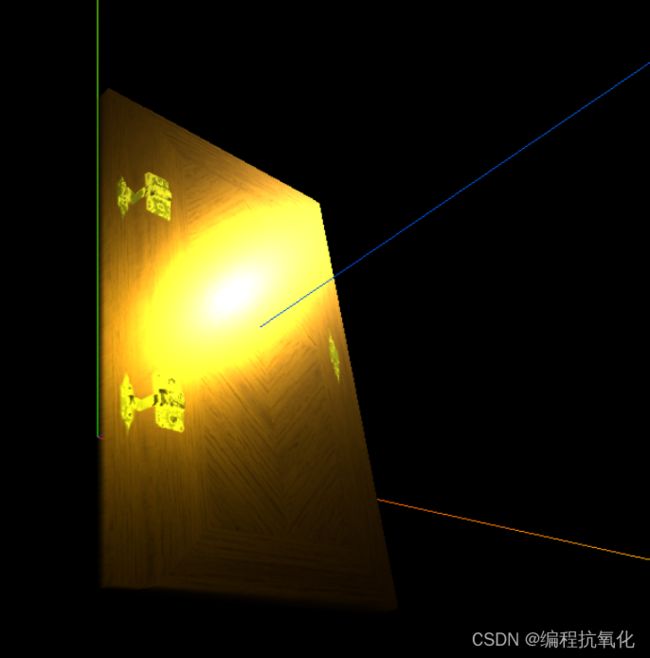
案例2:【平行光】照射物体
// 直线光源
const directionaLight = new THREE.DirectionalLight(0xffffff, 0.5);
// 设置光从哪个位置直射
directionaLight.position.set(10, 10, 10);
scene.add(directionaLight)
5.3、置换贴图与顶点细分设置
首先准备一张贴图

黑色还是不动,浅灰格外突出,特别是门把手和两块铁片要突出。
// 导入纹理
const textureLoader = new THREE.TextureLoader();
const doorColorTexture = textureLoader.load("./textures/door/color.jpg");
const doorAplhaTexture = textureLoader.load("./textures/door/alpha.jpg");
const doorAoTexture = textureLoader.load("./textures/door/ambientOcclusion.jpg")
// 导入置换贴图
const doorHeightTexture = textureLoader.load("./textures/door/height.jpg")

const cubeGeometry = new THREE.BoxGeometry(1, 1, 1, 200, 200);
// 材质
const material = new THREE.MeshStandardMaterial({
    color: "#ffff00",
    map: doorColorTexture,
    alphaMap: doorAplhaTexture,
    transparent: true,
    aoMap: doorAoTexture,
    aoMapIntensity: 1,
    displacementMap: doorHeightTexture,
    displacementScale: 0.1 // 默认是1,深浅度,0.1代表稍微突出一点
})
const cube = new THREE.Mesh(cubeGeometry, material);
scene.add(cube);

// 灯光(环境光)
// 参数分别为光的颜色和光的强度
const light = new THREE.AmbientLight(0xffffff, 0.5);
scene.add(light)
5.4、设置粗糙度与粗糙度贴图
// 添加物体
const cubeGeometry = new THREE.BoxGeometry(1, 1, 1, 200, 200);
// 材质
const material = new THREE.MeshStandardMaterial({
    color: "#ffff00",
    map: doorColorTexture,
    alphaMap: doorAplhaTexture,
    transparent: true,
    aoMap: doorAoTexture,
    aoMapIntensity: 1,
    displacementMap: doorHeightTexture,
    displacementScale: 0.1,
    roughness: 0 // 设置粗糙度为0,直接光滑到底
})
const cube = new THREE.Mesh(cubeGeometry, material);
scene.add(cube);

// 灯光(环境光)
// 参数分别为光的颜色和光的强度
const light = new THREE.AmbientLight(0xffffff);
scene.add(light)

// 直线光源
const directionaLight = new THREE.DirectionalLight(0xffffff);
// 设置光从哪个位置直射
directionaLight.position.set(10, 10, 10);
scene.add(directionaLight)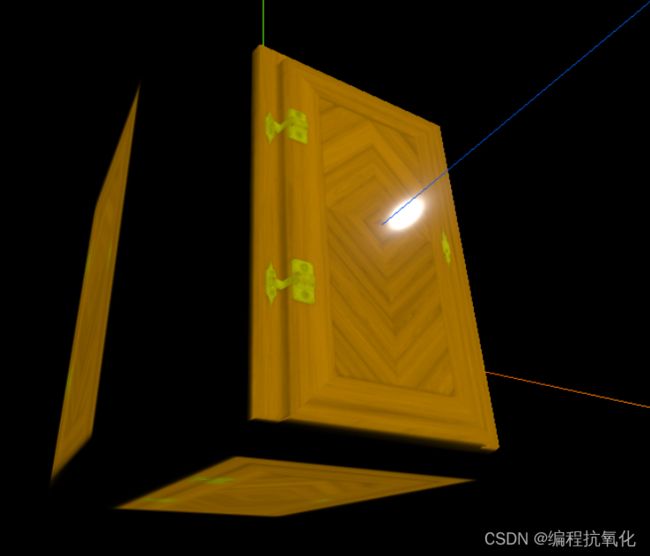
假如我们想单独设置金属片粗糙,门光滑怎么办?
使用粗糙度贴图

白色代表粗糙度为1,黑色代表粗糙度为0。


5.5、设置金属度与金属贴图

现在我们想让金属片完全像金属,门不用。
准备金属贴图

黑色完全不用金属材质,而白色完全用金属材质。
// 导入纹理
const textureLoader = new THREE.TextureLoader();
const doorColorTexture = textureLoader.load("./textures/door/color.jpg");
const doorAplhaTexture = textureLoader.load("./textures/door/alpha.jpg");
const doorAoTexture = textureLoader.load("./textures/door/ambientOcclusion.jpg")
// 导入置换贴图
const doorHeightTexture = textureLoader.load("./textures/door/height.jpg");
// 粗糙度贴图
const doorRoughnessTexture = textureLoader.load("./textures/door/roughness.jpg");
// 金属贴图
const doorMetalnessTexture = textureLoader.load("./textures/door/metalness.jpg");

// 添加物体
const cubeGeometry = new THREE.BoxGeometry(1, 1, 1, 200, 200);
// 材质
const material = new THREE.MeshStandardMaterial({
    color: "#ffff00",
    map: doorColorTexture,
    alphaMap: doorAplhaTexture,
    transparent: true,
    aoMap: doorAoTexture,
    aoMapIntensity: 1,
    displacementMap: doorHeightTexture,
    displacementScale: 0.1,
    // roughness: 0, // 设置粗糙度为0,直接光滑到底
    roughnessMap: doorRoughnessTexture,
    metalness: 1, // 金属度打满
    metalnessMap: doorMetalnessTexture // 引入金属贴图
})
const cube = new THREE.Mesh(cubeGeometry, material);
scene.add(cube);

// 灯光(环境光)
// 参数分别为光的颜色和光的强度
const light = new THREE.AmbientLight(0xffffff);
scene.add(light)

// 直线光源
const directionaLight = new THREE.DirectionalLight(0xffffff);
// 设置光从哪个位置直射
directionaLight.position.set(10, 10, 10);
scene.add(directionaLight)
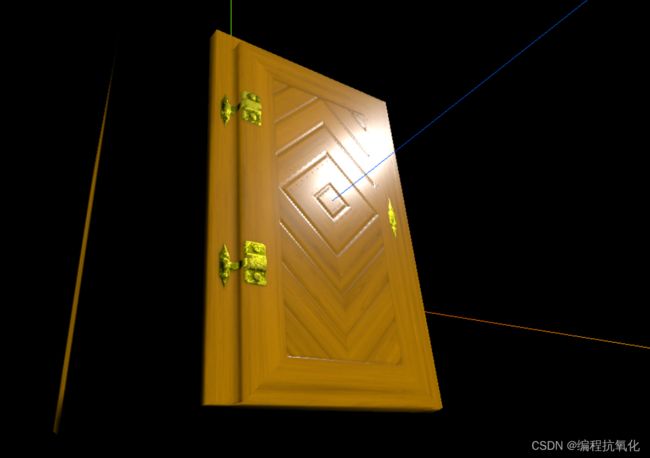
5.6、法线贴图应用
上一节中虽然体现出了金属的质感,但还不够完美,我们发现在光折射的时候,门和金属片并没有凹凸不平的样子,都是一个平面的感觉。
我们再引入一个凹凸感(法线)的贴图
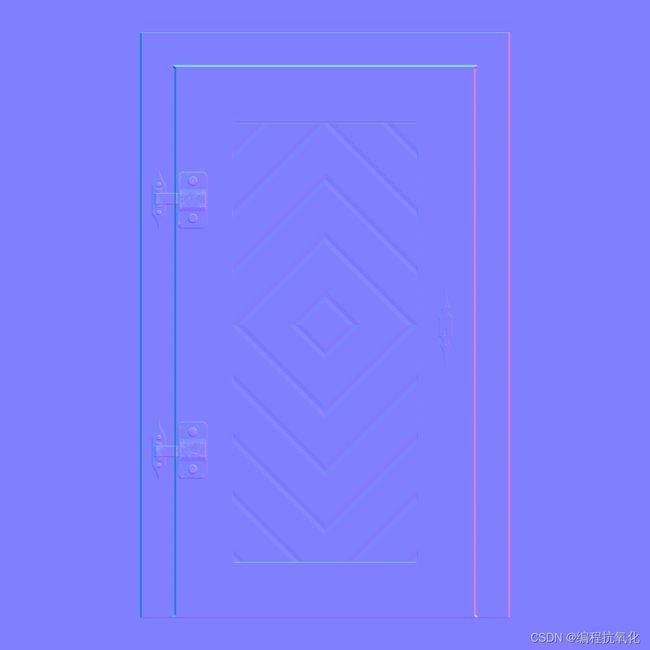
每个颜色都代表不同的朝向,相同的颜色相同朝向。

5.7、如何获取各种类型纹理贴图
网站:Poliigon - Textures, Models and HDRIs for 3D rendering
我们下载个免费的,解压一下

5.8、纹理加载进度情况
单张图片加载
let event = {}
// 单张纹理图的加载进度(color.jpg)
event.onLoad = function () {
    console.log("图片加载完成");
}
event.onProgress = function (e) {
    console.log("图片加载进度", e)
}
event.onError = function (e) {
    console.log("图片加载出现错误", e)
}

// 导入纹理
const textureLoader = new THREE.TextureLoader();
const doorColorTexture = textureLoader.load("./textures/door/color.jpg", event.onLoad, event.onProgress, event.onError);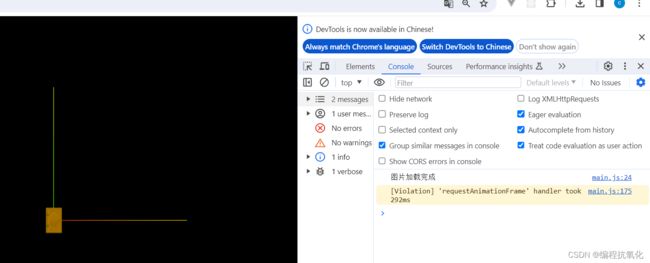
多张图片加载
let event = {}
event.onLoad = function () {
    console.log("图片加载完成");
}
event.onProgress = function (url, num, total) {
    console.log("图片加载路径", url)
    console.log("图片加载进度", num)
    console.log("图片总数", total)
    console.log("图片加载进度百分比", (num / total * 100).toFixed(2))
}
event.onError = function (e) {
    console.log("图片加载出现错误", e)
}

// 设置加载管理器
const loadingManager = new THREE.LoadingManager(event.onLoad, event.onProgress, event.onError);

// 导入纹理
const textureLoader = new THREE.TextureLoader(loadingManager);
const doorColorTexture = textureLoader.load("./textures/door/color.jpg");
const doorAplhaTexture = textureLoader.load("./textures/door/alpha.jpg");
const doorAoTexture = textureLoader.load("./textures/door/ambientOcclusion.jpg")
// 导入置换贴图
const doorHeightTexture = textureLoader.load("./textures/door/height.jpg");
// 粗糙度贴图
const doorRoughnessTexture = textureLoader.load("./textures/door/roughness.jpg");
// 金属贴图
const doorMetalnessTexture = textureLoader.load("./textures/door/metalness.jpg");
// 法线贴图
const doorNormalTexture = textureLoader.load("./textures/door/normal.jpg");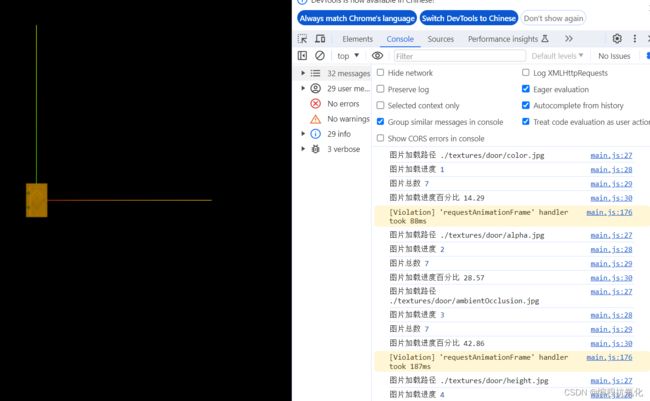
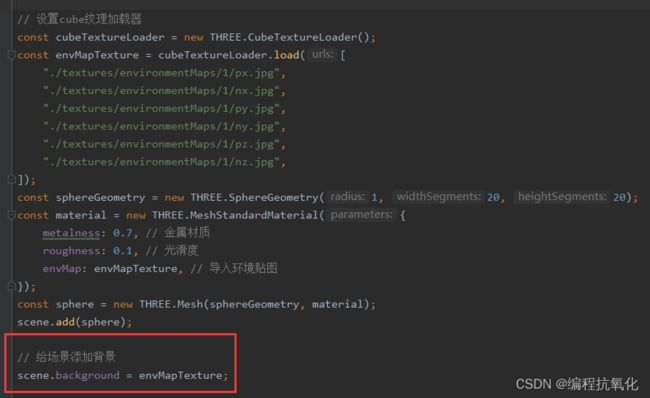
5.9、详解环境贴图
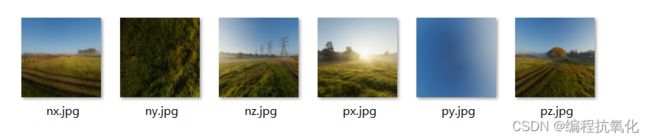
// 设置cube纹理加载器
const cubeTextureLoader = new THREE.CubeTextureLoader();
const envMapTexture = cubeTextureLoader.load([
    "./textures/environmentMaps/1/px.jpg",
    "./textures/environmentMaps/1/nx.jpg",
    "./textures/environmentMaps/1/py.jpg",
    "./textures/environmentMaps/1/ny.jpg",
    "./textures/environmentMaps/1/pz.jpg",
    "./textures/environmentMaps/1/nz.jpg",
]);
const sphereGeometry = new THREE.SphereGeometry(1, 20, 20);
const material = new THREE.MeshStandardMaterial({
    metalness: 0.7, // 金属材质
    roughness: 0.1, // 光滑度
    envMap: envMapTexture, // 导入环境贴图
});
const sphere = new THREE.Mesh(sphereGeometry, material);
scene.add(sphere);
5.10、经纬线映射贴图与HDR
经纬线映射贴图

HDR
import {RGBELoader} from 'three/examples/jsm/loaders/RGBELoader'

// 加载HDR环境图
const rgbeLoader = new RGBELoader();
rgbeLoader.loadAsync("./textures/hdr/002.hdr").then((texture) => {
    // 如果不设置映射mapping。则HDR环境图不会动
    texture.mapping = THREE.EquirectangularReflectionMapping;
    scene.background = texture;
    // 设置环境图(物体小球)
    scene.environment = texture;
});
六、详解灯光与阴影
6.1、灯光与阴影的关系与设置
目标:灯光与阴影
1、材质要满足对光照有反应。
2、设置渲染器开启阴影的计算 renderer.shadowMap.enabled = true;
3、设置光照投射阴影 directionaLight.castShadow = true;
4、设置物体投射阴影 sphere.castShadow = true;
5、设置物体接收阴影 plane.receiveShadow = true;
// 圆
const sphereGeometry = new THREE.SphereGeometry(1, 20, 20);
const material = new THREE.MeshStandardMaterial();
const sphere = new THREE.Mesh(sphereGeometry, material);
// 投射阴影
sphere.castShadow = true;
scene.add(sphere);

// 创建平面
const planeGeometry = new THREE.PlaneGeometry(10, 10);
const plane = new THREE.Mesh(planeGeometry, material);
plane.position.set(0, -1, 0);
plane.rotation.x = -Math.PI / 2;
// 接收阴影
plane.receiveShadow = true;
scene.add(plane);

// 直线光源
const directionaLight = new THREE.DirectionalLight(0xffffff, 0.5);
// 设置光从哪个位置直射
directionaLight.position.set(10, 10, 10);
// 设置该平行光会产生动态阴影
directionaLight.castShadow = true;
scene.add(directionaLight);


// 初始化渲染器
const renderer = new THREE.WebGLRenderer();
// 设置渲染的尺寸大小
renderer.setSize(window.innerWidth, window.innerHeight);
// 开启场景中的阴影贴图
renderer.shadowMap.enabled = true;
// 将webgl渲染的canvas内容添加到body
document.body.appendChild(renderer.domElement);
6.2、平行光阴影属性与阴影相机原理

