Carla——搭建一个简单的危险场景
文章目录
- 1.完整代码片段与实验结果(视频截图)
- 2. 程序的思路
-
- 2.1 生成前车
- 2.2 判断语句与车辆控制的思路
- 3.遇到的问题
本文在 上一篇:carla在指定位置生成车辆的基础上搭建一个非常简单的危险场景。
1.完整代码片段与实验结果(视频截图)
完整的代码片段:
import glob
import os
import sys

try:
    sys.path.append(glob.glob('../carla/dist/carla-*%d.%d-%s.egg' % (
        sys.version_info.major,
        sys.version_info.minor,
        'win-amd64' if os.name == 'nt' else 'linux-x86_64'))[0])
except IndexError:
    pass


import carla
#Import the library Transform used to explicitly spawn an actor
from carla import Transform, Location, Rotation
from carla import Map
from carla import Vector3D

import random
import time

actor_list = []

#--------------------------------Initialization-----------------------------------#
try:


	##General connection to server and get blue_print
	client = carla.Client('localhost',2000)
	client.set_timeout(5.0)

	world = client.get_world()
	mp = world.get_map()#get the map of the current world.
	blueprint_library = world.get_blueprint_library()


	##Search for specific actor and get its blueprint.
	vehicle_bp1 = blueprint_library.filter('tt')[0]
	vehicle_bp2 = blueprint_library.filter('model3')[0]

	##Change the color of the actors (attribute)
	vehicle_bp1.set_attribute('color', '255,255,255')# change the color to white
	vehicle_bp2.set_attribute('color', '0,0,0')

	##Spawn an actor at specified point by using Transform
	#lag Vehicle
	spawn_point_v1 = Transform(Location(x=-65.4, y=4.0, z=11),
		Rotation(pitch=0, yaw=180, roll=0))

	#Lead Vehicle
	spawn_point_v2 = Transform(Location(x=-105.4, y=4.0, z=11),
		Rotation(pitch=0, yaw=180, roll=0))

	vehicle1 = world.spawn_actor(vehicle_bp1, spawn_point_v1)
	vehicle2 = world.spawn_actor(vehicle_bp2, spawn_point_v2)

	actor_list.append(vehicle1)
	actor_list.append(vehicle2)
	##Keep the leading vehicle static
	vehicle2.apply_control(carla.VehicleControl(throttle=0.5, steer=0.0, brake=1.0, hand_brake=True))

#---------------------------------Control Part------------------------------------#
	while True:
		x_v1 = vehicle1.get_location().x
		x_v2 = vehicle2.get_location().x

		y_v1 = vehicle1.get_location().y
		y_v2 = vehicle2.get_location().y

		if abs(x_v2 - x_v1) > 12:#Drive with "safe distance"
		#Control the vehicle:
			vehicle1.apply_control(carla.VehicleControl(throttle=0.7, steer=0.0))

		elif abs(x_v2 - x_v1) <= 12:#When the lag vehicle  leave the "safe zone"

			while True:
				y_v1 = vehicle1.get_location().y
				y_v2 = vehicle2.get_location().y

				#lag vehicle turn left.
				vehicle1.apply_control(carla.VehicleControl(throttle=0.2, steer=-0.5))
				#if the rotation angle is too big, change the direction of steer
				if abs(y_v1 - y_v2) > 2:
					vehicle1.apply_control(carla.VehicleControl(throttle=0.5, steer=0.4))
					break

			while True:
				x_v1 = vehicle1.get_location().x
				x_v2 = vehicle2.get_location().x


				if abs(x_v1 - x_v2) < 1.0:
				#The number in this if statement depends on the safe distance set before.
					vehicle1.apply_control(carla.VehicleControl(throttle=0.7, steer=0.0))
					if abs(x_v1 - x_v2) > 25:
						break

			break
	time.sleep(100)

finally:
	for actor in actor_list:
		actor.destroy()
	print("All cleaned up!")
实验结果(视频截图)
开始左转:
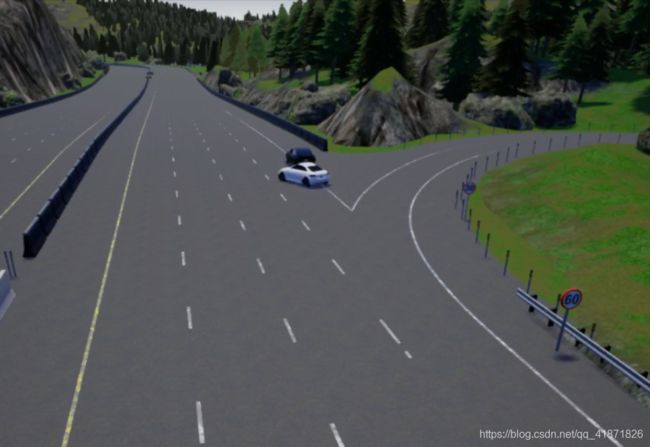
右转“回方向”:
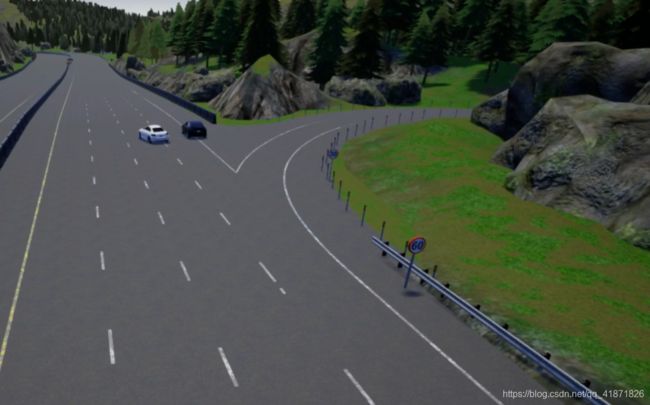
继续行驶:
2. 程序的思路
2.1 生成前车
关于车辆生成的介绍请参见上一篇:carla在指定位置生成车辆。前车的坐标设置为自车前的40m处,只有x的坐标在变化。前车为静止状态(参数中设置为hand_brake=True),对应的代码语句为:
...
vehicle2.apply_control(carla.VehicleControl(throttle=0.5, steer=0.0, brake=1.0, hand_brake=True))
2.2 判断语句与车辆控制的思路
在进行判断之前,我们需要调用车辆的位置信息 ( x , y , z ) (x,y,z) (x,y,z),对应的库函数是vehicle1.get_location().x或者是vehicle1.get_location().y,这里不太需要z轴的坐标值,因为假设车辆是在水平面上进行运动。
有了这些坐标信息,我们就可以用循环获取车辆每时每刻的位置信息。思路如下:
1. 设置安全距离
这里的安全车距被设置为12m,即只要两车x坐标的差值要大于12,自车继续行驶。对应语句为:
...
if abs(x_v2 - x_v1) > 12:#Drive without warning
			vehicle1.apply_control(carla.VehicleControl(throttle=0.7, steer=0.0))
2. 设定自车运动过程
当两车的距离小于安全距离时,自车开始运动。人为设定成左转-向右回轮-直行。
左转判断
左转的判断条件很简单:小于安全距离就开始左转
elif abs(x_v2 - x_v1) <= 12:

			while True:
				y_v1 = vehicle1.get_location().y
				y_v2 = vehicle2.get_location().y

				vehicle1.apply_control(carla.VehicleControl(throttle=0.2, steer=-0.5))
右转回轮判断
如果没有右转回轮,自车就会原地绕圈,既不“美观”也不符合实际情况。当两车“横向距离”(这里我只用了两车的y坐标)超过一定范围之后,自车开始回轮。
...
if abs(y_v1 - y_v2) > 2:#if the rotation angle is too big, change the direction of steer

					vehicle1.apply_control(carla.VehicleControl(throttle=0.5, steer=0.4))
直行判断
当自车车身基本与前车平行的时候,即自车与前车的x坐标差别不大的时候就可以
开始直行了。
	while True:
			x_v1 = vehicle1.get_location().x
			x_v2 = vehicle2.get_location().x
			if abs(x_v1 - x_v2) < 1.0:
			#The number in this 'if' statement depends on the safe distance set before.
			vehicle1.apply_control(carla.VehicleControl(throttle=0.7, steer=0.0))
				if abs(x_v1 - x_v2) > 25:
					break
3.遇到的问题
在调用waypoint函数中发现返回的yaw值没有什么实质性变化,所以不能只是简单地调用waypoint的信息来控制车辆的转向。获取车辆附近路点的语句:
waypoint_v1 = mp.get_waypoint(vehicle1.get_location())
yaw_v1 = waypoint_v1.transform.rotation.yaw
print(vehicle1.get_location())