Flink从入门到实践(二):Flink DataStream API
文章目录
- 系列文章索引
- 三、DataStream API
-
- 1、官网
- 2、获取执行环境(Environment)
- 3、数据接入(Source)
-
- (1)总览
- (2)代码实例(1.18版本已过时的)
- (3)使用Source接口
- 4、数据处理(Transformation)
-
- (1)总览
- (2)Map(后续用该结果测试)
- (3)Filter
- (4)FlatMap
- (5)KeyBy
- (6)Reduce
- (7)Union
- (8)Connect
- (9)CoMap, CoFlatMap
- (10)Physical Partitioning 分区
- (11)Side Outputs 分流操作
- 5、数据输出(Data Sinks、Connectors)
-
- (1)总览
- (2)print
- (3)自定义Sink打印到控制台
- (4)写入到文件
- (5)输出到MySQL
- (6)输出到Redis
- (7)输出到Socket
- (8)输出到Kafka
系列文章索引
Flink从入门到实践(一):Flink入门、Flink部署
Flink从入门到实践(二):Flink DataStream API
Flink从入门到实践(三):数据实时采集 - Flink MySQL CDC
三、DataStream API
1、官网
https://nightlies.apache.org/flink/flink-docs-release-1.18/docs/dev/datastream/overview/
2、获取执行环境(Environment)
/**
 * 1、获取Flink执行的环境
 * getExecutionEnvironment() 这是我们用的最多的一种
 * createLocalEnvironment()  这种仅限于本地开发使用
 * createRemoteEnvironment(String host, int port, String... jarFiles);  知道就行,开发不用
 *
 *
 * getExecutionEnvironment 传入一个 new Configuration(),本质上是一个HashMap
 */
// StreamExecutionEnvironment env = StreamExecutionEnvironment.getExecutionEnvironment(new Configuration());
final StreamExecutionEnvironment env = StreamExecutionEnvironment.getExecutionEnvironment();
env.enableCheckpointing(3000); // 3秒检查一次,提高应用程序的容错性和数据一致性。
DataStream<String> text = env.readTextFile("file:///path/to/file");
通常来说使用getExecutionEnvironment()就可以了,会自动选择你当前的运行环境。
3、数据接入(Source)
(1)总览
我们可以使用env.addSource(sourceFunction)来添加数据来源,实际有许多内置的Source,也可以定义自己的Source。
如果想要自定义数据来源,比如说(该方式在1.18已过时,推荐使用Source接口):
实现SourceFunction接口来实现单并行度的数据来源;
实现ParallelSourceFunction接口来实现多并行度的数据来源;
实现RichParallelSourceFunction接口来实现更高级的多并行度的数据来源。
内置的数据来源(本质上也是使用env.addSource(sourceFunction)来已经预实现了):
env.readTextFile(path):逐行读取文本文件,即符合TextInputFormat规范的文件,并将其作为字符串返回。
readFile(fileInputFormat, path):按照指定的文件输入格式读取(一次)文件。
readFile(fileInputFormat, path, watchType, interval, pathFilter, typeInfo):更加复杂的文件处理。
socketTextStream():从Socket读取。元素可以用分隔符分隔。
fromCollection(Collection)、fromCollection(Iterator, Class)、fromElements(T ...)、fromParallelCollection(SplittableIterator, Class)、generateSequence(from, to):从集合读取。
addSource(new FlinkKafkaConsumer<>(...)):从kafka读取。

(2)代码实例(1.18版本已过时的)
// 实体类
public class Access {

    private long time;
    private String domain;
    private double traffic;
}

public class Student {

    private int id;
    private String name;
    private int age;
}
// 工具类 需要引入mysql-connector-java包
import java.sql.Connection;
import java.sql.DriverManager;

public class MySQLUtils {

    public static Connection getConnection() throws Exception {
        Class.forName("com.mysql.jdbc.Driver");
        return DriverManager.getConnection("jdbc:mysql://localhost:3306/flink", "root", "123");
    }

    public static void close(AutoCloseable closeable) {
        if(null != closeable) {
            try {
                closeable.close(); // null.close
            } catch (Exception e) {
                e.printStackTrace();
            } finally {
                closeable = null;
            }
        }
    }
}
// 自定义source
/**
 * 自定义数据源
 * 并行度为1
 */
public class AccessSource implements SourceFunction<Access>{

    volatile boolean isRunning = true;

    /**
     * 造数据是自定义数据源的使用方式之一
     * @param ctx
     * @throws Exception
     */
    @Override
    public void run(SourceContext<Access> ctx) throws Exception {

        Random random = new Random();
        String[] domains = {"test1.com","test2.com","test3.com"};
        while (isRunning) {
            long time = System.currentTimeMillis();
            ctx.collect(new Access(time, domains[random.nextInt(domains.length)], random.nextInt(1000) + 1000));

            Thread.sleep(2000);
        }
    }

    @Override
    public void cancel() {
        isRunning = false;
    }
}

/**
 * 自定义数据源
 * 多并行度
 */
public class AccessSourceV2 implements ParallelSourceFunction<Access> {

    volatile boolean isRunning = true;

    /**
     * 造数据是自定义数据源的使用方式之一
     * @param ctx
     * @throws Exception
     */
    @Override
    public void run(SourceContext<Access> ctx) throws Exception {

        Random random = new Random();
        String[] domains = {"test1.com","test2.com","test3.com"};
        while (isRunning) {
            long time = System.currentTimeMillis();
            ctx.collect(new Access(time, domains[random.nextInt(domains.length)], random.nextInt(1000) + 1000));

            Thread.sleep(5000);
        }
    }

    @Override
    public void cancel() {
        isRunning = false;
    }
}

/**
 * RichSourceFunction: Rich  +   SourceFunction
 * Rich: 包含了生命周期方法  open  close
 * SourceFunction:单
 *
 * 自定义二次开发:按照框架(Flink/Spark/....)所提供的接口,去实现自己的业务逻辑即可
 * 自定义Source
 * 自定义Sink
 *
 *
 * 扩展:对于Spark SQL的外部数据源熟悉吗? 按照Spark所提供的接口,自己实现业务逻辑
 *
 */
public class MySQLSource extends RichSourceFunction<Student> {


    Connection connection;
    PreparedStatement pstmt;

    /**
     * 初始化操作,建立connection
     */
    @Override
    public void open(Configuration parameters) throws Exception {
        connection = MySQLUtils.getConnection();
        pstmt = connection.prepareStatement("select * from student");
    }

    /**
     * 释放资源,关闭connection
     */
    @Override
    public void close() throws Exception {
        MySQLUtils.close(pstmt);
        MySQLUtils.close(connection);

    }

    /**
     * 业务逻辑:就是把表中的数据读取出来 ==> Student
     */
    @Override
    public void run(SourceContext<Student> ctx) throws Exception {
        ResultSet rs = pstmt.executeQuery();
        while (rs.next()) {
            int id = rs.getInt("id");
            String name = rs.getString("name");
            int age = rs.getInt("age");
            Student student = new Student(id, name, age);
            ctx.collect(student);
        }
    }

    @Override
    public void cancel() {

    }
}
/**
 * Flink中datasource的使用
 */
public class FlinkDataSourceApp {
    public static void main(String[] args) throws Exception {
        StreamExecutionEnvironment env = StreamExecutionEnvironment.getExecutionEnvironment();

        /**
         * 使用内置的dataSource
         */
//        DataStreamSource source = env.readFile(new TextInputFormat(null), "data/wc.data");
//        // 这个readTextFile方法底层其实调用的就是readFile
//        DataStreamSource source = env.readTextFile("data/wc.txt");
//        System.out.println(source.getParallelism());  // 8
//
//        SingleOutputStreamOperator mapStream = source.map(String::toUpperCase);
//        System.out.println(mapStream.getParallelism());
//        mapStream.print();
//
//        DataStreamSource source = env.fromParallelCollection(new NumberSequenceIterator(1, 10), Long.TYPE);
//        System.out.println(source.getParallelism());// 8
//        SingleOutputStreamOperator map = source.map(x -> x + 1);
//        map.print();
//
//        DataStreamSource source = env.addSource(new AccessSourceV2()).setParallelism(3); // 对于ParallelSourceFunction是可以根据具体情况来设定并行度的
//        System.out.println(source.getParallelism());
//        source.print();

        /**
         * 使用自定义数据源
         */
//        env.addSource(new AccessSource()).print();
//        env.addSource(new AccessSourceV2()).setParallelism(3).print(); // 多并行度的可以自行设置并行度

        /**
         * 使用Flink自定义MySQL的数据源,进而读取MySQL里面的数据
         * 该方式已过时 …… flink更新太快了
         */
        env.addSource(new MySQLSource()).print();


        /**
         * 单并行度:fromElements  fromCollection  socketTextStream
         * 多并行度:readTextFile fromParallelCollection generateSequence  readFile
         * 自定义:
         */
        env.execute("作业名字");
    }
}
(3)使用Source接口
暂无
4、数据处理(Transformation)
(1)总览
官方文档:
https://nightlies.apache.org/flink/flink-docs-release-1.18/docs/dev/datastream/operators/overview/
运算符将一个或多个数据流转换为新的数据流。程序可以将多种转换组合成复杂的数据流拓扑。
(2)Map(后续用该结果测试)
把DataStream转换成新的DataStream。
// 将读取的文件,按照,分割,然后每一行数据组成一个Access对象
DataStream<Integer> dataStream = env.readTextFile("data/access.log");
SingleOutputStreamOperator<Access> mapStream = dataStream.map(new MapFunction<String, Access>() {
    @Override
    public Access map(String value) throws Exception {
        String[] splits = value.split(",");
        Access access = new Access();
        access.setTime(Long.parseLong(splits[0].trim()));
        access.setDomain(splits[1].trim());
        access.setTraffic(Double.parseDouble(splits[2].trim()));
        return access;
    }
});
mapStream.print();
(3)Filter
把DataStream转换成新的DataStream。
计算每个元素的布尔函数,并保留函数返回true的元素。
也即:过滤出满足条件的元素。
// 过滤出不为0的元素
dataStream.filter(new FilterFunction<Integer>() {
    @Override
    public boolean filter(Integer value) throws Exception {
        return value != 0;
    }
});
(4)FlatMap
把DataStream转换成新的DataStream。
可以是一对一、一对多、一对0 一个元素进来,可以出去0、1、多个元素。
dataStream.flatMap(new FlatMapFunction<String, String>() {
    @Override
    public void flatMap(String value, Collector<String> out)
        throws Exception {
        for(String word: value.split(" ")){ // 把每一个元素按空格分割
            out.collect(word); // 收集每一个 分割后的 元素
        }
    }
});
(5)KeyBy
把DataStream转换为KeyedStream 。
在逻辑上将流划分为不相交的分区。具有相同关键字的所有记录都被分配到同一个分区。
在内部,keyBy()是通过散列分区实现的。
(类似Map - Reduce思想)
注意!如果是根据一个对象分组,要重写 hashCode()方法,否则会使用默认的Object.hashCode()。
// 根据value的某个属性分组,相当于mysql的group by
// 通常分组之后,就要求和、求一些统计数据了
dataStream.keyBy(value -> value.getSomeKey());
dataStream.keyBy(value -> value.f0);

dataStream
.keyBy(value -> value.getSomeKey())
.sum("field") // 根据字段求和还可以求最大值最小值等
.print();
(6)Reduce
把KeyedStream 转换为 DataStream。
将当前元素与最后一个减少的值合并,并发出新值。
keyedStream.reduce(new ReduceFunction<Integer>() {
    @Override
    public Integer reduce(Integer value1, Integer value2)
    throws Exception {
        return value1 + value2;
    }
});
(7)Union
把多个DataStream合并为一个DataStream。
两个或多个数据流的联合,创建一个包含所有流中所有元素的新流。注意:如果您将数据流与其自身联合,您将在结果流中两次获得每个元素。
/**
 * union:合并多个流
 * 数据类型问题:union的多个流中数据类型是需要相同的
 * 数据类型相同的多流操作
 */
DataStreamSource<Integer> stream1 = env.fromElements(1, 2, 3);
DataStreamSource<Integer> stream2 = env.fromElements(11, 12, 13);
DataStreamSource<String> stream3 = env.fromElements("A", "B", "C");

stream1.union(stream2).map(x -> "PK_" + x).print();
stream1.union(stream1).print();
stream1.union(stream1, stream2).print();
(8)Connect
把两个DataStream 合并为 ConnectedStream。
DataStream<Integer> someStream = //...
DataStream<String> otherStream = //...
ConnectedStreams<Integer, String> connectedStreams = someStream.connect(otherStream);
/**
 * connect: 数据类型可以不同
 * 两个流的操作
 * 只是形式的连接
 */
ConnectedStreams<Integer, String> connectedStreams = stream1.connect(stream3);
connectedStreams.map(new CoMapFunction<Integer, String, String>() {
    // 共享状态
    String prefix = "common_";

    // 对第一个流的操作
    @Override
    public String map1(Integer value) throws Exception {
        return prefix + value*10;
    }

    // 对第二个流的操作
    @Override
    public String map2(String value) throws Exception {
        return prefix + value.toLowerCase();
    }
}).print();
(9)CoMap, CoFlatMap
将ConnectedStream 转换为 DataStream。
类似于连接数据流上的map和flatMap。
connectedStreams.map(new CoMapFunction<Integer, String, Boolean>() {
    @Override
    public Boolean map1(Integer value) {
        return true;
    }

    @Override
    public Boolean map2(String value) {
        return false;
    }
});
connectedStreams.flatMap(new CoFlatMapFunction<Integer, String, String>() {

   @Override
   public void flatMap1(Integer value, Collector<String> out) {
       out.collect(value.toString());
   }

   @Override
   public void flatMap2(String value, Collector<String> out) {
       for (String word: value.split(" ")) {
         out.collect(word);
       }
   }
});
(10)Physical Partitioning 分区
import org.apache.flink.api.common.functions.MapFunction;
import org.apache.flink.api.common.functions.Partitioner;
import org.apache.flink.api.common.functions.RichMapFunction;
import org.apache.flink.streaming.api.datastream.DataStreamSource;
import org.apache.flink.streaming.api.environment.StreamExecutionEnvironment;

public class PartitionTest2 {

    public static void main(String[] args) throws Exception {
        StreamExecutionEnvironment env = StreamExecutionEnvironment.getExecutionEnvironment();

        env.setParallelism(3); // 一般情况下,并行度跟分区相同,相同分区在同一个线程中执行
        DataStreamSource<String> sourcePartition = env.readTextFile("data/access.log");
        sourcePartition
                // 读取数据转成Access对象
                .map(new RichMapFunction<String, Access>() {
                    @Override
                    public Access map(String value) throws Exception {
                        String[] splits = value.split(",");
                        Access access = new Access();
                        access.setTime(Long.parseLong(splits[0].trim()));
                        access.setDomain(splits[1].trim());
                        access.setTraffic(Double.parseDouble(splits[2].trim()));
                        return access;
                    }
                })
                // 按照指定字段进行分区
                .partitionCustom(new Partitioner<String>() {
                    @Override
                    public int partition(String key, int numPartitions) {
                        System.out.println(numPartitions);

                        if("test1.com".equals(key)) {
                            return 0;
                        } else if("test2.com".equals(key)) {
                            return 1;
                        } else {
                            return 2;
                        }
                    }
                }, x -> x.getDomain())
                // 下面的这段map方法目的是验证:相同的域名是否真的在同一个分区内,看threadid是否相同即可
                .map(new MapFunction<Access, Access>() {
                    @Override
                    public Access map(Access value) throws Exception {
                        System.out.println("current thread id is " + Thread.currentThread().getId() + ", value is:" + value);
                        return value;
                    }
                }).print();
        env.execute("作业名字");
    }
}
(11)Side Outputs 分流操作
https://nightlies.apache.org/flink/flink-docs-release-1.18/docs/dev/datastream/side_output/
/**
 * 分流操作:把一个分拆分成多个流
 *
 * split 在老的flink版本中是有的,但是新的版本中已经没有这个api
 *
 * 那就说明新版本肯定提供了更好用的使用方式:side output
 */

DataStreamSource<String> source = env.readTextFile("data/access.log");
SingleOutputStreamOperator<Access> stream = source.map(new AccessConvertFunction());

// 很low的写法
//        SingleOutputStreamOperator pk1Stream = stream.filter(x -> "test1.com".equals(x.getDomain()));
//        SingleOutputStreamOperator pk2Stream = stream.filter(x -> "test1.com".equals(x.getDomain()));
//        pk1Stream.print("域名是pk1.com的流");
//        pk2Stream.print("域名是pk2.com的流");

// 定义两个Tag
OutputTag<Access> test1OutputTag = new OutputTag<Access>("test1"){};
OutputTag<Access> test2OutputTag = new OutputTag<Access>("test2"){};


SingleOutputStreamOperator<Access> processStream = stream.process(new ProcessFunction<Access, Access>() {
    @Override
    public void processElement(Access value, Context ctx, Collector<Access> out) throws Exception {
        if ("test1.com".equals(value.getDomain())) {
            ctx.output(test1OutputTag, value); // pk1.com的走pk1的OutputTag
        } else if ("test2.com".equals(value.getDomain())) {
            ctx.output(test2OutputTag, value);  // pk2.com的走pk2的OutputTag
        } else {
            out.collect(value); // pk3.com的走主流
        }
    }
});

processStream.print("主流:");
processStream.getSideOutput(test1OutputTag).print("test1的:");
processStream.getSideOutput(test2OutputTag).print("test2的:");

env.execute("作业名字");
5、数据输出(Data Sinks、Connectors)
(1)总览
https://nightlies.apache.org/flink/flink-docs-release-1.18/docs/dev/datastream/overview/#data-sinks
https://nightlies.apache.org/flink/flink-docs-release-1.18/docs/connectors/datastream/overview/
数据接收器消费数据流,并将它们转发到文件、Socket、外部系统或打印它们。
Flink自带多种内置输出格式:
writeAsText() / TextOutputFormat:将元素作为字符串逐行写入。字符串是通过调用每个元素的toString()方法获得的。
writeAsCsv(...) / CsvOutputFormat:将元组写入逗号分隔值文件。行和字段分隔符是可配置的。每个字段的值来自对象的toString()方法。
print() / printToErr():打印标准输出/标准错误流中每个元素的toString()值。可选地,可以提供一个前缀(msg),将其附加到输出的前面。这有助于区分不同的打印调用。如果并行度大于1,输出还将加上产生输出的任务的标识符。
writeUsingOutputFormat() / FileOutputFormat:自定义文件输出的方法和基类。支持自定义对象到字节的转换。
writeToSocket:根据SerializationSchema将元素写入Socket。
addSink:调用自定义接收器函数。Flink与其他系统(如Apache Kafka)的连接器捆绑在一起,这些连接器被实现为sink函数。
(2)print
stream.print();
/*
>7> Access{time=202810110120, domain='test1.com', traffic=2000.0}
1> Access{time=202810110120, domain='test2.com', traffic=4000.0}
11> Access{time=202810110120, domain='test1.com', traffic=5000.0}
4> Access{time=202810110120, domain='test3.com', traffic=1000.0}
9> Access{time=202810110120, domain='test2.com', traffic=6000.0}
线程号 + 数据.toString()

如果这样:
stream.print().setParallelism(1);
并行度设置为1,那么前面就不会输出数字

这样打印红色:
stream.printToErr();
*/
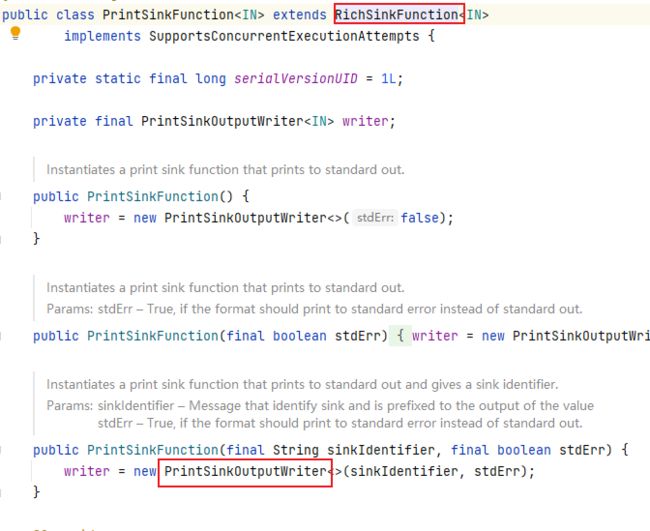
源码:


(3)自定义Sink打印到控制台
stream.addSink(new RichSinkFunction<Access>() {

    int subTaskId;

    // num>
    @Override
    public void open(Configuration parameters) throws Exception {
        super.open(parameters);

        subTaskId = getRuntimeContext().getIndexOfThisSubtask();
    }

    @Override
    public void invoke(Access value, SinkFunction.Context context) throws Exception {
        System.out.println(subTaskId + 1 + "> " + value); // 最终执行的方法,输出到终端
    }
});
(4)写入到文件
// 已过时
// 写入到文件,每一个并行度,会生成一个文件。并行度为1会生成test一个文件
stream.writeAsText("out/test", FileSystem.WriteMode.OVERWRITE).setParallelism(1);

// 也已经过时了,推荐使用 org.apache.flink.connector.file.sink.FileSink,需要额外引入包
StreamingFileSink<String> fileSink = StreamingFileSink
        .forRowFormat(new Path("out"), new SimpleStringEncoder())
        .withRollingPolicy(DefaultRollingPolicy.builder() // 构建文本滚动生成的策略
                .withRolloverInterval(Duration.ofMinutes(15)) // 按时间间隔滚动
                .withInactivityInterval(Duration.ofSeconds(5)) // 按不活跃滚动
                .withMaxPartSize(MemorySize.ofMebiBytes(1)) // 按大小滚动
                .build())
        .build();
// 数据类型需要前后对应
stream.map(Access::toString).addSink(fileSink);
(5)输出到MySQL
JdbcSink.sink提供至少一次保证。然而有效的是,通过创建upsert SQL语句或幂等SQL更新可以实现“恰好一次”。
<dependency>
    <groupId>org.apache.flinkgroupId>
    <artifactId>flink-connector-jdbcartifactId>
    <version>3.1.1-1.17version>
dependency>
// 写入到mysql
// 需要使用upsert语句
SinkFunction<Access> jdbcSink = JdbcSink.sink(
        // sql
        "insert into access (id, name) values (?, ?) on duplicate key update name=VALUES(name)",
        // sql的参数
        (JdbcStatementBuilder<Access>) (preparedStatement, access) -> {
            preparedStatement.setInt(1, (int)access.getTraffic());
            preparedStatement.setString(2, access.getDomain());
        },
        // 执行参数
        JdbcExecutionOptions.builder()
                .withBatchSize(5)
                .withBatchIntervalMs(200)
                .withMaxRetries(5) // 重试
                .build(),
        // jdbc连接信息
        new JdbcConnectionOptions.JdbcConnectionOptionsBuilder()
                .withUrl("jdbc:mysql://192.168.56.10:3306/testdb")
                .withDriverName("com.mysql.jdbc.Driver")
                .withUsername("root")
                .withPassword("root")
                .build()
);

stream.addSink(jdbcSink);
自1.13起, Flink JDBC sink支持恰好一次模式。该实现依赖于XA标准的JDBC驱动程序支持。如果数据库也支持XA,则大多数驱动程序都支持XA(因此驱动程序通常是相同的)。
StreamExecutionEnvironment env = StreamExecutionEnvironment.getExecutionEnvironment();
env
        .fromElements(...)
        .addSink(JdbcSink.exactlyOnceSink(
                "insert into books (id, title, author, price, qty) values (?,?,?,?,?)",
                (ps, t) -> {
                    ps.setInt(1, t.id);
                    ps.setString(2, t.title);
                    ps.setString(3, t.author);
                    ps.setDouble(4, t.price);
                    ps.setInt(5, t.qty);
                },
                JdbcExecutionOptions.builder()
                    .withMaxRetries(0)
                    .build(),
                JdbcExactlyOnceOptions.defaults(),
                () -> {
                    // create a driver-specific XA DataSource
                    // The following example is for derby
                    EmbeddedXADataSource ds = new EmbeddedXADataSource();
                    ds.setDatabaseName("my_db");
                    return ds;
                });
env.execute();
(6)输出到Redis
https://bahir.apache.org/docs/flink/current/flink-streaming-redis/
public static class RedisExampleMapper implements RedisMapper<Tuple2<String, String>>{

    @Override
    public RedisCommandDescription getCommandDescription() {
        return new RedisCommandDescription(RedisCommand.HSET, "HASH_NAME");
    }

    @Override
    public String getKeyFromData(Tuple2<String, String> data) {
        return data.f0;
    }

    @Override
    public String getValueFromData(Tuple2<String, String> data) {
        return data.f1;
    }
}
FlinkJedisPoolConfig conf = new FlinkJedisPoolConfig.Builder().setHost("127.0.0.1").build();

DataStream<String> stream = ...;
stream.addSink(new RedisSink<Tuple2<String, String>>(conf, new RedisExampleMapper());
(7)输出到Socket
// 输出到Socket,注意类型匹配,输出为字符串
stream.map(Access::toString).writeToSocket("localhost", 9528, new SimpleStringSchema());
(8)输出到Kafka
https://nightlies.apache.org/flink/flink-docs-release-1.18/docs/connectors/datastream/kafka/