ubuntu下编译nginx平滑添加stream模块以及fastdfs访问模块
前言
参考资料:
ubntu下单机配置fastdfs作为开发环境(2)—nginx生产环境下再编译+fastdfs扩展模块的编译
编译nginx平滑添加stream模块
nginx stream模块初探
Ubuntu 16.04安装Nginx
编译配置过程
首先看看有没有nginx,没有的话要安装一个—因为我们最后要看看官方安装时候的编译参数啊,否则凭自己能记住那么多编译参数吗?
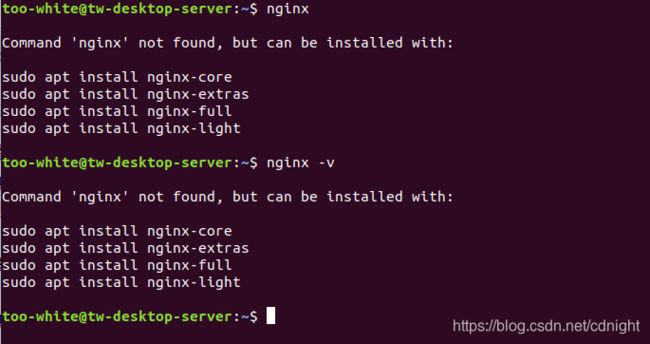
本机没有,安装:
sudo apt-get install nginx

注意,安装好以后可以发现 stream模块已经在了。
好了,下面只需要配置fastdfs的模块即可,具体参考:
ubntu下单机配置fastdfs作为开发环境(2)—nginx生产环境下再编译+fastdfs扩展模块的编译
对了,在配置之前,请按照教程配置好fastdfs,例如:
ubntu下单机配置fastdfs作为开发环境(1)—fastdfs的安装、配置及测试
编译安装过程
1、安装gcc
安装 nginx 需要先将官网下载的源码进行编译,编译依赖 gcc 环境,如果没有 gcc 环境,则需要安装:
查看是否已经下载:
dpkg -l | grep gcc
如果没有则下载安装
sudo apt-get install g+±5
2、 安装PCRE pcre-devel
PCRE(Perl Compatible Regular Expressions) 是一个Perl库,包括 perl 兼容的正则表达式库。nginx 的 http 模块使用 pcre 来解析正则表达式,所以需要在 linux 上安装 pcre 库,pcre-devel 是使用 pcre 开发的一个二次开发库。nginx也需要此库。命令:
sudo apt-get install openssl libssl-dev
3、安装zlib
zlib 库提供了很多种压缩和解压缩的方式, nginx 使用 zlib 对 http 包的内容进行 gzip ,所以需要在 Centos 上安装 zlib 库。
查看是否安装
dpkg -l | grep zlib
如果没有则下载安装
sudo apt-get install zlib1g-dev
4、安装OpenSSL
OpenSSL 是一个强大的安全套接字层密码库,囊括主要的密码算法、常用的密钥和证书封装管理功能及 SSL 协议,并提供丰富的应用程序供测试或其它目的使用。
nginx 不仅支持 http 协议,还支持 https(即在ssl协议上传输http),所以需要在 Centos 安装 OpenSSL 库。
sudo apt-get install openssl libssl-dev
获取默认安装好的nginx的源代码
额,不要用下面这个。。因为不是通用的,在centos下面可如何是好,对不对?
sudo apt-get source nginx
访问官方网站,下载源代码。。注意,用nginx 1.14.2,不保证更新的版本能够将fastdfs编译进去—fastdfs已经很久没更新了,估计不会支持太新的nginx版本的。。。
nginx源代码下载

下载以后解压缩,得到:

下载fastdfs的nginx模块,在这里:
https://github.com/happyfish100/fastdfs-nginx-module/releases/tag/V1.20
解压缩,然后放到

include-modules是新建文件夹,只是为了方便存放:
然后放到 /usr/local/nginx下面。

sudo mkdir -p /usr/local/nginx
sudo mv nginx-1.14.2 /usr/local/nginx/
查看复制nginx的编译参数:

如下:
–with-cc-opt=’-g -O2 -fdebug-prefix-map=/build/nginx-FIJPpj/nginx-1.14.0=. -fstack-protector-strong -Wformat -Werror=format-security -fPIC -Wdate-time -D_FORTIFY_SOURCE=2’ --with-ld-opt=’-Wl,-Bsymbolic-functions -Wl,-z,relro -Wl,-z,now -fPIC’ --prefix=/usr/share/nginx --conf-path=/etc/nginx/nginx.conf --http-log-path=/var/log/nginx/access.log --error-log-path=/var/log/nginx/error.log --lock-path=/var/lock/nginx.lock --pid-path=/run/nginx.pid --modules-path=/usr/lib/nginx/modules --http-client-body-temp-path=/var/lib/nginx/body --http-fastcgi-temp-path=/var/lib/nginx/fastcgi --http-proxy-temp-path=/var/lib/nginx/proxy --http-scgi-temp-path=/var/lib/nginx/scgi --http-uwsgi-temp-path=/var/lib/nginx/uwsgi --with-debug --with-pcre-jit --with-http_ssl_module --with-http_stub_status_module --with-http_realip_module --with-http_auth_request_module --with-http_v2_module --with-http_dav_module --with-http_slice_module --with-threads --with-http_addition_module --with-http_geoip_module=dynamic --with-http_gunzip_module --with-http_gzip_static_module --with-http_image_filter_module=dynamic --with-http_sub_module --with-http_xslt_module=dynamic --with-stream=dynamic --with-stream_ssl_module --with-mail=dynamic --with-mail_ssl_module
下面我们要添加fastdfs的nginx插件源码,譬如:
--add-module=./include-modules/fastdfs-nginx-module-1.20/src
注意,这个路径要根据nginx的configure文件的相对路径来定的,譬如我的是

综合就是:
./configure --add-module=./include-modules/fastdfs-nginx-module-1.20/src --with-cc-opt=’-g -O2 -fdebug-prefix-map=/build/nginx-FIJPpj/nginx-1.14.0=. -fstack-protector-strong -Wformat -Werror=format-security -fPIC -Wdate-time -D_FORTIFY_SOURCE=2’ --with-ld-opt=’-Wl,-Bsymbolic-functions -Wl,-z,relro -Wl,-z,now -fPIC’ --prefix=/usr/share/nginx --conf-path=/etc/nginx/nginx.conf --http-log-path=/var/log/nginx/access.log --error-log-path=/var/log/nginx/error.log --lock-path=/var/lock/nginx.lock --pid-path=/run/nginx.pid --modules-path=/usr/lib/nginx/modules --http-client-body-temp-path=/var/lib/nginx/body --http-fastcgi-temp-path=/var/lib/nginx/fastcgi --http-proxy-temp-path=/var/lib/nginx/proxy --http-scgi-temp-path=/var/lib/nginx/scgi --http-uwsgi-temp-path=/var/lib/nginx/uwsgi --with-debug --with-pcre-jit --with-http_ssl_module --with-http_stub_status_module --with-http_realip_module --with-http_auth_request_module --with-http_v2_module --with-http_dav_module --with-http_slice_module --with-threads --with-http_addition_module --with-http_geoip_module=dynamic --with-http_gunzip_module --with-http_gzip_static_module --with-http_image_filter_module=dynamic --with-http_sub_module --with-http_xslt_module=dynamic --with-stream=dynamic --with-stream_ssl_module --with-mail=dynamic --with-mail_ssl_module
好了,进行configure:
问题一:the HTTP rewrite module requires the PCRE library

参考资料:

安装:
sudo apt-get install libpcre3 libpcre3-dev

./configure: error: the HTTP XSLT module requires the libxml2/libxslt

安装依赖:
sudo apt-get install libxml2 libxml2-dev libxslt-dev
./configure: error: the HTTP image filter module requires the GD library

安装
sudo apt-get install libgd-dev
./configure: error: the GeoIP module requires the GeoIP library.

安装:
sudo apt-get install libgeoip-dev
然后:

终于configure成功了…
诶,每次编译都会觉得心累啊。。
安装:
make
fatal error: common_define.h: 没有那个文件或目录

好了,正常现象,解决方案:
找到fastdfs nginx 的模块的config文件:
并且很幸运的找到了解决方法:
编辑 fastdfs-nginx-module-1.20/src/config 文件
例如,我们的是:
include-modules/fastdfs-nginx-module-1.20/src/config
里面的内容是:

注意其中两个变量
ngx_module_incs以及CORE_INCS,改为如下:
将fastcommon添加上去
ngx_module_incs="/usr/include/fastdfs /usr/include/fastcommon/"
CORE_INCS="$CORE_INCS /usr/include/fastdfs /usr/include/fastcommon/"
然后在configure一次,再make。

终于编译成功了!!!!
sudo make install


替换默认的nginx
这里直接参考了之前的文章
ubntu下单机配置fastdfs作为开发环境(2)—nginx生产环境下再编译+fastdfs扩展模块的编译
好了,查看版本号:
/usr/local/nginx/sbin/nginx -V

?!不对,明明编译的是1.1.40版本的,而且添加了很多插件,为什么还是这个?
然后查一下所有nginx相关目录:

最后发现在:
/usr/share/nginx 下面才是我们编译的
/usr/share/nginx/sbin/nginx -V

对比一下目前版本的nginx:

确实是我们编译的。
好了,下一步我们要替换掉原本apt-get安装的nginx。
请先关停 nginx:
systemctl stop nginx
sudo rm /usr/sbin/nginx
sudo cp /usr/share/nginx/sbin/nginx /usr/sbin/nginx

替换成功。
总结
这一篇文章其实说的是,怎么全新编译一个可以用在生产环境的nginx并且这个nginx已经将fastdfs扩展模块编译进来了。基本上挺曲折的一条路。