(2)SpringBoot学习——芋道源码
Spring Boot 的自动配置
1.概述
EmbeddedWebServerFactoryCustomizerAutoConfiguration 类
@Configuration // <1.1>
@ConditionalOnWebApplication // <2.1>
@EnableConfigurationProperties(ServerProperties.class) // <3.1>
public class  EmbeddedWebServerFactoryCustomizerAutoConfiguration {

	/**
	 * Nested configuration if Tomcat is being used.
	 */
	@Configuration // <1.2>
	@ConditionalOnClass({ Tomcat.class, UpgradeProtocol.class })
	public static class TomcatWebServerFactoryCustomizerConfiguration {

		@Bean
		public TomcatWebServerFactoryCustomizer tomcatWebServerFactoryCustomizer(
				Environment environment, ServerProperties serverProperties) {
			// <3.2>
			return new TomcatWebServerFactoryCustomizer(environment, serverProperties);
		}

	}

	/**
	 * Nested configuration if Jetty is being used.
	 */
	@Configuration // <1.3>
	@ConditionalOnClass({ Server.class, Loader.class, WebAppContext.class })
	public static class JettyWebServerFactoryCustomizerConfiguration {

		@Bean
		public JettyWebServerFactoryCustomizer jettyWebServerFactoryCustomizer(
				Environment environment, ServerProperties serverProperties) {
			 // <3.3>
			return new JettyWebServerFactoryCustomizer(environment, serverProperties);
		}

	}

	/**
	 * Nested configuration if Undertow is being used.
	 */
	// ... 省略 UndertowWebServerFactoryCustomizerConfiguration 代码

	/**
	 * Nested configuration if Netty is being used.
	 */
	// ... 省略 NettyWebServerFactoryCustomizerConfiguration 代码

}
- ① 配置类
- ② 条件注解
- ③ 配置属性
① 配置类
<1.1> 处,在类上添加了 @Configuration 注解,声明这是一个配置类。因为它的目的是自动配置,所以类名以 AutoConfiguration 作为后缀。
<1.2>、<1.3> 处,分别是用于初始化 Tomcat、Jetty 相关 Bean 的配置类。
- TomcatWebServerFactoryCustomizerConfiguration 配置类,负责创建 TomcatWebServerFactoryCustomizer Bean,从而初始化内嵌的 Tomcat 并进行启动。
- JettyWebServerFactoryCustomizer 配置类,负责创建
JettyWebServerFactoryCustomizer Bean,从而初始化内嵌的 Jetty 并进行启动。
结论一:通过 @Configuration 注解的配置类,可以解决“创建哪些 Bean”的问题。
② 条件注解
<2> 处,在类上添加了 @ConditionalOnWebApplication 条件注解,表示当前配置类需要在当前项目是 Web 项目的条件下,才能生效。在 Spring Boot 项目中,会将项目类型分成 Web 项目(使用 SpringMVC 或者 WebFlux)和非 Web 项目。这样我们就很容易理解,为什么 EmbeddedWebServerFactoryCustomizerAutoConfiguration 配置类会要求在项目类型是 Web 项目,只有 Web 项目才有必要创建内嵌的 Web 服务器呀。
<2.1>、<2.2> 处,在类上添加了 @ConditionalOnClass 条件注解,表示当前配置类需要在当前项目有指定类的条件下,才能生效。
- TomcatWebServerFactoryCustomizerConfiguration 配置类,需要有tomcat-embed-core 依赖提供的 Tomcat、UpgradeProtocol 依赖类,才能创建内嵌的 Tomcat服务器。
- JettyWebServerFactoryCustomizer 配置类,需要有 jetty-server 依赖提供的 Server、Loader、WebAppContext 类,才能创建内嵌的 Jetty 服务器。
结论二:通过条件注解,可以解决“满足什么样的条件?”的问题。
③ 配置属性
< 3.1> 处,使用 @EnableConfigurationProperties 注解,让 ServerProperties 配置属性类生效。在 Spring Boot 定义了 @ConfigurationProperties 注解,用于声明配置属性类,将指定前缀的配置项批量注入到该类中。例如 ServerProperties 代码如下:
@ConfigurationProperties(prefix = "server", ignoreUnknownFields = true)
public class ServerProperties
		implements EmbeddedServletContainerCustomizer, EnvironmentAware, Ordered {

	/**
	 * Server HTTP port.
	 */
	private Integer port;

	/**
	 * Context path of the application.
	 */
	private String contextPath;

	// ... 省略其它属性

}
- 通过 @ConfigurationProperties 注解,声明将 server 前缀的配置项,设置到 ServerProperties配置属性类中。
< 3.2>、< 3.3> 处,在创建 TomcatWebServerFactoryCustomizer 和 JettyWebServerFactoryCustomizer 对象时,都会将 ServerProperties 传入其中,作为后续创建的 Web 服务器的配置。也就是说通过修改在配置文件的配置项,就可以自定义 Web 服务器的配置。
结论三:通过配置属性,可以解决“创建的 Bean 的属性?”的问题。
2. 自动配置类
- Spring Boot 的 spring-boot-autoconfigure 项目,提供了大量框架的自动配置
- 通过 SpringApplication#run(Class primarySource, String… args)方法,启动 Spring Boot 应用的时候,有个非常重要的组件 SpringFactoriesLoader 类,会读取META-INF 目录下的 spring.factories 文件,获得每个框架定义的需要自动配置的配置类。
- spring-boot-autoconfigure 项目提供的是它选择的主流框架的自动配置,所以其它框架需要自己实现。
3. 条件注解
在 Spring3.1 版本时,为了满足不同环境注册不同的 Bean ,引入了 @Profile 注解。
@Configuration
public class DataSourceConfiguration {

    @Bean
    @Profile("DEV")
    public DataSource devDataSource() {
        // ... 单机 MySQL
    }

    @Bean
    @Profile("PROD")
    public DataSource prodDataSource() {
        // ... 集群 MySQL
    }

}
- 在测试环境下,注册单机 MySQL 的 DataSource Bean。
- 在生产环境下,注册集群 MySQL 的 DataSource
Bean。
在 Spring4 版本时,提供了 @Conditional 注解,用于声明在配置类或者创建 Bean 的方法上,表示需要满足指定条件才能生效
@Configuration
public class TestConfiguration {
    @Bean
    @Conditional(XXXCondition.class) // XXXCondition: 实现Condition 接口,提供具体的条件实现。
    public Object xxxObject() {
        return new Object();
    }
}
- @ConditionalOnBean:当容器里有指定 Bean 的条件下
- @ConditionalOnMissingBean:当容器里没有指定 Bean 的情况下
- @ConditionalOnSingleCandidate:当指定 Bean 在容器中只有一个,或者虽然有多个但是指定首选 Bean
- @ConditionalOnClass:当类路径下有指定类的条件下
- @ConditionalOnMissingClass:当类路径下没有指定类的条件下
- @ConditionalOnProperty:指定的属性是否有指定的值
- @ConditionalOnResource:类路径是否有指定的值
- @ConditionalOnExpression:基于 SpEL 表达式作为判断条件
- @ConditionalOnJava:基于 Java版本作为判断条件
- @ConditionalOnJndi:在 JNDI 存在的条件下差在指定的位置
- @ConditionalOnNotWebApplication:当前项目不是 Web 项目的条件下
- @ConditionalOnWebApplication:当前项目是 Web项 目的条件下
4. 配置属性
Spring Boot 约定读取 application.yaml、application.properties 等配置文件,从而实现创建 Bean 的自定义属性配置,甚至可以搭配 @ConditionalOnProperty 注解来取消 Bean 的创建。
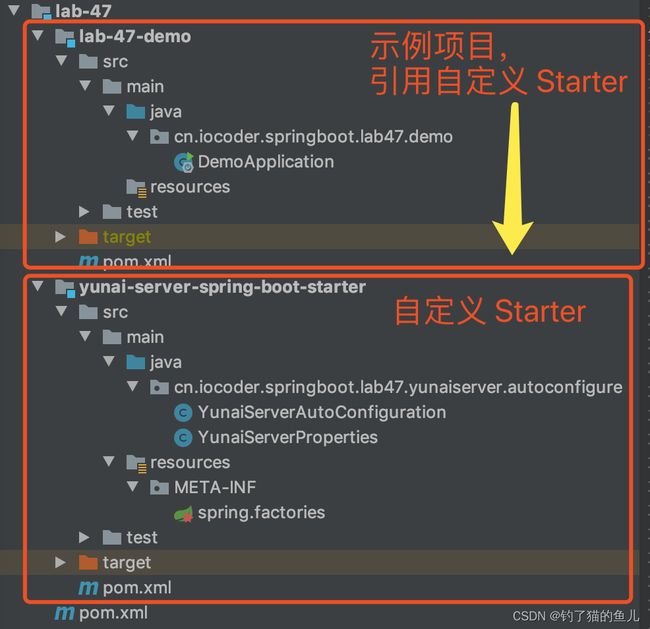
5.自定义 Starter
在一些场景下,需要实现自定义 Starter 来达到自动配置的目的。例如说:
- 三方框架并没有提供 Starter,比如说 Swagger、XXL-JOB 等。
- Spring Boot 内置的 Starter 无法满足自己的需求,比如说 spring-boot-starter-jdbc 不提供多数据源的配置。
命名规则

5.1 yunai-server-spring-boot-starter 项目
5.1.1 引入依赖
<project xmlns="http://maven.apache.org/POM/4.0.0"
         xmlns:xsi="http://www.w3.org/2001/XMLSchema-instance"
         xsi:schemaLocation="http://maven.apache.org/POM/4.0.0 http://maven.apache.org/xsd/maven-4.0.0.xsd">
    <parent>
        <artifactId>lab-47artifactId>
        <groupId>cn.iocoder.springboot.labsgroupId>
        <version>1.0-SNAPSHOTversion>
    parent>
    <modelVersion>4.0.0modelVersion>

    <artifactId>yunai-server-spring-boot-starterartifactId>

    <dependencies>

        <dependency>
            <groupId>org.springframework.bootgroupId>
            <artifactId>spring-boot-starterartifactId>
            <version>2.2.2.RELEASEversion>
        dependency>
    dependencies>

project>
5.1.2 YunaiServerProperties
在 cn.iocoder.springboot.lab47.yunaiserver.autoconfigure 包下,创建 YunaiServerProperties 配置属性类,读取 yunai.server 前缀的配置项。代码如下:
@ConfigurationProperties(prefix = "yunai.server")
public class YunaiServerProperties {

    /**
     * 默认端口
     */
    private static final Integer DEFAULT_PORT = 8000;

    /**
     * 端口
     */
    private Integer port = DEFAULT_PORT;

    public static Integer getDefaultPort() {
        return DEFAULT_PORT;
    }

    public Integer getPort() {
        return port;
    }

    public YunaiServerProperties setPort(Integer port) {
        this.port = port;
        return this;
    }

}
5.1.3 YunaiServerAutoConfiguration
在 cn.iocoder.springboot.lab47.yunaiserver.autoconfigure 包下,创建 YunaiServerAutoConfiguration 自动配置类,在项目中存在 com.sun.net.httpserver.HttpServer 类时,创建 HttpServer Bean,并启动该服务器。代码如下:
@Configuration // 声明配置类
@EnableConfigurationProperties(YunaiServerProperties.class) // 使 YunaiServerProperties 配置属性类生效
public class YunaiServerAutoConfiguration {

    private Logger logger = LoggerFactory.getLogger(YunaiServerAutoConfiguration.class);

    @Bean // 声明创建 Bean
    @ConditionalOnClass(HttpServer.class) // 需要项目中存在 com.sun.net.httpserver.HttpServer 类。该类为 JDK 自带,所以一定成立。
    public HttpServer httpServer(YunaiServerProperties serverProperties) throws IOException {
        // 创建 HttpServer 对象,并启动
        HttpServer server = HttpServer.create(new InetSocketAddress(serverProperties.getPort()), 0);
        server.start();
        logger.info("[httpServer][启动服务器成功,端口为:{}]", serverProperties.getPort());

        // 返回
        return server;
    }
}
5.1.4 spring.factories
在 resources 目录下创建,创建 META-INF 目录,然后在该目录下创建 spring.factories 文件,添加自动化配置类为 YunaiServerAutoConfiguration。内容如下:
rg.springframework.boot.autoconfigure.EnableAutoConfiguration=\
cn.iocoder.springboot.lab47.yunaiserver.autoconfigure.YunaiServerAutoConfiguration
5.2 lab-47-demo 项目
5.2.1 引入依赖
<project xmlns="http://maven.apache.org/POM/4.0.0"
         xmlns:xsi="http://www.w3.org/2001/XMLSchema-instance"
         xsi:schemaLocation="http://maven.apache.org/POM/4.0.0 http://maven.apache.org/xsd/maven-4.0.0.xsd">
    <parent>
        <artifactId>lab-47artifactId>
        <groupId>cn.iocoder.springboot.labsgroupId>
        <version>1.0-SNAPSHOTversion>
    parent>
    <modelVersion>4.0.0modelVersion>

    <artifactId>lab-47-demoartifactId>

    <dependencies>

        <dependency>
            <groupId>cn.iocoder.springboot.labsgroupId>
            <artifactId>yunai-server-spring-boot-starterartifactId>
            <version>1.0-SNAPSHOTversion>
        dependency>
    dependencies>

project>
5.2.2 配置文件
在 resource 目录下,创建 application.yaml 配置文件,设置 yunai.server.port 配置项来自定义 HttpServer 端口。配置如下:
yunai:
  server:
    port: 8888 # 自定义 HttpServer 端口
5.2.3 DemoApplication
创建 DemoApplication.java 类,配置 @SpringBootApplication 注解即可。代码如下:
@SpringBootApplication
public class DemoApplication {
    public static void main(String[] args) {
        SpringApplication.run(DemoApplication.class, args);
    }
}
5.2.4 测试
执行 DemoApplication#main(String[] args) 方法,启动 Spring Boot 应用。打印日志如下:
2020-02-02 13:03:12.156  INFO 76469 --- [           main] c.i.s.lab47.demo.DemoApplication         : Starting DemoApplication on MacBook-Pro-8 with PID 76469 (/Users/yunai/Java/SpringBoot-Labs/lab-47/lab-47-demo/target/classes started by yunai in /Users/yunai/Java/SpringBoot-Labs)
2020-02-02 13:03:12.158  INFO 76469 --- [           main] c.i.s.lab47.demo.DemoApplication         : No active profile set, falling back to default profiles: default
2020-02-02 13:03:12.873  INFO 76469 --- [           main] c.i.s.l.y.a.YunaiServerAutoConfiguration : [httpServer][启动服务器成功,端口为:8888]
2020-02-02 13:03:12.927  INFO 76469 --- [           main] c.i.s.lab47.demo.DemoApplication         : Started DemoApplication in 1.053 seconds (JVM running for 1.47)
- YunaiServerAutoConfiguration 成功自动配置 HttpServer Bean,并启动该服务器在 8888 端口