SpringBoot activemq收发消息、配置及原理
SpringBoot集成消息处理框架
Spring framework提供了对JMS和AMQP消息框架的无缝集成,为Spring项目使用消息处理框架提供了极大的便利。
与Spring framework相比,Spring Boot更近了一步,通过auto-configuration机制实现了对jms及amqp主流框架如ActiveMQ、RabbitMQ以及Kafka的自动配置,应用层开发过程中无需自己配置,只要classpath下加入了相应的消息处理框架包,Spring Boot会自动完成加载,程序员直接就可以使用,简直不能再方便了。
JMS
The Java Message Service (JMS) API is a messaging standard that allows application components based on the Java Platform Enterprise Edition (Java EE) to create, send, receive, and read messages. It enables distributed communication that is loosely coupled, reliable, and asynchronous.
JMS是java message service的简称,是一个基于java的消息处理规范,允许基于JAVA EE平台的应用组件创建、发送、接收、读取消息。使得分布式通讯耦合度更低、更加可靠、异步处理。
JMS提供两种编程模式:
Point-to-Point—Messages are sent to a single consumer using a JMS queue.
Publish and Subscribe—Messages are broadcast to all registered listeners through JMS topics.
点对点通讯:消息通过队列发送给单一的消费者。
发布订阅模式:消息通过主题以广播的形式发送给所有的订阅者。
JMS规范规定了5种不同类型的消息体:
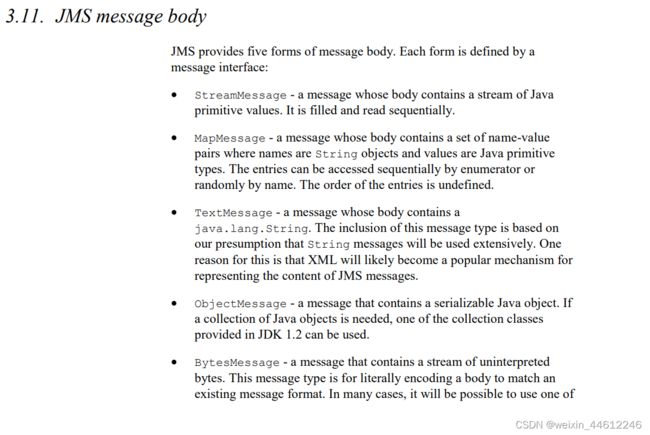
- StreamMessage:流式消息,顺序读取。
- MapMessage:键值对消息,可顺序读取,也可以通过键随机读取。
- TextMessage:文本消息,当初制定规范时候认为xml会成为最主流的消息载体,通过TextMessage可以发送xml格式的文本数据。
- ObjectMessage:对象消息,java对象序列化后发送。
- BytesMessage:字节消息。
JMS API对消息的发送、接收、存储等操作做了约定,每一个JMS消息框架的提供者(实现者)都必须遵守这些约定。
ActiveMQ
ActiveMQ是Apache旗下的、基于JMS的一款开源消息处理中间件,官网介绍:
Apache ActiveMQ® is the most popular open source, multi-protocol, Java-based message broker. It supports industry standard protocols so users get the benefits of client choices across a broad range of languages and platforms. Connect from clients written in JavaScript, C, C++, Python, .Net, and more. Integrate your multi-platform applications using the ubiquitous AMQP protocol. Exchange messages between your web applications using STOMP over websockets. Manage your IoT devices using MQTT. Support your existing JMS infrastructure and beyond. ActiveMQ offers the power and flexibility to support any messaging use-case.
最流行的开源、多协议、基于JAVA的消息处理中间件。支持工业级协议所以用户可以从多语言、跨平台的客户端选择中受益。等等…
目前ActiveMQ有两个主流版本:
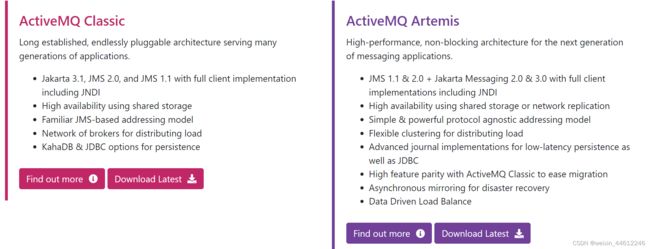
There are currently two “flavors” of ActiveMQ available - the well-known “classic” broker and the “next generation” broker code-named Artemis. Once Artemis reaches a sufficient level of feature parity with the “Classic” code-base it will become the next major version of ActiveMQ. Initial migration documentation is available as well as a development roadmap for Artemis.
等到代表“下一代”的Artemis成熟之后,就会替代“classic”成为ActiveMQ的主版本。
ActiveMQ的下载安装
官网找一个合适的版本下载安装即可,非常简单。
安装后提供了一个管理端口:

可以通过管理端口做测试,管理端口是8161,而默认的MQ服务端口是61616。
SpringBoot项目自动配置ActiveMQ
首先初步了解一下SpringBoot对ActiveMQ的集成情况,轻车熟路的,检查一下auto-configuration:

找到这个JmsAutoConfiguration类:
@Configuration(proxyBeanMethods = false)
@ConditionalOnClass({ Message.class, JmsTemplate.class })
@ConditionalOnBean(ConnectionFactory.class)
@EnableConfigurationProperties(JmsProperties.class)
@Import(JmsAnnotationDrivenConfiguration.class)
public class JmsAutoConfiguration {
很明显,他就是SpringBoot的自动配置类,如果classpath下存在Message.class, JmsTemplate.class 类、以及Spring容器中存在ConnectionFactory Bean的话就会被启用。检查一下代码发现他会自动装配JmsTemplate、JmsMessagingTemplate等对象到Spring IoC容器中。
SpringBoot项目引入ActiveMQ
POM文件引入:
            org.springframework.boot
            spring-boot-starter-activemq
以上starter包含了spring-jms以及activemq的相关配置,所以通过以上对auto-configuration的分析,JmsTemplate以及JmsMessagingTemplate等相关组件会被SpringBoot自动配置好,后面我们就可以直接拿来使用了。
ps:JmsTemplate组件的自动配置过程源码也比较复杂,今天暂时不涉及。
到此,其实我们并没做什么具体的工作,但是ActiveMQ已经准备好了,我们项目中就可以直接使用JmsTemplate收发消息了。
消息发送
在application.yml文件中加入activeMQ的配置:
spring:
  activemq:
    broker-url: tcp://localhost:61616
    user: admin
    password: admin
消息发送类中通过自动装配引入JmsTemplate:
    @Autowired
    private JmsTemplate jmsTemplate;
消息发送方法:
    public void sendMessage(String message){

        jmsTemplate.send("active.myqueue", new MessageCreator() {
            @Override
            public Message createMessage(Session session) throws JMSException {
                // 也可以创建对象 session.createObjectMessage()
                TextMessage textMessage = session.createTextMessage();
                textMessage.setText(message);
                return textMessage;
            }
        });
    }
Controller中加入对sendMessage方法的调用,以便测试:
    @GetMapping ("/sendmessage/{msg}")
    public String sendMessage(@PathVariable String msg){
        userService.sendMessage(msg);
        return "hello";
    }
消息接收
同样,消息接收方法中通过自动装配引入JmsTemplate。
消息接收方法:
    public String revieveMessage(){
        String message = (String)jmsTemplate.receiveAndConvert("active.myqueue");
        log.info("revieved message:"+message);
        return message;
    }
Controller方法中加入接收方法以便测试:
    @GetMapping ("/recievemsg")
    public String recieveMessage(){
        return userService.revieveMessage();
    }
这样,activeMQ的“点对点模式”收发消息的代码准备完毕,非常简单。
验证
首先启动activeMQ,启动之后在ActiveMQ的管理端监控队列(截图之前我已经测试过一次消息收发了,如果没测试过的话,队列是空的,不会存在active.myqueue这个队列):

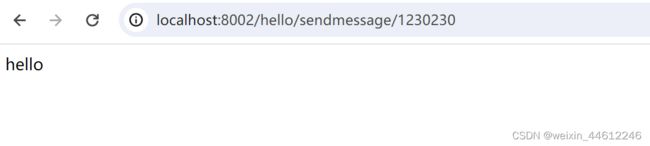
启动我们刚才创建的测试应用,测试发送消息:
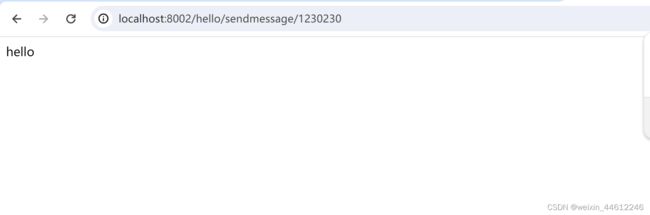
发送消息 1230230,收到反馈“hello”,说明消息发送成功。
我们从ActiveMQ管理端查看队列:
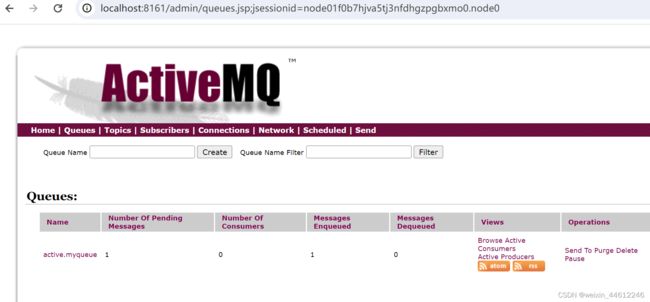
Number of pending Message 队列中尚未消费的消息数量为1,说明我们刚才的消息已经成功发送到队列中了。
消息接收测试:
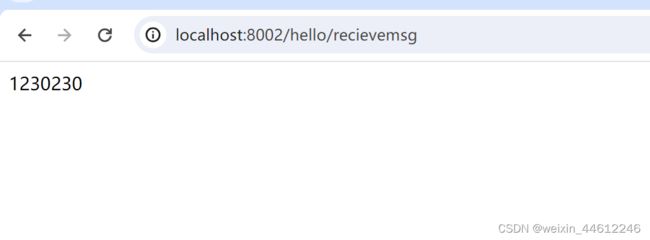
成功接收到消息1230230。
再次从ActiveMQ管理端验证:

队列中的pending message数量变为0,入队数量和出队数量都为1,说明刚才的消息已经被成功消费。
此时,队列中尚未消费的数量为0的情况下,如果再次执行消息消费方法(recievemsg方法),消费方法会阻塞等待,直到再次调用消息发送方法发送一条新消息到队列、消费方法获取到新消息后结束阻塞等待。
监听器方式接收消息
发布订阅模式与点对点模式的区别主要是在消息接收端,Spring提供了接收消息的注解@JmsListener。
@JmsListener需要与@Component家族的注解结合使用,UserService中编写两个listener监听active.listenqueue::
@Service
@Slf4j
public class UserService {
    @Autowired
    private JmsTemplate jmsTemplate;

   @JmsListener(destination = "active.listenqueue")
    public void revieveMsgListener(String content){
        log.info("revieveMsgListener:"+ content);
    }

    @JmsListener(destination = "active.listenqueue")
    public void revieveMsgListenerA(String content){
        log.info("revieveMsgListenerA"+content);
    }
UserService编写一个向该ActiveMQ发送消息的方法:
 public void sendMessage(String message){
        jmsTemplate.send("active.listenqueue", new MessageCreator() {
            @Override
            public Message createMessage(Session session) throws JMSException {
                // 也可以创建对象 session.createObjectMessage()
                TextMessage textMessage = session.createTextMessage();
                textMessage.setText(message);
                return textMessage;
            }
        });
    }
Controller中调用发送方法:
    @GetMapping ("/sendmessage/{msg}")
    public String sendMessage(@PathVariable String msg){
        userService.sendMessage(msg);
        return "hello";
    }
}
启动activeMQ,启动项目之后,查看activemq的admin端:

active.listenqueue以及2个监听器已经注册到ActiveMQ中,发送消息:

检查应用已经接收到了消息:

但是只有一个监听器接收到了消息,反复发送消息,后台log发现两个监听器轮番收到消息、但是一条消息不能被两个监听器同时接收到:

发布订阅模式
发布订阅模式下,消息发送给topic,订阅者仅订阅感兴趣的topic内的消息,消息消费完成后并不会从topic中消失,多个消费者可以从同一个topic内消费消息,所以,一条消息允许被多次消费。
默认情况下,SpringBoot集成ActiveMQ采用的是点对点队列模式,application.yml文件配置 spring:jms:pub-sub-domain参数为true开启topic模式:
spring:
  activemq:
    broker-url: tcp://localhost:61616
    user: admin
    password: admin
  jms:
    pub-sub-domain: true
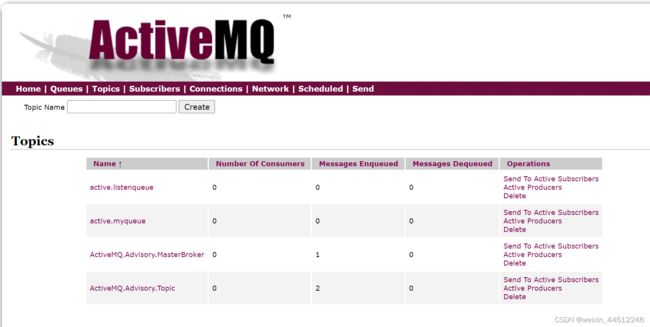
启动activeMQ,启动项目,topic下看到项目中启动的两个topic:
调用sendmessage方法发送消息:
检查ActiveMQ状态,可以发现1条消息成功发送到队列中,被2个消费者分别消费了一次、消息共被消费了2次:

检查log:

两个监听方法都接收到了消息。
OK,let’s say it’s a day!