yolov5训练自己的数据
目录
- 1. 环境搭建
- 2. 数据准备
- 3. 数据标注
- 4. 数据整理
-
- 4.1 数据集切分
- 4.2 修改数据文件
- 4.3 修改模型文件
- 5. 训练模型
-
- 5.1 训练
- 5.2 验证
- 5.3 测试
- 6. 训练结果分析
1. 环境搭建
安装anaconda、python、 cuda、 cudnn、 pytorch、 torchvision、 torchaudio等等。这里不详述
2. 数据准备
如果网上能找到开源数据集最好,找不到的话,需要自己爬取。
以下是爬取图片的代码:
from bs4 import BeautifulSoup
# -*- coding:utf-8
import re
import requests
from urllib import error
from bs4 import BeautifulSoup
import os
urlHead = 'https://photo.fengniao.com/' # 爬取网站地址
url = 'https://photo.fengniao.com/pic_48723655.html' # 网站中一张图片地址,即爬取的初始位置
def getHtmlurl(url): # 获取网址
try:
r = requests.get(url)
# 解决解析乱码问题
r.raise_for_status()
r.encoding = r.apparent_encoding
return r.text
except:
return ""
def getpic(html): # 获取图片地址并下载,再返回下一张图片地址
# 指定BeautifulSoup的解析器为:html.parser
soup = BeautifulSoup(html, 'html.parser')
all_img = soup.find('a', class_='downPic')
img_url = all_img['href']
reg = r'(.*?)
'
# 找到网页源代码中图片链接的位置,使用 正则表达式截取图片链接
r'(.*)' # 正则表达式
reg_ques = re.compile(reg) # 编译一下正则表达式,运行的更快
image_name = reg_ques.findall(html) # 匹配正则表达式
urlNextHtml = soup.find('a', class_='right btn')
urlNext = urlHead + urlNextHtml['href']
print('正在下载:' + img_url)
root = 'F:\YOLO-datasets\other'
path = os.path.join(root,image_name[0] + '.jpg')
try: # 创建或判断路径图片是否存在并下载
if not os.path.exists(root):
os.mkdir(root)
if not os.path.exists(path):
r = requests.get(img_url)
with open(path, 'wb') as f:
f.write(r.content)
f.close()
print("图片下载成功")
else:
print("文件已存在")
except:
print("爬取失败")
return urlNext
# 主函数
def main():
html = (getHtmlurl(url))
print(html)
return getpic(html)
num = 0
numPicture = 0
file = ''
List = []
#检测图片数量函数
def Find(url):
global List #设置为全局变量
print('正在检测图片总数,请稍等.....')
t = 0 #objURL 分页数初始值
i = 1
s = 0
while t < 1000:
Url = url + str(t) # url地址加上分页数
try:
Result = requests.get(Url, timeout=7) #获取到url.timeout时间为7秒.如果获取不到7秒后退出
except BaseException:
t = t + 60 #源代码分页数为60
continue
else:
result = Result.text #以encoding解析返回内容。字符串方式的响应体,会自动根据响应头部的字符编码进行解码。
pic_url = re.findall('"objURL":"(.*?)",', result, re.S) # 先利用正则表达式找到图片url
s += len(pic_url) #根据正则表达式循环取出图片.(根据图片的数量长度来取,其实就是统计图片的个数)
if len(pic_url) == 0: #长度为0说明没有符合条件的图片了退出
break
else:
List.append(pic_url) #将取出的图片存入到list中去
t = t + 60
return s
#推荐函数(推荐函数,主要是根据你键入的文本,在百度图片里找到相似的内容,返回给用户,类似于百度搜索的最下面)
def recommend(url):
Re = []
try:
html = requests.get(url) #获取url
except error.HTTPError as e:
return
else:
html.encoding = 'utf-8' #html解码格式为utf-8
bsObj = BeautifulSoup(html.text, 'html.parser') #html.text 根据encoding定义的code返回内容. html.parser 是解析器
div = bsObj.find('div', id='topRS') # 通过find()函数获取标签
if div is not None:
listA = div.findAll('a') #获取子标签 find_All()返回的是一个list find()直接返回结果
for i in listA:
if i is not None:
Re.append(i.get_text())
return Re
#下载图片函数
def dowmloadPicture(html, keyword):
global num
# t =0
pic_url = re.findall('"objURL":"(.*?)",', html, re.S) # 先利用正则表达式找到图片url
print('找到关键词:' + keyword + '的图片,即将开始下载图片...')
for each in pic_url:
print('正在下载第' + str(num + 1) + '张图片,图片地址:' + str(each))
try:
if each is not None:
pic = requests.get(each, timeout=7)
else:
continue
except BaseException:
print('错误,当前图片无法下载')
continue
else:
string = file + r'\\' + keyword + '_' + str(num) + '.jpg'
fp = open(string, 'wb')
fp.write(pic.content)
#text 返回的是unicode 型的数据,一般是在网页的header中定义的编码形式。
# content返回的是bytes,二级制型的数据。也就是说你如果想要提取文本就用text.但是如果你想要提取图片、文件,就要用到content
fp.close()
num += 1
if num >= numPicture:
return
if __name__ == '__main__': # 主函数入口
word = input("请输入搜索关键词(可以是人名,地名等): ")
# add = 'http://image.baidu.com/search/flip?tn=baiduimage&ie=utf-8&word=%E5%BC%A0%E5%A4%A9%E7%88%B1&pn=120'
url = 'http://image.baidu.com/search/flip?tn=baiduimage&ie=utf-8&word=' + word + '&pn='
tot = Find(url)
Recommend = recommend(url) # 记录相关推荐
print('经过检测%s类图片共有%d张' % (word, tot))
numPicture = int(input('请输入想要下载的图片数量 '))
file = input('请建立一个存储图片的文件夹,输入文件夹名称即可')
y = os.path.exists(file)
if y == 1:
print('该文件已存在,请重新输入')
file = input('请建立一个存储图片的文件夹,)输入文件夹名称即可')
os.mkdir(file)
else:
os.mkdir(file)
t = 0
tmp = url
while t < numPicture:
try:
url = tmp + str(t)
result = requests.get(url, timeout=10)
print(url)
except error.HTTPError as e:
print('网络错误,请调整网络后重试')
t = t + 60
else:
dowmloadPicture(result.text, word)
t = t + 60
print('当前搜索结束,感谢使用')
print('猜你喜欢')
for re in Recommend:
print(re, end=' ')
# 循环下载图片!
#if __name__ == '__main__':
# for i in range(1, 50):
# url = main()
以上代码是转过来的,出处记不清了,不过很好用。
注意:数据量一般应该在500张以上,正反例至少是1:1,反例不需要标注,但是需要生成label文件,只不过文件是空的
3. 数据标注
数据标注可以使用X-AnyLabeling进行自动标注,省事省心
参考:
X-Anylabeling: 一款多SOTA深度学习模型集成的新一代自动标注工具
https://github.com/CVHub520/X-AnyLabeling/blob/main/docs/zh_cn/custom_model.md
https://github.com/CVHub520/X-AnyLabeling
注意:
-
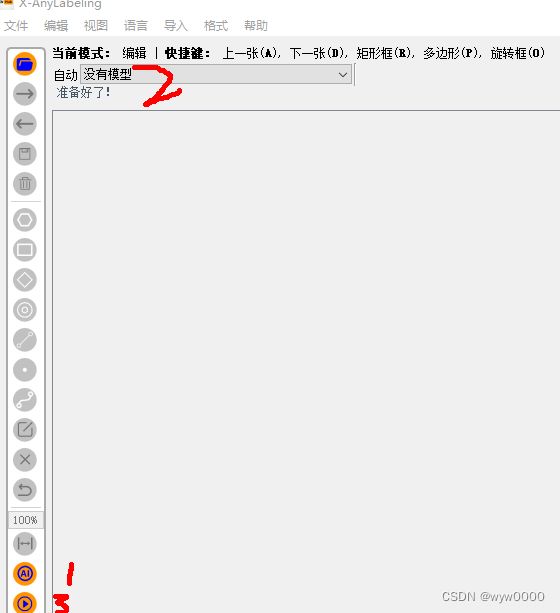
自动标注
点击下图中,1、AI按钮,2、选择模型,如果本地没有模型,将会自动下载,自动下载可能会很慢,可以手动下载,下载地址:
https://github.com/CVHub520/X-AnyLabeling/blob/main/docs/zh_cn/custom_model.md
-
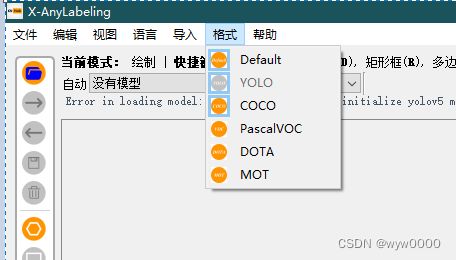
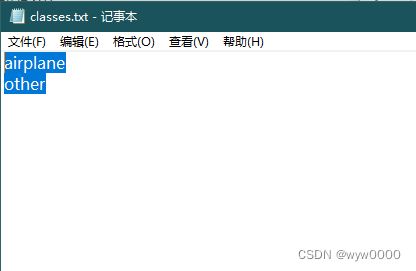
选择输出格式时,需要加载一个分类文件,这个分类文件是个简单的txt,内容一行一个分类即可。
-
设置模型识别的目标,找到模型下载目录下的config.yaml,增加filter_classes:字段
模型下载存储目录C:\Users\Administrator\anylabeling_data\models
比如只识别飞机
filter_classes:
- airplane
classes:
- person
- bicycle
- car
- motorcycle
- airplane
4. 数据整理
4.1 数据集切分
训练集、验证集、测试集的比例是训练集80%,验证集和测试集分别是10~20%
images和labels都要进行切分,存储在相应的目录下
yolov5的数据目录结构如下:

4.2 修改数据文件
将yolov5的data目录下,coco.yaml复制一份并重命名,修改内容中的数据文件路径、数据文件名、分类数及分类名。
如下:
# YOLOv5 by Ultralytics, GPL-3.0 license
# COCO 2017 dataset http://cocodataset.org
# Example usage: python train.py --data coco.yaml
# parent
# ├── yolov5
# └── datasets
# └── coco ← downloads here
# Train/val/test sets as 1) dir: path/to/imgs, 2) file: path/to/imgs.txt, or 3) list: [path/to/imgs1, path/to/imgs2, ..]
path: ./data/datasets/airplane # dataset root dir
train: train.txt # train images (relative to 'path') 118287 images
val: val.txt # train images (relative to 'path') 5000 images
test: test.txt # 20288 of 40670 images, submit to https://competitions.codalab.org/competitions/20794
# Classes
nc: 2 # number of classes
names: ['airplane', 'other'] # class names
4.3 修改模型文件
以训练yolov5m.yaml模型为例,复制一份yolov5m.yaml并重命名,修改文件中的nc为训练数据的类别数即可。
如下:
nc: 2 # number of classes
depth_multiple: 0.67 # model depth multiple
width_multiple: 0.75 # layer channel multiple
anchors:
- [10,13, 16,30, 33,23] # P3/8
- [30,61, 62,45, 59,119] # P4/16
- [116,90, 156,198, 373,326] # P5/32
。。。
5. 训练模型
5.1 训练
python train.py --weights yolov5m6.pt --data data/airplane.yaml --img 640 --device 0 --cfg models/yolov5m-airplane.yaml --batch-size 8 --epochs 100
- –weights 加载预训练权重
- –data 数据文件路径
- –img 输入数据分辨率640
- –device GPU编号
- –cfg 模型配置文件
5.2 验证
python val.py --weights E:\code\other\yolov5-6.0\runs\train\exp10\weights\best.pt --data ./data/airplane.yaml --img 640 --iou-thres 0.65 --conf-thres 0.25
5.3 测试
python detect.py --weights E:\code\other\yolov5-6.0\runs\train\exp10\weights\best.pt --source ./data/datasets/airplane/images/test --conf-thres 0.25 --iou-thres 0.45 --save-txt --save-conf```
6. 训练结果分析
参考:链接