一步一步做项目(4)配置SSH
一步一步做项目(4)配置SSH
- 导入JAR包
-
- 导入Struts2.5.20库
- 导入Hibernate5.4.4库
-
- 导入c3p0连接池
- 导入Spring5.1.9库
- 导入MySQL JDBC驱动器
- 配置SSH
-
- web.xml
- struts.xml
- hibernate.cfg.xml
- web.xml中添加Spring支持
- applicationContext.xml
- jdbc.properties
- 创建SSH项目包结构
在前面一步一步做项目(3)创建Web项目的基础上继续。
导入JAR包
在Project Explorer中,展开项目节点cmis->WebContent->WEB-INF-lib上,单击鼠标右键,弹出全局菜单,如下图所示:

选择Import…命令,弹出Import对话框,如下图所示:

导入Struts2.5.20库
展开General,选择File System,点击Next >按钮,继续导入File System,如下图所示:

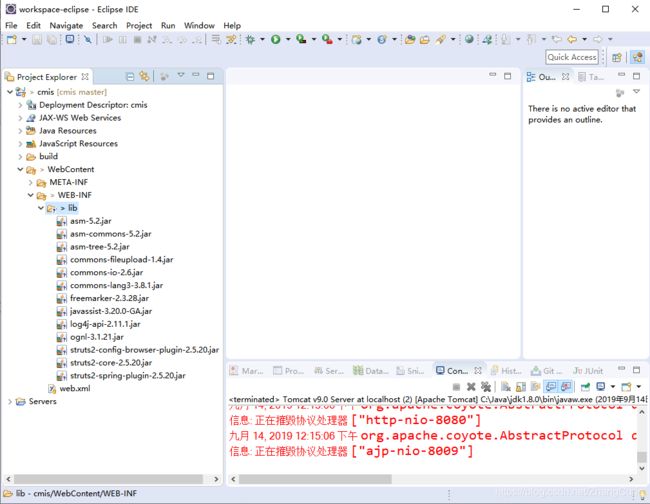
通过点击Browse…按钮,选择Struts2.5.20所在目录,导入Struts支持库,选择要导入的JAR包,点击Finish,完成导入,如下图所示:
这里添加的struts2-config-browser-plugin包,可以提供浏览器配置支持,在浏览器中,可以在浏览器地址栏输入下面地址来查看Struts2的配置信息。
http://localhost:8080/cmis/config-browser/actionNames.action?namespace=action
struts2-spring-plugin包用来整合Spring。
导入Hibernate5.4.4库
选择required最小支持包,如下图所示:

通过点击Browse…按钮,选择Hibernate5.4.4所在目录,导入基本要求的Hibernate支持库,选择required要导入的JAR包,点击Finish,完成导入。
导入c3p0连接池
选择c3p0支持包,以便提供自动回收空闲连接功能,如下图所示:

通过点击Browse…按钮,在Hibernate5.4.4所在目录中找到optional,选择c3p0所在目录,选中要导入的JAR包,点击Finish,完成导入。
导入Spring5.1.9库
选择Spring支持包,如下图所示:

通过点击Browse…按钮,在Spring5.1.9所在目录中找到libs目录,选中要导入的JAR包,点击Finish,完成导入。
这里需要导入以下JAR包:

导入MySQL JDBC驱动器
选择MySQL JDBC驱动器存放目录,如下图所示:

通过点击Browse…按钮,在MySQL JDBC8.0.17所在的目录,选中要导入的JAR包,点击Finish,完成导入。
这里也可以通过项目属性对话框,配置Java Build Path,通过添加Libraries,选择User Libraries,将已经配置好的MySQL JDBC库添加到构建路径上。
配置SSH
导入基本的SSH支持JAR包后,需要进行相关配置文件的设置。
web.xml
在web.xml中,添加Struts2过滤器配置,内容如下:
<web-app xmlns:xsi="http://www.w3.org/2001/XMLSchema-instance" xmlns="http://xmlns.jcp.org/xml/ns/javaee" xsi:schemaLocation="http://xmlns.jcp.org/xml/ns/javaee http://xmlns.jcp.org/xml/ns/javaee/web-app_4_0.xsd" id="WebApp_ID" version="4.0">
  <display-name>cmisdisplay-name>
  <welcome-file-list>
    <welcome-file>index.htmlwelcome-file>
    <welcome-file>index.htmwelcome-file>
    <welcome-file>index.jspwelcome-file>
    <welcome-file>default.htmlwelcome-file>
    <welcome-file>default.htmwelcome-file>
    <welcome-file>default.jspwelcome-file>
  welcome-file-list>

  <filter>
      <filter-name>action2filter-name>
      <filter-class>org.apache.struts2.dispatcher.filter.StrutsPrepareAndExecuteFilterfilter-class>
  filter>

  <filter-mapping>
      <filter-name>action2filter-name>
      <url-pattern>/*url-pattern>
  filter-mapping>

web-app>
struts.xml
在Project Explorer中,展开Java Resources,在src下创建struts.xml文件,在文件中进行struts2配置,基本配置如下:
<struts>

    <constant name="struts.i18n.reload" value="true" />
    <constant name="struts.enable.DynamicMethodInvocation" value="false" />

    <constant name="struts.devMode" value="false" />
    <constant name="struts.configuration.xml.reload" value="true" />
    <constant name="struts.custom.i18n.resources" value="Messages" />
	<constant name="struts.i18n.encoding" value="UTF-8" />
    <constant name="struts.action.extension" value=",do,action" />

    <constant name="struts.multipart.maxSize" value="1000000000" />

    <constant name="struts.convention.package.locators.basePackage" value="cn.lut.curiezhang" />
    <constant name="struts.convention.result.path" value="/WEB-INF" />

    <constant name="struts.serve.static" value="true" />
    <constant name="struts.serve.static.browserCache" value="false" />

struts>
这里只配置了一些基本参数,其它的设置将随着后面的代码逐步添加。
hibernate.cfg.xml
在SSH中可以省略。
web.xml中添加Spring支持
要使用Spring,需要在web.xml中添加Spring监听器,内容添加在
    <listener>
        <listener-class>org.springframework.web.context.ContextLoaderListenerlistener-class>
    listener>

    <context-param>
     <param-name>contextConfigLocationparam-name>
     <param-value>classpath:applicationContext.xmlparam-value>
    context-param>
applicationContext.xml
在src目录下创建applicationContext.xml文件,进行SSH集成配置,基本内容如下:
<beans xmlns="http://www.springframework.org/schema/beans"
       xmlns:xsi="http://www.w3.org/2001/XMLSchema-instance"
       xmlns:context="http://www.springframework.org/schema/context"
       xmlns:aop="http://www.springframework.org/schema/aop"
       xmlns:tx="http://www.springframework.org/schema/tx"
       xsi:schemaLocation="
       http://www.springframework.org/schema/beans
       http://www.springframework.org/schema/beans/spring-beans.xsd
       http://www.springframework.org/schema/aop
       http://www.springframework.org/schema/aop/spring-aop.xsd
       http://www.springframework.org/schema/context
       http://www.springframework.org/schema/context/spring-context.xsd
       http://www.springframework.org/schema/tx
       http://www.springframework.org/schema/tx/spring-tx.xsd">


	<context:property-placeholder location="classpath:jdbc.properties"/>


  <bean id="dataSource" class="com.mchange.v2.c3p0.ComboPooledDataSource" destroy-method="close">
  	<property name="driverClass" value="${jdbc.driverClass}"/>
  	<property name="jdbcUrl" value="${jdbc.url}"/>
  	<property name="user" value="${jdbc.username}"/>
  	<property name="password" value="${jdbc.password}"/>

		<property name="minPoolSize">
			<value>5value>
		property>

		<property name="maxPoolSize">
			<value>100value>
		property>

		<property name="initialPoolSize">
			<value>30value>
		property>

		<property name="maxIdleTime">
			<value>60value>
		property>

		<property name="acquireIncrement">
			<value>10value>
		property>

		<property name="maxStatements">
			<value>0value>
		property>


		<property name="idleConnectionTestPeriod">
			<value>60value>
		property>


		<property name="automaticTestTable">
			<value>C3P0Testvalue>
		property>

		<property name="acquireRetryAttempts">
			<value>30value>
		property>
		<property name="acquireRetryDelay" value="1000"/>
		<property name="testConnectionOnCheckin" value="true"/>

		<property name="breakAfterAcquireFailure">
			<value>truevalue>
		property>

		<property name="testConnectionOnCheckout">
			<value>falsevalue>
		property>

		<property name="checkoutTimeout">
			<value>30000value>
		property>
  bean>


	<bean id="sessionFactory" class="org.springframework.orm.hibernate5.LocalSessionFactoryBean">

		<property name="dataSource" ref="dataSource"/>

		<property name="hibernateProperties">
			<props>
				<prop key="hibernate.dialect">org.hibernate.dialect.MySQLDialectprop>
				<prop key="hibernate.show_sql">trueprop>
				<prop key="hibernate.format_sql">trueprop>
				<prop key="hibernate.hbm2ddl.auto">updateprop>

				<prop key="hibernate.autoReconnect">trueprop>
				<prop key="hibernate.autoReconnectForPools">trueprop>
				<prop key="hibernate.is-connection-validation-required">trueprop>
			props>
		property>

		<property name="mappingResources">
			<list>
			list>
		property>
	bean>


	<bean id="transactionManager" class="org.springframework.orm.hibernate5.HibernateTransactionManager" >
		<property name="sessionFactory" ref="sessionFactory"/>
	bean>


	<tx:annotation-driven transaction-manager="transactionManager"/>


beans>
这里提供c3p0连接池配置,Hibernate配置,Spring的相关配置。
jdbc.properties
前面的配置中,用到了属性文件,因此,在src目录下创建jdbc.properties文件,进行如下设置:
jdbc.driverClass=com.mysql.cj.jdbc.Driver
jdbc.url=jdbc:mysql://localhost:3306/cmis?serverTimezone=GMT%2B8&useSSL=false
jdbc.username=cmis
jdbc.password=
用户名和密码换成你对应的用户名和密码即可。
创建SSH项目包结构
在src目录下创建相应的包,基本结构如下:

这里action包主要用于Struts,dao包用于Hibernate,service包用于Spring,model包用于存储实体类,按照框架进行分层表示。