Hello MVVM
关于什么是MVVM partten,及MVVM partten的相关理论介绍这篇博文就不多说了,各位可以去看下Youtube相关的tutorial。
LZ也是在Youtube、CodePlex和CodeProject上看了许久的教材后,写下了这篇博文,类似的例子外文的网站上很多。写作这篇随笔的目的是,感受一下如何写一个MVVM的WPF 程序。MS的WPF MVP刘铁锰给的一个视频对MVVM的介绍也不错,示例也很好。作为一个MVVM的初学者,希望能通过这篇博文,展现MVVM代码的写作流程。
Beginer to Beginer,为此,LZ在代码中添加了必要的说明。
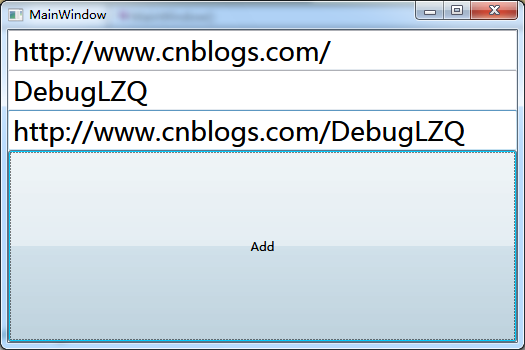
我们的Demo设计的界面如下:
<Window x:Class="MVVMPro1.MainWindow"

        xmlns="http://schemas.microsoft.com/winfx/2006/xaml/presentation"

        xmlns:x="http://schemas.microsoft.com/winfx/2006/xaml"

        Title="MainWindow" Height="350" Width="525">

    <Grid>

        <Grid.RowDefinitions>

            <RowDefinition Height="40"/>

            <RowDefinition Height="40"/>

            <RowDefinition Height="40"/>

            <RowDefinition Height="*"/>

        </Grid.RowDefinitions>

        <TextBox Grid.Row="0" FontSize="26" />

        <TextBox Grid.Row="1" FontSize="26" />

        <TextBox Grid.Row="2" FontSize="26" />

        <Button  Grid.Row="3" Content="Add" />

    </Grid>

</Window>
非常的简洁,现在要实现的功能是在点击Button,在第三个TextBox中显示钱两个TextBox的Text属性的连接。
--------------------
对于这样一个程序,不用MVVM可能就一行代码就搞定了:为Button添加Click事件,并在其事件处理中写上类似这么的一条语句:
TextBox3.Text=TextBox1.Text+TextBox2.Text;
当然事实也是这样,完全可以不用MVVM模式!
“MVVM的诸多优点。。。。”
MVVM优点,主要目的是通过分离视图(View)和模型(Model),(个人认为:一切模式的最终目标是降低项目成本!)有几大优点
1. 低耦合。
视图(View)可以独立于Model变化和修改,一个ViewModel可以绑定到不同的"View"上,当View变化的时候Model不可以不变,当Model变化的时候View也可以不变。
2. 可重用性。
你可以把一些视图逻辑放在一个ViewModel里面,让很多view重用这段视图逻辑。
3. 独立开发。
开发人员可以专注于业务逻辑和数据的开发(ViewModel),设计人员可以专注于页面设计,使用Expression Blend可以很容易设计界面并生成xaml代码。
4. 可测试。
界面素来是比较难于测试的,而现在测试可以针对ViewModel来写。
-------------------------------------
好吧!下面看用MVVM如何来写,不借助Prism等框架,我们纯手工来写。
我们可以在项目中添加几个文件夹以方便整个项目的管理。
1.在ViewModels文件夹中添加一个类NotificationObject,这个类是我们所有ViewModel的基类,实现INotifyPropertyChanged接口,还记得前面这个接口?。
using System.ComponentModel;


namespace MVVMPro1.ViewModels

{

    /// <summary>

    /// ViewModel的基类

    /// </summary>

    class NotificationObject:INotifyPropertyChanged

    {

        #region INotifyPropertyChanged 成员


        public event PropertyChangedEventHandler PropertyChanged;


        #endregion


        //定义一个方法封转这个事件

        public void RaisePropertyChange(string propertyName)

        {

            if (PropertyChanged !=null)

            {

                PropertyChanged.Invoke(this, new PropertyChangedEventArgs(propertyName));

            }

        }

    }

}
2.在Commands文件夹中添加一个DelegateCommand命令,实现ICommand接口:
using System;

using System.Windows.Input;


namespace MVVMPro1.Commands

{

    /// <summary>

    /// MVVM命令使用的事件

    /// </summary>

    class DelegateCommand:ICommand

    {

        #region ICommand 成员


        public bool CanExecute(object parameter)

        {

            if (CanExecuteFunc == null)

            {

                return true;

            }

            return CanExecuteFunc(parameter);

        }


        public event EventHandler CanExecuteChanged;


        public void Execute(object parameter)

        {

            if (ExecuteAction == null)

            {

                return;

            }

            ExecuteAction(parameter);

        }


        #endregion


        public Action<object> ExecuteAction { get; set; }

        public Func<object, bool> CanExecuteFunc { get; set; }

    }

}
3.有了以上1-2准备,我们可以为MainWindow这个View实现一个ViewModel了,在ViewModels文件夹中添加一个MainWindowViewModel类,继承自1定义的NotificationObject类,如下。注意其中的注释部分,这是MVVM模式不容易理解的地方!
using System;

using MVVMPro1.Commands;


namespace MVVMPro1.ViewModels

{

    class MainWindowViewModel:NotificationObject

    {

        //MainWindow有2个输入,1个输出,对应3个“数据属性”

        private string input1;

        public string Input1

        {

            get { return input1; }

            set

            {

                input1 = value;

                RaisePropertyChange("Input1");

            }

        }

        private string input2;

        public string Input2

        {

            get { return input2; }

            set

            {

                input2 = value;

                RaisePropertyChange("Input2");

            }

        }

        private string output1;

        public string Output1

        {

            get { return output1; }

            set

            {

                output1= value;

                RaisePropertyChange("Output1");

            }

        }

        //一个Button,共一个“命令属性”

        public DelegateCommand AddCommand{get;set;}

        private void Add(object parameter)

        {

            Output1 = Input1 + Input2;

        }

        //Ctor中进行关联

        public MainWindowViewModel()

        {

            AddCommand = new DelegateCommand();

            AddCommand.ExecuteAction = new Action<object>(Add);

        }


    }

}
4.为MainWindow添加数据Binding,注意其中的Binding部分
<Window x:Class="MVVMPro1.MainWindow"

        xmlns="http://schemas.microsoft.com/winfx/2006/xaml/presentation"

        xmlns:x="http://schemas.microsoft.com/winfx/2006/xaml"

        Title="MainWindow" Height="350" Width="525">

    <Grid>

        <Grid.RowDefinitions>

            <RowDefinition Height="40"/>

            <RowDefinition Height="40"/>

            <RowDefinition Height="40"/>

            <RowDefinition Height="*"/>

        </Grid.RowDefinitions>

        <TextBox Grid.Row="0" FontSize="26" Text="{Binding Input1}"/>

        <TextBox Grid.Row="1" FontSize="26" Text="{Binding Input2}"/>

        <TextBox Grid.Row="2" FontSize="26" Text="{Binding Output1}"/>

        <Button  Grid.Row="3" Content="Add" Command="{Binding AddCommand}"  />

    </Grid>

</Window>
using System.Windows;

using MVVMPro1.ViewModels;


namespace MVVMPro1

{

    /// <summary>

    /// MainWindow.xaml 的交互逻辑

    /// </summary>

    public partial class MainWindow : Window

    {

        public MainWindow()

        {

            InitializeComponent();

            //不要忘了这里

            this.DataContext = new MainWindowViewModel();

        }

    }

}
OK了,Demo下过如下:
OK,这样就OK了,注意不使用MVVM模式与使用MVVM模式程序的区别。
MVVM实现了View(UI)的分离,只要程序的需求没有本质的变更,需要更改界面,只需要把相应的Binding添加到更新后的界面位置就OK了,ViewModel都不用动!
小结:这个例子很初级,学习也是一个循序渐进的过程。这个Demo本身没有什么价值,希望能通过它来有一个具体的东西来消化MVVM的抽象的讲解。没有什么可圈可点的地方,因此写个自己吧,作为一种沉淀的方式。个人倒是很喜欢诸如YouTube、CodeProject、CodePlex等外文网站的关于MVVM的讲解,老外的东西确实不错!
MVVM 完全不一样的开发理念!静下心来,理解它,并感受它的美!
没什么高端的东西,请关注后续博文~