Ansible 简单粗暴入门篇
puppet
SaltStack
Salt一种全新的基础设施管理方式,部署轻松,在几分钟内可运行起来,扩展性好,很容易管理上万台服务器,速度够快,服务器之间秒级通讯。
Ansible
Ansible是新出现的运维工具是基于Python研发的糅合了众多老牌运维工具的优点实现了批量操作系统配置、批量程序的部署、批量运行命令等功能。
在进行大规模部署时,手工配置服务器环境是不现实的,这时必须借助于自动化部署工具。
介绍

Ansible 的命名由来?
此名取自 Ansible 作者最喜爱的《安德的游戏》小说,而这部小说更被后人改编成电影 -《战争游戏》。
大家或许早在电影中就已看过安塞波 (Ansible),它是虚构的超光速通讯装置。
片中主角安德 (Ender) 和他的伙伴们透过 Ansible 跨越时空指挥无数的战舰,就好比我们操控海量的远端服务器一样。
运维自动化工具本来是用来简化运维工作的,但如果工具本身比较复杂,甚至需要一定的程序开发能力,
就会增加使用和推广的难度。Ansible 有三个最吸引人的地方:无客户端、简单易用和 日志集中管控。
Ansible 很简单,上手方便,不需要啃一本很大本的书才能学会使用 ( 从这一点来看,这可谓业界良心)。
- 萧田国 (开放运维联盟联合主席,高效运维社区发起人 )
我希望自动化的事情尽快完成,这样我就能有更多时间投入在我更该关注的事情上面。Ansible 并不是一个你需要整天和
它打交道的系统。你可以很快地把它拿起来,很快地搞定,然后又很快地回到你更该关心的事情上面。
我希望这些也会成为你喜欢 Ansible 的原因。
- Michael DeHaan (Ansible 软件的创作者,Ansible, Inc. 前 CTO)
简而言之,现在的资讯人员 (IT Engineer) 除了要会管机器、管网络、on-call 之外,
还得要会写些自动化的工具来辅助自己,不然是难以在下一个世代生存的!
现代的 IT人 得具备十八般武艺,
从系统规划、部署 (Deployment)、开发 (Development)、测试 (QA)、运维 (Operations)、监控 (Monitoring) 到效能优化 (Performance Optimisation)
等样样都要融汇贯通。
在现代,有个叫「DevOps」的名词概括了不少技能和工具,
如 Ansible, Chef, Docker container, Git, Jenkins CI, Vagrant, Zabbix monitoring server … 等
借由虚拟化技术、云端运算和组态管理工具等,在相对快速的时间里完成任务
官方文档
https://docs.ansible.com/ansible/latest/index.html
基础介绍
ansible是新出现的自动化运维工具,基于Python开发,集合了众多运维工具(puppet、cfengine、chef、func、fabric)的优点,
实现了批量系统配置、批量程序部署、批量运行命令等功能。
Ansible可以完成哪些功能
1)批量执行远程命令,可以对N多台主机同时进行命令的执行。
2)批量配置软件服务,可以进行自动化的方式配置和管理服务。
3)实现软件开发功能,jumpserver底层使用ansible来实现的自动化管理。
4)编排高级的IT任务,Ansible的Playbook是一门编程语言,可以用来描绘一套T架构*。
ansible是基于模块工作的,本身没有批量部署的能力。真正具有批量部署的是ansible所运行的模块,ansible只是提供一种框架。主要包括:
(1)、连接插件connection plugins:负责和被监控端实现通信;
(2)、host inventory:指定操作的主机,是一个配置文件里面定义监控的主机;
(3)、各种 核心模块、command模块、自定义模块等;
(4)、借助于插件完成记录日志邮件等功能;
(5)、playbook:剧本执行多个任务时,非必需可以让节点一次性运行多个任务。
总体架构

工作流程
第一步:
1,由ad-hoc(命令行)或者playbook传入命令预期以及要执行的主机、清单
2,ansbile框架解析相应的ad-hoc或者playbook得到host清单以及模块清单。
第二步:
1,通过匹配hosts清单得到要执行模块的远程主机由哪些。
2,通过ssh加密以及tcp链接形成安全的远程链接到匹配的主机。
第三步:
1,连接到远程主机之后,通过模块清单来调用远程主机上的python模块执行相关命令。
2,ansible将执行后的结果进行返回给操作机(观察是否达到期望预期)
特性
(1)、no agents:不需要在被管控主机上安装任何客户端;
(2)、no server:无服务器端,使用时直接运行命令即可; (区别于其他工具的C/S 模式,这样的架构就让 ansible 变得更加易于维护)
(3)、modules in any languages:基于模块工作,可使用任意语言开发模块;
(4)、yaml,not code:使用yaml语言定制剧本playbook; (更加的易读,易懂)
(5)、ssh by default:基于SSH工作; (并发执行,加速模块,几乎所有的Linux主机都具备 ssh)
(6)、strong multi-tier solution:可实现多级指挥。
优点
(1)、轻量级,无需在客户端安装agent,更新时,只需在操作机上进行一次更新即可;
(2)、批量任务执行可以写成脚本,而且不用分发到远程就可以执行;
(3)、使用python编写,维护更简单,ruby语法过于复杂;
(4)、支持sudo。
任务执行流程

Ansible主要组成部分
ANSIBLE PLAYBOOKS:任务剧本(任务集),编排定义Ansible任务集的配置文件,
                   由Ansible顺序依次执行,通常是JSON格式的YAML文件
INVENTORY:Ansible管理主机的清单  /etc/anaible/hosts
MODULES:  Ansible执行命令的功能模块,多数为内置核心模块,也可自定义
PLUGINS:  模块功能的补充,如连接类型插件、循环插件、变量插件、过滤插件等,该功能不常用
API:      供第三方程序调用的应用程序编程接口
ANSIBLE:  组合INVENTORY、API、MODULES、PLUGINS的绿框,可以理解为是ansible命令工具,其为核心执行工具
Ansible命令执行来源:
    1> USER,普通用户,即SYSTEM ADMINISTRATOR
    2> CMDB(配置管理数据库) API 调用
    3> PUBLIC/PRIVATE CLOUD API调用  (公有私有云的API接口调用)
    4> USER-> Ansible Playbook -> Ansibile

利用ansible实现管理的方式:
    1> Ad-Hoc 即ansible单条命令,主要用于临时命令使用场景
    2> Ansible-playbook 主要用于长期规划好的,大型项目的场景,需要有前期的规划过程
Ansible-playbook(剧本)执行过程
    将已有编排好的任务集写入Ansible-Playbook
    通过ansible-playbook命令分拆任务集至逐条ansible命令,按预定规则逐条执行

Ansible主要操作对象
   HOSTS主机
   NETWORKING网络设备

注意事项:
   执行ansible的主机一般称为主控端,中控,master或堡垒机
   主控端Python版本需要2.6或以上
   被控端Python版本小于2.4需要安装python-simplejson
   被控端如果开启SELinux需要安装libselinux-python
   windows不能做为主控端
   ansible不是服务,不会一直启动,只是需要的时候启动
实验环境
| 主机名 | ip |
|---|---|
| ansible1 | 192.168.245.180 |
| ansible2 | 192.168.245.181 |
| ansible3 | 192.168.245.182 |
安装
rpm包安装: EPEL源
    yum install ansible

编译安装:
    yum -y install python-jinja2 PyYAML python-paramiko python-babel python-crypto
    tar xf ansible-1.5.4.tar.gz
    cd ansible-1.5.4
    python setup.py build
    python setup.py install
    mkdir /etc/ansible
    cp -r examples/* /etc/ansible


Git方式:
    git clone git://github.com/ansible/ansible.git --recursive
    cd ./ansible
    source ./hacking/env-setup

pip安装: pip是安装Python包的管理器,类似yum
    yum install python-pip python-devel
    yum install gcc glibc-devel zibl-devel rpm-bulid openssl-devel
    pip install --upgrade pip
    pip install ansible --upgrade

确认安装:
    ansible --version
我采用的是epel源yum安装
[root@ansible1 opt]# cd /opt/
[root@ansible1 opt]# wget -O /etc/yum.repos.d/epel.repo http://mirrors.aliyun.com/repo/epel-7.repo
[root@ansible1 opt]# yum clean all
[root@ansible1 opt]# yum makecache
[root@ansible1 opt]# yum -y install ansible   # 安装
[root@ansible1 opt]# ansible --version   # 验证版本
ansible 2.9.27
  config file = /etc/ansible/ansible.cfg   # 配置文件
  configured module search path = [u'/root/.ansible/plugins/modules', u'/usr/share/ansible/plugins/modules']   # 模块存放
  ansible python module location = /usr/lib/python2.7/site-packages/ansible
  executable location = /usr/bin/ansible
  python version = 2.7.5 (default, Aug  4 2017, 00:39:18) [GCC 4.8.5 20150623 (Red Hat 4.8.5-16)]
相关文件
配置文件
    /etc/ansible/ansible.cfg  主配置文件,配置ansible工作特性(一般无需修改)
    /etc/ansible/hosts        主机清单(将被管理的主机放到此文件)
    /etc/ansible/roles/       存放角色的目录

程序
    /usr/bin/ansible          主程序,临时命令执行工具
    /usr/bin/ansible-doc      查看配置文档,模块功能查看工具
    /usr/bin/ansible-galaxy   下载/上传优秀代码或Roles模块的官网平台
    /usr/bin/ansible-playbook 定制自动化任务,编排剧本工具
    /usr/bin/ansible-pull     远程执行命令的工具
    /usr/bin/ansible-vault    文件加密工具
    /usr/bin/ansible-console  基于Console界面与用户交互的执行工具
ansible 配置文件
Ansible 配置文件/etc/ansible/ansible.cfg (一般保持默认)

vim /etc/ansible/ansible.cfg

[defaults]
#inventory     = /etc/ansible/hosts      # 主机列表配置文件
#library       = /usr/share/my_modules/  # 库文件存放目录
#remote_tmp    = $HOME/.ansible/tmp      # 临时py命令文件存放在远程主机目录
#local_tmp     = $HOME/.ansible/tmp      # 本机的临时命令执行目录
#forks         = 5                       # 默认并发数,同时可以执行5次
#sudo_user     = root                    # 默认sudo 用户
#ask_sudo_pass = True                    # 每次执行ansible命令是否询问ssh密码
#ask_pass      = True                    # 每次执行ansible命令是否询问ssh口令
#remote_port   = 22                      # 远程主机的端口号(默认22)

建议优化项:
host_key_checking = False               # 检查对应服务器的host_key,建议取消注释
log_path=/var/log/ansible.log           # 日志文件,建议取消注释
module_name   = command                 # 默认模块
配置文件优先级
ANSIBLE_CONFIG环境变量指定的任何文件将覆盖所有其他配置文件。如果没有设置该变量,则接下来检查运行ansible命令的目录中是否有ansible.cfg文件。如果不存在该文件,则检查用户的家目录是否有 .ansible.cfg文件。只有在找不到其他配置文件时,才使用全局 /etc/ansible/ansible.cfg文件。如果 /etc/ansible/ansible.cfg配置文件不存在,Ansible包含它使用的默认值。
Ansible仅使用具有最高优先级的配置文件中的设置。即使存在优先级较低的其他配置文件,其设置也会被忽略,不会与选定配置文件中的设置结合。因此,如果你选择自行创建配置文件来取代全局 /etc/ansible/ansible.cfg配置文件,就需要将该文件中所有需要的设置复制到自己的用户级配置文件中。用户组配置文件中未定义的设置将保持设为内置默认值,即使已在全局配置文件中设为某个其他值也是如此。
总结:ANSIBLE_CONFIG环境变量 > 当前目录下的ansible.cfg > ~/.ansible.cfg(家目录) > /etc/ansible/ansible.cfg
修改配置文件
[root@ansible1 ansible]# cp /etc/ansible/hosts /etc/ansible/hosts.bak   # 备份配置文件
[root@ansible1 ansible]# grep -Ev "#|^$" ansible.cfg
[defaults]
host_key_checking = False
log_path = /var/log/ansible.log
[inventory]
[privilege_escalation]
[paramiko_connection]
[ssh_connection]
[persistent_connection]
[accelerate]
[selinux]
[colors]
[diff]
# 部分主要配置解释
#inventory      = /etc/ansible/hosts      #主机列表配置文件
#library        = /usr/share/my_modules/  #库文件存放目录
#remote_tmp     = ~/.ansible/tmp          #临时py文件存放在远程主机目录
#local_tmp      = ~/.ansible/tmp          #本机的临时执行目录
#forks          = 5                       #默认并发数
#sudo_user      = root                    #默认sudo用户
#ask_sudo_pass = True                     #每次执行是否询问sudo的ssh密码
#ask_pass      = True                     #每次执行是否询问ssh密码
#remote_port    = 22                      #远程主机端口
host_key_checking = False                 #跳过检查主机指纹
log_path = /var/log/ansible.log           #ansible日志

[privilege_escalation]					#如果是普通用户则需要配置提权
#become=True
#become_method=sudo
#become_user=root
#become_ask_pass=False

# 有个发送密钥的配置项,不建议开,如下图

主机清单inventory
Inventory 主机清单
1> ansible的主要功能在于批量主机操作,为了便捷地使用其中的部分主机,可以在inventory file中将其分组命名
2> 默认的inventory file为/etc/ansible/hosts
3> inventory file可以有多个,且也可以动态生成

/etc/ansible/hosts文件格式
inventory文件遵循INI文件风格,中括号中的字符为组名。
可以将同一个主机同时归并到多个不同的组中;
此外,当如若目标主机使用了非默认的SSH端口,还可以在主机名称之后使用冒号加端口号来标明
    ntp.lin.com   不分组,直接加

    [webservers]     webservers组
    www1.lin.com:2222  可以指定端口
    www2.lin.com

    [dbservers]
    db1.lin.com
    db2.lin.com
    db3.lin.com

如果主机名称遵循相似的命名模式,还可以使用列表的方式标识各主机
示例:
    [websrvs]
    www[1:100].example.com   ip: 1-100

    [dbsrvs]
    db-[a:f].example.com     dba-dbf
配置主机清单
以下有不同的写法,先举例再搭建
1.场景一、基于密码连接
[root@ansible1 ~]# cat /etc/ansible/hosts
#方式一、主机+端口+密码
[webservers]
172.16.1.7 ansible_ssh_port=22 ansible_ssh_user=root ansible_ssh_pass='123456'
172.16.1.8 ansible_ssh_port=22 ansible_ssh_user=root ansible_ssh_pass='123456'

#方式二、域名+密码
[webservers]
web[1:2].ansible ansible_ssh_pass='123456'

#方式三、域名组+密码组
[webservers]
web[1:2].ansible
[webservers:vars]			#给webservers主机组设置共用变量
ansible_ssh_pass='123456'
2.场景二、基于密钥连接
需要先创建公钥和私钥,并下发公钥至被控端
[root@ansible1 ~]# ssh-keygen
[root@ansible1 ~]# ssh-copy-id -i ~/.ssh/id_rsa.pub [email protected]
[root@ansible1 ~]# ssh-copy-id -i ~/.ssh/id_rsa.pub [email protected]
-----------------------------------------------------------
[root@ansible1 ~]# cat hosts
#方式一、主机+端口+密钥
[webservers]
172.16.1.7
172.16.1.8
[root@ansible1 ~]# ansible webservers -m ping -i ./hosts
172.16.1.8 | SUCCESS => {
"changed": false,
"ping": "pong"
}
172.16.1.7 | SUCCESS => {
"changed": false,
"ping": "pong"
}
-----------------------------------------------------------
[root@ansible1 ~]# cat hosts
#方式二、域名+主机+端口+密钥 #使用域名时,一定要注意/etc/hosts文件
[webservers]
web01 ansible_ssh_host=172.16.1.7 ansible_ssh_port=22
web02 ansible_ssh_host=172.16.1.8
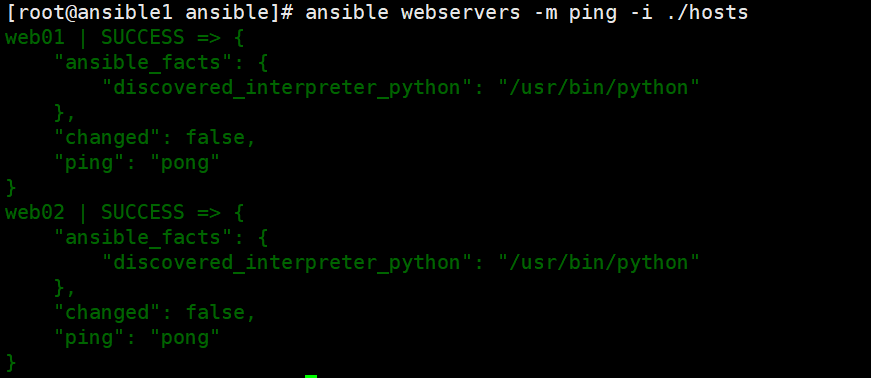
[root@ansible1 ~]# ansible webservers -m ping -i ./hosts
web02 | SUCCESS => {
"changed": false,
"ping": "pong"
}
web01 | SUCCESS => {
"changed": false,
"ping": "pong"
}
--------------------------------------------------
场景三、主机组使用方式
#1.定义两个组
[web]
192.168.245.181
192.168.245.182
[db]
192.168.245.183
[rsync]
192.168.245.184
#2.data组包括两个子组[db,web]
[data:children]
db
web
[webserver:children]
data
采用免密方式搭建(第一种)
设置免密
[root@ansible1 ansible]# ssh-keygen -t RSA -N '' -f ~/.ssh/id_rsa
[root@ansible1 ansible]# ssh-copy-id -i ~/.ssh/id_rsa.pub 192.168.188.21
[root@ansible1 ansible]# ssh-copy-id -i ~/.ssh/id_rsa.pub 192.168.245.181
[root@ansible1 ansible]# ssh-copy-id -i ~/.ssh/id_rsa.pub 192.168.245.182
[root@ansible1 ansible]# ssh 192.168.245.181
[root@ansible1 ansible]# ssh 192.168.245.182
原因方便和安全
[root@ansible1 ansible]# cp /etc/ansible/hosts /etc/ansible/hosts.bak   # 先备份原配置
[root@ansible1 ansible]# vim /etc/ansible/hosts
[root@ansible1 ansible]# grep -Ev "#|^$" /etc/ansible/hosts
[web]
192.168.245.181
[db]
192.168.245.182
验证
[root@ansible1 ansible]# ansible web -m ping -i ./hosts   # ping一下web组的主机

[root@ansible1 ansible]# ansible db -m ping -i ./hosts   # ping一下db组的主机

[root@ansible1 ansible]# ansible all -m ping -i ./hosts   # ping一下所有组的主机

# 成功如下图

第二种写法
[root@ansible1 ansible]# vim /etc/ansible/hosts
[root@ansible1 ansible]# grep -Ev "#|^$" /etc/ansible/hosts
[webservers]
web01 ansible_ssh_host=192.168.245.181 ansible_ssh_port=22
web02 ansible_ssh_host=192.168.245.182
[root@ansible1 ansible]# ansible webservers -m ping -i ./hosts
第三种写法(子组)
[root@ansible1 ansible]# vim /etc/ansible/hosts
[root@ansible1 ansible]# grep -Ev "#|^$" /etc/ansible/hosts
[web1]
web01 ansible_ssh_host=192.168.245.181
[web2]
web02 ansible_ssh_host=192.168.245.182
[server:children]
web1
web2
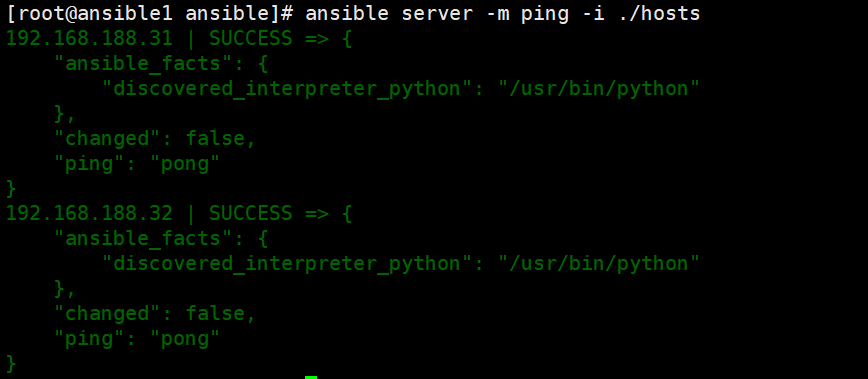
[root@ansible1 ansible]# ansible server -m ping -i ./hosts

[root@ansible1 opt]# ansible all -m ping -i /etc/ansible/hosts --list-hosts   # 列出当前某个组有多少台主机
  hosts (2):
    192.168.245.181
    192.168.245.182
ansible基本命令
ansible通过ssh实现配置管理、应用部署、任务执行等功能,
建议配置ansible端能基于密钥认证的方式联系各被管理节点
语法:
ansible  [-m module_name] [-a args]
ansible +被管理的主机(ALL) +模块  +命令
    --version              显示版本
    -m module              指定模块,默认为command
    -a 					   后接命令
    -v                     详细过程 –vvv -vvvv为“debug模式”
    --list-hosts           显示主机列表,可简写 --list
    -k, --ask-pass         提示输入ssh连接密码,默认Key验证
    -i 					   后接inventory文件(自定义路径)
    -C, --check            检查,并不执行
    -T, --timeout=TIMEOUT  执行命令的超时时间,默认10s
    -u, --user=REMOTE_USER 执行远程执行的用户
    -b, --become           代替旧版的sudo切换
        --become-user=USERNAME 指定sudo的runas用户,默认为root
    -K, --ask-become-pass  提示sudo用户密码

ansible all --list  列出所有主机
ping模块: 探测网络中被管理主机是否能够正常使用  走ssh协议
          如果对方主机网络正常,返回pong
ansible-doc -s ping   查看ping模块的语法

检测所有主机的网络状态
1>  默认情况下连接被管理的主机是ssh基于key验证,如果没有配置key,权限将会被拒绝
    因此需要指定以谁的身份连接,输入用户密码,必须保证被管理主机用户密码一致
    ansible all -m ping -k

2> 或者实现基于key验证 将公钥ssh-copy-id到被管理的主机上 , 实现免密登录
   ansible all -m ping
ansible系列命令1
Ansible系列命令
    ansible ansible-doc ansible-playbook ansible-vault ansible-console
    ansible-galaxy ansible-pull

ansible-doc: 显示模块帮助
    ansible-doc [options] [module...]
        -a            显示所有模块的文档
        -l, --list    列出可用模块
        -s, --snippet 显示指定模块的playbook片段(简化版,便于查找语法)

示例:
    ansible-doc -l      列出所有模块
    ansible-doc ping    查看指定模块帮助用法
    ansible-doc -s ping 查看指定模块帮助用法
ansible系列命令2
可以通过网上写好的
ansible-galaxy
    > 连接 https://galaxy.ansible.com
      下载相应的roles(角色)

    > 列出所有已安装的galaxy
        ansible-galaxy list

    > 安装galaxy
        ansible-galaxy install geerlingguy.redis

    > 删除galaxy
        ansible-galaxy remove geerlingguy.redis

ansible-pull
    推送命令至远程,效率无限提升,对运维要求较高


ansible-playbook  可以引用按照标准的yml语言写的脚本
    执行playbook
    示例:ansible-playbook hello.yml
        cat hello.yml
        #hello world yml file
        - hosts: websrvs
          remote_user: root
          tasks:
            - name: hello world
              command: /usr/bin/wall hello world

ansible-vault  (了解)
功能:管理加密解密yml文件
    ansible-vault [create|decrypt|edit|encrypt|rekey|view]
        ansible-vault encrypt hello.yml 加密
        ansible-vault decrypt hello.yml 解密
        ansible-vault view hello.yml    查看
        ansible-vault edit hello.yml    编辑加密文件
        ansible-vault rekey hello.yml   修改口令
        ansible-vault create new.yml    创建新文件


Ansible-console:2.0+新增,可交互执行命令,支持tab  (了解)

    root@test (2)[f:10] $
    执行用户@当前操作的主机组 (当前组的主机数量)[f:并发数]$

    设置并发数:         forks n   例如: forks 10
    切换组:             cd 主机组 例如: cd web
    列出当前组主机列表: list
    列出所有的内置命令: ?或help
    示例:
        root@all (2)[f:5]$ list
        root@all (2)[f:5]$ cd appsrvs
        root@appsrvs (2)[f:5]$ list
        root@appsrvs (2)[f:5]$ yum name=httpd state=present
        root@appsrvs (2)[f:5]$ service name=httpd state=started
ansible的Host-pattern
ansible的Host-pattern
匹配主机的列表
    All :表示所有主机清单中的所有主机
        ansible all -m ping
    * :通配符
        ansible "*" -m ping  (*表示所有主机)
        ansible 192.168.1.* -m ping
        ansible "*srvs" -m ping
    或关系 ":"
        ansible "websrvs:appsrvs" -m ping
        ansible "192.168.1.10:192.168.1.20" -m ping
        在websrvs组或者在dbsrvs组中的主机
    逻辑与 ":&"
        ansible "websrvs:&dbsrvs" -m ping
        在websrvs组并且在dbsrvs组中的主机
    逻辑非 ":!"
        ansible 'websrvs:!dbsrvs' -m ping
        在websrvs组,但不在dbsrvs组中的主机
        注意:此处为单引号	也可以在!前加转义符\

    综合逻辑
        ansible 'websrvs:dbsrvs:&appsrvs:!ftpsrvs' -m ping
    正则表达式
        ansible "~(web|db).*\.lin\.com" -m ping
        		web.lin.com
ansible命令执行过程
ansible命令执行过程
    1. 加载自己的配置文件 默认/etc/ansible/ansible.cfg
    2. 加载自己对应的模块文件,如command
    3. 通过ansible将模块或命令生成对应的临时py文件,
       并将该文件传输至远程服务器的对应执行用户$HOME/.ansible/tmp/ansible-tmp-数字/XXX.PY文件
    4. 给文件+x执行
    5. 执行并返回结果
    6. 删除临时py文件,sleep 0退出

执行状态:
    绿色:执行成功并且不需要做改变的操作
    黄色:执行成功并且对目标主机做变更
    红色:执行失败

# 去其他机子ps会发现有进程在运行
[root@ansible2 opt]# ps -ef | grep yum
root      10608  10531  0 16:45 pts/1    00:00:00 /bin/sh -c /usr/bin/python /root/.ansible/tmp/ansible-tmp-1650271497.65-10690-151938432124301/AnsiballZ_yum.py && sleep 0
root      10619  10608  5 16:45 pts/1    00:00:00 /usr/bin/python /root/.ansible/tmp/ansible-tmp-1650271497.65-10690-151938432124301/AnsiballZ_yum.py
root      10626   1133  0 16:45 pts/0    00:00:00 grep --color=auto yum
注意
1. 返回信息:红色是错误,黄色是系统发生变化(比如yum)、动态变化(用shell模块进行创文件),绿色是静态(ping) ==> 一般是按照未来是否发生改变来判定

2. 紫色是警告

ansible使用示例
示例
    以wang用户执行ping存活检测
        ansible all -m ping -u wang -k
    以wang sudo至root执行ping存活检测
        ansible all -m ping -u wang -k -b
    以wang sudo至abc用户执行ping存活检测
        ansible all -m ping -u wang -k -b --become-user=abc
    以wang sudo至root用户执行ls
        ansible all -m command -u wang -a 'ls /root' -b --become-user=root -k -K

ansible ping模块测试连接
    ansible 192.168.38.126,192.168.38.127 -m ping -k
帮助手册
使用过程中需要先了解ansible-doc帮助手册
[root@ansible1 opt]# ansible-doc -l   # 查看所有模块说明

[root@ansible1 opt]# ansible-doc -s copy   # 表示指定模块参数

[root@ansible1 ansible]# ansible-doc yum   # ansible-doc 模块名
# 进去输入/,再输入EXA找到案例
模块
Ad-Hoc,常用模块
command             # 执行shell命令(不支持管道等特殊字符)
shell               # 执行shell命令
script             # 执行shell脚本
yum_repository      # 配置yum仓库
联网下载		get_url
安装			yum(ansible all -m yum -a "name=iftop state=present")
配置			copy
启动			service、systemd
创建用户与组	user、group
授权			file
定时任务		crond
挂载			mount
command默认执行bash命令模块
command默认执行bash命令模块,模块不支持重定向或管道
[root@ansible1 opt]# ansible web1 -m command -a "hostname"
192.168.188.31 | CHANGED | rc=0 >>
ansible2
command不能接管道;shell会暂时把权限提升到最高而且如果有漏洞很可能被入侵
shell远程主机上执行命令
[root@ansible1 opt]# ansible web1 -m shell -a "ps -ef |grep ssh"
192.168.188.31 | CHANGED | rc=0 >>
root        859      1  0 14:15 ?        00:00:00 /usr/sbin/sshd -D

注:并不是所有命令都能执行
调用bash执行命令 类似 cat /tmp/stanley.md | awk -F'|' '{print $1,$2}' &> /tmp/example.txt
这些复杂命令,即使使用shell也可能会失败,
    解决办法:写到脚本时,copy到远程执行,再把需要的结果拉回执行命令的机器

    修改配置文件,使shell作为默认模块
        vim /etc/ansible/ansible.cfg
        module_name = shell
script远程主机运行本地脚本
# script模块
# 作用:在远程主机运行本地的脚本;
# 调用格式:
# -m script -a "/PATH/TO/SCRIPT_FILE";
# 参数:
# creates:如果其后跟的文件存在,则不执行脚本;
# removes:如果其后跟的文件存在,则执行脚本;

[root@ansible1 opt]# cat /opt/test.sh
#!/bin/bash
echo "hello word"
# 在本地运行模块,等同于在远程执行,不需要将脚本文件进行推送目标主机执行
[root@ansible1 opt]# ansible web1 -m script -a '/opt/test.sh'
192.168.188.31 | CHANGED => {
    "changed": true,
    "rc": 0,
    "stderr": "Shared connection to 192.168.188.31 closed.\r\n",
    "stderr_lines": [
        "Shared connection to 192.168.188.31 closed."
    ],
    "stdout": "hello word\r\n",
    "stdout_lines": [
        "hello word"
    ]
}
yum安装软件模块
name
	httpd							#指定要安装的软件包名称,多个用“,”隔开
	file://							#指定从本地哪个目录安装rpm
	http://							#指定从哪个网站安装rpm包
state       						#指定使用yum的方法
				present 或installed #安装软件包
				absent 或remove     #移除软件包
				latest				#安装最新软件包
list=ansible						#列出当前仓库可用的软件包
enablerepo=epel						#通过epel仓库安装,如果仓库关闭,也会临时开启
disablerepo="epel,local"		   #安装软件时,不从哪些仓库获取
download_only=true					#仅下载软件包,不安装
exclude=xxx							#排除某包
disable_gpg_check					#默认为no,即为开启检查
[root@ansible1 ansible]# rpm -qa | grep tree
[root@ansible1 ansible]# ansible all -m yum -a "name=tree state=present"   # 返回信息是黄色

#使用epel源安装htop软件包,并关闭gpg_key检查
[root@ansible1 yum.repos.d]# ansible test -m yum -a "name=htop enablerepo=epel state=present disable_gpg_check=yes"

#使用epel源只下载一个软件包(自选)
yum_repository配置yum源仓库
name 		#yum源的名字
baseurl 	#仓库路径
file		#指定yum配置文件的路径和名称 注意不需要以.repo结尾 默认使用name的内容作为文件名
enabled 	yes/no 是否开启yum源  默认是yes 开启
state 		#absent(删除)/present(默认为安装)
description	#描述信息


# 2号机没有epel源
[root@ansible2 opt]# ls /etc/yum.repos.d/
bak  CentOS-Base.repo  local.repo
# ansible批量创建yum源仓库(额外内容:需要添加gpgkey)
[root@ansible1 yum.repos.d]# ansible test -m yum_repository -a "name=epel baseurl=http://mirrors.aliyun.com/epel/7/$basearch enabled=0 description='Extra Packages for Enterprise Linux 7 - $basearch' "
[root@ansible1 yum.repos.d]# ansible test -a "cat /etc/yum.repos.d/epel.repo"
192.168.245.182 | CHANGED | rc=0 >>
[epel]
baseurl = http://mirrors.aliyun.com/epel/7/ #缺失变量
enabled = 0
name = Extra Packages for Enterprise Linux 7 - #缺失变量
192.168.245.181 | CHANGED | rc=0 >>
[epel]
baseurl = http://mirrors.aliyun.com/epel/7/
enabled = 0
name = Extra Packages for Enterprise Linux 7 -
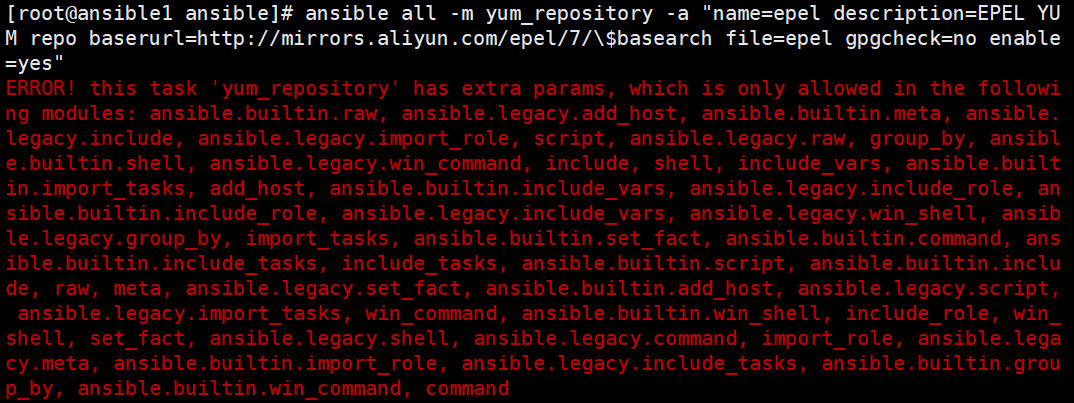
[root@ansible1 ansible]# ansible test -m yum_repository -a "name=epel baseurl=http://mirrors.aliyun.com/epel/7/\$basearch enabled=0 description='Extra Packages for Enterprise Linux 7 - \$basearch' " #模块不支持使用变量,需要用转义符
192.168.188.32 | CHANGED => {
"ansible_facts": {
"discovered_interpreter_python": "/usr/bin/python"
},
"changed": true,
"repo": "epel",
"state": "present"
}
192.168.188.31 | CHANGED => {
"ansible_facts": {
"discovered_interpreter_python": "/usr/bin/python"
},
"changed": true,
"repo": "epel",
"state": "present"
}
# 此时再检查已经创建好
[root@ansible2 opt]# ls /etc/yum.repos.d/
bak  CentOS-Base.repo  epel.repo  local.repo
# 当ansible重新更改epel里面的内容会覆盖掉
get_url文件下载模块
dest		#到目标地址
url			#下载路径
src  		#源文件
dest		#指定目标路径
mode 		#设置权限
checksum	#校验(md5  sha256)


1.通过get_url下载文件或者软件
[root@ansible1 yum.repos.d]# ansible 192.168.245.181 -m get_url -a "url=http://nginx.org/download/nginx-1.20.2.tar.gz dest=/opt mode=777"
192.168.245.181 | CHANGED => {
    "ansible_facts": {
        "discovered_interpreter_python": "/usr/bin/python"
    },
    "changed": true,
    "checksum_dest": null,
    "checksum_src": "59888fdeb78eec4979a8df89a80b43ee84b73eb7",
    "dest": "/opt/nginx-1.20.2.tar.gz",
    "elapsed": 1,
    "gid": 0,
    "group": "root",
    "md5sum": "3bcc5ccdc052c35d0d3c5557cf56c7d2",
    "mode": "0777",
    "msg": "OK (1062124 bytes)",
    "owner": "root",
    "size": 1062124,
    "src": "/root/.ansible/tmp/ansible-tmp-1666233107.4-1751-92028453301044/tmp3Y01Jm",
    "state": "file",
    "status_code": 200,
    "uid": 0,
    "url": "http://nginx.org/download/nginx-1.20.2.tar.gz"
}


2.对一个文件先进行md5校验
[root@ansible2 opt]# md5sum nginx-1.20.2.tar.gz
3bcc5ccdc052c35d0d3c5557cf56c7d2  nginx-1.20.2.tar.gz

3.使用ansible下载文件,通过则下载,不通过则不下载
ansible 192.168.245.181 -m get_url -a "url=http://nginx.org/download/nginx-1.20.2.tar.gz dest=/opt mode=777 checksum=md5:3bcc5ccdc052c35d0d3c5557cf56c7d2 "
# 下载图片到主机清单里面的机子并指定目录与权限
[root@ansible1 ansible]# ansible all -m get_url -a "url=https://images.anime-pictures.net/091/0910ba3ebc65f07a718b15705ede599e.jpeg?if=ANIME-PICTURES.NET_-_649260-2382x3573-tensei+shitara+slime+datta+ken-8bit-rimuru+tempest-junkt729-single-long+hair.jpeg dest=/opt/ mode='0644'"
# 下载图片到主机清单里面的机子、指定目录并改名与权限
[root@ansible1 ansible]# ansible all -m get_url -a "url=https://images.anime-pictures.net/091/0910ba3ebc65f07a718b15705ede599e.jpeg?if=ANIME-PICTURES.NET_-_649260-2382x3573-tensei+shitara+slime+datta+ken-8bit-rimuru+tempest-junkt729-single-long+hair.jpeg dest=/opt/图片.jpeg mode='0644'"

copy文件拷贝模块
src             #推送数据的源文件信息
dest            #推送数据的目标路径
backup          #对推送传输过去的文件,进行备份
content         #直接批量在被管理端文件中添加内容
group           #将本地文件推送到远端,指定文件属组信息
owner           #将本地文件推送到远端,指定文件属主信息
mode            #将本地文件推送到远端,指定文件权限信息

1.copy文件拷贝模块
#1.拷贝文件文件至被控节点
[root@ansible1 yum.repos.d]# ansible 192.168.245.181 -m copy -a "src=/etc/hosts dest=/opt/ mode=600"
192.168.245.181 | CHANGED => {
    "ansible_facts": {
        "discovered_interpreter_python": "/usr/bin/python"
    },
    "changed": true,
    "checksum": "35103ab3645ce6aaff9e923c035b9364800a8432",
    "dest": "/opt/hosts",
    "gid": 0,
    "group": "root",
    "md5sum": "54ab6dbd73fb188db9614ca77008bc30",
    "mode": "0600",
    "owner": "root",
    "size": 216,
    "src": "/root/.ansible/tmp/ansible-tmp-1666235917.0-2154-42402630981833/source",
    "state": "file",
    "uid": 0
}
[root@ansible1 yum.repos.d]# ansible 192.168.245.181 -a "ls /opt"
192.168.245.181 | CHANGED | rc=0 >>
0910ba3ebc65f07a718b15705ede599e.jpeg
a.txt
base.sh
b.txt
hostname.sh
hosts
roles
图片.jpeg

#2.对远端已有文件进行备份,按照时间信息备份
[root@ansible1 ~]# ansible 192.168.245.181 -m copy -a "content='this is a good day' dest=/opt/hosts mode=600 backup=yes"
192.168.245.181 | CHANGED => {
    "ansible_facts": {
        "discovered_interpreter_python": "/usr/bin/python"
    },
    "backup_file": "/opt/hosts.4158.2022-10-20@11:23:46~",
    "changed": true,
    "checksum": "eaf28278e6dccce4c32a99e73210382b35df1481",
    "dest": "/opt/hosts",
    "gid": 0,
    "group": "root",
    "md5sum": "5613384ade73a91c3cedf83743f61704",
    "mode": "0600",
    "owner": "root",
    "size": 18,
    "src": "/root/.ansible/tmp/ansible-tmp-1666236225.83-2305-229613384813654/source",
    "state": "file",
    "uid": 0
}

[root@ansible1 ~]# ansible 192.168.245.181 -a "ls /opt"
192.168.245.181 | CHANGED | rc=0 >>
0910ba3ebc65f07a718b15705ede599e.jpeg
a.txt
base.sh
b.txt
hostname.sh
hosts
hosts.4158.2022-10-20@11:23:46~
roles
图片.jpeg


#3.向被控端主机写入数据,并且会覆盖远端文件内原有数据信息
[root@ansible1 ~]# ansible 192.168.245.181 -m copy -a "content='this is a good day' dest=/opt/a.txt mode=600"
192.168.245.181 | CHANGED => {
    "ansible_facts": {
        "discovered_interpreter_python": "/usr/bin/python"
    },
    "changed": true,
    "checksum": "eaf28278e6dccce4c32a99e73210382b35df1481",
    "dest": "/opt/a.txt",
    "gid": 0,
    "group": "root",
    "md5sum": "5613384ade73a91c3cedf83743f61704",
    "mode": "0600",
    "owner": "root",
    "size": 18,
    "src": "/root/.ansible/tmp/ansible-tmp-1666236099.76-2253-41121094243075/source",
    "state": "file",
    "uid": 0
}
[root@ansible1 ~]# ansible 192.168.245.181 -a "cat /opt/a.txt"
192.168.245.181 | CHANGED | rc=0 >>
this is a good day


#4.将管理主机上的数据信息传送给多台主机并改名
[root@ansible1 ~]# ansible 192.168.245.181 -m copy -a "src=/etc/hosts dest=/opt/a_hosts mode=600"
192.168.245.181 | CHANGED => {
    "ansible_facts": {
        "discovered_interpreter_python": "/usr/bin/python"
    },
    "changed": true,
    "checksum": "35103ab3645ce6aaff9e923c035b9364800a8432",
    "dest": "/opt/a_hosts",
    "gid": 0,
    "group": "root",
    "md5sum": "54ab6dbd73fb188db9614ca77008bc30",
    "mode": "0600",
    "owner": "root",
    "size": 216,
    "src": "/root/.ansible/tmp/ansible-tmp-1666236442.77-2400-239949733288490/source",
    "state": "file",
    "uid": 0
}
[root@ansible1 ~]# ansible 192.168.245.181 -a "ls /opt"
192.168.245.181 | CHANGED | rc=0 >>
a_hosts
# 差值拷贝
# 会在远程机子创建一个文件名加时间戳的文件,就是新的文件有差异的,需要远程机子有hosts文件而且修改再推送就会出现
[root@ansible1 ~]# ansible 192.168.245.181 -m copy -a "content='this is a good day' dest=/opt/hosts mode=600 "	#没添加backup
192.168.245.181 | CHANGED => {
    "ansible_facts": {
        "discovered_interpreter_python": "/usr/bin/python"
    },
    "backup_file": "/opt/hosts.4701.2022-10-20@11:29:43~",
    "changed": true,
    "checksum": "eaf28278e6dccce4c32a99e73210382b35df1481",
    "dest": "/opt/hosts",
    "gid": 0,
    "group": "root",
    "md5sum": "5613384ade73a91c3cedf83743f61704",
    "mode": "0600",
    "owner": "root",
    "size": 18,
    "src": "/root/.ansible/tmp/ansible-tmp-1666236582.42-2474-264212795682500/source",
    "state": "file",
    "uid": 0
}


[root@ansible2 ~]# echo "this is a bad day" >> /opt/hosts
[root@ansible1 ~]# ansible 192.168.245.181 -m copy -a "content='this is a good day' dest=/opt/hosts mode=600 backup=yes"
192.168.245.181 | CHANGED => {
    "ansible_facts": {
        "discovered_interpreter_python": "/usr/bin/python"
    },
    "backup_file": "/opt/hosts.4701.2022-10-20@11:29:43~",
    "changed": true,
    "checksum": "eaf28278e6dccce4c32a99e73210382b35df1481",
    "dest": "/opt/hosts",
    "gid": 0,
    "group": "root",
    "md5sum": "5613384ade73a91c3cedf83743f61704",
    "mode": "0600",
    "owner": "root",
    "size": 18,
    "src": "/root/.ansible/tmp/ansible-tmp-1666236582.42-2474-264212795682500/source",
    "state": "file",
    "uid": 0
}
# 可以创建文件和覆盖文件内容
[root@ansible1 ~]# ansible all -m copy -a "content='GuangZhou' dest=/opt/test3.text"
Fetch文件拉取模块
src             #推送数据的源文件信息
dest            #推送数据的目标路径
从远程主机提取文件至主控端,copy相反,目前不支持目录,可以先打包,再提取文件  ansible websrvs -m fetch -a 'src=/root/test.sh dest=/data/scripts'

会生成每个被管理主机不同编号的目录,不会发生文件名冲突
ansible all -m shell -a 'tar jxvf test.tar.gz /root/test.sh'
     > ansible all -m fetch -a 'src=/root/test.tar.gz dest=/data/'
file文件创建模块
path            #指定远程主机目录或文件
src             #推送数据的源文件信息
dest            #推送数据的目标路径
recurse         #递归授权
state           #状态
    directory   #在远端创建目录
    touch       #在远端创建文件
    link        #创建链接文件
    hard		#硬链接
    absent      #表示删除文件或目录
    mode        #设置文件或目录权限
    owner       #设置文件或目录属主
    group       #设置文件或目录属组

1.直接修改被控端的权限
[root@ansible1 ~]# ansible 192.168.245.181 -m file -a "dest=/opt/b.txt mode=600 state=touch "
192.168.245.181 | CHANGED => {
    "ansible_facts": {
        "discovered_interpreter_python": "/usr/bin/python"
    },
    "changed": true,
    "dest": "/opt/b.txt",
    "gid": 0,
    "group": "root",
    "mode": "0600",
    "owner": "root",
    "size": 0,
    "state": "file",
    "uid": 0
}


2.在被控端创建目录
[root@ansible1 ~]# ansible 192.168.245.181 -m file -a "dest=/opt/abc state=directory "
192.168.245.181 | CHANGED => {
    "ansible_facts": {
        "discovered_interpreter_python": "/usr/bin/python"
    },
    "changed": true,
    "gid": 0,
    "group": "root",
    "mode": "0755",
    "owner": "root",
    "path": "/opt/abc",
    "size": 6,
    "state": "directory",
    "uid": 0
}

3.在被控端创建文件
[root@ansible1 ~]# ansible 192.168.245.181 -m file -a "dest=/opt/a.txt state=touch "
192.168.245.181 | CHANGED => {
    "ansible_facts": {
        "discovered_interpreter_python": "/usr/bin/python"
    },
    "changed": true,
    "dest": "/opt/a.txt",
    "gid": 0,
    "group": "root",
    "mode": "0644",
    "owner": "root",
    "size": 0,
    "state": "file",
    "uid": 0
}


4.递归授权目录权限
[root@ansible1 ~]# ansible 192.168.245.181 -m file -a "dest=/opt/abc mode=600  recurse=yes"
192.168.245.181 | CHANGED => {
    "ansible_facts": {
        "discovered_interpreter_python": "/usr/bin/python"
    },
    "changed": true,
    "gid": 0,
    "group": "root",
    "mode": "0600",
    "owner": "root",
    "path": "/opt/abc",
    "size": 6,
    "state": "directory",
    "uid": 0
}

5.删除文件或目录
[root@ansible1 opt]# ansible 192.168.245.181 -m file -a "path=/opt/a.txt  state=absent"
192.168.245.181 | CHANGED => {
    "ansible_facts": {
        "discovered_interpreter_python": "/usr/bin/python"
    },
    "changed": true,
    "path": "/opt/a.txt",
    "state": "absent"
}

[root@ansible2 opt]# ll
总用量 0
drw------- 2 root root  6 10月 20 11:41 abc
-rw------- 1 root root  0 10月 20 11:43 b.txt

6.软链接
[root@ansible1 opt]# ansible 192.168.245.181 -m file -a "src=/opt/a.txt dest=/opt/c.txt state=link"
192.168.245.181 | CHANGED => {
    "ansible_facts": {
        "discovered_interpreter_python": "/usr/bin/python"
    },
    "changed": true,
    "dest": "/opt/c.txt",
    "gid": 0,
    "group": "root",
    "mode": "0777",
    "owner": "root",
    "size": 10,
    "src": "/opt/a.txt",
    "state": "link",
    "uid": 0
}

[root@ansible2 opt]# ll
总用量 0
drw------- 2 root root  6 10月 20 11:41 abc
-rw------- 1 root root  0 10月 20 11:43 b.txt
lrwxrwxrwx 1 root root 10 10月 20 14:25 c.txt -> /opt/a.txt


或者
[root@ansible1 opt]# ansible 192.168.245.181 -m file -a "src=/opt/b.txt path=/opt/d.txt  state=link"
192.168.245.181 | CHANGED => {
    "ansible_facts": {
        "discovered_interpreter_python": "/usr/bin/python"
    },
    "changed": true,
    "dest": "/opt/d.txt",
    "gid": 0,
    "group": "root",
    "mode": "0777",
    "owner": "root",
    "size": 10,
    "src": "/opt/b.txt",
    "state": "link",
    "uid": 0
}

[root@ansible2 opt]# ll
总用量 0
drw------- 2 root root  6 10月 20 11:41 abc
-rw-r--r-- 1 root root  0 10月 20 11:39 a.txt
-rw------- 1 root root  0 10月 20 11:43 b.txt
lrwxrwxrwx 1 root root 10 10月 20 14:25 c.txt -> /opt/a.txt
lrwxrwxrwx 1 root root 10 10月 20 14:28 d.txt -> /opt/b.txt


# 两种写法
# 默认是软连接,state=hard是硬链接


7.硬链接
user模块
name			#用户名
uid             #指定用户的uid
group           #指定用户组名称
groups          #指定附加组名称
password        #给用户添加密码(记得单引号)
shell           #指定用户登录shell
create_home     #是否创建家目录
comment			#注释内容
state			#present(创建)/absent(移除,但不会删除家目录)
remove			#清除账号(删除家目录)

1.创建用户指定uid和gid,不创建家目录也不允许登陆
[root@ansible1 opt]# ansible 192.168.245.181 -m user -a "name=abc uid=666 shell=/sbin/nologin create_home=no "

2.删除用户
[root@ansible1 opt]# ansible 192.168.245.181 -m user -a "name=abc state=absent "

3.清除用户,查看家目录是否存在
ansible 192.168.245.181 -m user -a "name=abc state=absent remove=yes"

4.给新创建的用户生成ssh密钥对(了解)
[root@ansible1 ~]# ansible 192.168.245.181 -m user -a "name=oo uid=6677 group=adm generate_ssh_key=yes ssh_key_bits=2048 ssh_key_file=.ssh/id_rsa" -i ./hosts

5.将明文密码进行hash加密,然后进行用户创建
[root@ansible1 ~]# ansible localhost -m debug -a "msg={{ '123456' | password_hash('sha512', 'salt') }}"
localhost | SUCCESS => {
    "msg": "$6$salt$MktMKPZJ6t59GfxcJU20DwcwQzfMvOlHFVZiOVD71w.igcOo1R7vBYR65JquIQ/7siC7VRpmteKvZmfSkNc69."
}
[root@ansible1 ~]# ansible webservers -m user -a 'name=xlw password=$6$salt$MktMKPZJ6t59GfxcJU20DwcwQzfMvOlHFVZiOVD71w.igcOo1R7vBYR65JquIQ/7siC7VRpmteKvZmfSkNc69. create_home=yes shell=/bin/bash' -i ./hosts


    安装mkpasswd
    yum insatll expect
    mkpasswd 生成口令
    openssl passwd -1  生成加密口令
指定密码生成,但是ansible不允许明文输入,所以需要密文输入,密文输入请参考这篇文章https://blog.csdn.net/weixin_33672109/article/details/91658947;也可以采用上面的方法
group组模块
name            #指定创建的组名
gid             #指定组的gid
state
    absent      #移除远端主机的组
    present     #创建远端主机的组(默认)

1.创建组名www,并设置gid为777
[root@ansible1 ~]# ansible web1 -m group -a "name=www gid=777"

# 验证
[root@ansible2 ~]# tail -1 /etc/group
www:x:777:

2.修改www组的gid为888
[root@ansible1 ~]# ansible web1 -m group -a "name=www gid=888"

# 验证
[root@ansible2 ~]# tail -2 /etc/group
shy2:x:1001:
www:x:888:

3. 删除组
[root@ansible1 ~]# ansible web1 -m group -a "name=www gid=888 state=absent"
Archive:打包压缩模块
将远程主机目录打包
        path:   指定路径
        dest:   指定目标文件
        format: 指定打包格式
        owner:  指定所属者
        mode:   设置权限

#将ansible2上的/etc/sysconfig以bz2压缩包打包
ansible all -m archive -a 'path=/etc/sysconfig dest=/data/sysconfig.tar.bz2 format=bz2 owner=wang mode=0777'
unarchive解压模块
unarchive
src             #推送数据的源文件信息
dest            #推送数据的目标路径
copy			#解压在哪里解压
备注:
1,copy等于yes时,是在控制机解压完成后把目录传送给远程机
   copy等于no时,控制机登录远程机进行压缩包的解压工作。
2,得注意解压的机器上必须有相应的解压工具,否则会解压失败(示例:如果压缩包时zip结尾,要解压的机器上必须得有unzip命令)


解压模块:
1、解压ansible管理机上的压缩文件到远程主机:
[root@ansible1 opt]# ansible 192.168.245.181 -m unarchive -a "src=/opt/nginx-1.20.2.tar.gz dest=/opt/ copy=yes"
192.168.245.181 | CHANGED => {
    "ansible_facts": {
        "discovered_interpreter_python": "/usr/bin/python"
    },
    "changed": true,
    "dest": "/opt/",
    "extract_results": {
        "cmd": [
            "/usr/bin/gtar",
            "--extract",
            "-C",
            "/opt/",
            "-z",
            "-f",
            "/root/.ansible/tmp/ansible-tmp-1666249502.65-3235-195806870400684/source"
        ],
        "err": "",
        "out": "",
        "rc": 0
    },
    "gid": 0,
    "group": "root",
    "handler": "TgzArchive",
    "mode": "0755",
    "owner": "root",
    "size": 76,
    "src": "/root/.ansible/tmp/ansible-tmp-1666249502.65-3235-195806870400684/source",
    "state": "directory",
    "uid": 0
}


2、解压远程主机上的文件到目录:
[root@ansible1 opt]# ansible 192.168.245.181 -m unarchive -a "src=/opt/nginx-1.20.2.tar.gz dest=/opt/ copy=no"    #当copy为no时,src的地址为目标主机的地址
192.168.245.181 | FAILED! => {
    "ansible_facts": {
        "discovered_interpreter_python": "/usr/bin/python"
    },
    "changed": false,
    "msg": "Source '/opt/nginx-1.20.2.tar.gz' does not exist"
}

[root@ansible2 opt]# ll						#目标机器上没有压缩包
总用量 0
drw------- 2 root root   6 10月 20 11:41 abc
-rw-r--r-- 1 root root   0 10月 20 11:39 a.txt
-rw------- 1 root root   0 10月 20 11:43 b.txt
lrwxrwxrwx 1 root root  10 10月 20 14:25 c.txt -> /opt/a.txt
drwxr-xr-x 8 test test 158 11月 16 2021 nginx-1.20.2
管理服务的启动与停止,使用service、systemd
name        # 定义要启动服务的名称
state       # 指定服务状态
    started     #启动服务
    stopped     #停止服务
    restarted   #重启服务
    reloaded    #重载服务
enabled         #开机自启


#1.启动crond服务,并加入开机自启
[root@ansible1 ~]# ansible webservers -m service -a "name=crond state=started enabled=yes"
#2.停止crond服务,并删除开机自启
[root@ansible1 ~]# ansible webservers -m service -a "name=crond state=stopped enabled=no"
#3.重启crond服务
[root@ansible1 ~]# ansible webservers -m service -a "name=crond state=restarted"
#4.重载crond服务
[root@ansible1 ~]# ansible webservers -m service -a "name=crond state=reloaded"
#5.查看crond服务状态
[root@ansible1 opt]# ansible 192.168.245.181 -m command  -a "systemctl status crond"
192.168.245.181 | FAILED | rc=3 >>
● crond.service - Command Scheduler
   Loaded: loaded (/usr/lib/systemd/system/crond.service; enabled; vendor preset: enabled)
   Active: inactive (dead) since 四 2022-10-20 15:16:14 CST; 49s ago
  Process: 536 ExecStart=/usr/sbin/crond -n $CRONDARGS (code=exited, status=0/SUCCESS)
 Main PID: 536 (code=exited, status=0/SUCCESS)

10月 20 09:22:41 ansible2 systemd[1]: Started Command Scheduler.
10月 20 09:22:41 ansible2 systemd[1]: Starting Command Scheduler...
10月 20 09:22:41 ansible2 crond[536]: (CRON) INFO (RANDOM_DELAY will be scaled with factor 56% if used.)
10月 20 09:22:41 ansible2 crond[536]: (CRON) INFO (running with inotify support)
10月 20 15:16:14 ansible2 systemd[1]: Stopping Command Scheduler...
10月 20 15:16:14 ansible2 systemd[1]: Stopped Command Scheduler.non-zero return code
crond定时任务模块
| * | * | * | * | * | echo 123456 >/opt/crond.txt |
|---|---|---|---|---|---|
| minute | hour | day | month | week | job |
name 		#注释说明
state		#present(增加)/absent(删除)

# 正常使用crond服务(默认没写的时间都算*表示)
[root@ansible1 ~]# crontab -l
*/2 * * * * echo 123456 >/opt/crond.txt

# 使用ansible添加一条定时任务
[root@ansible1 opt]# ansible 192.168.245.181 -m cron -a "minute=*/2 job='echo "123456" >/opt/crond.txt' name='this is a test crond_job'"
192.168.245.181 | CHANGED => {
    "ansible_facts": {
        "discovered_interpreter_python": "/usr/bin/python"
    },
    "changed": true,
    "envs": [],
    "jobs": [
        "this is a test crond_job"
    ]
}
[root@ansible1 opt]# ansible 192.168.245.181 -a "crontab -l"
192.168.245.181 | CHANGED | rc=0 >>
#Ansible: this is a test crond_job
*/2 * * * * echo 123456 >/opt/crond.txt


# 设置定时任务注释信息,防止重复,name设定
[root@ansible1 ~]# ansible webservers -m cron -a "name='cron01' job='/bin/sh /server/scripts/test.sh'"

# 删除相应定时任务
[root@ansible1 opt]# ansible 192.168.245.181 -m cron -a "name='this is a test crond_job' state=absent "
192.168.245.181 | CHANGED => {
    "ansible_facts": {
        "discovered_interpreter_python": "/usr/bin/python"
    },
    "changed": true,
    "envs": [],
    "jobs": []
}


[root@ansible1 opt]# ansible 192.168.245.181 -m cron -a "job='echo 123456 >/opt/crond.txt'  state=absent "
[DEPRECATION WARNING]: The 'name' parameter will be required in future releases.. This feature will be removed in version 2.12.
Deprecation warnings can be disabled by setting deprecation_warnings=False in ansible.cfg.
192.168.245.181 | SUCCESS => {
    "ansible_facts": {
        "discovered_interpreter_python": "/usr/bin/python"
    },
    "changed": false,
    "envs": [],
    "jobs": [
        "this is a test crond_job"
    ]
}
注:只能通过name来进行删除

#删除不是由ansible生成的计时任务
[root@ansible2 opt]# crontab -l

* */2 * * * echo 123456 >/opt/crond1.txt
#Ansible: this is a test crond_job
*/2 * * * * echo 123456 >/opt/crond.txt

添加andible注释:
[root@ansible2 opt]# crontab -l
#Ansible: crond1
* */2 * * * echo 123456 >/opt/crond1.txt
#Ansible: this is a test crond_job
*/2 * * * * echo 123456 >/opt/crond.txt

[root@ansible1 opt]# ansible 192.168.245.181 -m cron -a " name=crond1  state=absent "
192.168.245.181 | CHANGED => {
    "ansible_facts": {
        "discovered_interpreter_python": "/usr/bin/python"
    },
    "changed": true,
    "envs": [],
    "jobs": [
        "this is a test crond_job"
    ]
}

[root@ansible2 opt]# crontab -l
#Ansible: this is a test crond_job
*/2 * * * * echo 123456 >/opt/crond.txt


# 注释相应定时任务,使定时任务失效
[root@ansible1 opt]# ansible 192.168.245.181 -m cron -a " name='this is a test crond_job' job='echo 123456 >/opt/crond.txt'  disabled=yes "
192.168.245.181 | CHANGED => {
    "ansible_facts": {
        "discovered_interpreter_python": "/usr/bin/python"
    },
    "changed": true,
    "envs": [],
    "jobs": [
        "this is a test crond_job"
    ]
}
[root@ansible1 opt]# ansible 192.168.245.181 -a "crontab -l"
192.168.245.181 | CHANGED | rc=0 >>

#Ansible: this is a test crond_job
#* * * * * echo 123456 >/opt/crond.txt			#发现计划任务注释掉


删除与注释有点小区别
mount挂载模块
src				# 源分区
path			# 目标分区
state
	present     # 开机挂载,仅将挂载配置写入/etc/fstab
	mounted     # 挂载设备,并将配置写入/etc/fstab
	unmounted   # 卸载设备,不会清除/etc/fstab写入的配置
	absent      # 卸载设备,会清理/etc/fstab写入的配置
fstype			#挂载类型


1.在服务器上安装nfs
2.配置
3.创建目录修改所有者
4.启动服务并开机自启动
5.服务器上面进行挂载(本地测试)
6.web服务器进行挂载

1.在服务器上安装nfs
[root@ansible1 opt]# ansible 192.168.245.181 -m yum  -a "name=nfs-utils,rpcbind enablerepo=local state=present" -v

2.配置
[root@ansible1 opt]# ansible 192.168.245.181 -m copy -a "content='/opt/nfstest 192.168.245.*(rw)' dest=/etc/exports "
192.168.245.181 | CHANGED => {
    "ansible_facts": {
        "discovered_interpreter_python": "/usr/bin/python"
    },
    "changed": true,
    "checksum": "044407139d78aee1365aab13cb68ddb50648a62e",
    "dest": "/etc/exports",
    "gid": 0,
    "group": "root",
    "md5sum": "ea12d18fdba2081afd56b510c5f753c5",
    "mode": "0644",
    "owner": "root",
    "size": 30,
    "src": "/root/.ansible/tmp/ansible-tmp-1666255664.06-4205-21648177808721/source",
    "state": "file",
    "uid": 0
}
[root@ansible1 opt]# ansible 192.168.245.181 -a "cat /etc/exports"
192.168.245.181 | CHANGED | rc=0 >>
/opt/nfstest 192.168.245.*(rw)


3.创建目录修改所有者
[root@ansible1 opt]# ansible 192.168.245.181 -m file -a "path=/opt/nfstest state=directory"
192.168.245.181 | CHANGED => {
    "ansible_facts": {
        "discovered_interpreter_python": "/usr/bin/python"
    },
    "changed": true,
    "gid": 0,
    "group": "root",
    "mode": "0755",
    "owner": "root",
    "path": "/opt/nfstest",
    "size": 6,
    "state": "directory",
    "uid": 0
}
[root@ansible1 opt]# ansible 192.168.245.181 -a "ls /opt"
192.168.245.181 | CHANGED | rc=0 >>
abc
a.txt
b.txt
crond.txt
c.txt
nfstest
nginx-1.20.2


4.启动服务并开机自启动
[root@ansible1 opt]# ansible 192.168.245.181 -m systemd -a "name=nfs,rpcbind state=started enabled=yes "				#启动服务不支持多个一起启动
192.168.245.181 | FAILED! => {
    "ansible_facts": {
        "discovered_interpreter_python": "/usr/bin/python"
    },
    "changed": false,
    "msg": "Could not find the requested service nfs,rpcbind: host"
}

[root@ansible1 opt]# ansible 192.168.245.181 -m systemd -a "name=nfs state=started enabled=yes "
192.168.245.181 | CHANGED => {
    "ansible_facts": {
        "discovered_interpreter_python": "/usr/bin/python"
    },
    "changed": true,
    "enabled": true,
    "name": "nfs",
    "state": "started",


[root@ansible1 opt]# ansible 192.168.245.181 -m systemd -a "name=rpcbind state=started enabled=yes "
192.168.245.181 | SUCCESS => {
    "ansible_facts": {
        "discovered_interpreter_python": "/usr/bin/python"
    },
    "changed": false,
    "enabled": true,
    "name": "rpcbind",
    "state": "started",


5.ansible2上面进行挂载
[root@ansible1 opt]# ansible 192.168.245.182 -m mount -a "src=192.168.245.181:/opt/nfstest  path=/opt/abc fstype=nfs state=mounted"
192.168.245.182 | CHANGED => {
    "ansible_facts": {
        "discovered_interpreter_python": "/usr/bin/python"
    },
    "changed": true,
    "dump": "0",
    "fstab": "/etc/fstab",
    "fstype": "nfs",
    "name": "/opt/abc",
    "opts": "defaults",
    "passno": "0",
    "src": "192.168.245.181:/opt/nfstest"
}
[root@ansible1 opt]# ansible 192.168.245.182 -a "df -h "
192.168.245.182 | CHANGED | rc=0 >>
文件系统                      容量  已用  可用 已用% 挂载点
/dev/sda3                      18G  1.4G   17G    8% /
devtmpfs                      479M     0  479M    0% /dev
tmpfs                         489M     0  489M    0% /dev/shm
tmpfs                         489M  6.7M  482M    2% /run
tmpfs                         489M     0  489M    0% /sys/fs/cgroup
/dev/sr0                      4.3G  4.3G     0  100% /mnt
/dev/sda1                     197M   97M  100M   50% /boot
tmpfs                          98M     0   98M    0% /run/user/0
192.168.245.181:/opt/nfstest   18G  1.5G   17G    8% /opt/abc
[root@ansible1 opt]# ansible 192.168.245.182 -a "cat /etc/fstab "
192.168.245.182 | CHANGED | rc=0 >>

#
# /etc/fstab
# Created by anaconda on Tue Mar 22 00:22:51 2022
#
# Accessible filesystems, by reference, are maintained under '/dev/disk'
# See man pages fstab(5), findfs(8), mount(8) and/or blkid(8) for more info
#
UUID=4bd69169-06a2-4098-91f4-27d19efe1cab /                       xfs     defaults        0 0
UUID=d3600a22-f307-4eca-a0fc-f6458fd3555a /boot                   xfs     defaults        0 0
UUID=03efe8dd-e26a-45da-b741-68632f697608 swap                    swap    defaults        0 0
/dev/sr0 /mnt iso9660 defaults 0 0
192.168.245.181:/opt/nfstest /opt/abc nfs defaults 0 0


#卸载分区
[root@ansible1 opt]# ansible 192.168.245.182 -m mount -a "src=192.168.245.181:/opt/nfstest  path=/opt/abc fstype=nfs state=unmounted"


[root@ansible1 opt]# ansible 192.168.245.182 -m mount -a "src=192.168.245.181:/opt/nfstest  path=/opt/abc fstype=nfs state=absent"