spring整合mybatis详细步骤
spring整合mybatis的全部过程( 整合方式一 :简单版)
1.在pom.xml中导入mybatis相应的jar包:
(2) < dependency >
< groupId >org.mybatis groupId >
< artifactId >mybatis artifactId >
< version >3.5.3 version >
dependency >
(2) < dependency >
< groupId >org.mybatis groupId >
< artifactId >mybatis-spring artifactId >
< version >2.0.7 version >
dependency >
(3) < dependency >
< groupId >org.springframework groupId >
< artifactId >spring-jdbc artifactId >
< version >5.3.11 version >
dependency >
2.在spring的核心配置文件中配置连接数据库的jdbc配置:(个人想法:其实就是将mybatis中的核心配置文件中连接数据库的配置移了个位置)
< bean id ="dataSource" class ="org.springframework.jdbc.datasource.DriverManagerDataSource" >
<property name="driverClassName" value="com.mysql.jdbc.Driver"/>
<property name="url" value="jdbc:mysql://localhost:3306/javatest?useSSL=true&useUnicode=true&characterEncoding= UFT- 8&nullCatalogMeansCurrent=true"/>
<property name="username" value="root"/>
<property name="password" value="root"/>
bean>
3. 连接完数据库之后就拥有了访问数据库的能力,然后通过SqlSessionfactoryBean创建SqlSessionFactory工厂,并且绑定mybatis的核心配置文件和mapper.xml文件:
< bean id ="sqlSessionFactory" class ="org.mybatis.spring.SqlSessionFactoryBean" >
< property name ="dataSource" ref ="dataSource" />
< property name ="configLocation" value ="classpath:mybatis-config.xml" />
< property name ="mapperLocations" value ="classpath:com/wang/dao/*.xml" />
bean >
4. 既然有了SqlSessionFactory工厂,那咱们就可以通过这个工厂创建SqlSession对象啦,不过是通过这个工厂中SqlSession模板(SqlSessionTemplate)来直接创建SqlSession对象:(在这个Bean管理中需要通过 constructor-arg构造器进行注入并且给这个构造器的参数(index)给其赋值, 通过参数在参数列表中的索引找到参数列表中对应参数,index从0开始 )
< bean id ="sqlSession" class ="org.mybatis.spring.SqlSessionTemplate" >
< constructor-arg index ="0" ref ="sqlSessionFactory" />
bean >
5.有了前面的一些准备工作呢那咱们就可以做一个简单的测试啦!!!
5.1 首先先要准备测试的数据库相应的实体类

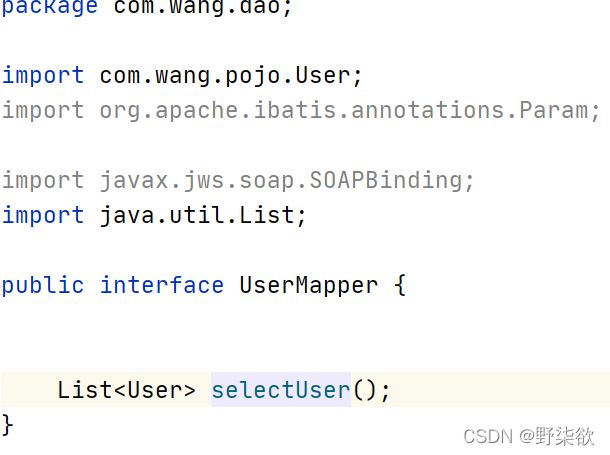
5.2 有了这个实体类还需要一个编辑数据库数据的接口:
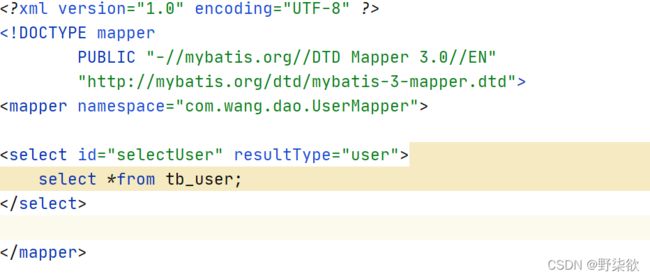
5.3 创建上面实体类的Mapper.xml文件,然后将上面的接口配置到mapper.xml中,再编写相应操作的sql语句(我这里是简单的查询表)
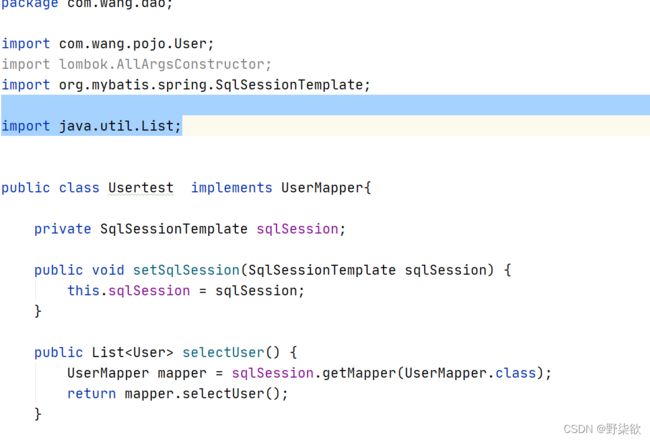
5.4 使用spring整合mybatis需要一个实体类来通过SqlSessionTemplate创建的SqlSession对象获取上面的被Mapper.xml实现的接口,并实现接口里面的方法:
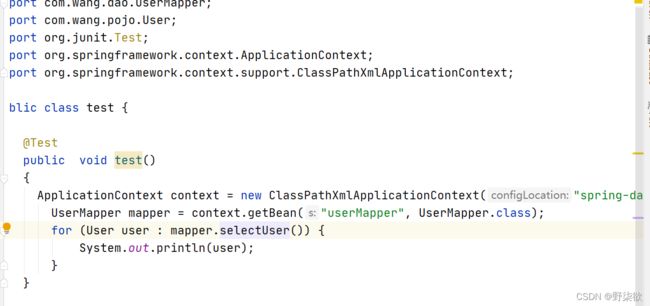
5.5 最后来写测试类来测试:
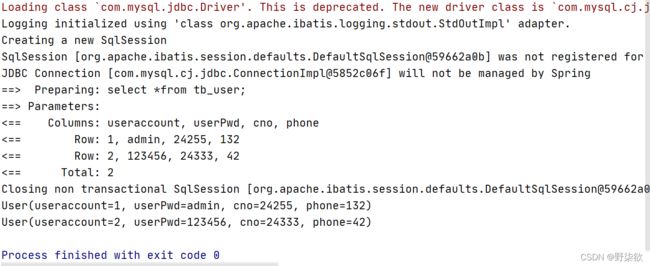
5.6 输出结果:
到这来咱们简单的spring整合mybatis就全部完成啦!!!!!!!
6. 总结:在我看来呢, 这种方法确实将mybatis运用到了spring中,也很好的减少一些代码量,不过我觉得很多代码都跟mybatis一样仅仅是挪了个地方,这种方法也很好的复习了mybatis的使用方法,总之学习使我快乐!!!!