图结构选型:Gephi 、 Cytoscape # ArangoDB、OrientDB、JanusGraph;弃nebula因其explorer收费; ssh X11Forward
图结构选型
图可视化工具
- 图结构可视化、分析(开源、完全免费、重型PC软件):Gephi 、 Cytoscape
还有另外三个 等待确定 : Graphexp 、 KeyLines 、 Linkurious
支持以上图可视化工具的 图数据库
-
图数据库(开源、完全免费、支持可视化工具Gephi或Cytoscape): ArangoDB、OrientDB、JanusGraph
-
丢弃的: 弃Neo4j,因此专业版收费 ;弃Amazon Neptune, 因无其源码
一些参考:
图数据库排名
比较 Dgraph,Neo4j,OrientDB,Titan(JanusGraph)
TODO 再问: ArangoDB、OrientDB、JanusGraph 谁导入更方便、谁更容易使用、谁的教程资料更多、谁更容易上手?
- JanusGraph : 存储有点复杂?不适合单机?
另类的
- Pajek: 无源码、免费、只有微软windows平台、容易上手
txt2pajek
可视化库(非独立运行的工具)
理论上不喜欢可视化库,不方便
以下待确定:
- graph_tool
- networkx
ArangoDB
环境 : ubuntu 22.04 x64
1. 下载
下载页面
安装说明, 这里说的设置arangodb密码不需要做,因为 安装.deb过程会要求设置arangodb密码,所以 请完全忽略 此 安装说明
服务端+客户端 arangodb3_3.11.6-1_amd64.deb,此已经包括客户端了 因此不需要 下一行的客户端
客户端 arangodb3-client_3.11.6-1_amd64.deb,不需要此客户端
2. 安装
sudo apt install arangodb3_3.11.6-1_amd64.deb
#或sudo gdebi-gtk ./arangodb3_3.11.6-1_amd64.deb  #可以看到 .deb包中的文件列表
安装过程会要求root密码,这里root密码设置为root, 安装完已经启动了
3. 启动
sudo systemctl status arangodb3.service
#一切按照systemctl 启动、停止 服务即可

sudo systemctl start arangodb3.service
怎么知道服务名字的? 两个途径:
- 扫一眼
gdebi-gtk x.deb给出给deb包的文件列表, 其中一定有*/systemd/system/x.service即知道服务名x - 利用shell自动完成 ,
systemctl status ar会补全服务名, 比如fish shell有此功能。
4. 改监听地址为0.0.0.0
sudo netstat -lntp | grep arango, 有8529端口,但监听的是127.0.0.1
观看.deb中文件列表可知,arango配置文件为
/etc/arangodb3/*.conf
grep 8529 /etc/arangodb3/*.conf,以下配置文件都有8529端口:,但显示 arangod的配置文件应该是/etc/arangodb3/arangod.conf
/etc/arangodb3/arangobench.conf:endpoint = tcp://127.0.0.1:8529
/etc/arangodb3/arangod.conf:endpoint = tcp://127.0.0.1:8529
/etc/arangodb3/arangodump.conf:endpoint = tcp://127.0.0.1:8529
/etc/arangodb3/arangoexport.conf:endpoint = tcp://127.0.0.1:8529
/etc/arangodb3/arangoimport.conf:endpoint = tcp://127.0.0.1:8529
/etc/arangodb3/arangoinspect.conf:endpoint = tcp://127.0.0.1:8529
/etc/arangodb3/arangorestore.conf:endpoint = tcp://127.0.0.1:8529
/etc/arangodb3/arangosh.conf:endpoint = tcp://127.0.0.1:8529
/etc/arangodb3/foxx-manager.conf:endpoint = tcp://127.0.0.1:8529
将
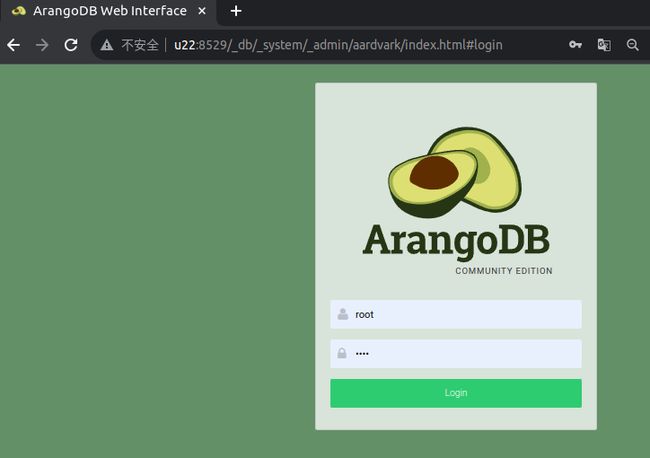
/etc/arangodb3/arangod.conf:endpoint = tcp://0.0.0.0:8529中的127.0.0.1改为0.0.0.0, 再sudo systemctl restart arangodb3.service重启arangod, 浏览器上访问http://u22:8529其中u22是arangod机器地址, 即进入arangod的web页面如下, 用户名root,密码是安装.deb时要求设置的密码
tar包安装
下载
下载页面
安装说明 ,只有一句话
arango-secure-installation
服务端+客户端arangodb3-linux-3.11.6_x86_64.tar.gz,此已经包括客户端了 因此不需要 下一行的客户端
客户端arangodb3-client-linux-3.11.6_x86_64.tar.gz,不需要此客户端
安装(被卡住了)
cd /app/
tar -zxf arangodb3-linux-3.11.6_x86_64.tar.gz
#按照 安装说明 ,应该执行 arango-secure-installation, 但是执行其 会报错找不到setup.json配置文件,解压路径下并没有setup.json文件、且 扫一眼 .deb的文件列表中 貌似也没有setup.json?  所以 tar安装 暂时亭在这里了,卡住了。
/app/arangodb3-linux-3.11.6_x86_64/usr/sbin/arango-secure-installation
启动 (TODO)
nebula
总体步骤说明
- “nebula-graph : 2. nebula-graph启动”
- “nebula-console :3. add hosts”
- “nebula-studio : 2. nebula-studio启动”
- “nebula-import : 2.csv导入例子” 或者 “nebula-studio : 4. web浏览器 访问 nebula-studio导入csv例子”
- 坑:nebula explorer(探索数据)是收费的, 杂整?放弃nebula, 然后 换什么?
nebula-graph安装启动
1. nebula-graph下载页面、启动参考
下载页面
nebula启动参考
2. nebula-graph启动举例
wget https://oss-cdn.nebula-graph.com.cn/package/3.6.0/nebula-graph-3.6.0.ubuntu2004.amd64.tar.gz

cd /app/nebula-graph-3.6.0.ubuntu2004.amd64/

tar -zxvf nebula-graph-3.6.0.ubuntu2004.amd64.tar.gz  -C /app/

ln -s /app/nebula-graph-3.6.0.ubuntu2004.amd64/etc/nebula-metad.conf.default  /app/nebula-graph-3.6.0.ubuntu2004.amd64/etc/nebula-metad.conf

ln -s /app/nebula-graph-3.6.0.ubuntu2004.amd64/etc/nebula-graphd.conf.default  /app/nebula-graph-3.6.0.ubuntu2004.amd64/etc/nebula-graphd.conf

ln -s /app/nebula-graph-3.6.0.ubuntu2004.amd64/etc/nebula-storaged.conf.default  /app/nebula-graph-3.6.0.ubuntu2004.amd64/etc/nebula-storaged.conf

# 以下 启动 、 停止  续接此处
- 启动
./scripts/nebula.service start all后,立即到 nebula-console 的 “3. add hosts” 去添加hosts
如果没做 “3. add hosts” 直接浏览器访问 nebula-studio 并添加 space, 则看日志
tail -f /app/nebula-graph-3.6.0.ubuntu2004.amd64/logs/*会发现报错 “host not enough”
- 停止
./scripts/nebula.service stop all
nebula-console安装启动
0. 下载页面
nebula-console下载页面
nebula-console-linux-amd64-v3.6.0下载地址
2. 安装nebula-console
cd /app/
wget https://github.com/vesoft-inc/nebula-console/releases/download/v3.6.0/nebula-console-linux-amd64-v3.6.0

chmod +x nebula-console-linux-amd64-v3.6.0

file  nebula-console-linux-amd64-v3.6.0
#nebula-console-linux-amd64-v3.6.0: ELF 64-bit LSB executable, x86-64, version 1 (SYSV), statically linked, Go BuildID=4U3dEmVWtiSpoocc6QOp/W00PAWiSBiRMb4OV52cA/liErU2om-F29DTgEedLn/AiFBelgMiY8xl8cGgKLb, not stripped


sudo ln -s /app/nebula-console-linux-amd64-v3.6.0 /usr/bin/nebula-console
3. add hosts
注意 得先执行 “2. 安装nebula-console”, 才能执行本步骤"3. add hosts"
nebula-console -addr 127.0.0.1 -port 9669 -u root -p nebula -e 'ADD HOSTS "127.0.0.1":9779', 输出如下:
(root@nebula) [(none)]> ADD HOSTS "127.0.0.1":9779
Execution succeeded (time spent 3.749ms/3.982688ms)

Wed, 03 Jan 2024 23:23:18 CST


Bye root!
Wed, 03 Jan 2024 23:23:18 CST
参考: host not enough 报错解决
nebula-studio安装启动
1. nebula-studio 下载页面、安装参考
nebula-studio下载页面
nebula-graph-studio-3.8.0.x86_64.tar.gz
nebula-studio安装启动参考
2. nebula-studio启动举例
tar -zxf nebula-graph-studio-3.8.0.x86_64.tar.gz


nohup /app/nebula-graph-studio/server -f  /app/nebula-graph-studio/etc/studio-api.yaml &
#或/app/nebula-graph-studio && nohup ./server -f  ./etc/studio-api.yaml &

#Starting server at 0.0.0.0:7001...
3. web浏览器访问 nebula-studio
浏览器访问 http://localhost:7001
默认用户名 密码, 默认用户名 root、密码 nebula
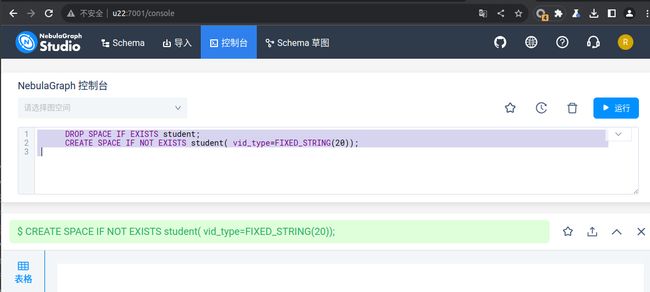
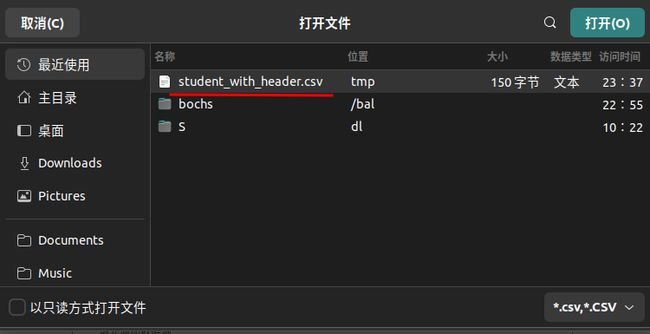
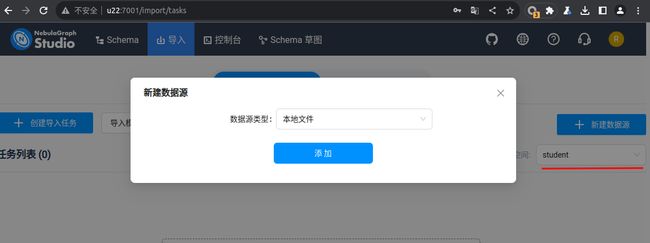
4. web浏览器 访问 nebula-studio导入csv例子
csv导入例子
下面的截图 没整理(ubuntu22 下没找到好用的类似mspaint的工具)


nebula explorer (探索数据)是收费的, 杂整?放弃nebula, 然后 换什么?
nebula explorer(探索数据)是收费的
注意 安装好的 nebula-studio 其web界面上是没有 explorer按钮的 , 但是例子 中的视频内的web界面上是有探索按钮的,该探索按钮就是 收费的nebula explorer
nebula-import
1. 下载安装
nebula-importer下载页面
nebula-importer 安装
cd /app/
wget https://github.com/vesoft-inc/nebula-importer/releases/download/v2.6.0/nebula-importer-linux-amd64-v2.6.0

file /app/nebula-importer-linux-amd64-v2.6.0
#/app/nebula-importer-linux-amd64-v2.6.0: ELF 64-bit LSB executable, x86-64, version 1 (SYSV), statically linked, Go BuildID=yLraovtggnM5_ye--udT/_gW5ygtLIiXh7XsN0a8D/AMgkgP8eLVemW_mERgKE/NgyBR0CJTJQffaM3hzso, not stripped
sudo ln -s /app/nebula-importer-linux-amd64-v2.6.0 /usr/bin/nebula-import
2. csv导入例子 (TODO)
csv导入例子
TODO:
# hostname == shinelon
# pwd == /home/z/20240103/
ls ~/20240103/*
#fn.db  instrLog.db  LinuxKernelSystemMap.db

#需要从这3个db 构造出 节点.csv 、 边.csv


#节点 即 函数

#边 即 instrLog.txt 中 第k行 到 第k+1 行
ssh X11Forward
ssh服务端
diff /etc/ssh/sshd_config /etc/ssh/sshd_config.origin
AddressFamily inet
PermitRootLogin yes
PasswordAuthentication yes
X11UseLocalhost no #不用localhost, 这样局域网内都可以
XAuthLocation /usr/bin/xauth  #which xauth
export XAUTHORITY=$HOME/.Xauthority
如果没有此,则报错“X11 connection rejected because of wrong authentication.”
- 允许display
- 允许某个display
allowLine=(xauth -f  $HOME/.Xauthority list | grep giteaz) #找到某一行display
#比如:  giteaz:13  MIT-MAGIC-COOKIE-1  6245e237c3b1ae505a6a329765867647
xauth add $allowLine
- 允许任意display
xauth +, 此命令必须在本地终端运行
ssh客户端
diff /etc/ssh/ssh_config /etc/ssh/ssh_config.origin
ForwardX11 yes
XAuthLocation /usr/bin/xauth
报错修复
修复报错X11 connection rejected because of wrong authentication.
修复报错X11 connection rejected because of wrong authentication., 即 步骤2中的
export XAUTHORITY=$HOME/.Xauthority