Keycloak 高可用部署实战
Keycloak 简介
Keycloak是一个开源的Identity 和 Access Management工具,主要特性:
- 单点登录
使用Keycloak实现单点登录,这意味着你不必要为每个应用都单独开发一套登录表单、验证用户和存储用户信息等相关功能。
- 身份代理和社交登录
Keycloak 可以代理登录目前主流的网络服务账号,比如谷歌、GitHub、FaceBook等。
- 用户联邦
Keycloak 已经内建支持已有 LDAP 或者 Active Directory 服务。
- 管理控制台
通过管理控制台,可以集中对服务,账号、权限、会话等功能进行管理。
- 支持标准协议
支持 OpenID Connect、 OAuth 2.0、SAML等标准协议
更多技术细节请参考 Keycloak 官方文档。
环境准备
本文参考官方文档 Get started with Keycloak on bare metal 的部署方式进行部署
https://jdk.java.net/java-se-ri/11 下载OpenJDK11
https://github.com/keycloak/keycloak/releases/download/20.0.3/keycloak-20.0.3.zip 下载最新版 Keycloak
这里我采用 nginx 做反向代理(代理模式 passthrough),nginx的高可用在这里就不在演示。
数据库使用mysql(mysql安装、数据库创建、账号分配相信大家也都能搞得)
| 主机 | 服务 |
|---|---|
| 10.0.2.10/node01.example.io | Nginx(反向代理) |
| 10.0.2.11/node02.example.io | keycloak |
| 10.0.2.12/node03.example.io | keycloak |
生成证书
keycloak生产环境默认使用tls加密通信,这里就使用自签证书
1、自签CA
openssl genrsa -out ca.key 2048
openssl req -x509 -new -nodes -key ca.key -subj "/CN=example.io" -days 3650 -out ca.crt
2、编辑 CSR 请求配置文件 req.conf
[ req ]
default_bits = 2048
prompt = no
default_md = sha256
req_extensions = v3_req
distinguished_name = dn

[ dn ]
C = CN
L = BeiJing
OU = CondingDemo
CN = KeyCloak

[ v3_req ]
keyUsage = nonRepudiation, digitalSignature, keyEncipherment
extendedKeyUsage = serverAuth
subjectAltName = @alt_names

[ alt_names ]
DNS.1 = keycloak.example.io
DNS.2 = node02.example.io
DNS.3 = node03.example.io
IP.1 = 10.0.2.11
IP.2 = 10.0.2.12
3、基于上面的配置文件生成证书签名请求
openssl genrsa -out server.key 2048
openssl req -new -key server.key -out server.csr -config req.conf
4、基于自签CA签发证书
openssl x509 -req -in server.csr -CA ca.crt -CAkey ca.key \
    -CAcreateserial -out server.crt -days 3650 \
    -extensions v3_req -extfile req.conf -sha256
部署KeyCloak
在 node02.example.io和node03.example.io 上部署 keycloak,两个节点上配置相同
1、关闭防火墙、启用时间同步服务(此处以CentOS7为例)
systemctl stop firewalld.service
systemctl disable firewalld.service

systemctl enable chronyd.service
systemctl start chronyd.service
2、安装OpenJDK
tar -xzf openjdk-11+28_linux-x64_bin.tar.gz -C /opt/
# 配置环境变量
# vi /etc/profile.d/jdk.sh
export JAVA_HOME=/opt/jdk-11
export PATH=$PATH:$JAVA_HOME/bin
3、安装keycloak
unzip keycloak-20.0.2.zip
cd keycloak-20.0.2

# 创建tls目录,并将生成证书文件 server.crt、server.key 复制到tls目录下
mkdir tls
4、修改配置文件
# vi conf/keycloak.conf
db=mysql
db-username=keycloak
db-password=CondingDemo
db-url=jdbc:mysql://192.168.21.138:3306/keycloak?characterEncoding=UTF-8
health-enabled=true
metrics-enabled=true
https-certificate-file=${kc.home.dir}/tls/server.crt
https-certificate-key-file=${kc.home.dir}/tls/server.key
proxy=passthrough
hostname-url=https://keycloak.example.io
hostname-admin-url=https://keycloak.example.io
https-protocols=TLSv1.2
log=file
5、启动keycloak
# 首次启动需要设置管理员账号密码(只有首次启动需要),只需在node02.example.io或node03.example.io一台机器上添加即可
export KEYCLOAK_ADMIN=admin
export KEYCLOAK_ADMIN_PASSWORD=CondingDemo

# 启动
bin/kc.sh start
配置代理
本文选用 CentOS 7 部署 nginx 作为反向代理服务,上文 keycloak 配置的代理模式为 passthrough,所以这里使用 nginx 的stream模块进行tcp代理
yum -y install epel-release
yum -y install nginx nginx-all-modules.noarch

vi /etc/nginx/nginx.conf
......
stream {
    upstream keycloak {
        server 10.0.2.11:8443;
        server 10.0.2.12:8443;
    }
    server {
        listen 443;
        proxy_pass keycloak;
    }
}
......

systemctl enable nginx.service
systemctl start nginx.service
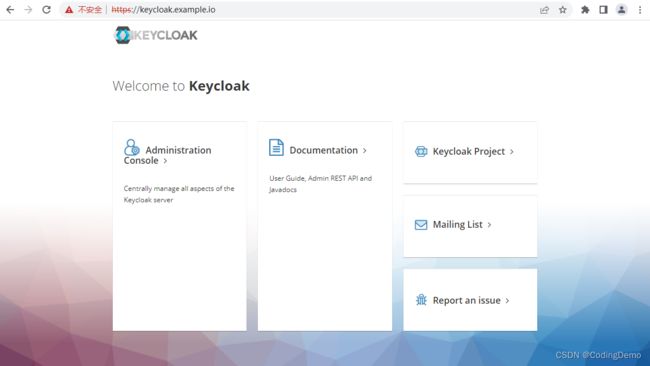
客户端访问
配置DNS或者修改本地的 hosts 文件,添加 10.0.2.10 keycloak.example.io 地址映射
浏览器访问 https://keycloak.example.io 即可登录管理控制台