RabbitMQ入门指南(五):Java声明队列、交换机以及绑定
专栏导航
RabbitMQ入门指南
从零开始了解大数据
目录
专栏导航
前言
一、Spring AMQP基本API
二、案例分析
1.Fanout交换机案例
2.Direct交换机案例
3.Topic交换机案例
总结
前言
RabbitMQ是一个高效、可靠的开源消息队列系统,广泛用于软件开发、数据传输、微服务等领域。本文主要介绍了Java声明队列、交换机以及绑定队列和交换机等内容。
一、Spring AMQP基本API
在上一节案例中都是通过RabbitMQ控制台来手动创建队列和交换机。然而,在实际开发中这些队列和交换机通常是在代码中定义的,推荐的做法是在程序启动时检查队列和交换机是否存在,如果不存在则自动创建。Spring AMQP提供了一套完整的API来帮助开发者与RabbitMQ进行交互。
Spring AMQP提供了类,用来声明队列、交换机及其绑定关系:
- Queue:用于声明队列,可以用工厂类QueueBuilder构建
- Exchange:用于声明交换机,可以用工厂类ExchangeBuilder构建
- Binding:用于声明队列和交换机的绑定关系,可以用工厂类BindingBuilder构建
Spring AMQP提供了QueueBuilder来简化队列的创建过程。

Exchange接口表示了不同类型的交换机,可以创建和配置不同类型的交换机,如Direct Exchange、Fanout Exchange、Topic Exchange等,以满足不同的消息传递需求。

Spring AMQP提供了ExchangeBuilder来简化交换机的创建过程。

在绑定队列和交换机时,需要使用BindingBuilder来创建Binding对象。这个对象表示一个队列和一个交换机之间的绑定关系,它定义了消息应该如何从交换机路由到队列。

二、案例分析
1.Fanout交换机案例
声明交换机:
- 创建FanoutExchange Bean:
    @Bean
    public FanoutExchange fanoutExchange1(){
        return new FanoutExchange("test1.fanout");
}- 使用ExchangeBuilder创建FanoutExchange Bean:
    @Bean
    public FanoutExchange fanoutExchange2(){
        return ExchangeBuilder.fanoutExchange("test2.fanout").build();
    }
声明队列:
- 创建队列Bean(默认为持久队列):
    @Bean
    public Queue fanoutQueue1(){
        return new Queue("test1.queue");
}- 使用QueueBuilder创建持久队列Bean:
    @Bean
    public Queue fanoutQueue2(){
        return QueueBuilder.durable("test2.queue").build();
    }
使用BindingBuilder创建Binding Bean来绑定队列和交换机:
- 方法一:
    @Bean
    public Binding fanoutBinding1(Queue fanoutQueue1, FanoutExchange fanoutExchange1){
        return BindingBuilder.bind(fanoutQueue1).to(fanoutExchange1);
}- 方法二:
@Bean
public Binding fanoutBinding2(){
return BindingBuilder.bind(fanoutQueue1()).to(fanoutExchange1());
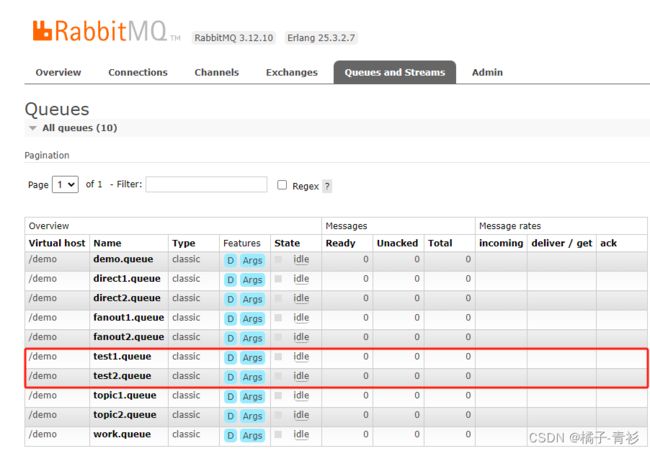
}运行结果:


2.Direct交换机案例
声明交换机:
    @Bean
    public DirectExchange directExchange(){
        return new DirectExchange("test1.direct");
    }
声明队列:
    @Bean
    public Queue directQueue1(){
        return new Queue("test3.queue");
    }
使用BindingBuilder创建Binding Bean来绑定队列和交换机:
    @Bean
    public Binding directQueueBindingRed1(Queue directQueue1, DirectExchange directExchange){
        return BindingBuilder.bind(directQueue1).to(directExchange).with("red");
    }

    @Bean
    public Binding directQueueBindingBlue2(Queue directQueue1, DirectExchange directExchange){
        return BindingBuilder.bind(directQueue1).to(directExchange).with("blue");
    }
Spring AMQP还提供了基于@RabbitListener注解来声明队列、交换机和绑定队列和交换机的方式:
    @RabbitListener(bindings = @QueueBinding(
            value = @Queue(name = "test3.queue", durable = "true"),
            exchange = @Exchange(name = "test1.direct", type = ExchangeTypes.DIRECT),
            key = {"red", "blue"}))
    public void listenDirectQueue1(String msg) throws InterruptedException {
        System.out.println("test1.direct:" + msg);
    }
运行结果:


3.Topic交换机案例
基于@RabbitListener注解来声明队列、交换机和绑定队列和交换机的方式:
    @RabbitListener(bindings = @QueueBinding(
            value = @Queue(name = "test4.queue"),
            exchange = @Exchange(name = "test1.topic", type = ExchangeTypes.TOPIC),
            key = "china.#"))
    public void listenTopicQueue1(String msg) {
        System.out.println("test1.topic:" + msg);
    }
运行结果:


总结
RabbitMQ是一个开源的消息队列软件,旨在提供可靠的消息传递和消息队列功能。本文主要介绍了Java声明队列、交换机以及绑定队列和交换机等内容,希望对大家有所帮助。