nginx优化与防盗链
nginx服务优化
系统内核级别的优化:

/ete/security/limits.conf内核限制文件
*     soft    noproc          65535        打开的进程数
*     hard    noproc          65535
*     soft    nofile          65535        打开的文件数
*     hard    nofile          65535
*     soft    memlock         unlimited    不做内存锁定
*     hard    memlock         unlimited
你常用的Nginx模块,用来做什么
rewrite模块:实现重写功能
access模块:来源控制
ssl模块:安全加密
ngxhttp_gzipmodule:网络传输压缩模块
ngx_http_proxy_module:模块实现代理
ngx_httpupstreammodule:模块实现定义后端服务器列表
ngxcache_purge:实现缓存清除功能
用过哪些nginx模块?
http_gzip_module #网页压缩模块
http_stup_status_module #状态统计模块
http_auth_basic_module #网页用户认证模块
http_fastcgi_module #fastcgi#转发php-fpm的模块
http rewrite module #URL重气模块
http ssl module #https安全加密模块
http limit conn module #限制最人连接数模块
一、配置nginx隐藏版本号,避免安全漏洞
如何显示版本号:
crul -I(大i) ip地址 server:系统和版本号
1.修改配置文件方式
vim /usr/local/nginx/conf/nginx.conf #进入nginx主配置文件
http {
include mime.types;
default_type application/octet-stream;
添加配置项: server_tokens off; #隐藏版本号信息
......
}
nginx -t#检查配置文件
systemctl restart nginx#重载nginx
2.修改源代码
vim /opt/nginx-1.12.0/src/core/nginx.h #nginx源码文件 #define NGINX_VERSION "1.1.1" #修改版本号 #define NGINX_VER "IIS" NGINX_VERSION #修改服务器类型
退到nginx软件包目录中重新进行编译安装
cd /opt/nginx-1.12.0/

./configure --prefix=/usr/local/nginx --user=nginx --group=nginx --with-http_stub_status_module

make && make install
vim /usr/local/nginx/conf/nginx.conf http { include mime.types; default_type application/octet-stream; server_tokens on; #将此配置项打开或者注释掉,显示版本号 ...... } systemctl restart nginx curl -I ip检查版本号
二、修改用户与组
1.编译安装时--user(指定用户)和--group(指定用户组)
2.修改配置文件
vim /usr/local/nginx/conf/nginx.conf ser nginx nginx; #取消注释,修改用户为 nginx ,组为 nginx systemctl restart nginx ps aux | grep nginx


三、配置nginx网页缓存时间
-
当Nginx将网页数据返回给客户端后,可设置缓存的时间,以方便在日后进行相同内容的请求时直接返回,避免重复请求,加快了访问速度。
-
一般针对静态网页设置,对动态网页不设置缓存时间
配置方法:修改Nginx的配置文件,在location段加入expires 参数
修改配置文件vim /usr/local/nginx/conf/nginx.conf
vim /usr/local/nginx/conf/nginx.conf
http {
......
server {
......
location / {
root html;
index index.html index.htm;
}
location ~\.(gif|jpg|jepg|png|bmp|ico)$ { #加入新的 location,以图片作为缓存对象
root html; #存放图片位置
expires 1d; #指定缓存时间,1天1day
#只要是以gif|jpg|jepg|png|bmp|ico为结尾的路径,就会呗location匹配到,从html目录中获取到网页的静态内容,并且让浏览器缓存这些资源一天
}
......
}
}
nginx -t#检查nginx配置文件修改是否有误
systemctl restart nginx


四、实现nginx的日志分割
日志分割:脚本+crontab
编写脚本进行日志切割的思路
vi /opt/fenge.sh
#!/bin/bash
# Filename: fenge.sh #注释信息
#设置变量
day=$(date -d "-1 day" "+%Y%m%d") #显示前一天的时间
logs_path="/var/log/nginx" #nginx日志目录
pid_path="/usr/local/nginx/logs/nginx.pid"#nginx的pid文件的路径
[ -d $logs_path ] || mkdir -p $logs_path
#-d,判断日志文件目录是否存在,如果不存在则创建日志文件目录
mv /usr/local/nginx/logs/access.log ${logs_path}/kgc.com-access.log-$day
#移动并重命名日志文件
kill -USR1 $(cat $pid_path)
#重建新日志文件
find $logs_path -mtime +30 -exec rm -rf {} ;
#删除30天之前修改过的日志文件
(mtime:,ctime,atime)
chmod +x /opt/fenge.sh
------------------------------
/opt/fenge.sh
ls /var/log/nginx
ls /usr/local/nginx/logs/access.log
crontab -e
0 0 * * * /opt/fenge.sh #使用分时日月周,每天的0点0分做日志分割
补充(ctime/atime/mtime)
在linux操作系统中,每个文件都有很多的时间参数,其中有三个比较主要,分别是 ctime,atime,mtime ctime 修改文件属性时间 atime 访问文件的时间 mtime 修改文件内容时间
五、连接超时
-
HTTP有一个KeepAlive模式,它告诉web服务器在处理完一个请求后保持这个TCP连接的打开状态。若接收到来自同一客户端的其它请求,服务端会利用这个未被关闭的连接,而不需要再建立一个连接。
-
KeepAlive 在一段时间内保持打开状态,它们会在这段时间内占用资源。占用过多就会影响性能。
vim /usr/local/nginx/conf/nginx.conf
http {
......
keepalive_timeout 60 60;
#指定一个长连接最多可以保持多长时间,若将它设置为0,代表关闭长连接,第一个60是指服务器的超时时间,第二个是指客户端的超时时间
keepalive_requests 100; #指定一个长连接中最多允许的请求数
client_header_timeout 80; #用于去指定客户端向服务端发送的完整的请求头的超时时间
client_body_timeout 80; #指定客户端与服务端建立连接后发送的请求体的超时时间
......
}
systemctl restart nginx #重启nginx
六、更改nginx运行进程数
修改配置文件的worker_processes参数
-
一般设为cpu的个数或核数
-
在高并发的情况下课设置为cpu个数或者核数的2倍
cat /proc/cpuinfo | grep -c "physical id"   #查看cpu核数
ps aux | grep nginx #查看nginx主进程中包含几个子进程
vim /usr/local/nginx/conf/nginx.conf
worker_processes 2; #修改为核数相同或者2倍 worker_cpu_affinity 01 10; #设置每个进程由不同cpu处理,进程数配为4时0001 0010 0100 1000 worker_rlimit_nofile 63335; #配置最大并发量
systemctl restart nginx

七、配置网页压缩
vim /usr/local/nginx/conf/nginx.conf http { ...... gzip on; #配置前取消注释,开启gzip压缩功能
#添加配置选项: gzip_min_length 1k; #最小压缩文件大小 gzip_buffers 4 64k; #压缩缓冲区,大小为4个64k缓冲区 gzip_http_version 1.1; #压缩版本(默认1.1,前端如果是squid2.5请使用1.0) gzip_comp_level 6; #压缩比率 gzip_vary on; #支持前端缓存服务器存储压缩页面 gzip disable"MSIE[1-6]\."; #配置禁用gzip条件,支持正则。此处表示ie6及以下不启用gzip(因为ie低版本不支持)
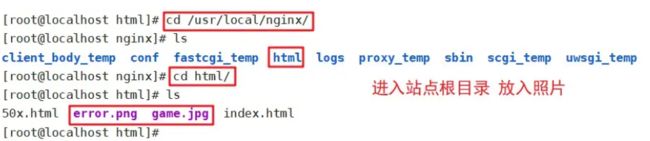
cd /usr/local/nginx/html 先将game.jpg文件传到/usr/local/nginx/html目录下 vim index.html ......#网页中插入图片